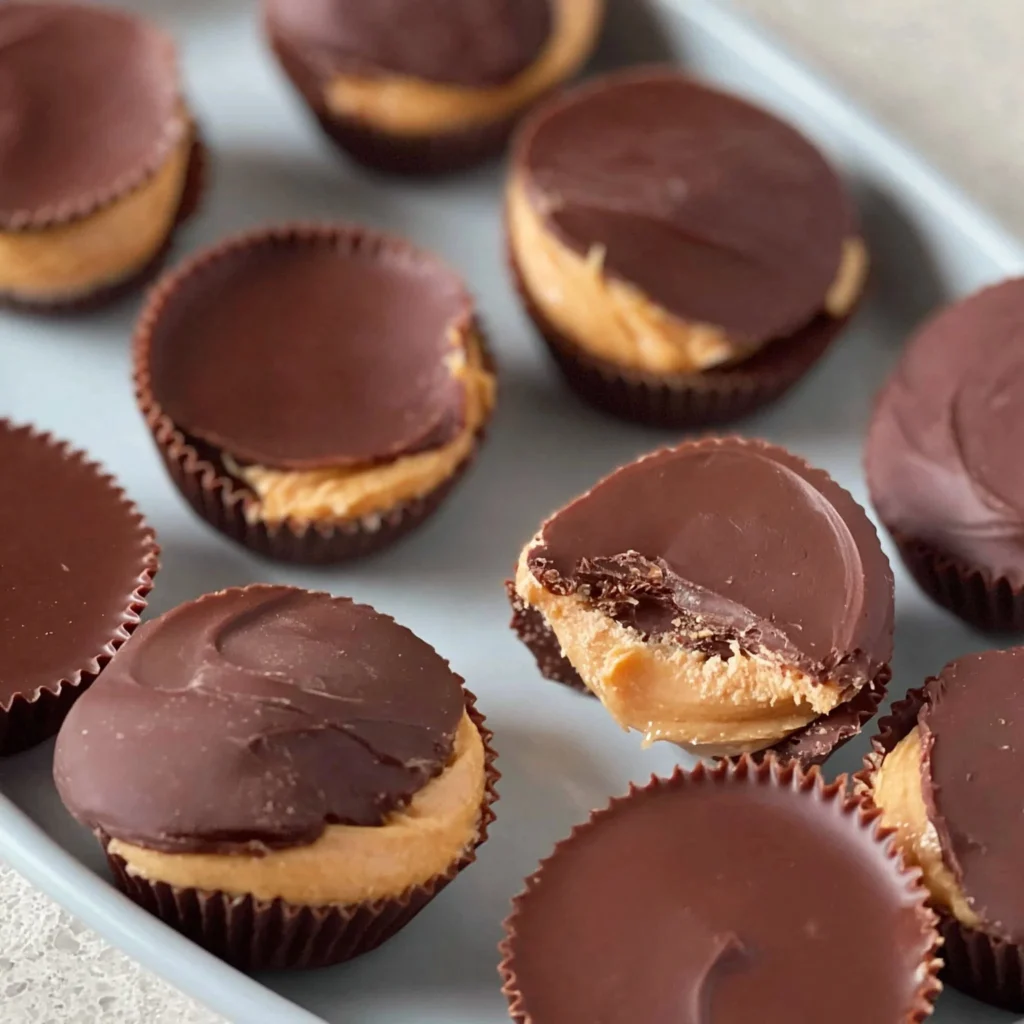
There are days when I want the idea of a candy bar—snappy chocolate, creamy center—without unwrapping anything. These homemade peanut butter cups hit that exact craving with a short ingredient list and a freezer set, no baking required. If you’ve made my no-bake peanut butter oat cups, this is the sleeker, chocolate-first cousin.
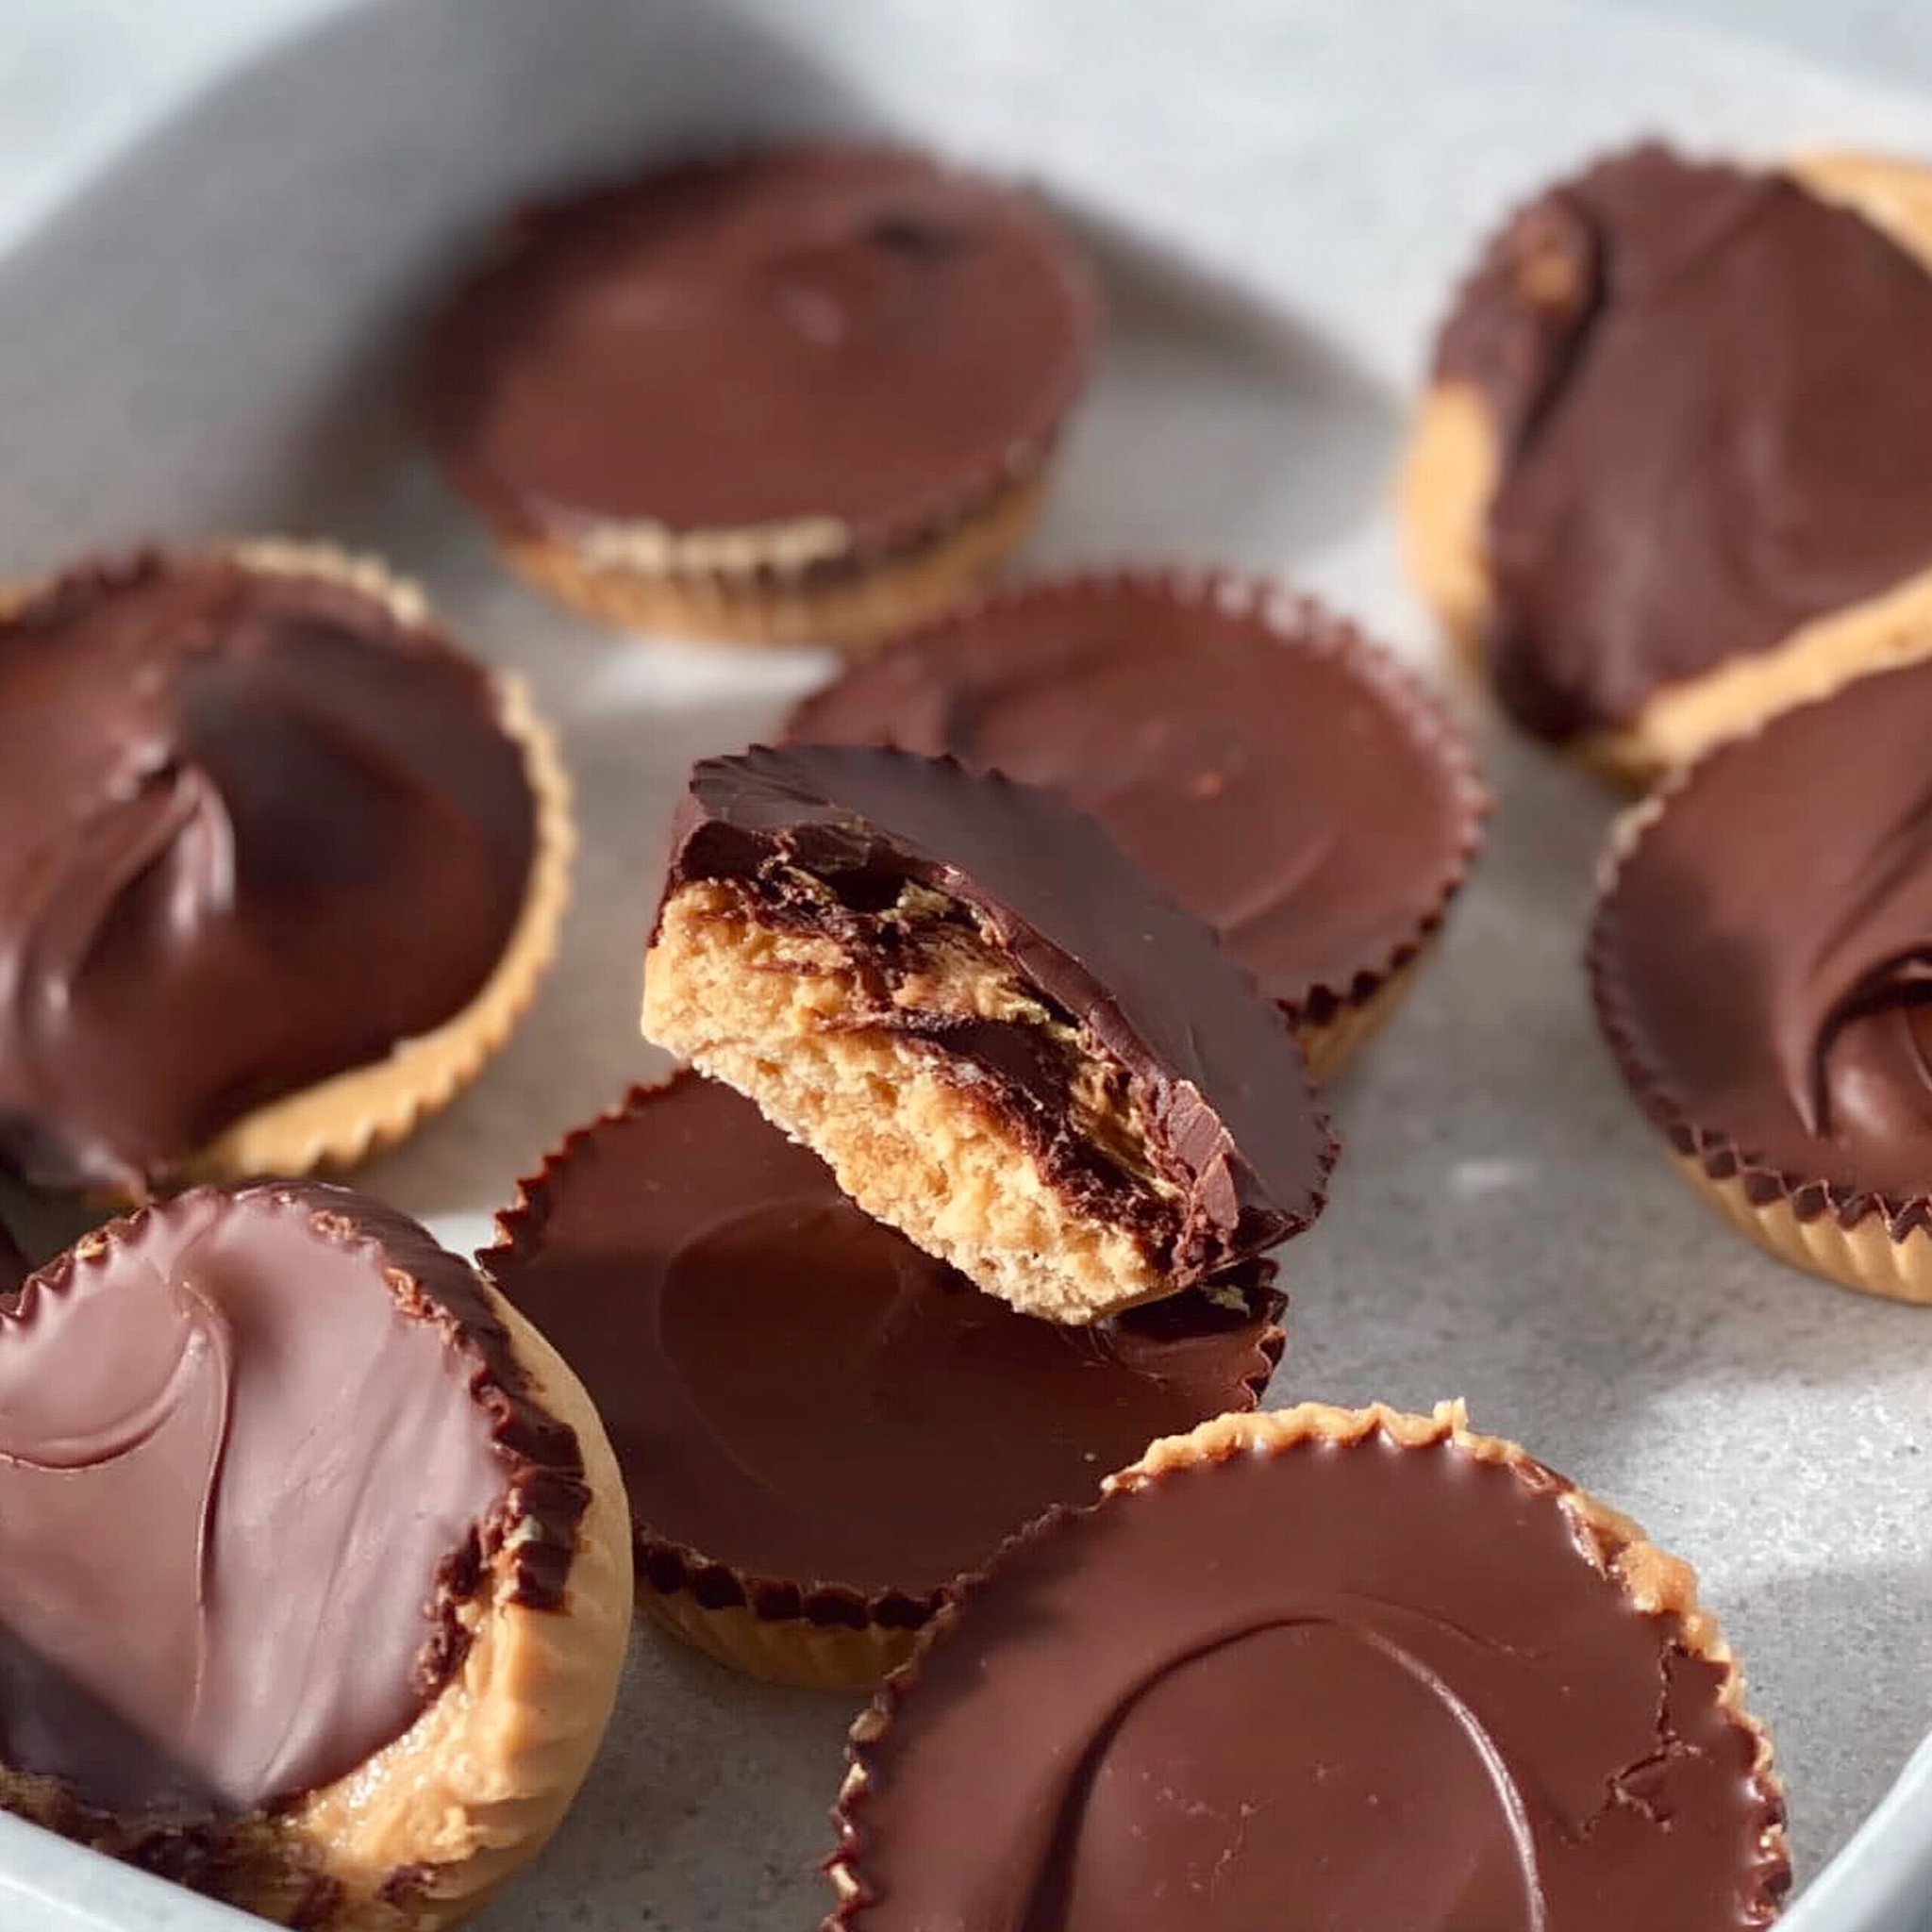
What makes this version special is the filling: peanut butter mixed with oat flour and maple syrup turns thick and fudge-like, so it stays put instead of oozing out when you bite in. The dark chocolate layer snaps once cold, and the pinch of salt keeps the whole thing from tasting one-note sweet.
Why You’ll Love This Recipe
- The filling sets up soft-firm and sliceable thanks to oat flour—no gritty powdered sugar texture here.
- Maple syrup adds a caramel-like sweetness and a slightly glossy, creamy center when mixed well.
- Dark chocolate gives you that clean “snap” after freezing, with a rich cocoa finish against salty peanut butter.
- The method is genuinely simple: melt, layer, spoon, cover, freeze—done in about 30 minutes of chill time.
- They look polished in cupcake liners, making them easy for sharing (or stashing in the freezer for later), similar to my frozen peanut butter cups style of grab-and-go treat.
The Story Behind This Recipe
I tested this on a weeknight when I wanted a peanut butter cup now, but also wanted the center to feel substantial—not runny, not crumbly—and oat flour ended up being the quiet hero that turns peanut butter and maple syrup into a thick, truffle-like filling that layers neatly under melted dark chocolate.
What It Tastes Like
These are moderately sweet (maple-forward, not sugary), with a deep chocolate aroma and a pronounced peanut butter richness. The texture is the best part: a firm, snappy chocolate shell around a dense, creamy center that feels like peanut butter fudge, with just enough salt to keep each bite sharp and chocolatey instead of cloying.
Ingredients You’ll Need
Peanut butter is doing most of the heavy lifting here, so use one you enjoy eating by the spoonful—its flavor comes through loud and clear. Oat flour thickens the filling into a moldable paste, while maple syrup sweetens and smooths it. Dark chocolate chips melt into a clean, glossy coating, and that small amount of salt is what makes the chocolate-peanut butter contrast pop (especially if your peanut butter is on the mild side, like in my chocolate + peanut butter recipes).
- 1 cup peanut butter
- 1/2 cup oat flour
- 1/4 cup maple syrup
- 1/2 cup dark chocolate chips
- 1/4 teaspoon salt
How to Make Homemade Peanut Butter Cups
Mix the filling. In a bowl, stir together the peanut butter, oat flour, maple syrup, and salt until completely smooth. You’re looking for a thick, cohesive mixture—more like soft cookie dough than a drizzle. If it looks streaky, keep mixing until the oat flour disappears and the surface looks uniform and slightly glossy.
Melt the chocolate. Melt the dark chocolate chips in the microwave in short bursts or over a double boiler until smooth. Stop as soon as it’s melted and fluid; overheated chocolate can turn thick and harder to spread.
Start the chocolate base. Set out cupcake liners. Pour (or spoon) a thin layer of melted chocolate into the bottom of each liner and tilt gently so it spreads into an even circle. You want enough to cover the base so the peanut butter layer won’t touch the liner directly.
Add the peanut butter layer. Spoon a portion of the peanut butter mixture onto the chocolate base. Use the back of the spoon to nudge it into a flatter puck—aim for a little space around the edge so the top chocolate can seal it in.
Seal with more chocolate. Cover the peanut butter layer with another spoonful of melted chocolate, spreading to the edges so the filling is enclosed. A fully covered top helps the cups release cleanly from the liners once set.
Freeze until firm. Freeze for about 30 minutes, or until the tops look matte and the cups feel solid when you press gently on the center. Once set, peel away the liner and eat straight from the freezer for the snappiest bite.
Tips for Best Results
- Mix the filling until it’s truly smooth. Any dry pockets of oat flour will feel chalky; the finished filling should look uniform and hold its shape on a spoon.
- Keep the first chocolate layer thin but complete. A thin “base coat” gives you a clean snap without making the cups too hard to bite.
- Leave a small border around the filling. That little gap makes it easier to fully seal with the top chocolate, so you don’t get exposed peanut butter at the edges.
- Work efficiently once the chocolate is melted. If it starts to thicken as you’re layering, it won’t spread as neatly and the tops can look rough.
- Freeze until fully set before peeling. If you peel too early, the chocolate can fingerprint and the edges can crack.
Variations and Substitutions
- Chocolate intensity: Stick with dark chocolate chips for a bolder, less-sweet shell; using a sweeter chocolate will make the overall cup noticeably sweeter.
- Texture tweak: For a slightly softer center, mix the filling just until cohesive and avoid overworking it; for a firmer, more “fudge” bite, mix until very thick and uniform.
- If you want a different peanut butter-chocolate format later, my lava-style peanut butter cookies are a fun warm contrast to these freezer cups.
How to Serve It
Serve these straight from the freezer for the cleanest chocolate snap and the densest, fudge-like center. If you prefer a slightly softer bite, let them sit at room temp just long enough that the chocolate loses its icy chill but still holds its shape. They’re also great alongside coffee—dark chocolate and salty peanut butter really stand out next to something bitter.
How to Store It
Keep the peanut butter cups in the freezer so the chocolate stays firm and the filling stays neatly set. I like storing them in their liners inside a covered container so they don’t pick up freezer smells and so the tops don’t get scuffed. You can make them ahead and pull out one at a time—if they sit out too long, the chocolate will soften and the edges won’t stay as crisp.

Final Thoughts
If you like a classic peanut butter cup but want a thicker, more substantial center, this oat flour + maple filling is the move: it’s quick to mix, layers cleanly, and freezes into that perfect chocolate-snap/creamy-center combo—exactly the kind of small batch treat I keep around for a sweet bite without a whole baking project.
Conclusion
If you’re in a peanut butter cup phase (same), it’s fun to compare approaches—especially chocolate thickness and filling texture—so you might also enjoy the method in Homemade Peanut Butter Cups (From Scratch), the classic-style layering from Homemade Peanut Butter Cups, or the straightforward spin in Peanut Butter Cups.