The Memory Behind This Treat
The first time I experimented with Ninja Creami Mint Chocolate Chip Ice Cream, it was a sweltering summer day when the AC mysteriously decided to take a break. My niece, with a face full of freckles and a sweet tooth as big as her curiosity, was visiting. We needed something to cool us down and bring a little joy to the sticky afternoon.
This recipe took me back to my childhood summers, where mint chocolate chip was a coveted treat from the local ice cream truck. The moment my niece and I blended the ingredients, the refreshing scent of peppermint filled the kitchen, washing away the heat. As we poured the mix into the Ninja Creami pint, I shared stories of those truck visits, where every scoop was filled with delight and a hint of adventure.
When the moment finally arrived to churn this minty concoction, the anticipation was palpable. Watching my niece’s eyes light up as the creamy, cool ice cream emerged was pure magic. It reminded me why I love creating these experiences—connecting generations through flavors and a bit of kitchen wizardry. Plus, there’s nothing quite like seeing someone discover the joy of homemade ice cream, especially when it’s as simple and delightful as this. If you’re looking for a taste with a story, this is the one to try.
How To Make It (Mix & Ingredients)
Creating the perfect Ninja Creami Mint Chocolate Chip Ice Cream begins with a simple, delightful mix of ingredients. Picture this: you’ll blend together whole milk, half-and-half, and a touch of sugar to form the creamy base. But here’s the kicker—softened cream cheese. Yes, I know it sounds unusual, but this little secret transforms your ice cream into a velvety dream. Add pure peppermint extract for that iconic minty freshness. If you’re feeling playful, a few drops of green food coloring will give your dessert that classic mint chocolate chip look.
Instructions Process of Ninja Creami Mint Chocolate Chip Ice Cream
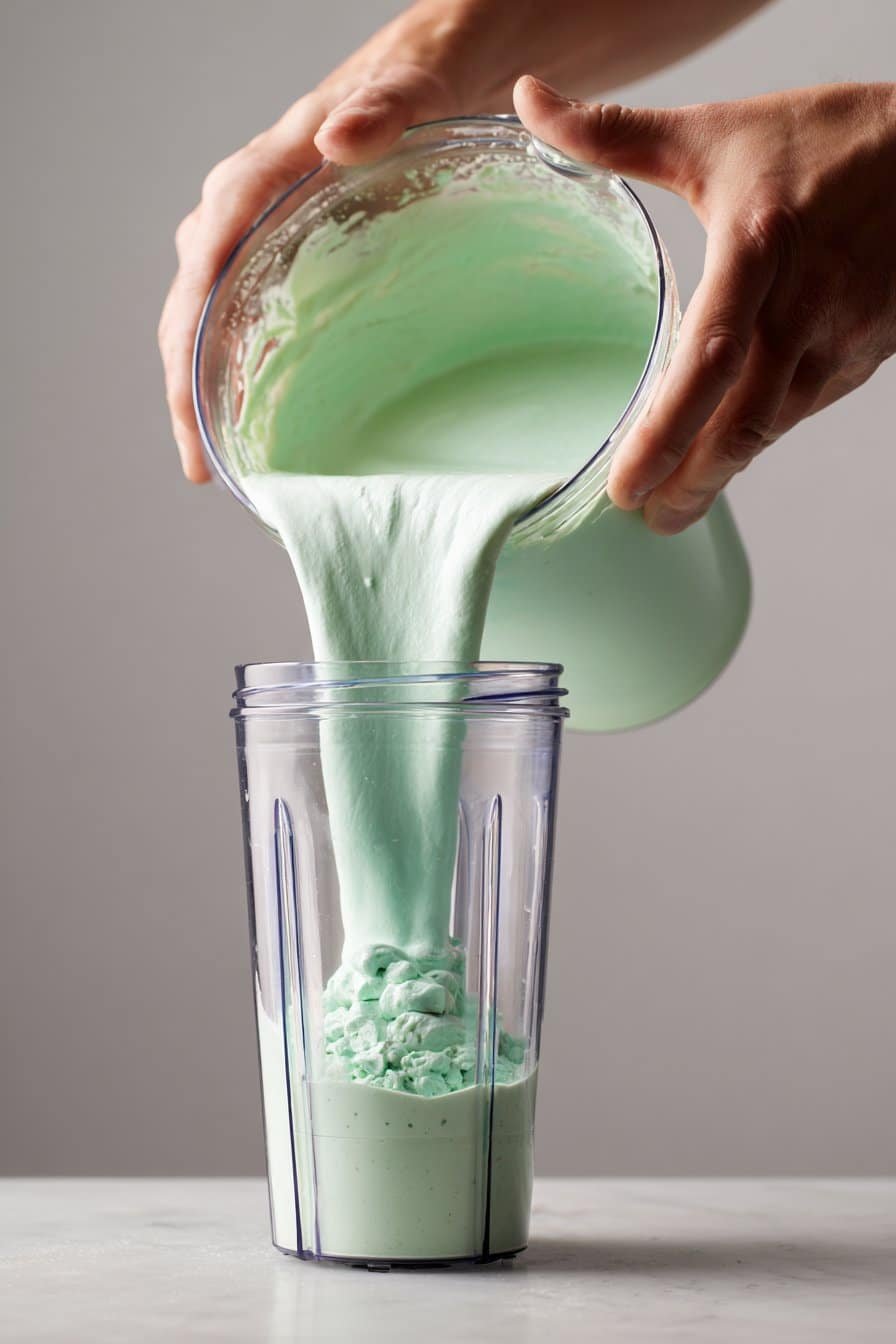
Once your blend is smooth and lump-free, pour it into your Ninja Creami pint container. Make sure to leave about half an inch of space at the top for expansion. Trust me, you’ll need it! Freeze the mixture uncovered for a full 24 hours on a flat shelf. This patience pays off, as it ensures that the ice cream churns up flawlessly in the next step. Just think about the anticipation as you wait for that delightful moment of spinning—it’s like counting down to Christmas morning!When ready, set your Ninja Creami to “Ice Cream” mode. If the result is a bit crumbly, no worries! Just add a tablespoon of milk and re-spin. For any icy bits, give it another spin. Finally, make a charming little well in the center and sprinkle in those mini chocolate chips. Activate the “Mix-In” cycle, and like magic, your ice cream will have perfect pockets of chocolatey goodness. The result? A creamy, minty, chocolaty dessert that’ll have everyone coming back for seconds.
Make-Ahead & Storage
The beauty of the Ninja Creami Mint Chocolate Chip Ice Cream is its adaptability for advance preparation. Planning ahead means you can have this delightful treat ready whenever the craving strikes. After blending the base, pour it into your Ninja Creami pint, ensuring you leave about half an inch of space at the top. This allows for expansion as it freezes. Once it’s set on a flat shelf in the freezer, you’ll need to wait a full 24 hours for the magic to happen. Trust me, it’s worth planning around this wait time.
Once you’ve spun your ice cream to creamy perfection, you can store any leftovers right in the Ninja Creami pint. Simply pop on the lid and it can stay in the freezer for up to a month. Though, let’s be honest, it rarely lasts that long! When you’re ready to enjoy it again, you might find that it’s a little firm. No worries—just set it out on the counter for 5 to 10 minutes, or give it a quick re-spin in the Ninja Creami. This will bring back that luscious texture in no time.
For those of you who like to plan for gatherings, making this ice cream ahead is a breeze. Prepare several pints in advance and store them in the freezer. When guests arrive, you’ll be the hero with homemade, no-churn mint chocolate chip goodness. Just add some of these delightful desserts to your next family gathering and watch everyone spin with joy!
Best Ingredients & Party Variations
When it comes to crafting the perfect Ninja Creami Mint Chocolate Chip Ice Cream, quality ingredients make all the difference. Start with whole milk and half-and-half—these rich bases ensure a velvety texture. The secret hero here is softened cream cheese. It may sound unusual, but it lends a silky smoothness that’s downright dreamy. Be sure to use pure peppermint extract. It delivers that refreshing minty zing without veering into toothpaste territory! And while green food coloring is optional, it adds a playful touch that’s especially fun if you’re serving this at a party.
Now, let’s talk about some delightful variations to jazz up your ice cream parties. For a twist on tradition, consider swapping mini chocolate chips for dark chocolate chunks or even white chocolate chips. Feeling adventurous? Add in some crushed peppermint candies for an extra crunch and festive flair. You could even make a batch of Ninja Creami Chocolate Peanut Butter Ice Cream to accompany your mint creation—trust me, the duo is a hit at any gathering. With this base recipe, the possibilities are endless, so let your creativity flow. Enjoy experimenting and remember, the key is to have fun with it!
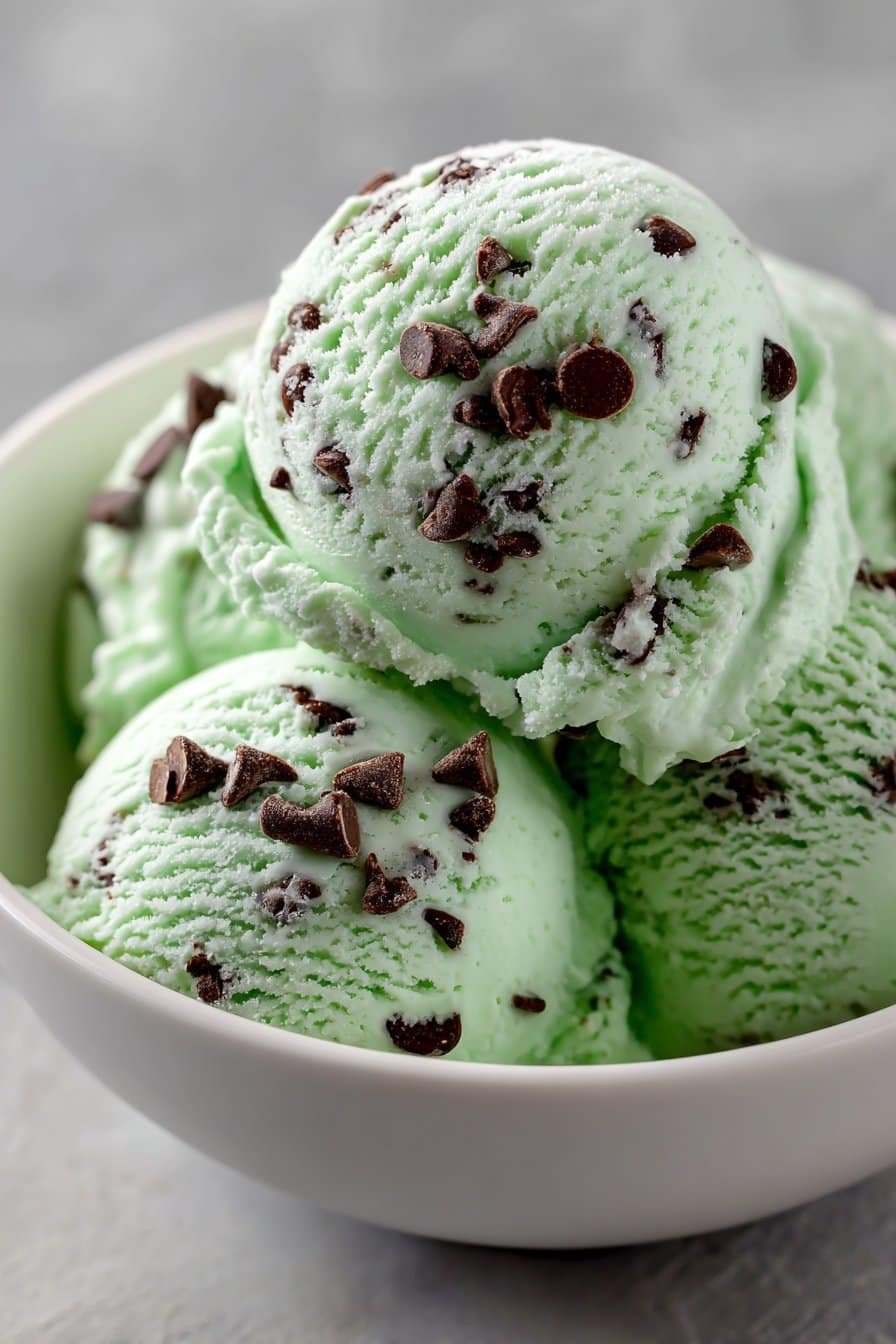
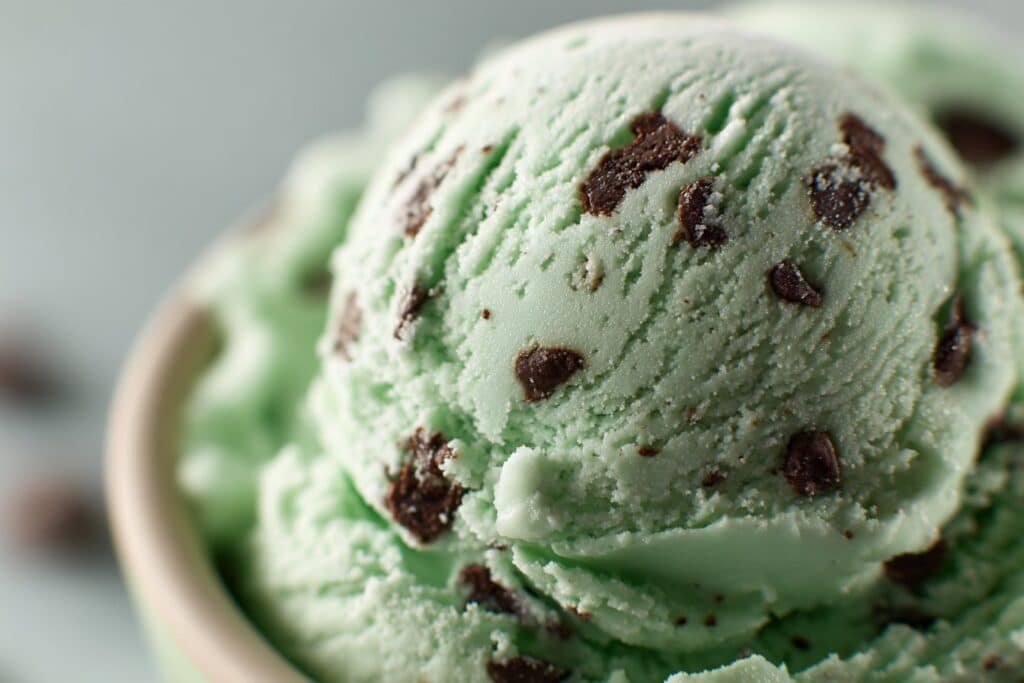
Serving of Ninja Creami Mint Chocolate Chip Ice Cream
Conclusion
There’s a certain magic in creating your own Ninja Creami Mint Chocolate Chip Ice Cream. The simple process transforms into a delightful ritual, filling your kitchen with the refreshing scent of mint and the promise of sweet, creamy joy. Imagine the smiles as you share a scoop with loved ones, the playful crunch of chocolate chips sparking laughter and connection.
Homemade treats like this have a way of bringing people together, transforming ordinary moments into cherished memories. Whether it’s a sunny afternoon or a cozy evening, this ice cream is a perfect companion.
I wholeheartedly encourage you to whip up this minty masterpiece. Dive into the joy of creating something special that everyone will love. And remember, each scoop carries a sprinkle of happiness.
For more delicious recipes like this, follow us on social media! Let’s keep the kitchen adventures going together.
What type of milk is best for Ninja Creami Mint Chocolate Chip Ice Cream?
For the creamiest texture and richest flavor, whole milk is your best bet. Using skim or low-fat milk can lead to a less smooth and icier final product. Stick with whole milk as specified in the recipe to achieve that indulgent, creamy consistency we all love in mint chocolate chip ice cream.
Can I use mint extract instead of peppermint extract in this recipe?
It’s recommended to use pure peppermint extract for the authentic mint chocolate chip flavor. Mint extract often includes spearmint, which can alter the taste significantly. Sticking with peppermint ensures a bright and familiar minty taste that complements the chocolate chips perfectly.
Do I need green food coloring for Ninja Creami Mint Chocolate Chip Ice Cream?
Green food coloring is entirely optional and purely for aesthetic purposes. If you skip it, your ice cream will be white but will still taste just as delicious. The coloring is just a nod to the classic look, so feel free to omit it if you prefer a more natural appearance.
Recipe

Ninja Creami Mint Chocolate Chip Ice Cream
Ingredients
Ingredients
- 1 cup whole milk
- 2/3 cup half-and-half
- 1/3 cup granulated sugar
- 1 tbsp softened cream cheese
- 1/2 tsp pure peppermint extract
- 4 drops green food coloring optional
- 1/4 cup mini chocolate chips
Instructions
- Combine milk, half-and-half, sugar, cream cheese, peppermint extract, and food coloring in a blender. Mix 45 seconds until smooth.
- Pour into Ninja Creami pint, leaving 1/2 inch space at the top. Freeze uncovered for 24 hours on a flat shelf.
- Select "Ice Cream" mode. If crumbly, add 1 tbsp milk and re-spin.
- For icy bits, re-spin once.
- Poke a hole in the center using a spoon handle. Add chocolate chips and run “Mix-In” cycle.
Notes
- Allow space for expansion during freezing.