I pulled these jelly candies together on a slow afternoon because I wanted something bright, nostalgic, and unfussy to tuck into gift boxes. They’re shockingly simple: a clear, glossy sugar-gel base split into five small bowls, each brightened with a packet of unsweetened Kool‑Aid or a trio of fruit extracts and food coloring. The payoff is a set of firm-but-yielding squares that hold their shape, glint in the light, and have that clean, punchy fruit flavor kids and adults both reach for.
There’s real satisfaction in the texture — a snappy exterior that softens to a tender chew — plus the chance to mix colors and flavors without specialty ingredients. If you like small-batch candy projects (think delightful homemade bubble gum), these are a similarly playful weekend project that travel well and make excellent, colorful gifts. For another Kool‑Aid-based idea try my take on homemade Kool-Aid candy ropes.
Why You’ll Love This Recipe
- Bright, individual flavors: dividing the mix into five bowls lets each packet of Kool‑Aid or extract shine on its own instead of muddling flavors together.
- Clean, glossy appearance: the long sugar syrup and gelatin set yields a smooth, translucent sheet that bounces light — perfect for gift jars.
- Hands-on but simple: most of the work is stirring and waiting; active time is straightforward and the biggest effort is letting things chill overnight.
- Customizable size and thickness: using 8×8 pans and loaf pans gives you a mix of thin and chunky candies to suit different tastes. Pair them on a plate with classic chocolate chip cookies for contrast.
- Make-ahead friendly: the candies firm up overnight and the separate sugar coating step means you can finish and package them over two days.
The Story Behind This Recipe
This recipe is a streamlined, home-kitchen version of classic jelly squares — no specialty molds, just basic pans and a pizza cutter — built around the reliable chemistry of gelatin and a simple sugar syrup, so you get consistent, glossy candies every time.
What It Tastes Like
These jellies are decidedly sweet but not syrupy — think bright, pronounced fruit flavor with a clean sugar finish. The aroma after cooking is a warm, sweet steam from the boiling sugar; once chilled, the texture is slightly springy in the center with a smooth surface that picks up sanding sugar for a crisp contrast. The Kool‑Aid versions have that sharp, candy-fruit tang; extracts give a rounder, more natural fruit note.
Ingredients You’ll Need
A quick note on ingredients: the gelatin is the structure — don’t skimp on blooming it — and the long sugar syrup gives the candies their clear, firm body and shine. Unsweetened Kool‑Aid packets add both flavor and color in one step; if you use extracts, plan for 3 teaspoons per batch and compensate with food coloring drops so the candies look as bright as they taste. The coating sugar gives a dry, frosted exterior that keeps pieces from sticking together.
- 2 – 1 oz. boxes gelatin (8 envelopes)
- 2 cups cold water
- 2 1/2 cups boiling water
- 6 cups sugar
- Unsweetened Kool-Aid packets or flavored extract with food coloring (5 packets or 15 tsp extract and color drops)
- 2 cups sugar for coating
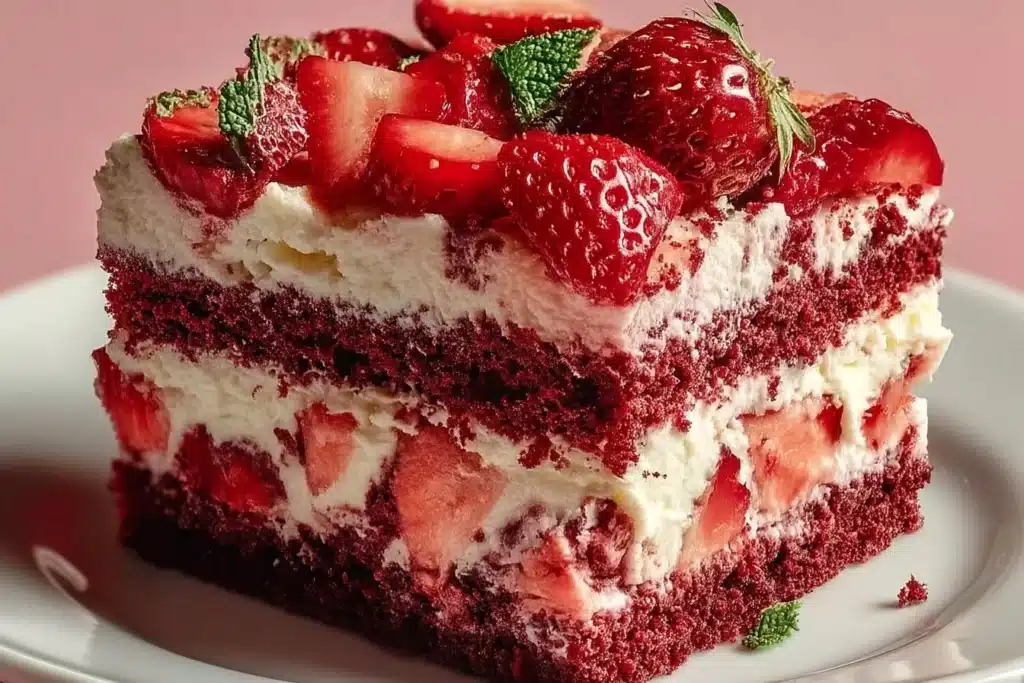
(If you like making small, shareable sweets you can serve alongside a slice of strawberry Italian cream pound cake for a very pretty dessert board.)
How to Make Homemade Jelly Candy Recipe
- Prepare pans. Line three 8×8 oven pans and two bread loaf pans with plastic wrap, smoothing the wrap so there are no big wrinkles. Lightly spray the wrap with vegetable spray — this keeps the finished sheets from sticking and makes turning them out much easier.
- Bloom the gelatin. Pour 2 cups cold water into a large bowl and sprinkle the gelatin evenly over the surface. Stir just enough to moisten the powder, then let it sit undisturbed to bloom for 5–10 minutes. The surface should look puffed and slightly spongy when it’s ready.
- Make the sugar syrup. In a medium (preferably deep) saucepan bring 2 1/2 cups of water to a boil. Add 6 cups sugar and stir constantly until the sugar dissolves and the liquid returns to a simmer. The mixture should look clear and glossy — not grainy — before you add the gelatin. Warning: this syrup is extremely hot; keep children away and use a long-handled spoon.
- Combine gelatin with syrup. Stir the bloomed gelatin into the hot sugar syrup until the gelatin is completely dissolved and there are no visible lumps. Return the pan to a gentle boil and cook for 2–3 minutes to “activate” the gelatin; you’ll see the mixture thicken very slightly and remain glossy. Remove from heat.
- Cool briefly before flavoring. Let the syrup sit off the heat for 1–2 minutes — it should still be hot but not scalding. This brief cooldown prevents the flavoring from getting cooked off or the color from running.
- Divide and flavor. Divide the gelatin mixture evenly into five separate bowls (use measuring cups or a kitchen scale for even portions). Add one Kool‑Aid packet to each bowl; if using extracts, add 3 teaspoons extract plus the appropriate food-color drops (for example, about 5 drops green for lime). Whisk until the color and flavor are fully uniform and the mixture is smooth. Each bowl should be vividly colored and glossy.
- Pour and chill. Pour each flavored portion into the prepared pans (you’ll layer colors across the pans to fill them). Smooth the surfaces gently; they should settle into perfectly flat, glossy sheets. Refrigerate the pans overnight (about 8–12 hours) until fully firm — the sheets will be set but still slightly springy when pressed.
- Turn out and sugar bed. Lay a sheet of parchment on the counter and spread a thin layer of the 2 cups sugar across it. Turn a gelatin sheet out onto the sugared parchment so the bottom side of the jelly contacts the sugar. Transfer the sugared sheet onto a fresh parchment sheet (sugar side down) to keep the face clean. The sugar will adhere to the surface and give you a non-sticky sheet to cut.
- Cut into shapes. Using a sharp pizza cutter, slice the gelatin sheet into small squares or rectangles. Press firmly and make straight, decisive cuts so the pieces have clean edges. If the cutter drags, chill the whole pan 10–15 minutes more until firmer.
- Dry and coat. Let the cut candies sit uncovered on parchment overnight to firm slightly — they should become less tacky but still pliable. Coat the bottom sides with sugar (press gently if needed), then leave the candies again overnight with the newly coated side facing up so the sugar sets and the surface dries properly. Done looks like a frosted, non-sweaty surface with sugar crystals adhered, not dissolving into the candy.
- Store. Once fully set and coated, transfer the candies into airtight bags or containers to maintain freshness.
Tips for Best Results
- Bloom gelatin fully: if the gelatin isn’t visibly puffed before heating, your final texture will be weak and overly soft.
- Use a deep saucepan: the sugar syrup can bubble and climb; a taller pot prevents boil-overs.
- Measure sugar accurately: these candies rely on a high sugar ratio for clarity and structure — too little sugar gives softer, cloudier results.
- Cool slightly before flavoring: adding flavoring while the syrup is boiling can mute delicate extracts and make colors run. A 1–2 minute cooldown is enough.
- Keep pieces separate in storage: layer parchment between sheets in containers to prevent sticking and abrasion to the sugar coating.
Variations and Substitutions
- Kool‑Aid vs extracts: Kool‑Aid gives a very bright, nostalgic candy tang and built‑in color. Extracts produce a more natural fruit aroma but need food coloring to match the vivid look. Either method works; stick to the same total flavor quantity (one packet or 3 tsp extract per portion).
- Pan choices: the recipe uses three 8×8 pans and two loaf pans; use only loaf pans for thicker pieces or only 8×8 pans for thinner squares — thicker pieces will need slightly longer chilling to firm fully.
- Coating options: sanding sugar gives a glittery, crisp exterior; stick with plain granulated sugar if you prefer a subtler frost.
How to Serve It
Serve these jelly squares at room temperature on a platter so their glossy faces catch the light; they make a bright, colorful addition to cookie plates or candy dishes. For a pretty dessert spread, place a small pile of jellies beside a slice of best homemade blueberry upside-down cake — the tartness of the berries contrasts nicely with the pure sweetness of the jellies. 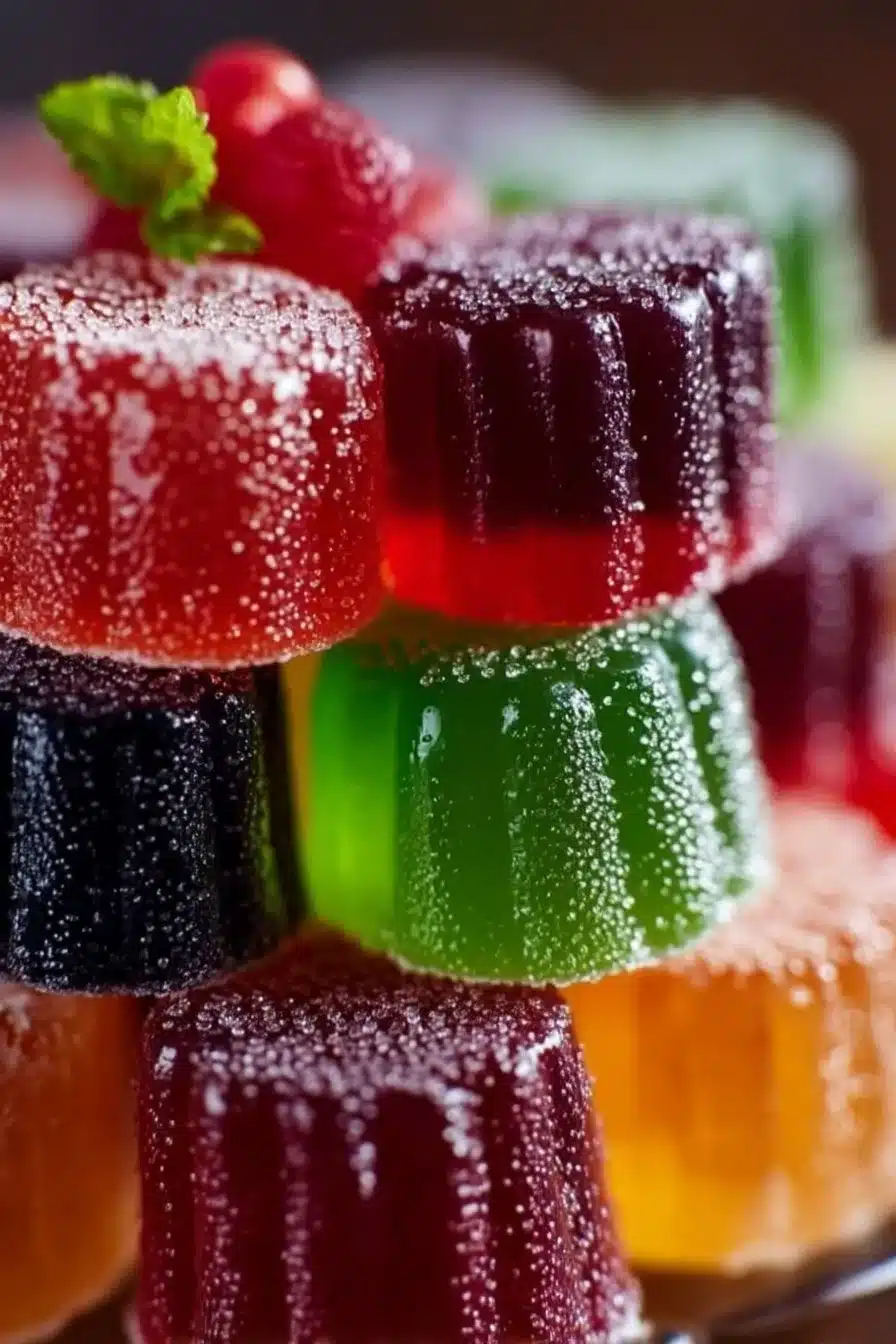
How to Store It
Store jelly candies in airtight bags or containers at room temperature in a cool, dry place. Separate layers with parchment so the sugar coating doesn’t rub off. They’re best enjoyed within a few weeks; if pieces begin to feel excessively sticky, give them a few hours uncovered on parchment to dry before re-bagging.

Final Thoughts
These jelly candies are one of the most satisfying small projects: vivid color, clean fruit flavor, and a chewy-but-slightly-snap texture that tastes and looks handmade without fuss. Follow the chilling and coating steps closely and you’ll end up with neat, giftable squares every time.
Conclusion
If you want another take on similar candies, here’s a detailed run-through of Homemade Jelly Candies – What Jew Wanna Eat that covers different flavor options. For a step-by-step giftable presentation, this Homemade Jelly Candies Recipe to Make and Gift – Hearth and Vine is a nice companion resource. And for a version using real fruit juice, see The Best Homemade Real Fruit Juice Jelly Candy Recipe – Foodal.