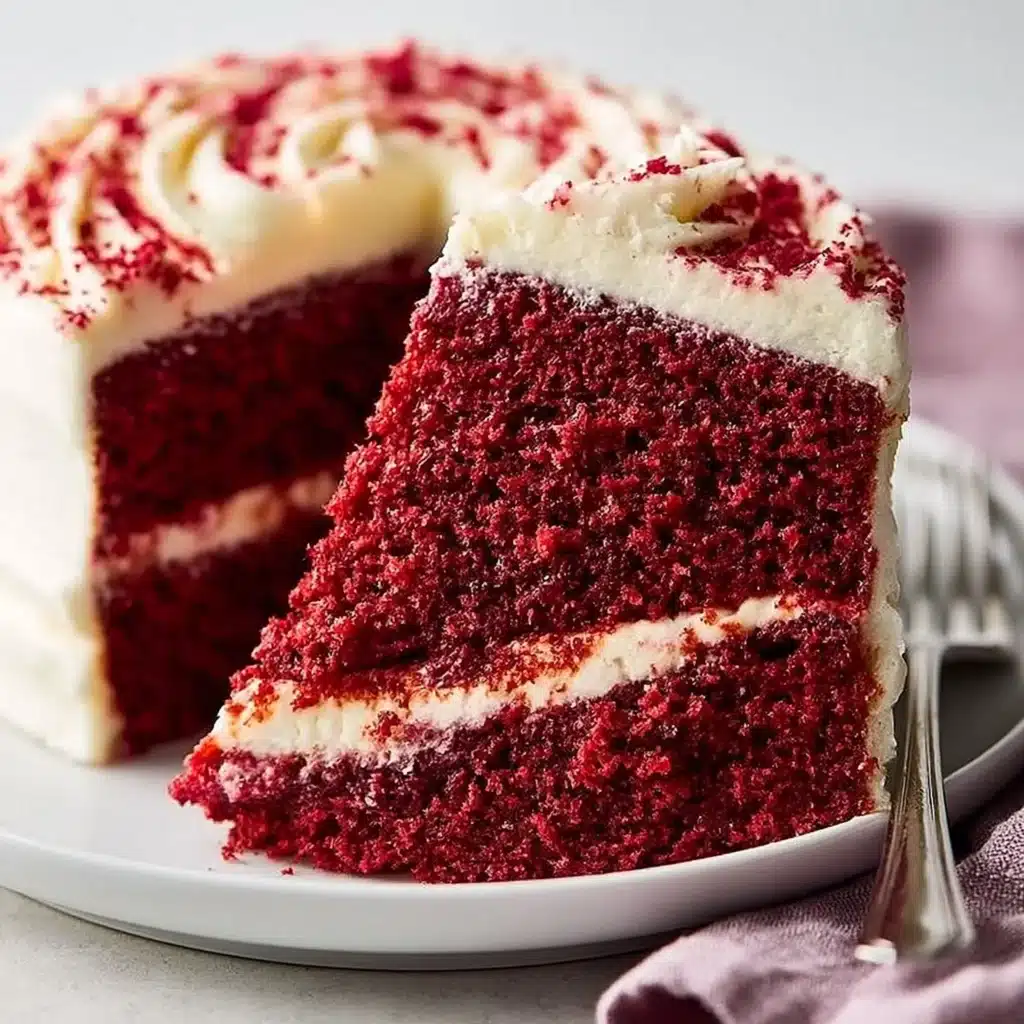
The first time I tested this red velvet cake, what surprised me most was how quickly the batter comes together—no creaming butter, no fussy steps—yet the layers bake up tall and plush. The crumb stays soft (thanks to the oil), and the cocoa is just a whisper in the background instead of turning it into a chocolate cake.
And that frosting: cream cheese and butter beaten until silky, then powdered sugar to make it thick enough to swoosh over the sides without sliding. If you want a cake that slices cleanly, looks bold on a plate, and tastes like classic red velvet—this is the one I pull out. If you’re in a full red-velvet mood, I also love keeping mini red velvet cheesecakes in the rotation for smaller gatherings.
Why You’ll Love This Recipe
- Moist, velvety layers (no dryness): using 1 1/2 cups vegetable oil keeps the crumb tender for days, even after chilling.
- That signature red velvet flavor: just 1 teaspoon cocoa powder gives a gentle cocoa aroma without overpowering the tangy buttermilk.
- Simple mixing method: whisk wet + sift dry, then combine—no stand mixer required for the cake batter.
- Even, reliable bake in two 9-inch pans: the layers bake up level and slice neatly when fully cooled.
- Cream cheese frosting that’s thick but spreadable: softened cream cheese + butter whip smooth, and 4 cups powdered sugar gives it structure for stacking.
The Story Behind This Recipe
As a former food stylist, I’ve made a lot of red velvet cakes that look perfect but eat a little dry—so I built this one around oil and buttermilk for a softer bite, then kept the cocoa low so the tangy-vanilla “red velvet” identity stays front and center. When I want a twist on the theme, I’ll bake a red velvet cheesecake swirl cake, but this classic layer version is my go-to.
What It Tastes Like
This cake is moderately sweet with a clear buttermilk tang and a light cocoa-and-vanilla aroma—more “red velvet” than chocolate. The crumb is plush and springy (oil does that), and the cream cheese frosting brings a cool, slightly salty richness that balances the red layers beautifully without tasting heavy.
Ingredients You’ll Need
A few ingredients do the heavy lifting here: buttermilk adds tang and tenderness, a small amount of cocoa powder gives that classic red velvet depth, and vinegar + baking soda help the layers lift without feeling bready. For the frosting, make sure your cream cheese and butter are softened so it beats up smooth—any chill will leave little lumps.
- 2 1/2 cups all-purpose flour
- 1 1/2 cups granulated sugar
- 1 teaspoon baking soda
- 1 teaspoon salt
- 1 teaspoon cocoa powder
- 1 1/2 cups vegetable oil
- 1 cup buttermilk, room temperature
- 2 large eggs, room temperature
- 2 tablespoons red food coloring
- 1 teaspoon vanilla extract
- 1 teaspoon white vinegar
- 8 oz cream cheese, softened
- 1/2 cup unsalted butter, softened
- 4 cups powdered sugar
- 1 teaspoon vanilla extract
How to Make The BEST Red Velvet Cake
- Preheat and prep your pans. Heat the oven to 350°F (175°C). Grease and flour two 9-inch round cake pans. (Take a second to tap out excess flour—too much can leave white patches on the crust.)
- Sift the dry ingredients. In a large bowl, sift together the flour, sugar, baking soda, salt, and cocoa powder. You’re looking for an even, cocoa-speckled mix with no little cocoa clumps.
- Mix the wet ingredients until smooth. In another bowl, combine the oil, room-temp buttermilk, room-temp eggs, red food coloring, vanilla extract, and vinegar. Whisk until it looks fully blended and glossy—no streaks of egg.
- Combine wet and dry (don’t overmix). Gradually add the wet mixture into the dry mixture, stirring until just combined. The batter will be fairly loose and pourable. Stop as soon as you no longer see dry flour; overmixing can make the layers a bit tough.
- Divide and level. Split the batter evenly between the prepared pans. Give each pan a gentle tap on the counter to pop big air bubbles.
- Bake. Bake for 25–30 minutes, until the tops look set and a toothpick inserted in the center comes out clean (a moist crumb is fine; wet batter isn’t). The cakes should spring back lightly when you touch the center.
- Cool properly. Cool the cakes in their pans for 10 minutes, then turn out onto wire racks to cool completely. Don’t frost while warm—cream cheese frosting will soften and slide.
- Make the frosting. Beat the softened cream cheese and softened butter until completely smooth and creamy. Add the powdered sugar gradually, then mix in the vanilla extract. The frosting should be thick, fluffy, and easy to spread without tearing the cake.
- Frost and stack. Place one fully cooled layer on your serving plate, spread on frosting, top with the second layer, and frost the top and sides. If you like extra clean slices, chill the frosted cake briefly before serving. (If you’re a frosting lover, you’d probably also appreciate these oven-baked Oreo cupcakes—same “big payoff, straightforward method” energy.)
Tips for Best Results
- Use room-temperature buttermilk and eggs. Cold ingredients can make the batter look slightly broken and bake less evenly; room temp blends into a smoother, more uniform red batter.
- Sift the cocoa powder (don’t skip). With only 1 teaspoon cocoa, any lumps stand out and can leave tiny bitter spots.
- Stop mixing as soon as the flour disappears. This batter should stay loose and silky; overmixing can tighten the crumb.
- Cool the layers completely before frosting. If the cakes still feel warm underneath, the cream cheese frosting will lose structure and slide.
- Beat the frosting until truly smooth before adding sugar. Cream cheese lumps don’t disappear later—get it silky first, then sweeten.
Variations and Substitutions
- Double-layer look with a different format: This recipe is written for two 9-inch rounds; if you want a different red velvet presentation, try marbled red velvet cheesecake bars for neat, handheld slices.
- Frosting finish: Keep it simple and swooshy, or smooth it more firmly with an extra minute of mixing to make it look sharper on the sides (the ingredients stay the same).
How to Serve It
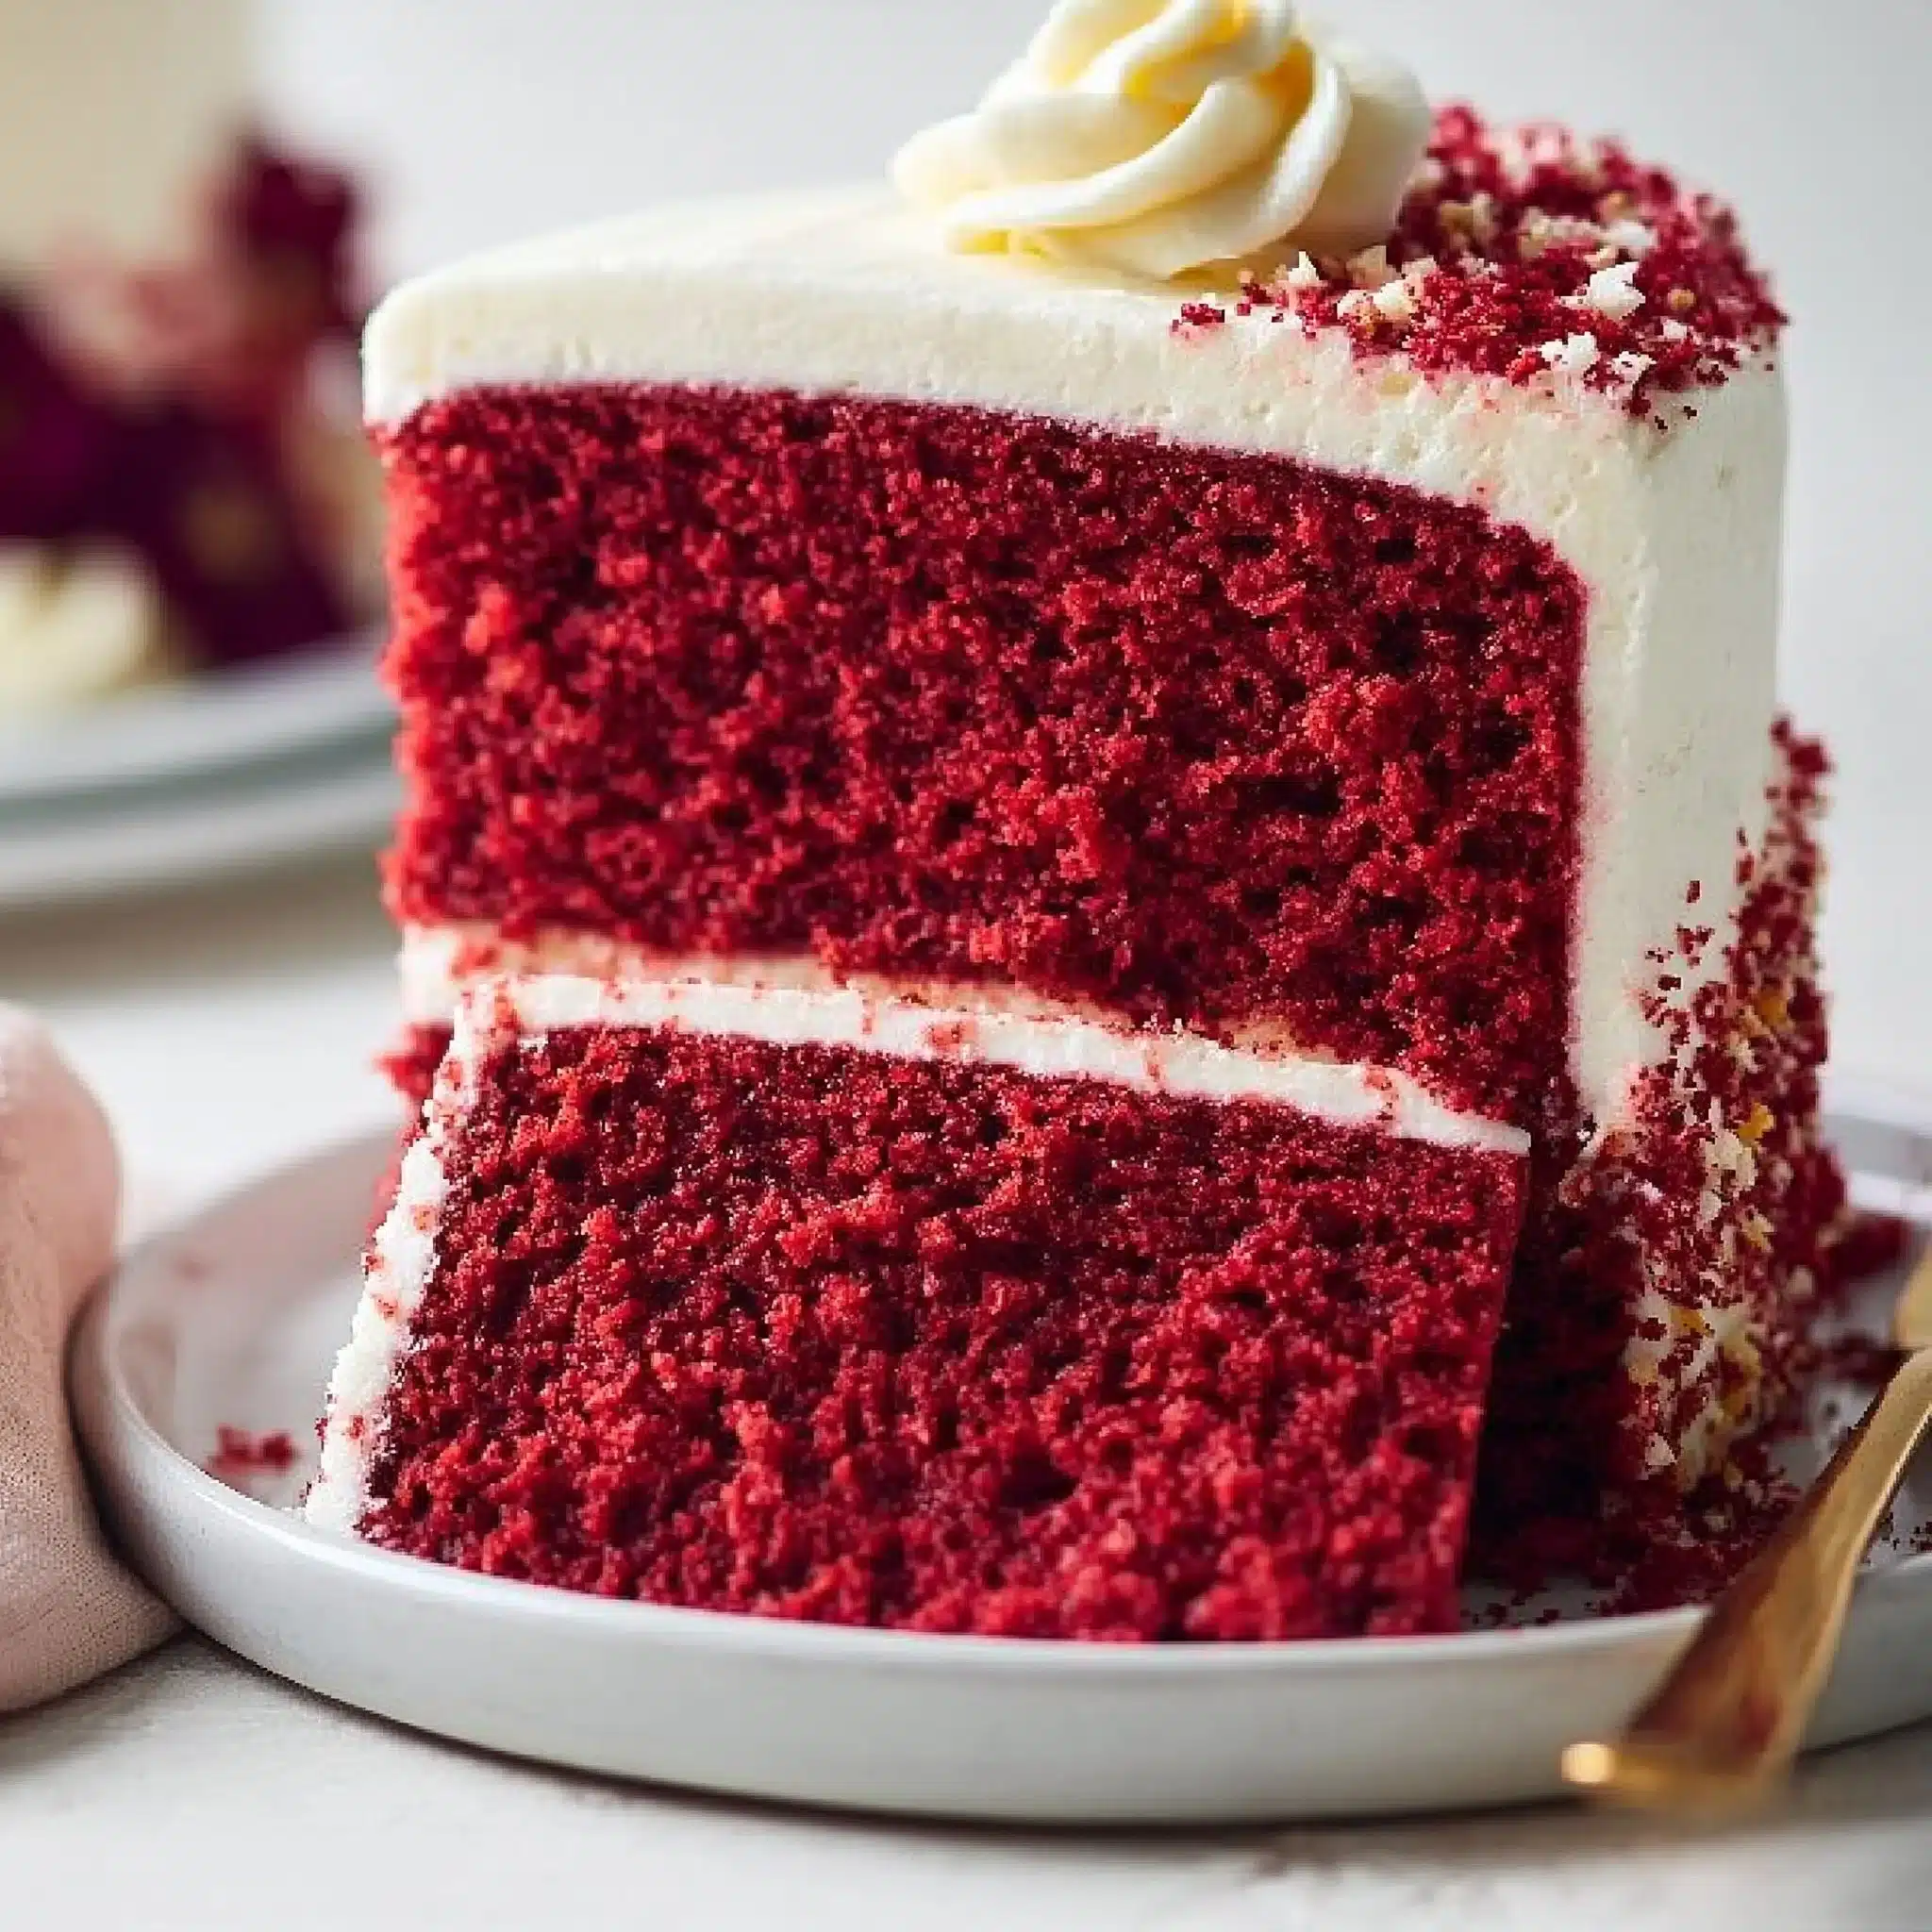
Slice the cake with a long knife and wipe the blade between cuts for clean, bakery-style edges that show off the red crumb. I love serving it slightly chilled so the cream cheese frosting feels extra thick and creamy, then letting slices sit for 10 minutes so the cake itself tastes softer and more aromatic. For a bigger dessert table, pair it with something tangy-and-rich like a knock-you-naked red velvet cheesecake so guests can choose cake or cheesecake.
How to Store It
Because the frosting is cream cheese-based, store the frosted cake covered in the refrigerator. For the nicest slices, cut while the cake is cool and the frosting is set. You can also freeze the cake (frosted or unfrosted) by wrapping it well to protect it from freezer flavors; thaw in the fridge so the frosting stays stable. If making ahead, baking the layers and cooling them completely before frosting makes assembly calmer and cleaner.

Final Thoughts
This is the kind of red velvet cake I make when I want bold color, a soft crumb that stays moist, and that unmistakable cream cheese frosting tang in every bite—without complicated steps. Take your time cooling the layers, whip the frosting smooth, and you’ll end up with a cake that looks as good as it tastes.
Conclusion
If you enjoy comparing techniques, I found it helpful to read a side-by-side red velvet recipe review to see how different mixing styles affect texture. For another well-tested approach, you can also look at a classic red velvet layer cake guide for extra visual cues on crumb and frosting consistency. And if you’re curious about a more traditional spin, a Southern-style red velvet recipe is a great reference point for flavor balance and serving style.