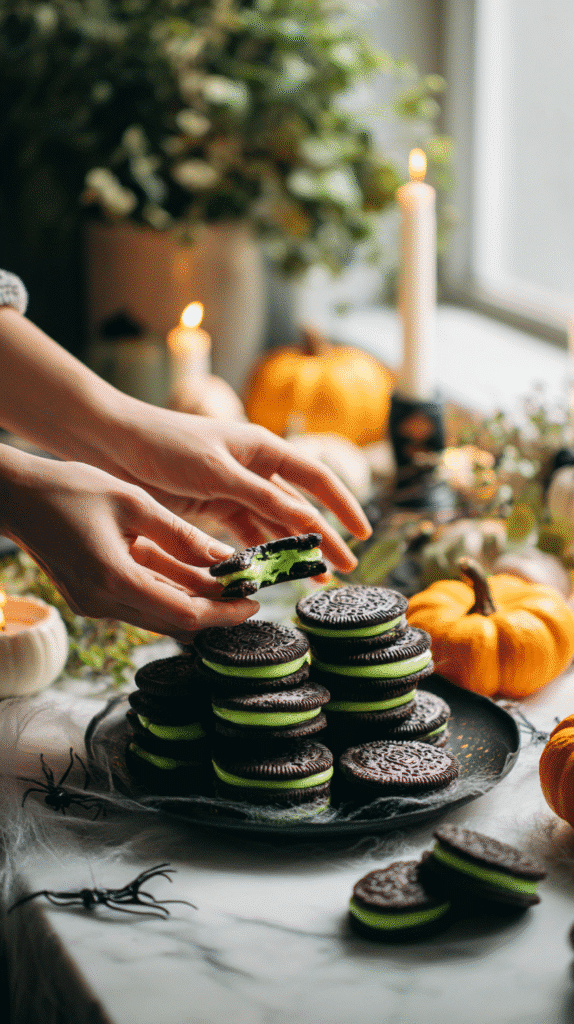
Halloween is my favorite excuse to play with food—and these slime filled Halloween cookies are as spooky as they are delicious. Imagine biting into a soft, chocolatey cookie only to find a gooey green slime oozing from the center. They’re creepy enough to impress the kids, but tasty enough to keep the adults coming back for seconds.
In this post, we’ll dive into the story behind these cookies, tips for making them perfect, and of course, the full recipe.
The Story Behind Slime Filled Halloween Cookies
Every Halloween, I try to create one show-stopping dessert that makes my family’s eyes light up. Last year, it was spider web cupcakes, and the year before that, haunted chocolate bark. But the winner of all time? These slime filled Halloween cookies. The first time I tested them, my kitchen looked like a mad scientist’s lab—bowls of melted candy, sticky marshmallow fluff strings stretching across the counter, and me laughing at the mess. It was chaotic, but when I pulled those first cookies from the oven and added the gooey slime filling, I knew I had something magical.
The best part about these cookies is that they strike the perfect balance: they’re fun to look at but easy to make. Unlike elaborate cakes that require hours of decorating, these cookies come together with simple pantry staples plus a little creative flair. They’re soft, chewy, and filled with just the right amount of spooky surprise. If you’ve ever tried my Halloween spider cookies or my pumpkin chocolate chip muffins, you’ll appreciate how approachable this recipe feels.
The slime filling is what makes these cookies truly unforgettable. By combining green candy melts with marshmallow fluff, you get a stretchy, gooey center that feels straight out of a monster movie. Kids love the “ick” factor, while adults love that the slime is sweet and marshmallow-y rather than scary. Plus, you can customize the filling with neon colors, candy eyeballs, or even edible glitter if you want to turn the creep factor up a notch.
Ingredients for the Perfect Slime Filled Cookies
When it comes to Halloween baking, the best recipes are the ones that look impressive but don’t require a degree in pastry school. That’s exactly why these slime filled Halloween cookies are such a hit—they use simple ingredients you probably already have, plus a few fun extras to make them spooky.
The cookie base is a classic chocolate dough made with butter, sugar, cocoa powder, and a touch of vanilla. This gives you a rich, chewy bite that pairs beautifully with the sweet, gooey filling. To create the “slime,” you’ll melt green candy melts (or white chocolate with food coloring) and stir in marshmallow fluff. The result is stretchy, sticky, and just the right amount of gross for Halloween night. If you’ve ever made my Halloween witch hat cookies or chocolate crinkle cookies, you’ll recognize how versatile pantry staples like cocoa powder and chocolate chips can be.
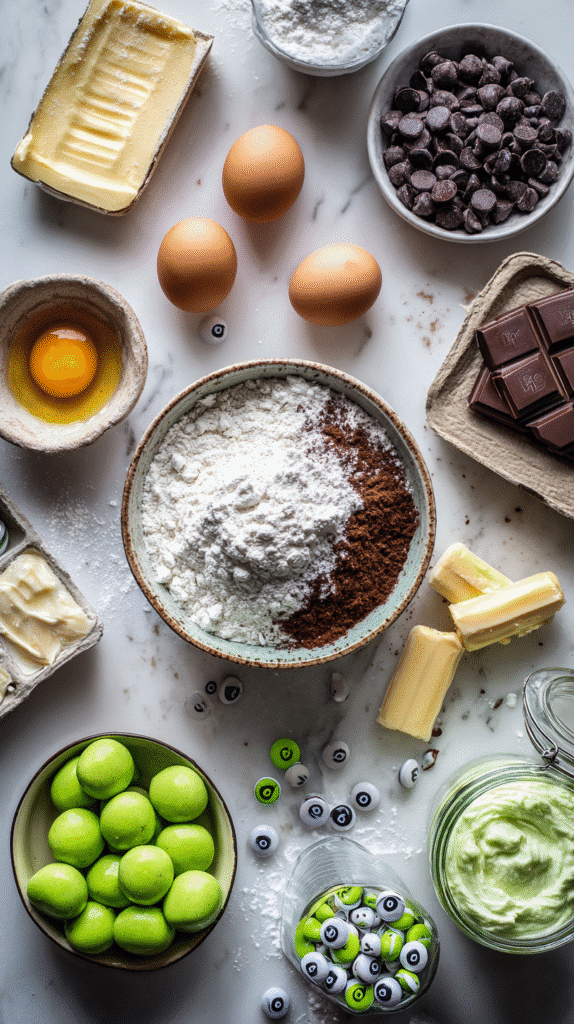
Here’s a quick ingredient breakdown:
- Butter and sugars for a soft, chewy base.
- Cocoa powder for deep chocolate flavor.
- Eggs and vanilla to bind and add richness.
- Chocolate chips for pockets of melty goodness.
- Green candy melts and marshmallow fluff for the oozy slime effect.
- Candy eyeballs (optional, but highly recommended for spookiness).
If you can’t find candy melts, white chocolate tinted with neon green food coloring works just as well. And if marshmallow fluff isn’t available, you can use melted marshmallows for a similar effect. The beauty of these cookies is that they’re flexible—perfect for experimenting with what you already have in your pantry.
Tip: Bake your cookies just until the edges are set and the centers are slightly soft. That way, when you add the slime filling, the contrast between chewy cookie and gooey center is absolutely irresistible.
Also Read: Blood Splatter Cookies – Creepy Yet Delicious Halloween Treats
How to Make Slime Filled Halloween Cookies
Baking these slime filled Halloween cookies is easier than you might think. The trick is to keep the dough simple, bake just until set, and then have a little fun with the oozy filling. Here’s how to do it step by step.
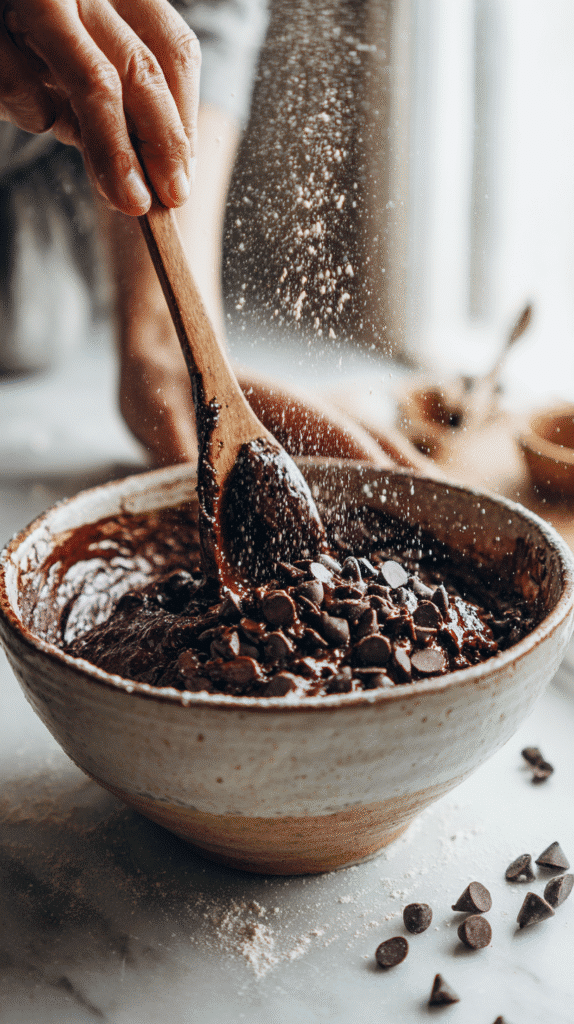
First, preheat your oven to 350°F (175°C) and line two baking sheets with parchment paper. In a large mixing bowl, cream together butter and sugars until fluffy. This step is key for that classic chewy cookie texture. Add eggs one at a time, followed by vanilla, then mix in the dry ingredients: flour, cocoa powder, baking soda, and salt. Finally, fold in chocolate chips. If you’ve tried my soft pumpkin cookies before, you’ll notice this mixing method keeps the dough tender and moist.
Next, scoop the dough into even balls and place them on your prepared baking sheets. Bake for 9–11 minutes, just until the edges are set but the centers are soft. Overbaking will give you dry cookies, so keep an eye on them. Let the cookies cool slightly, then use a spoon to create a shallow indent in the center of each one.
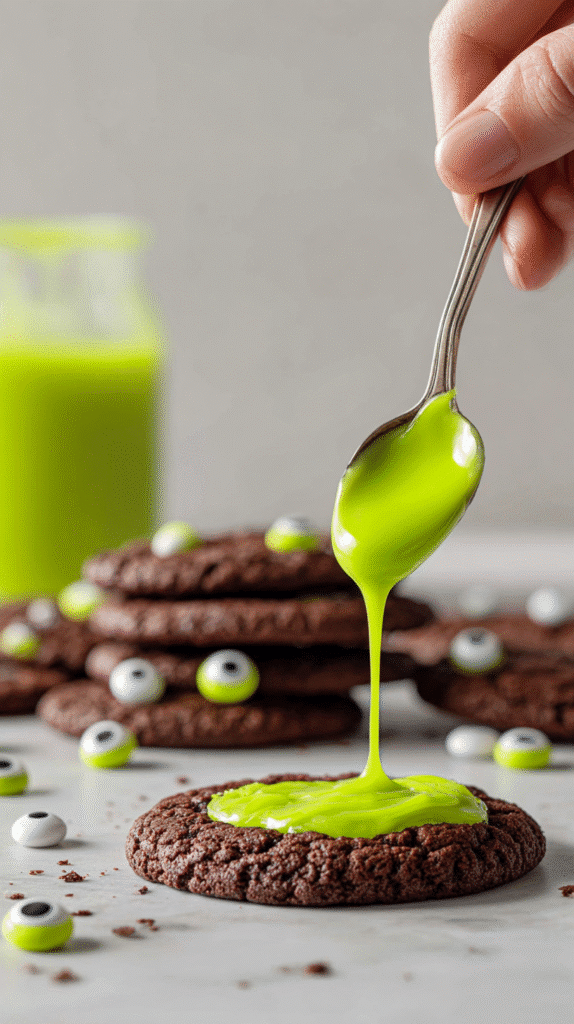
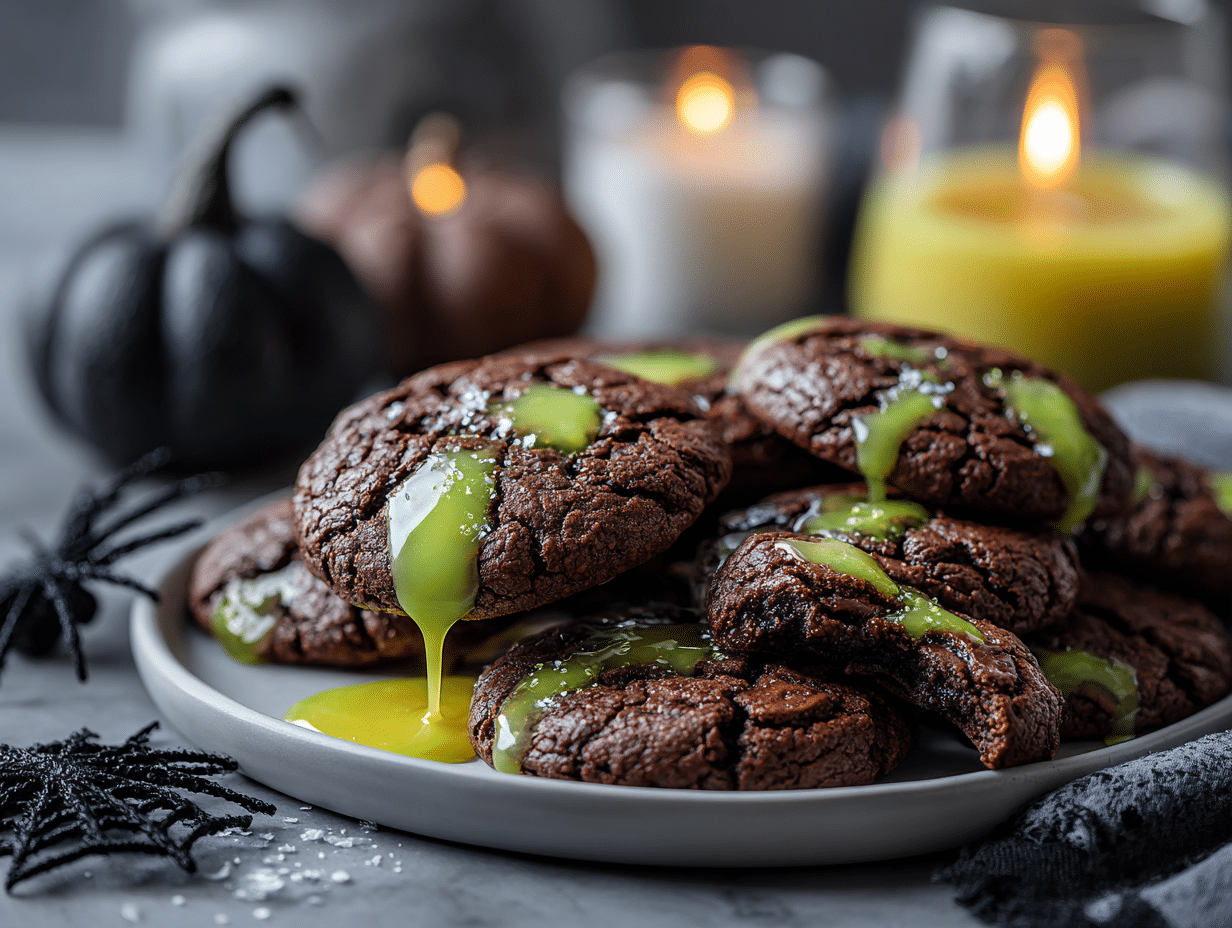
Now comes the fun part: the slime. Melt your green candy melts (or tinted white chocolate) and stir in marshmallow fluff. The mixture should be gooey and stretchy—perfect for that creepy Halloween vibe. Spoon a small amount into each cookie indent, letting it ooze slightly for dramatic effect. For extra spook factor, press candy eyeballs into the slime before it sets.
That’s it! In less than 30 minutes, you’ll have cookies that are equal parts eerie and delicious. They’re perfect for classroom parties, Halloween movie nights, or even as a centerpiece for your dessert table. Pair them with a tray of mummy brownies for a spread that’s guaranteed to wow your guests.
Also Read: Peanut Butter Spider Cookies: The Cutest Halloween Treat You’ll Love
Serving and Storing Slime Filled Halloween Cookies
The best thing about these slime filled Halloween cookies is watching people’s reactions when they take their first bite. Serve them warm if you want the slime to ooze dramatically—kids especially love pulling the cookies apart to see the goo stretch. If you prefer a neater presentation for parties, let the filling set a little before serving so it’s still chewy but less messy. These cookies are guaranteed to be a conversation starter at any Halloween event.
When it comes to storing, place cooled cookies in an airtight container at room temperature for up to 4 days. The slime filling stays soft, but if you want to refresh the cookies, microwave them for just 5–10 seconds before serving. You can also refrigerate them if your kitchen runs warm, though they’re best enjoyed at room temp. If you’re prepping ahead, bake the cookies without filling, then add the slime just before serving for the freshest look. This method works especially well if you’re setting up a themed dessert table with other treats like my pumpkin cheesecake bars or Halloween sugar cookies.
Frequently Asked Questions About Slime Filled Halloween Cookies
How long do Halloween cookies last?
Homemade Halloween cookies usually last 3–4 days when stored in an airtight container at room temperature. For longer freshness, refrigerate or freeze the dough instead of the baked cookies.
How do you make Halloween slime?
For edible slime, melt green candy melts or white chocolate tinted with food coloring. Stir in marshmallow fluff for stretchiness and gooey texture. This combo creates the perfect slime for filling cookies.
How long do cookies last once made?
Most cookies stay fresh for 3–5 days at room temperature. These slime filled Halloween cookies keep their soft texture for about 4 days in an airtight container.
How long are Halloween chocolates good for?
Unopened Halloween chocolates can last several months if stored in a cool, dry place. Once opened, they’re best enjoyed within 2–3 weeks.
Do cookies go bad if left out?
Yes. If cookies are left uncovered, they’ll dry out within 24 hours. Always store them in a sealed container to preserve moisture and flavor.
Can you freeze cookie dough?
Absolutely! Shape the dough into balls, freeze on a tray, then store in a freezer-safe bag for up to 2 months. Bake from frozen with just 1–2 minutes added to the bake time.
Conclusion
These slime filled Halloween cookies are the ultimate spooky-sweet treat for October. With their gooey centers, chewy chocolate base, and endless decorating possibilities, they’re as fun to make as they are to eat. Whether you’re baking for a Halloween party, a classroom celebration, or just a cozy night in, these cookies are sure to bring out smiles (and maybe a few playful screams).
Pair them with other seasonal favorites, keep a stash of dough in the freezer, and you’ll always be ready to whip up something festive. Happy baking, and may your Halloween be deliciously eerie!
If you’re inspired to try this recipe, I’d love to see your creations! Share them with me on Facebook or pin your version on Pinterest so we can keep the baking (and sipping) community growing together. With just a few simple steps, you can transform your daily pick-me-up into something extraordinary.
Slime Filled Halloween Cookies That Ooze Spooky Fun
Ingredients
- 1 cup unsalted butter softened
- 1 cup granulated sugar
- 1 cup light brown sugar packed
- 2 large eggs
- 1 tsp vanilla extract
- 2 ½ cups all-purpose flour
- 1 tsp baking soda
- ½ tsp salt
- ½ cup cocoa powder
- 1 cup semi-sweet chocolate chips
- ½ cup green candy melts or white chocolate + green food coloring
- ½ cup marshmallow fluff
- Candy eyeballs optional
Instructions
- 1. Preheat oven to 350°F (175°C) and line baking sheets.
- 2. Cream butter and sugars until fluffy.
- 3. Beat in eggs and vanilla.
- 4. Mix flour, cocoa, baking soda, salt, then combine with wet mix.
- 5. Fold in chocolate chips and chill dough 30 minutes.
- 6. Scoop dough into balls, bake 9–11 mins until edges are set.
- 7. Cool slightly, indent centers with spoon.
- 8. Melt candy melts, stir in marshmallow fluff to make slime.
- 9. Spoon slime into cookies and decorate with eyeballs.
- 10. Serve warm or let filling set.