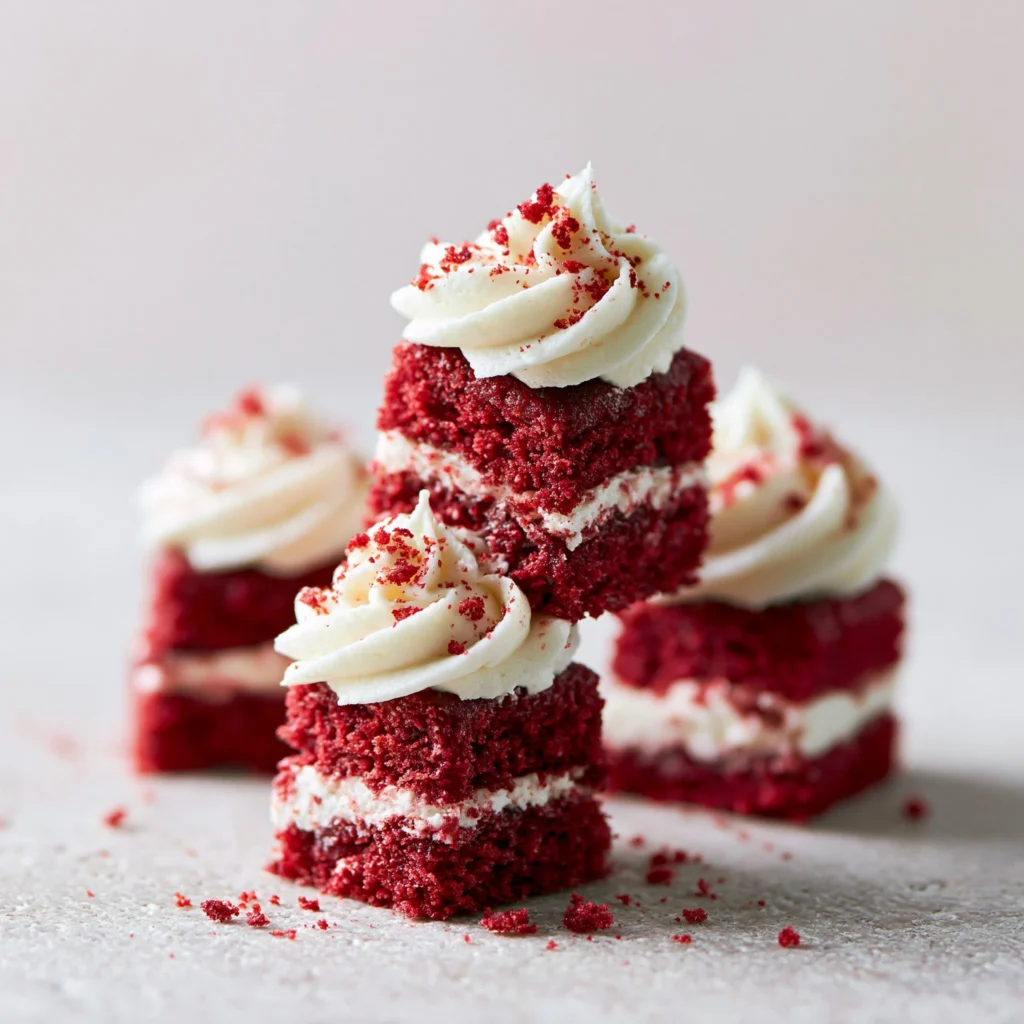
The fastest way to make red velvet feel a little fancy is to shrink it down. These mini cakes bake up in a mini muffin tin with tall, domed tops and that classic red velvet look—deep red with a soft cocoa undertone—then you finish them with a swirl of tangy cream cheese frosting.
What I love most is how unfussy the batter is: oil keeps the crumb plush, buttermilk adds that subtle tang, and the whole thing comes together in two bowls without any creaming. If you want the full printable version later, I keep it here: Red Velvet Cake Minis.
Why You’ll Love This Recipe
- Perfect mini-cake texture: vegetable oil + buttermilk makes the crumb moist and springy, not dry or crumbly.
- That “real” red velvet flavor: you get a gentle cocoa aroma (from just 2 tablespoons of cocoa powder) instead of a straight-up chocolate cake vibe.
- Quick bake time: 10–12 minutes is all it takes, which means you can knock these out even on a busy day.
- Cream cheese frosting that actually balances sweetness: the tang from 4 ounces of cream cheese keeps the powdered sugar from tasting flat.
- Built-in portioning: the mini muffin tin does the measuring for you—each cake is a neat, giftable little bite.
The Story Behind This Recipe
I developed these when I wanted the look of frosted cupcakes without committing to full-size ones—mini muffin cakes are easier to serve, faster to bake, and you still get the signature red velvet + cream cheese combination in two or three bites. They also make a great “something sweet” alongside other red velvet treats like red velvet cake pops on a dessert table.
What It Tastes Like
These taste lightly chocolatey (think cocoa perfume more than cocoa punch) with a noticeable buttermilk tang that keeps the sweetness in check. The cakes are soft and tender with a fine crumb, and the frosting is creamy, vanilla-scented, and just tangy enough to cut through the sugar. Together, it’s that classic red velvet contrast: mild cocoa cake + cool, rich cream cheese topping.
Ingredients You’ll Need
This recipe is all about balance: buttermilk brings tang and tenderness, oil keeps the minis moist even after chilling, and a small amount of cocoa powder gives red velvet its signature flavor without turning it into chocolate cake. Use softened cream cheese and butter for the frosting so it whips smooth—if either is still cool and firm, you’ll fight lumps.
- 1 cup all-purpose flour
- 1 cup granulated sugar
- 1/2 cup vegetable oil
- 1/2 cup buttermilk
- 1 large egg
- 2 tablespoons unsweetened cocoa powder
- 1 teaspoon baking soda
- 1/2 teaspoon salt
- 1 tablespoon red food coloring
- 1 teaspoon vanilla extract
For the frosting:
- 4 ounces cream cheese, softened
- 1/2 cup unsalted butter, softened
- 2 cups powdered sugar
- 1 teaspoon vanilla extract
How to Make Red Velvet Cake Minis
- Prep the pan and oven. Heat the oven to 350°F (175°C). Line a mini muffin tin with paper liners so the cakes lift cleanly and the edges stay neat.
- Mix the dry ingredients. In a medium mixing bowl, whisk together the flour, granulated sugar, cocoa powder, baking soda, and salt. You want the cocoa evenly dispersed—no little dark pockets.
- Whisk the wet ingredients. In a second bowl, whisk the vegetable oil, buttermilk, egg, red food coloring, and vanilla until the mixture looks fully blended and uniformly red.
- Combine—gently. Pour the wet mixture into the dry mixture and stir just until you don’t see dry flour. The batter should look smooth and pourable, but don’t keep mixing once it’s together (overmixing can make minis bake up a bit tough).
- Fill the liners. Spoon batter into the mini muffin cups, filling each about 2/3 full. This gives you a nice rounded top without overflow.
- Bake. Bake for 10–12 minutes, until the tops look set and a toothpick inserted into the center comes out clean. The cakes should spring back lightly when you touch the top.
- Cool completely. Let the mini cakes cool until they’re no longer warm at all—warm cakes will melt cream cheese frosting and make it slide.
- Make the frosting base. Beat the softened cream cheese and softened butter together until completely smooth and creamy, with no visible streaks.
- Sweeten and fluff. Gradually add the powdered sugar and vanilla, mixing until the frosting looks fluffy and holds soft peaks.
- Frost and serve. Frost the cooled mini cakes. I like a generous little swoop so you get frosting in every bite.
Tips for Best Results
- Measure the fill level: stopping at about 2/3 full keeps the tops nicely domed instead of spilling over the liners.
- Watch the last 2 minutes: minis go from perfect to overbaked fast. Pull them as soon as the toothpick is clean—dry crumbs are okay, wet batter isn’t.
- Cool before frosting (really): if there’s any warmth left, the cream cheese frosting turns glossy and loose instead of fluffy.
- Beat the frosting until smooth before adding sugar: once powdered sugar goes in, lumps are harder to fix. Start with very soft cream cheese and butter.
- If your frosting is too sweet, don’t add more sugar “to fix it”: this frosting is meant to be sweet, but the tang from the cream cheese balances it once it’s on the cake.
Variations and Substitutions
- More or less red color: you can adjust the red food coloring slightly for your preferred shade; the flavor stays the same, but the visual “red velvet” impact changes.
- Make it a mini red velvet dessert spread: pair these with something creamy like mini red velvet cheesecake or bar-style treats like marbled red velvet cheesecake bars for a mix of textures.
How to Serve It
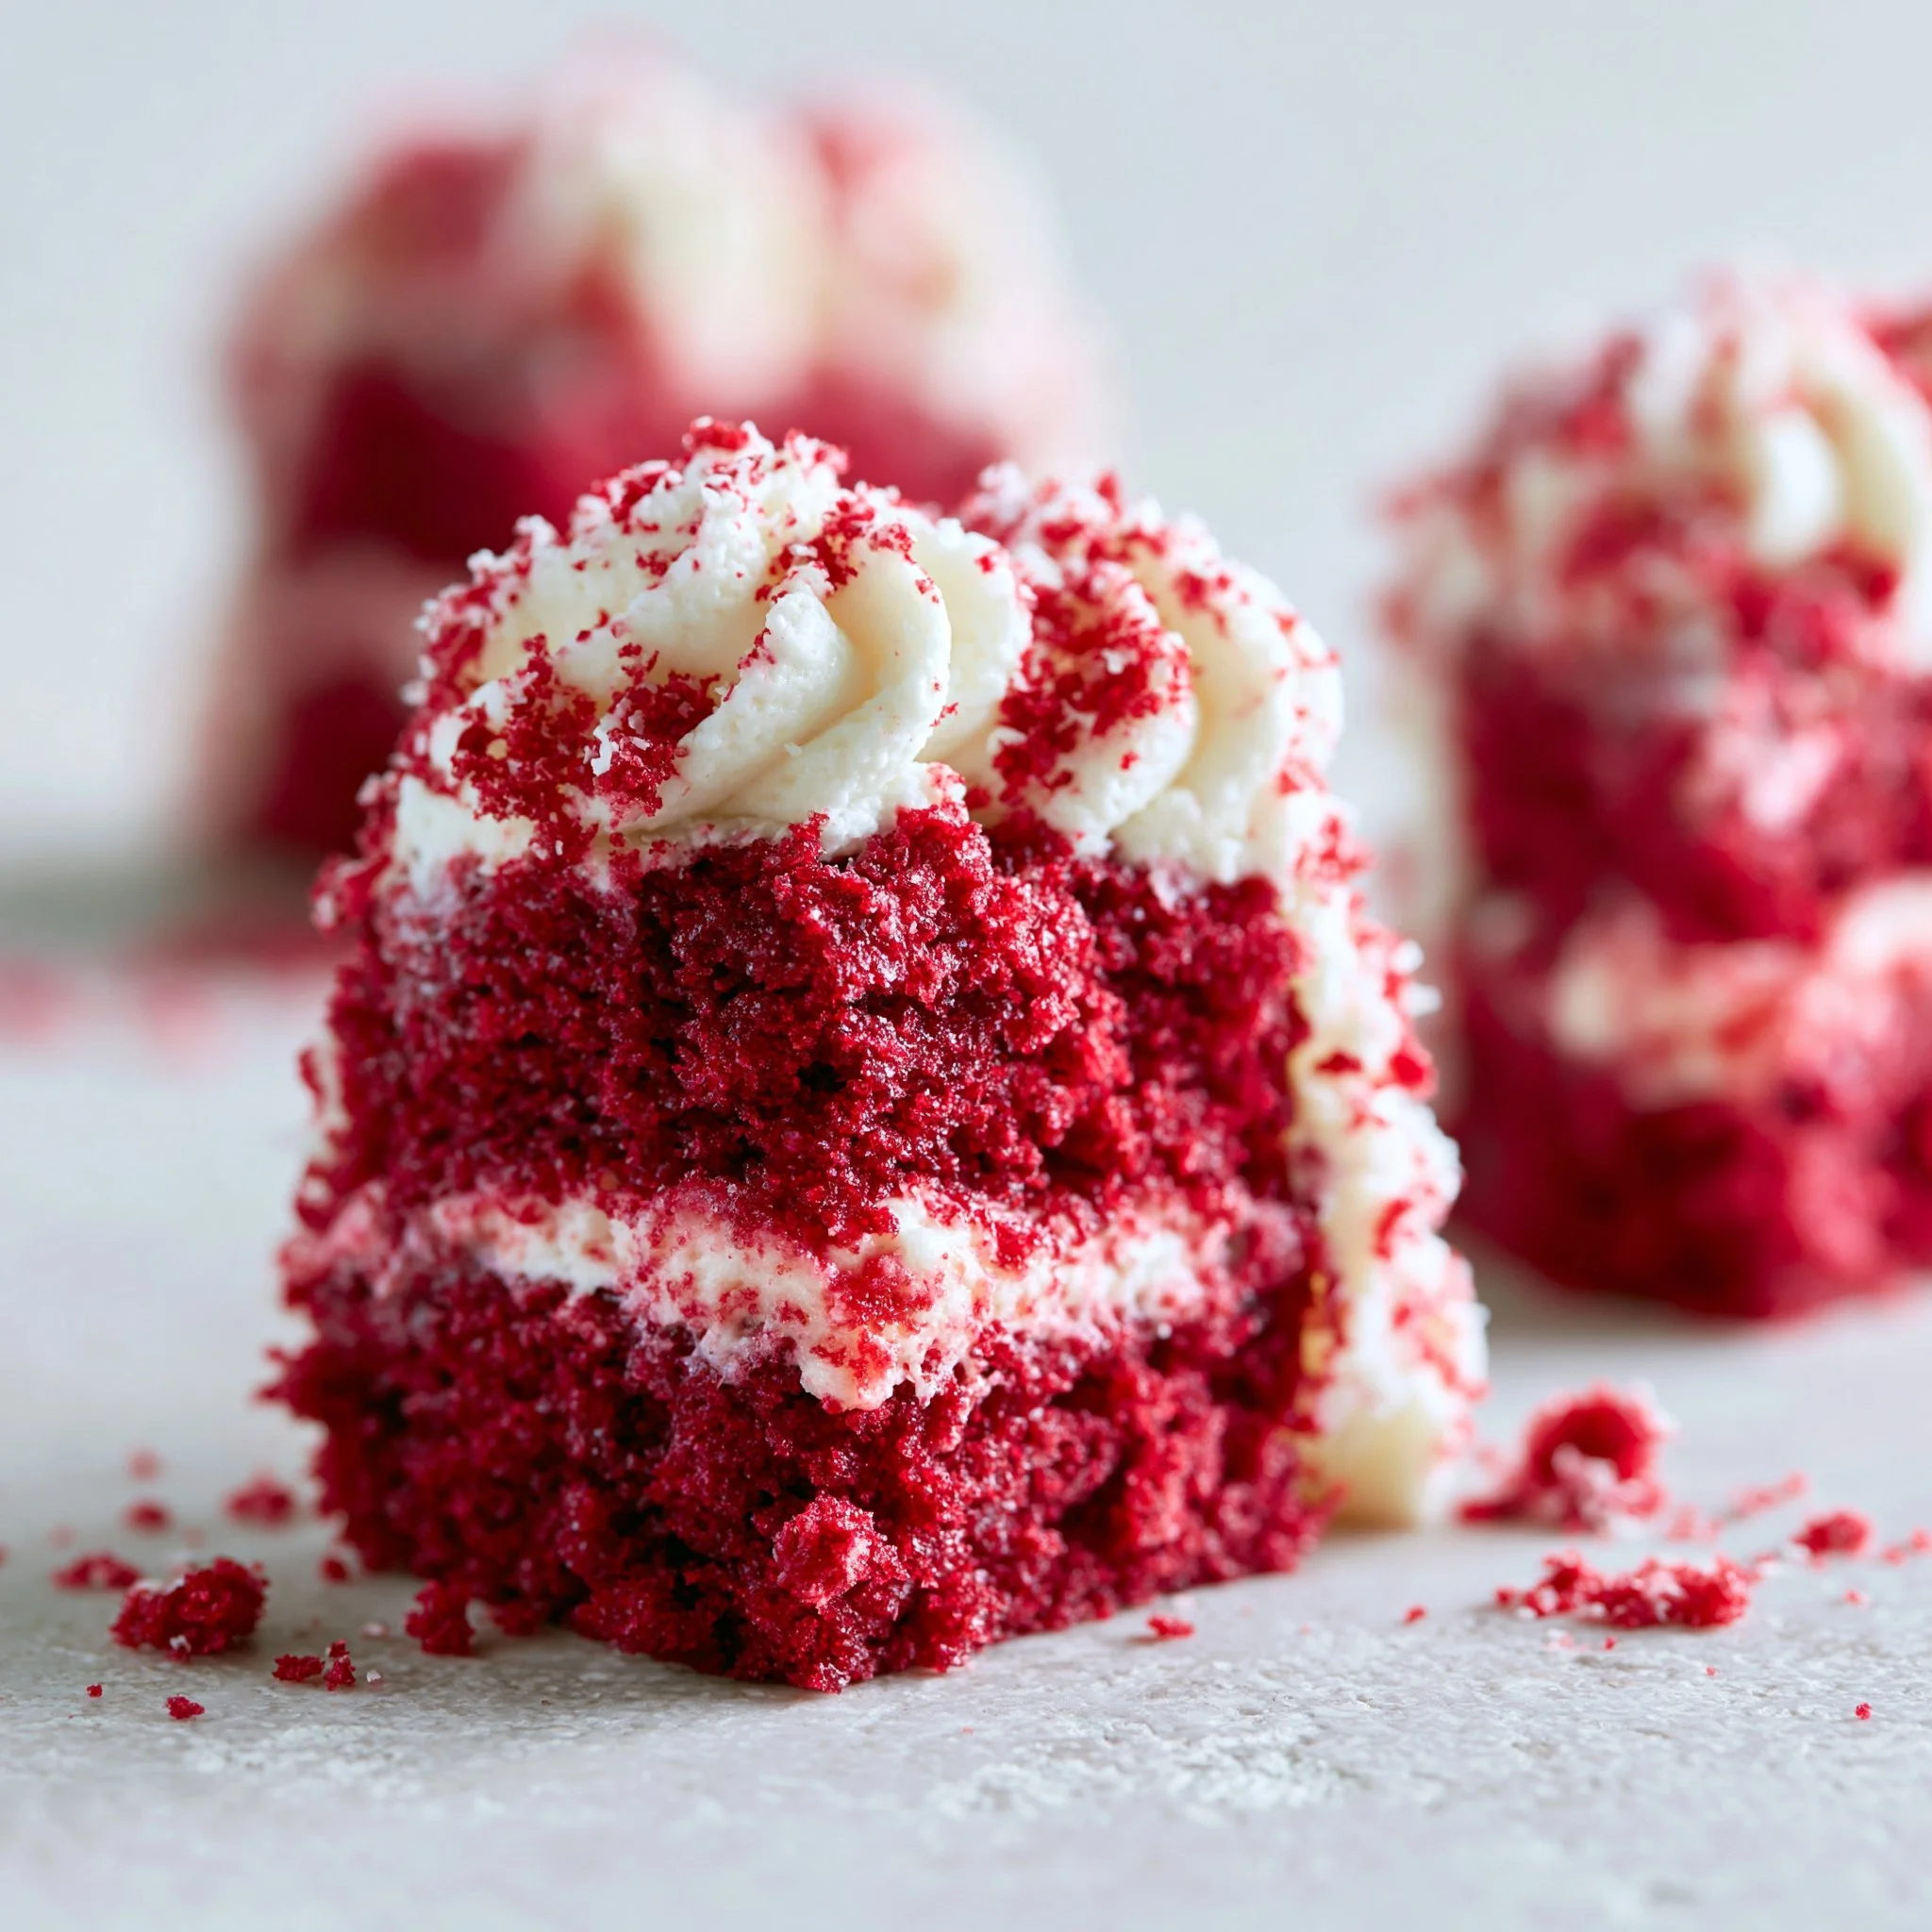
Serve these at room temperature so the cake stays soft and the frosting tastes extra creamy. They’re great on a platter where the red crumb shows against the white frosting, and they’re easy to portion for parties—no slicing, no crumbs everywhere. If you’re building a red velvet-themed table, a richer option like knock-you-naked red velvet cheesecake makes these minis feel like the cute, grab-and-go counterpart.
How to Store It
Because of the cream cheese frosting, store the frosted minis in the refrigerator in a covered container so they don’t pick up fridge smells. For the best texture, let them sit out for a few minutes before serving so the frosting softens slightly. If you’re making them ahead, you can bake and cool the cakes first, then frost once they’re fully cooled (frosting too early is when you’ll see sliding or smearing).

Final Thoughts
If you want a red velvet payoff without the commitment of a full layer cake, these minis hit the sweet spot: tender, lightly cocoa-scented cake with a tangy vanilla cream cheese frosting that makes each bite feel finished and special.
Conclusion
If you enjoy comparing techniques across bakers, I like the presentation ideas in Red Velvet Cake Minis – Sprinkle Bakes, the frosting approach in Super-Moist Mini Red Velvet Cakes – Amycakes Bakes, and the scaling inspiration in Small Batch Red Velvet Cake – Sugar & Sparrow.