The day you want something sweet but can’t be bothered to turn on the oven is exactly the day these no-bake chia pudding bars make sense. You stir everything in one bowl, let it thicken for a few minutes, then press it into a pan and walk away while the fridge does the heavy lifting.
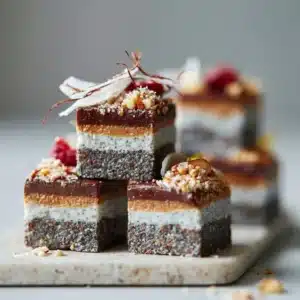
What you get is a sliceable, brownie-meets-pudding situation: deeply chocolatey (from cocoa or melty chocolate chips), lightly sweet, and pleasantly nutty from the nut butter. If you’ve ever made spoonable chia pudding, like my chia pudding with yogurt, this is the same cozy texture—just set up firm enough to cut into clean little squares.
Why You’ll Love This Recipe
- Truly no-bake, no-fuss: one bowl, one pan, and the fridge—no mixer, no stove, no oven.
- Sliceable texture you can count on: after chilling, the chia seeds gel the mixture into a firm, tender bar (not runny pudding).
- Rich chocolate + nut butter flavor: cocoa (or chocolate chips) plus nut butter gives a chocolate-peanut-butter-cup vibe, depending on your choice.
- Make-ahead friendly: it needs at least 2 hours to set, which means it’s ideal for prepping earlier in the day.
- Easy to dress up: fruit, nuts, or coconut flakes add crunch or brightness right on top without complicating the base.
- Flexible with the milk: almond milk works great, but any milk you like will still let the chia do its thickening job.
The Story Behind This Recipe
I started making these when I wanted the satisfaction of a snack bar but didn’t want anything baked or crumbly—just something cold, dense, and chocolatey that I could cut into neat rectangles and stash in the fridge (similar energy to my no-bake apricot chia bars, but with a more pudding-like set).
What It Tastes Like
These bars are gently sweet (more “snack” than “candy”), with a clear nutty backbone from the nut butter and a deep cocoa aroma when you slice in. The texture is the best part: thick and creamy with that signature chia pop, like a chilled chocolate pudding that holds its shape—especially satisfying with a little crunch from nuts or coconut on top.
Ingredients You’ll Need
Chia seeds are the structure here—they’re what transforms a loose chocolatey mixture into a firm slab once chilled. Nut butter adds richness and helps the bars taste substantial, not watery. Sweetener (honey or maple syrup) rounds out the cocoa, and a pinch of salt makes the chocolate taste more chocolatey. Almond milk keeps everything smooth and pourable at the start; you can use any milk you prefer and the bars will still set thanks to the chia (if you like coconut flavor, you might also enjoy my chia seed pudding with coconut milk).
- 1 cup chia seeds
- 4 cups almond milk (or any milk of choice)
- 1/2 cup nut butter (peanut butter, almond butter, etc.)
- 1/4 cup honey or maple syrup
- 1/4 cup cocoa powder or chocolate chips
- Pinch of salt
- Toppings (optional: fruits, nuts, or coconut flakes)
How to Make No-Bake Chia Pudding Bars
- Mix the base. In a large bowl, add the chia seeds, almond milk, nut butter, honey or maple syrup, cocoa powder (or chocolate chips), and a pinch of salt. Stir thoroughly—keep going until the nut butter is fully blended and you don’t see streaky clumps. The mixture will look loose at first, like thin chocolate milk with seeds.
- Let it thicken for 10 minutes. Set the bowl aside and stir a couple times during those 10 minutes. You’re looking for a noticeable change: it should go from sloshy to thick and spoonable, with the chia seeds suspended evenly instead of sinking.
- Prepare the pan. Line a baking dish with parchment paper so you can lift the bars out later. Press the parchment into the corners—this helps you get a clean-edged slab.
- Spread into an even layer. Pour the thickened chia mixture into the lined dish. Use a spatula or spoon to smooth it into a level layer. Take a moment here: an even thickness means even setting and cleaner slices.
- Chill until firm. Refrigerate for at least 2 hours. When it’s ready, the surface should look set (not wet), and the slab should feel firm when you gently press the center—springy, not liquidy.
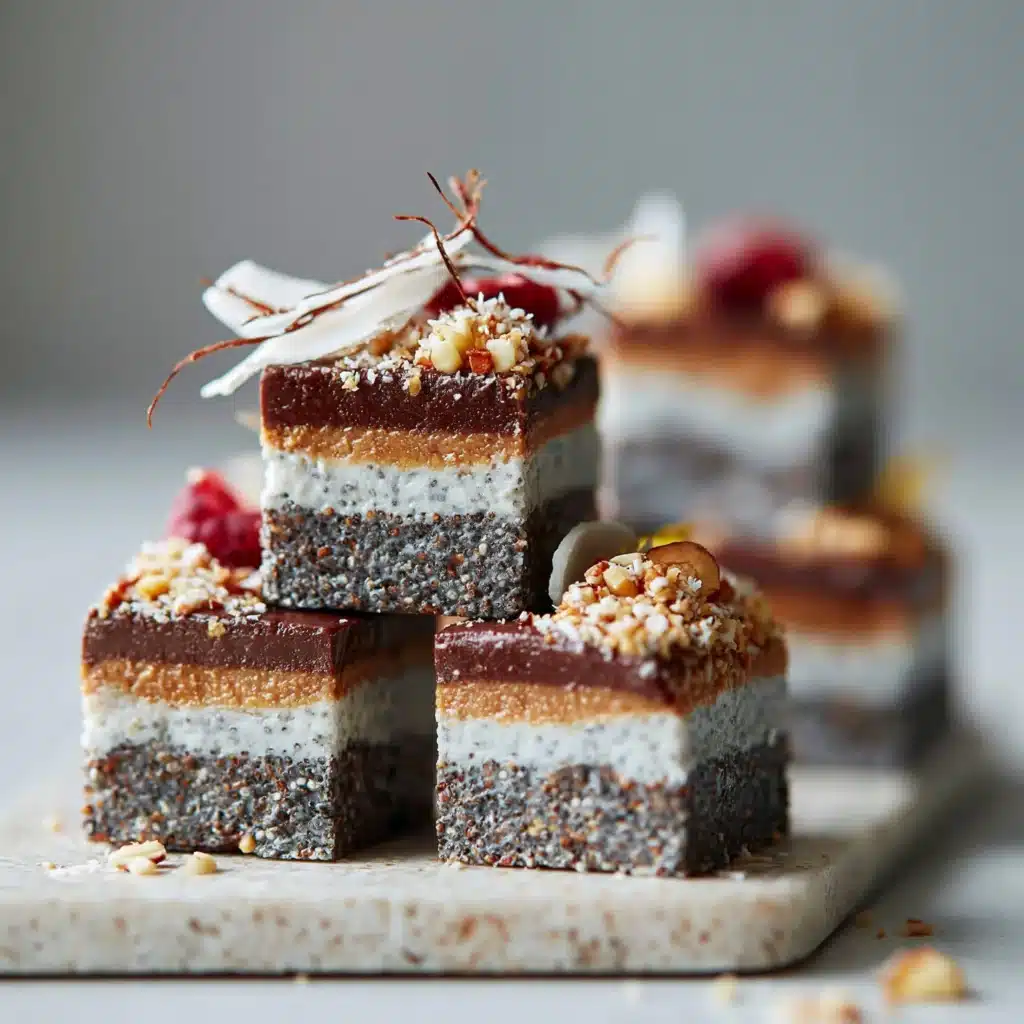
- Slice and finish. Lift the slab out using the parchment. Cut into squares or rectangles. Add toppings if you’d like—fruit for freshness, nuts for crunch, or coconut flakes for extra texture.
Tips for Best Results
- Stir well enough to fully incorporate the nut butter. If you leave little blobs, you’ll get uneven richness and pockets that don’t set quite the same.
- Don’t skip the 10-minute thickening rest. This is when the chia starts gelling; pouring too early can lead to seeds settling and a less uniform bar.
- Aim for a smooth, level top before chilling. Once it sets, bumps stay bumps—spreading it evenly makes it look cleaner and slice more neatly.
- Judge “set” by touch, not the clock. After 2 hours it should be firm, but your fridge temperature and dish thickness matter—press the center lightly to confirm it’s no longer soft and loose.
- Add toppings after slicing for the cleanest cuts. Especially with fruit—topping first can drag through the knife and make edges messy (similar approach I use for neat cuts on no-bake cheesecake-style bars).
Variations and Substitutions
- Cocoa powder vs. chocolate chips: cocoa gives a more evenly chocolatey bar; chocolate chips will read a bit sweeter and more “chocolate-studded.”
- Nut butter choice: peanut butter makes the chocolate taste bolder and more classic; almond butter is milder and a little more toasty.
- Sweetener: honey tastes rounder; maple syrup adds a gentle caramel note. Either works—use the one you prefer.
How to Serve It
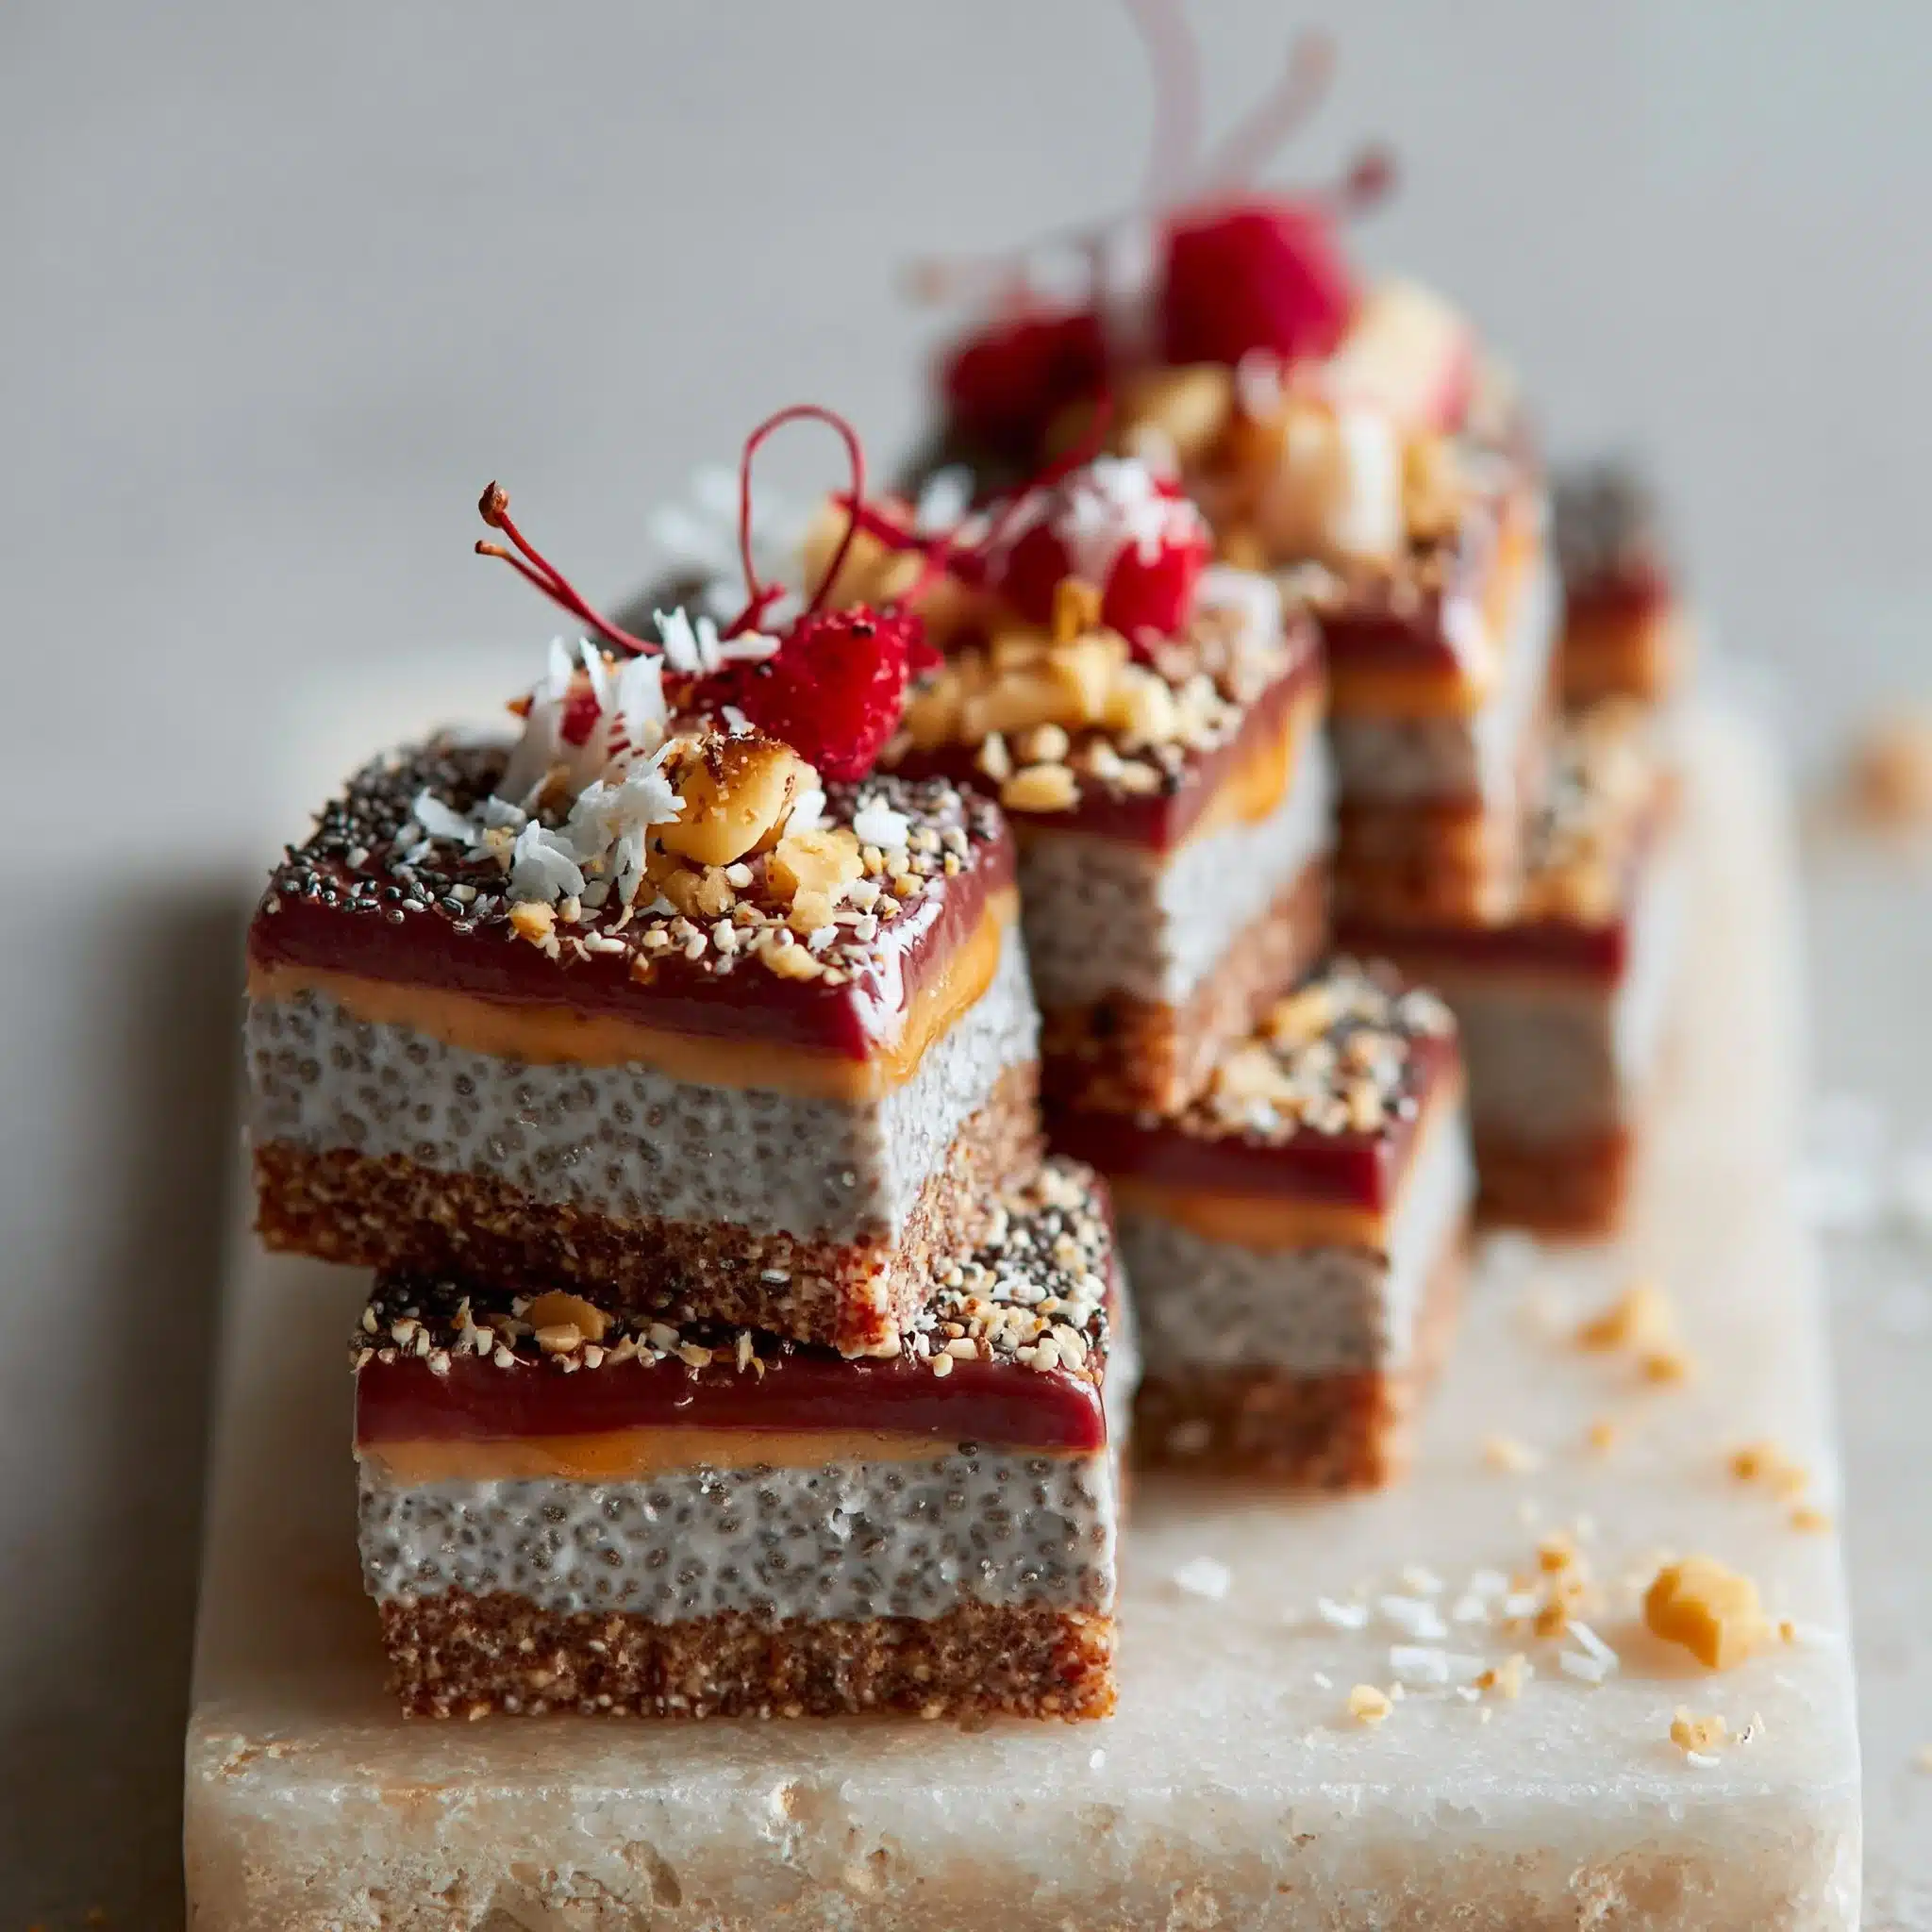
Serve these chilled straight from the fridge for the cleanest slices and the best “firm pudding” bite. I like them cut small (they’re rich), topped with fruit for contrast, or with nuts/coconut flakes for crunch. They’re also a great no-bake option to add alongside other bite-size treats—like my banana pudding truffles—when you want a dessert spread without turning on the oven.
How to Store It
Keep the bars covered in the refrigerator so they don’t pick up fridge odors or dry out. If you’re using fruit on top, add it right before serving so the surface stays neat and the bars don’t get watery. For make-ahead, I prefer chilling the plain slab, slicing, then topping as you go.

Final Thoughts
If you like chocolate desserts that feel both wholesome and genuinely satisfying, these chia pudding bars are a smart one to keep in your back pocket—minimal effort, big payoff, and that chilled, fudgy texture that makes “no-bake” feel like a real dessert.
Conclusion
If you’re in a chia phase and want more ideas, Bianca Zapatka’s blueberry chia pudding cake is a beautiful no-bake spin with a fruit-forward vibe. For a bolder chocolate direction, these healthy chocolate chia bars lean into that candy-bar feeling. And if you’d rather go bright and tangy, this key lime pie chia pudding is a fun contrast to the deep cocoa flavor here.
No-Bake Chia Pudding Bars
Ingredients
Base Ingredients
- 1 cup chia seeds Gives structure to the bars.
- 4 cups almond milk (or any milk of choice) Keeps the mixture smooth.
- 1/2 cup nut butter (peanut butter, almond butter, etc.) Adds richness.
- 1/4 cup honey or maple syrup Sweetens the mixture.
- 1/4 cup cocoa powder or chocolate chips Provides chocolate flavor.
- 1 pinch salt Enhances chocolate flavor.
Optional Toppings
- fruits, nuts, or coconut flakes Add crunch or brightness on top.
Instructions
Preparation
- In a large bowl, add the chia seeds, almond milk, nut butter, honey or maple syrup, cocoa powder or chocolate chips, and a pinch of salt. Stir thoroughly until well blended.
- Let it thicken for 10 minutes, stirring a couple of times during the wait for the mixture to gel.
- Line a baking dish with parchment paper for easy removal later.
- Pour the thickened chia mixture into the lined dish and smooth it into an even layer using a spatula.
Chilling
- Refrigerate for at least 2 hours until set and firm.
Serving
- Lift the slab out using the parchment and cut into squares or rectangles. Add toppings if desired.