
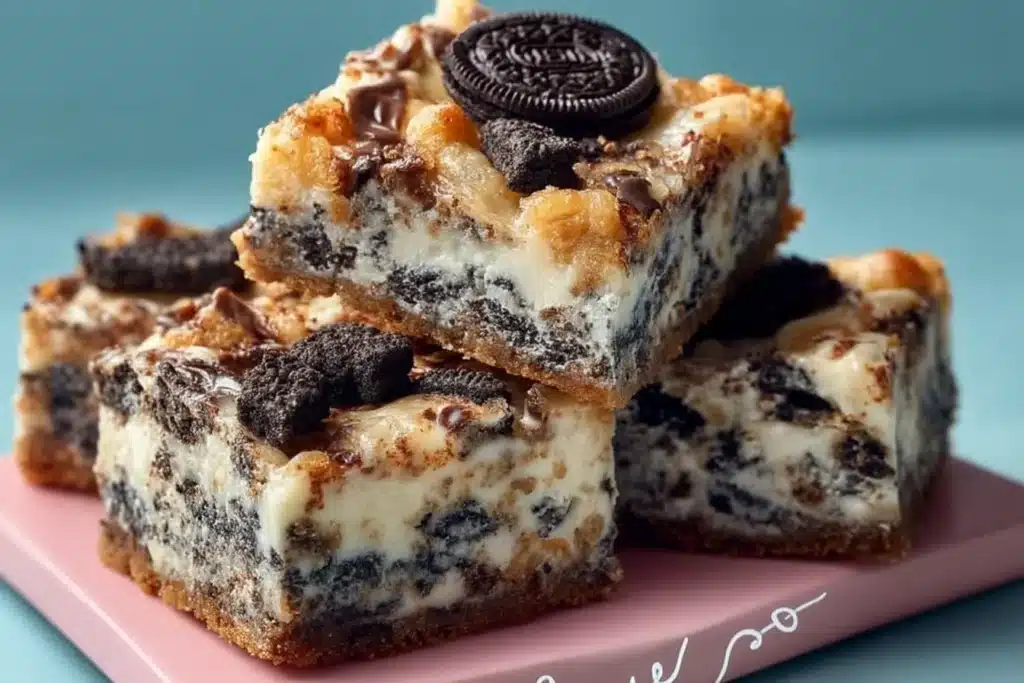
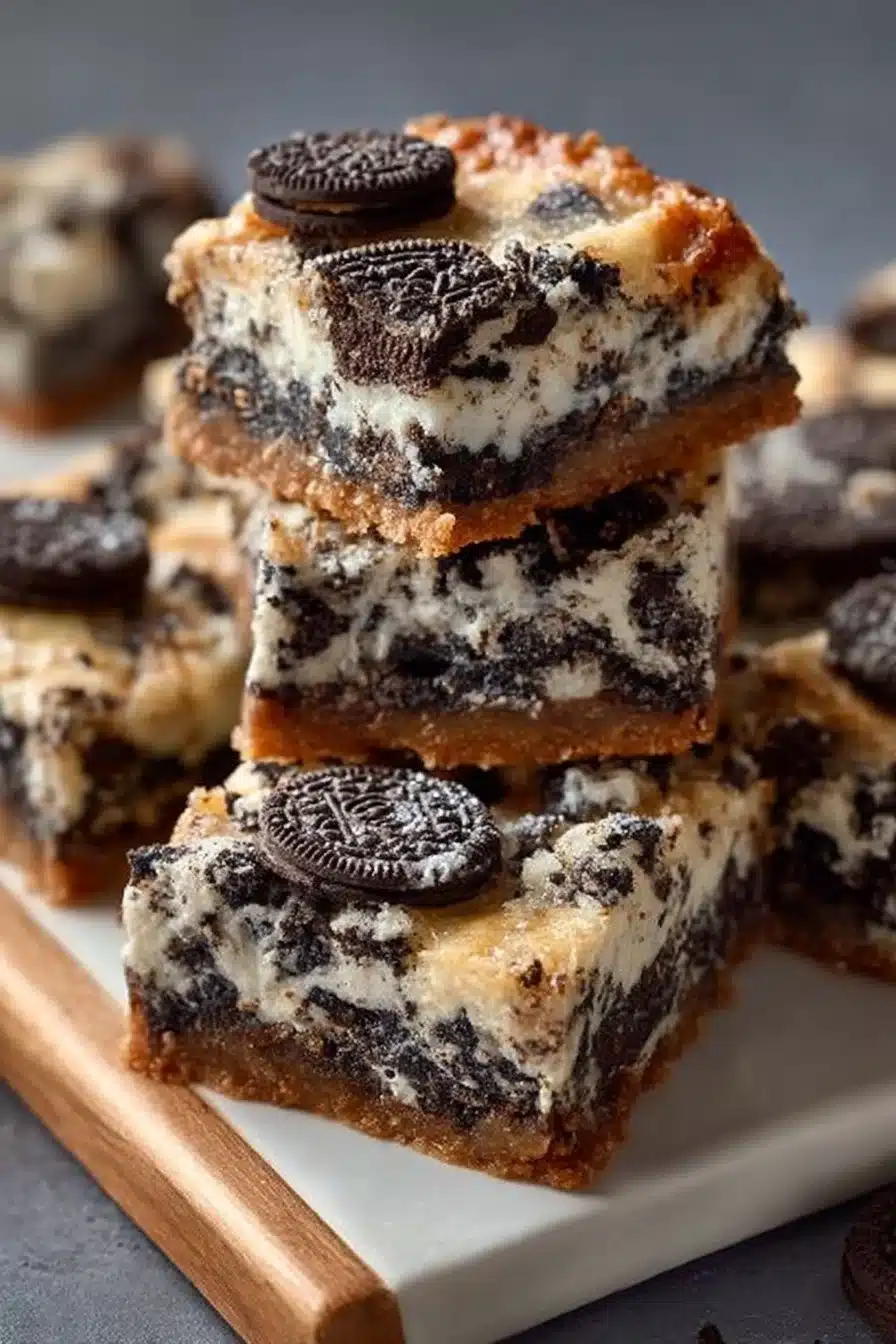
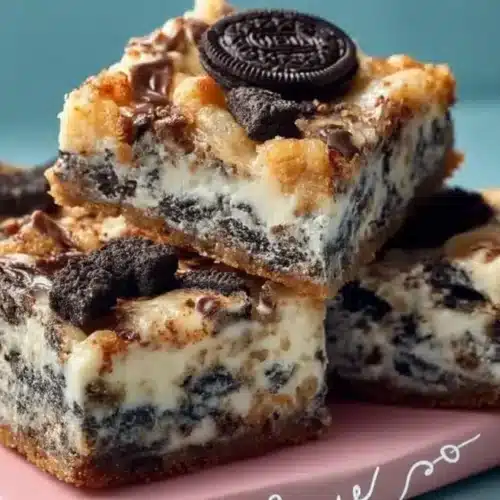
I have a soft spot for desserts that feel luxurious without much fuss—these Cookies and Cream Magic Bars are exactly that. A buttery, finely crushed cookies-and-cream crust holds a glossy ribbon of sweetened condensed milk that melts white or milk chocolate chips into soft pockets; broken cookie pieces on top add big, satisfying crunch. The result slices into neat bars that look like something from a small bakery but take almost no active time.
They’re ridiculously easy to assemble yet deliver a real contrast: crunchy cocoa crumbs, sweet chew from the condensed milk, and creamy melty chocolate where the chips have sunk in. If you’re into quick no-fuss bars, I’ve got more in my cookies and bars collection that follow the same make-ahead-friendly logic.
Why You’ll Love This Recipe
- Straightforward assembly: the base is just finely crushed cookies mixed with melted butter, so the crust presses together easily and bakes to a tight, slightly sandy texture that holds slices well.
- Textural contrast: the interior is glossy and slightly chewy from the condensed milk while the cookie crumbs stay crispest at the edges and under the top cookies.
- Flexibility of chocolate: using white or milk chocolate chips gives different sweetness and color—white chips give a vanilla-forward richness, milk chips add deeper cocoa notes.
- Eye-catching finish: the large broken cookies on top stay crunchy after baking and create an attractive, rustic look without extra frosting.
- Make-ahead friendly: these bars firm up as they cool, making them easy to slice and transport for parties or packed treats.
The Story Behind This Recipe
I developed these when I wanted something that tasted like an over-the-top cookies-and-cream candy bar but could be thrown together in a single pan—no piping, no separate filling—and the condensed milk does all the heavy lifting to bind the layers into one sticky-sweet whole.
What It Tastes Like
These bars are decidedly sweet, tempered by the cocoa-and-cream flavor of the crushed cookies. The aroma while baking is warm butter and vanilla with an undercurrent of chocolate from the chips. Texture-wise they’re crisp at the base and edges, soft and slightly chewy where the condensed milk pools, and punctuated by crunchy cookie pieces on top—every bite has a little different mouthfeel.
Ingredients You’ll Need
Start by getting the cookies finely crushed and the butter just melted; that’s what builds a compact crust. The condensed milk acts as the binder—pour it over the crust and the chips so the heat from baking and contact will create pockets of creamy chocolate rather than a uniform layer. If you want the same flavor in cake form, check my cookies and cream cupcakes for a different take.
- 300 g 300g (10.5oz) cookies and cream biscuits (Oreos), finely crushed (Fine crumbs for better texture.)
- 110 g 110g (7½ tbsp) unsalted butter, melted (Do not overheat; just melted.)
- 1 can 1 x 397g (14oz) can condensed milk (To bind the components.)
- 300 g 300g (1⅓ cups) white or milk chocolate chips (For a rich chocolate flavor.)
- 20 pieces 20 cookies and cream biscuits, broken (for topping) (For added crunch.)
How to Make Cookies and Cream Magic Bars
- Prepare the crumbs: Pulse the cookies to fine crumbs—aim for a mostly uniform sand with a few slightly larger specks so the crust compresses well. Mix in the melted butter until the crumbs hold together when pressed between your fingers; they should be damp, not oily.
- Press the crust: Press the crumb mixture evenly into the bottom of your pan so it forms a compact, level base. Use the back of a measuring cup or glass to get a tidy, smooth surface; this helps the bars slice cleanly later.
- Add the binder and chips: Pour the condensed milk evenly over the crust, spreading slightly if needed so it reaches close to the edges. Scatter the chocolate chips on top in an even layer—expect some to sink a bit into the condensed milk as it warms.
- Top with broken cookies: Nestle the broken cookie pieces into the surface so they’re partly embedded; they’ll toast lightly on top and stay crunchy for contrast.
- Bake and watch for doneness: Bake until the condensed milk is bubbling at the edges and the top looks set with the chocolate chips melted into glossy pools—visual cues matter here rather than a strict time. The edges should be a touch more golden than the center; the center will still feel slightly soft but not jiggly.
- Cool completely before slicing: Let the pan cool on a rack, then chill until firm. The bars slice much cleaner when the condensed milk has fully set and the chocolate pockets have cooled; warm bars will smear and crumble.
Expert warning: Don’t overheat the butter when melting—if it’s smoking or very dark the flavor will be off. Also avoid over-pressing the crust to the point where it becomes rock-hard after baking.
Tips for Best Results
- Aim for fine crumbs: the finer the cookie crumbs, the more cohesive and less crumbly the crust will be—use short pulses in a food processor and stop when most pieces are the size of coarse sand.
- Keep butter just melted: warm butter makes the crumbs bind; if it’s hot, let it cool slightly so it doesn’t melt the chips when you add them.
- Watch the edges as a doneness cue: bubbling at the edges and a lightly golden rim are better indicators than timing alone—this prevents a dried-out top with undercooked center.
- Chill fully before slicing: refrigerate until the center feels firm to the touch; this yields clean, bakery-style bars.
- For neater slices, warm a sharp chef’s knife in hot water, wipe dry, then make each cut in one smooth motion.
For other make-ahead ideas that rely on cold-setting for clean slices, see my cookies-and-cream protein overnight oats.
Variations and Substitutions
- Swap chips for white or milk: white chips emphasize vanilla and contrast visually with the dark crumbs; milk chips add cocoa depth—both work without changing method.
- Add a sprinkle: scatter a few extra finely crushed crumbs over the top before baking for a speckled finish.
- Turn into a frozen treat: after chilling, cut into squares and freeze for a firmer, icebox-style bar; this pairs well with a scoop of cookies-and-cream ice cream like the one I make in the cookies and cream ice cream recipe.
How to Serve It
Serve these bars slightly chilled so the layers hold their shape; they look best with the top cookies visible and a few chocolate pockets showing. A small dusting of extra cookie crumbs on the plate or a single broken cookie piece on each bar makes them feel intentionally finished rather than rushed. They’re great cut into small squares for a party tray or into larger bars for dessert alongside coffee.
How to Store It
- Fridge: Keep in an airtight container for up to 5 days; chilling helps the condensed milk remain set and preserves the contrast between chewy interior and crunchy topping.
- Freezer: Wrap individual bars tightly or layer with parchment in a sealed container for up to 1 month—thaw in the fridge before serving so the texture softens.
- Make-ahead: You can assemble, bake, and chill the whole pan a day ahead; top with the broken cookies right after baking so they toast slightly, then refrigerate for firm slices.

Final Thoughts
This recipe is one of those easy wins: a little pressing, a pour of condensed milk, and the rest is visual cues and patience while it cools. The payoff is a bar that looks impressive, slices clean, and tastes like a bite-sized cookies-and-cream celebration—perfect for gifting or keeping all to yourself.
Conclusion
If you’d like to compare how other cooks layer these same flavors, check this version with a similar crunchy base at Cookies & Cream Magic Bars | Dessert Now Dinner Later. For a televised chef’s take that highlights a simple assembly, see Cookies and Cream Magic Bars Recipe | Eddie Jackson. And for a playful red-velvet twist on the idea, take a look at Red Velvet Cookies n Cream Magic Bars | The Domestic Rebel.
Cookies and Cream Magic Bars
Ingredients
For the crust
- 300 g 300 g cookies and cream biscuits (Oreos), finely crushed Fine crumbs for better texture.
- 110 g 110 g unsalted butter, melted Do not overheat; just melted.
For the filling
- 1 can 1 x 397g can condensed milk To bind the components.
- 300 g 300 g white or milk chocolate chips For a rich chocolate flavor.
For the topping
- 20 pieces 20 cookies and cream biscuits, broken For added crunch.
Instructions
Preparation
- Pulse the cookies to fine crumbs—aim for a mostly uniform sand with a few slightly larger specks.
- Mix in the melted butter until the crumbs hold together when pressed; they should be damp, not oily.
- Press the crumb mixture evenly into the bottom of your pan to form a compact, level base.
- Pour the condensed milk evenly over the crust, spreading slightly if needed.
- Scatter the chocolate chips on top in an even layer.
- Nestle the broken cookie pieces into the surface so they’re partly embedded.
Baking
- Bake until the condensed milk is bubbling at the edges and the top looks set, with the chocolate chips melted into glossy pools.
- Cool completely before slicing to ensure clean cuts.


