
Why This One Delivers
These Easy No-Bake Strawberry Cheesecake Cups with Creamy Bliss work so well because they balance speed and texture without tasting like a shortcut dessert. You press together a simple graham cracker crumb mixture that chills into a crunchy, buttery base, then top it with a filling that feels like classic cheesecake without the water bath or oven guesswork. Whipped heavy cream lightens the cream cheese, so every spoonful tastes cloud soft instead of dense. The strawberries get just a kiss of lemon juice and optional honey, so they stay fresh and bright rather than overly sweet or syrupy. It tastes like a full cheesecake, but you only committed 30 minutes of actual hands on time.
This recipe also delivers because it is unfussy and forgiving, which is exactly what you want in weeknight desserts or casual entertaining. If your crumbs look a little dry, you just add another spoonful of melted butter. If your cream cheese is slightly lumpy, an extra minute of whisking smooths it out. The individual cups make any table instantly feel special, whether you line them up in mason jars for a backyard cookout or serve them in small glasses after a cozy family dinner. You get the flavor of bakery style Easy No-Bake Strawberry Cheesecake Cups with Creamy Bliss with none of the pressure of unmolding, slicing, or praying the crust does not crack.
From Prep to Finish
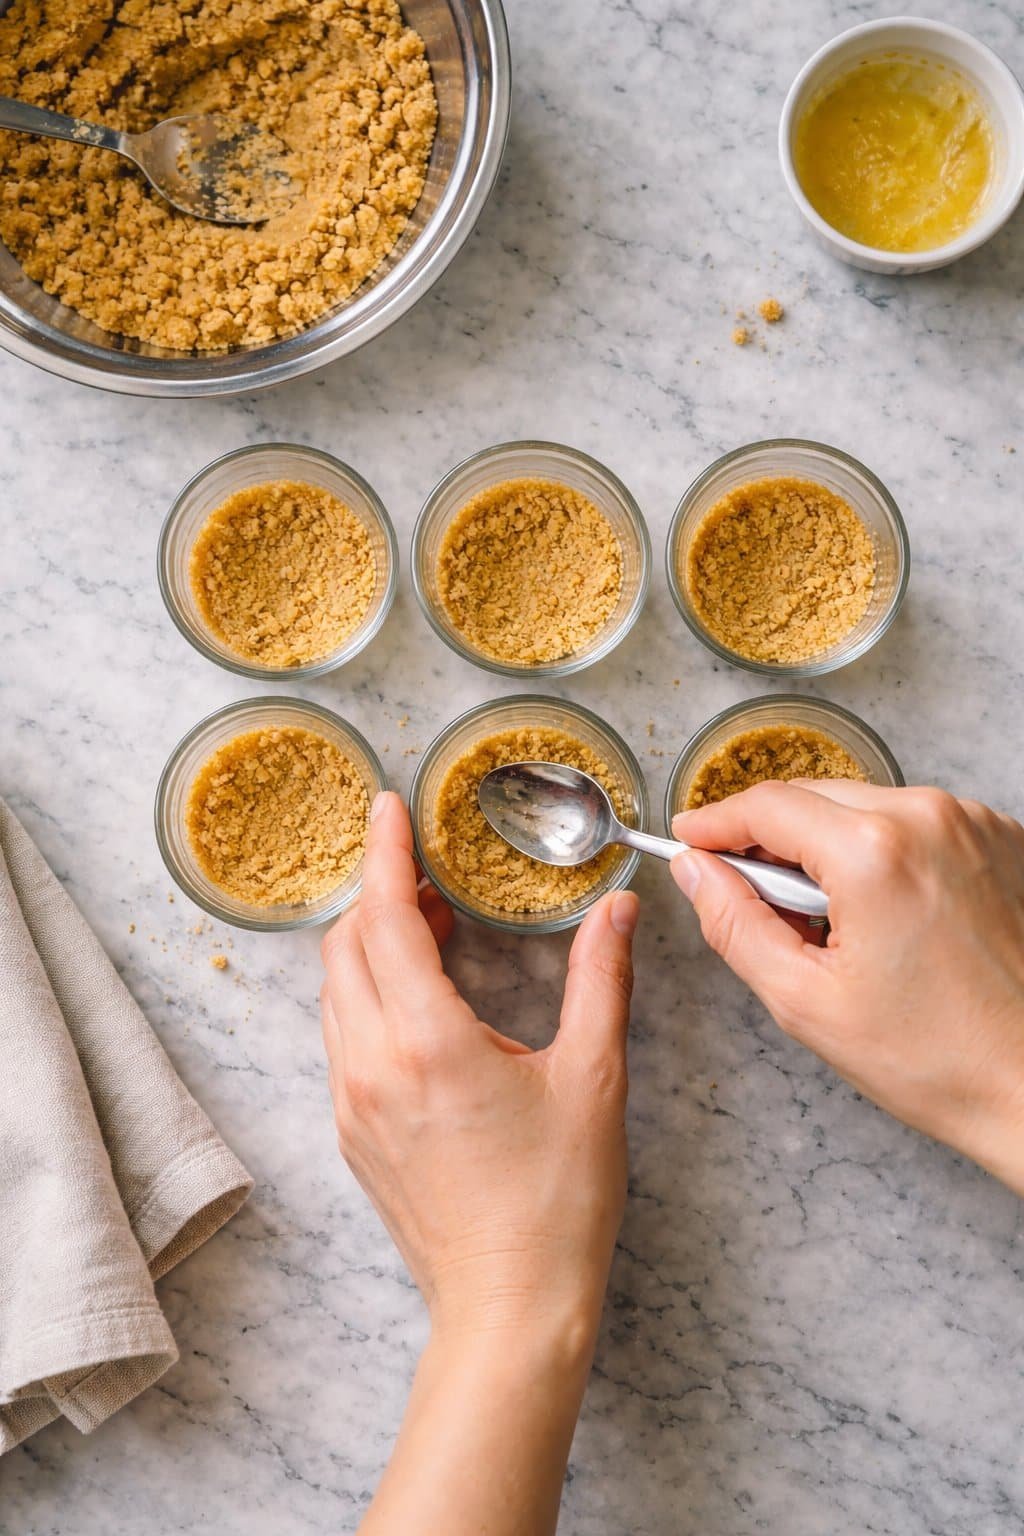
From the very first stir of crumbs to the final spoonful, these Easy No-Bake Strawberry Cheesecake Cups with Creamy Bliss move in a simple, satisfying rhythm. You start with the graham cracker base, making sure every crumb is evenly coated so it packs tightly and does not crumble when you dig in. A flat bottomed glass or measuring cup works like magic here, pressing the crust into a firm, even layer in each cup. While those chill and firm up, you shift your attention to the filling, which should feel soft, smooth, and lump free before you ever fold in the whipped cream.
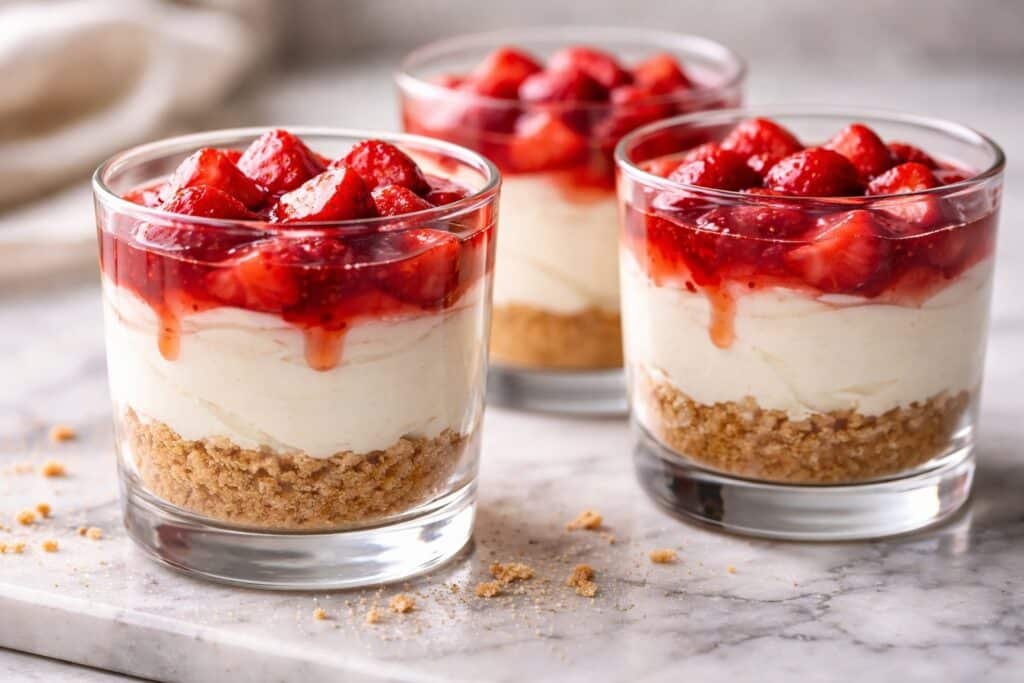
Process Image of Easy No-Bake Strawberry Cheesecake Cups with Creamy Bliss
Once the cream cheese mixture looks silky, you whip the heavy cream with vanilla bean paste until you get stiff, glossy peaks that stand tall on the whisk. Gently folding the cream into the cheese keeps everything light, almost cloudlike, so your Easy No-Bake Strawberry Cheesecake Cups with Creamy Bliss taste as airy as they look. Spoon the filling over the chilled crusts, level the tops with the back of a spoon, and slide the cups into the fridge so the mixture can set into a sliceable, spoonable mousse. While they chill, you can macerate the strawberries with lemon juice and a touch of honey, just like you might do for a summer shortcake, and let their juices turn syrupy and bright. By the time you spoon the glossy berries over each chilled cup, you have a dessert that looks special enough for company, yet feels as effortless and cozy as a no bake night in the kitchen.
Timing, Storage, and Make-Ahead
You can prep these Easy No-Bake Strawberry Cheesecake Cups with Creamy Bliss in the morning and have them ready by dessert. The active prep takes about 30 minutes, but they need at least 2 hours of chill time so the filling can firm up and the crust can set. If you want a slightly firmer, more classic cheesecake texture, let them chill 4 hours or overnight. The strawberry topping is best added within a few hours of serving so the berries stay bright and juicy. If you are planning a layered dessert night with something like my creamy panna cotta cups, you can make all the chilled components the day before and assemble right before guests arrive.
Leftovers keep nicely for up to 3 days in the refrigerator if you cover each cup tightly with plastic wrap or close them in an airtight container. The crust will soften a bit by day 2, but the flavor is still lovely and the creamy layers stay smooth. For the best texture, store the cheesecake layer and strawberries separately if you know you will not serve them all on the same day. Do not freeze these Easy No-Bake Strawberry Cheesecake Cups with Creamy Bliss, since the whipped cream filling can turn grainy after thawing and the strawberries can release extra liquid. If you want a make ahead shortcut, mix the crust, filling, and macerated berries up to 24 hours in advance, then chill each part and assemble the cups just before serving or packing them into lunch boxes for a sweet surprise.
Ingredient Swaps and Serving Options
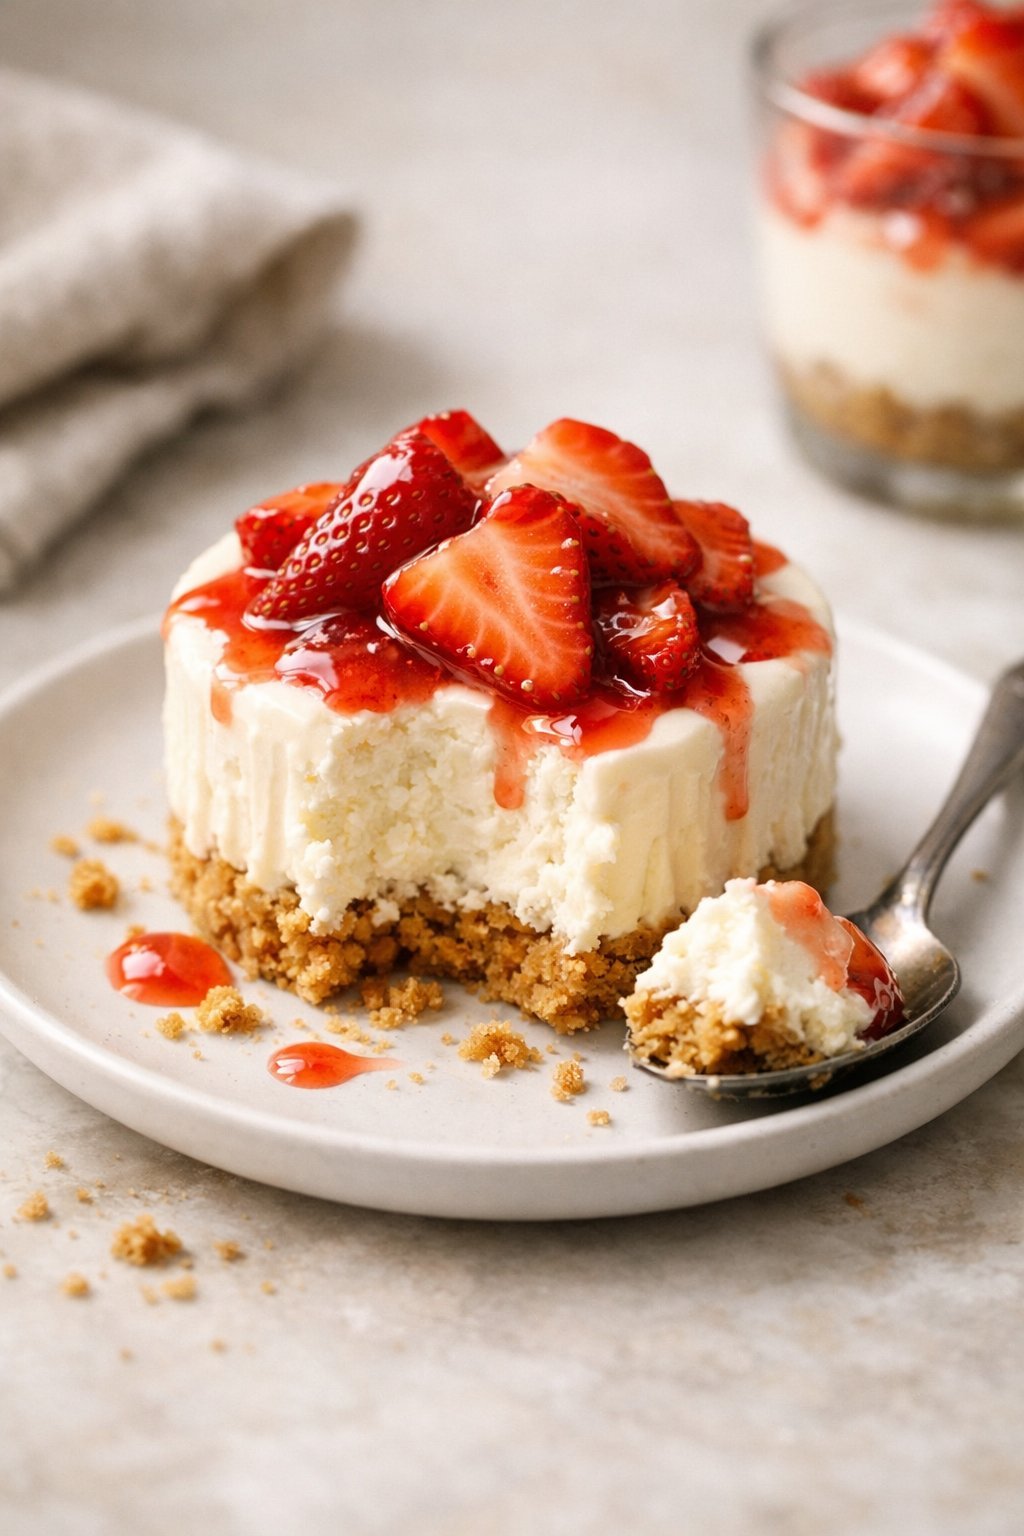
Serving Image of Easy No-Bake Strawberry Cheesecake Cups with Creamy Bliss
You can tailor these Easy No-Bake Strawberry Cheesecake Cups with Creamy Bliss to whatever you have in your pantry and fridge. For the crust, swap graham crackers with crushed digestive biscuits, vanilla wafers, or even chocolate cookies for a deeper, brownie like vibe. Need gluten free Support the base with certified gluten free graham crackers or almond meal, then add an extra tablespoon of melted butter so it holds together. If you are out of heavy cream, you can use canned coconut cream for a silky, lightly tropical twist, just chill it and whip the thick part only. Use vanilla bean paste instead of vanilla bean paste if needed, and try flavored extracts like almond or lemon for a different finish.
The toppings are where these cups really play dress up. Replace strawberries with mixed berries, peach slices, cherries, or a quick spoon of lemon curd if fresh fruit is low. You can swirl a teaspoon of strawberry jam or a spoon of chocolate hazelnut spread into the cheesecake layer for a marbled look that feels bakery worthy. For a lighter treat, use reduced fat cream cheese and slightly less powdered sugar, knowing the texture will be a touch softer but still creamy and satisfying. If you love a dessert bar moment like my berry crumble cups or mini pumpkin pie jars, you can serve these in tiny shot glasses for parties, or layer them in mason jars for a picnic and add the strawberries right before serving so they stay bright and fresh.
Conclusion
If you are anything like me, the best desserts are the ones that feel special without asking you to clear your whole afternoon. These little cups are sweet proof that you can create something beautiful and memorable with just a few simple ingredients and a bit of love. Whether you are layering them on a quiet weeknight or lining them up for a celebration, they have a way of turning ordinary moments into something just a little more magical.
I love how these Easy No-Bake Strawberry Cheesecake Cups with Creamy Bliss invite people to gather. Kids can help spoon in the layers, friends can linger over seconds, and you get to be the one who made it all happen without ever turning on the oven. If you have been craving a dessert that is both easy and impressive, consider this your gentle nudge to grab the cream cheese and strawberries and give it a try.
For more delicious recipes like this, follow us on Facebook and Pinterest!
Recipe
Easy No-Bake Strawberry Cheesecake Cups with Creamy Bliss
Ingredients
Ingredients
- 1 cup graham cracker crumbs
- 1/4 cup unsalted butter melted
- 2 tablespoons granulated sugar
- 8 ounces cream cheese softened
- 1/2 cup powdered sugar
- 1 cup heavy cream cold
- 1 teaspoon vanilla bean paste
- 2 cups fresh strawberries sliced
- 1 tablespoon lemon juice
- 1 tablespoon honey or maple syrup
Instructions
- In a medium bowl, combine graham cracker crumbs, granulated sugar, and melted butter and stir until all crumbs are evenly moistened.
- Divide the crumb mixture among six small cups or jars and press firmly into an even layer to form the crust, then refrigerate for 10 minutes to set.
- In a large bowl, beat the softened cream cheese and powdered sugar together with a whisk or hand mixer until completely smooth and creamy, about 1 to 2 minutes.
- In a separate bowl, whip the cold heavy cream and vanilla bean paste with a mixer until stiff, glossy peaks form, about 2 to 3 minutes.
- Gently fold the whipped cream into the cream cheese mixture in two additions until fully combined and light.
- Spoon or pipe the cheesecake filling evenly over the chilled crusts, smoothing the tops, then refrigerate the filled cups for at least 2 hours or up to overnight to firm.
- Just before serving or up to 1 hour ahead, place the sliced strawberries in a medium bowl, add the lemon juice and honey or maple syrup, and toss gently until the berries are glossy and slightly syrupy.
- Spoon the strawberry mixture over the chilled cheesecake cups and serve cold.
Notes
- Store leftover cheesecake cups covered in the refrigerator for up to 3 days, keeping the strawberry topping separate for the best texture.


