

The Memory Behind This Treat
The first time I baked this yogurt cake, it was a breezy Sunday afternoon, and the kitchen was filled with the warm, comforting aroma of vanilla and lemon. It reminded me of a trip to a quaint Greek village, where I spent a summer savoring simple, flavorful treats made with local ingredients. The villagers were generous with their recipes, sharing them with a smile and a story. This yogurt cake recipe, with its velvety texture and subtle sweetness, brings me back to those sunlit days and the genuine warmth of Greek hospitality.
I remember the pleasure of creating something delightful yet uncomplicated. As I whisked the Greek yogurt and olive oil, I couldn’t help but appreciate the ease of the process—just like those Greek home bakers who didn’t fuss over fancy techniques. The beauty of this cake lies in its simplicity and the way it celebrates the flavors of each ingredient. When I took the first bite, it was like a gentle hug—soft, moist, and perfectly sweet without any guilt.
Every time I make this cake now, I encourage friends and family to join in, turning the baking process into a shared experience. We laugh about flour-dusted noses and sneak tastes of the batter. This yogurt cake isn’t just a dessert; it’s a way to connect, to share stories, and to relish in the joy that comes with a homemade, heartfelt creation.
How To Make It (Mix & Ingredients)
Creating this Yogurt Cake is as simple as a breezy afternoon chat over tea. You’ll start by gathering a few pantry staples and some fresh Greek yogurt. The magic begins with the wet ingredients. In a large mixing bowl, whisk together the Greek yogurt, eggs, olive oil, vanilla extract, and erythritol. This is your canvas, smooth and creamy, just like an artist’s palette. Be sure to whisk until everything is silky, a moment where you can almost feel the cake coming to life.

Instructions Process of Yogurt Cake
Once your wet ingredients are ready, it’s time to turn your attention to the dry components. In a separate bowl, combine the all-purpose flour, baking powder, and salt. If you’re feeling a bit adventurous or longing for a hint of citrus, add in the zest of a lemon. This extra touch can transport your taste buds to a sunlit Greek island. Gently fold these dry ingredients into your wet mixture. Use a spatula or wooden spoon and mix just until no streaks of flour remain. Overmixing is a common pitfall, but don’t worry—if your batter looks lumpy, you’re in good shape!Pour the well-mixed batter into your prepared cake pan, smoothing the top for an even bake. As your cake bakes, your kitchen will fill with the warm, inviting aroma of vanilla and lemon—a delightful precursor to the treat awaiting you. If you enjoy this Greek-inspired bake, you might also love trying out a Lemon Olive Oil Cake for another citrusy delight.
Make-Ahead & Storage
Making this yogurt cake ahead of time is a breeze and can be a lifesaver for busy moments. Once your cake has cooled completely, wrap it tightly in plastic wrap or store it in an airtight container. This will keep it fresh on the counter for up to 3 days. If you find yourself with leftovers (a rare occurrence in my house!), consider storing slices individually wrapped, making it easy to grab a piece when the craving hits.
For longer storage, pop your wrapped cake in the freezer for up to a month. Simply thaw it in the refrigerator overnight when you’re ready to enjoy it again. This yogurt cake’s delicate, moist texture holds up incredibly well to freezing, ensuring you don’t miss out on any of its delightful flavor. Keep in mind, though, that freezing may slightly alter the cake’s lemony aroma and make it a tad denser—worth it for the convenience!
When you’re ready to serve your pre-made cake, consider giving it a quick dusting of powdered erythritol or adding a dollop of Greek yogurt on the side for a fresh touch. For more creative serving ideas, you might explore other recipes like my Lemon Drizzle Loaf or Berry Compote Topping, which complement the flavors beautifully. Whether prepared ahead or enjoyed fresh, this yogurt cake is a treat that’s ready to meet your schedule and satisfy your sweet tooth!
Best Ingredients & Party Variations
When it comes to crafting the perfect Yogurt Cake, choosing quality ingredients can make all the difference. The star of the show here is Greek yogurt, which adds a delightful tang and keeps the cake wonderfully moist. Opt for a full-fat version for richness or stick with vanilla-flavored Greek yogurt for extra sweetness. The olive oil not only contributes to the cake’s moist texture but also infuses a subtle, fruity aroma. If you’re watching calories, consider using a light olive oil instead.
Now, for those times when you want to add a bit of festive flair, consider some exciting variations. Hosting a summer get-together? Fold in fresh berries like blueberries or raspberries into the batter for bursts of color and flavor. A sprinkle of almond slices on top before baking will add a delightful crunch and nutty essence. Feeling adventurous? Swap out the vanilla for almond extract or even a splash of rose water for a floral twist that’s sure to impress your guests.
No gathering is complete without a dash of personalization. For a winter party, try adding a teaspoon of cinnamon or a touch of nutmeg to the batter to evoke warm, cozy flavors. Serving it with a dollop of whipped cream or a drizzle of honey will elevate this simple yogurt cake into a dessert that’s not just delicious but also unforgettable.
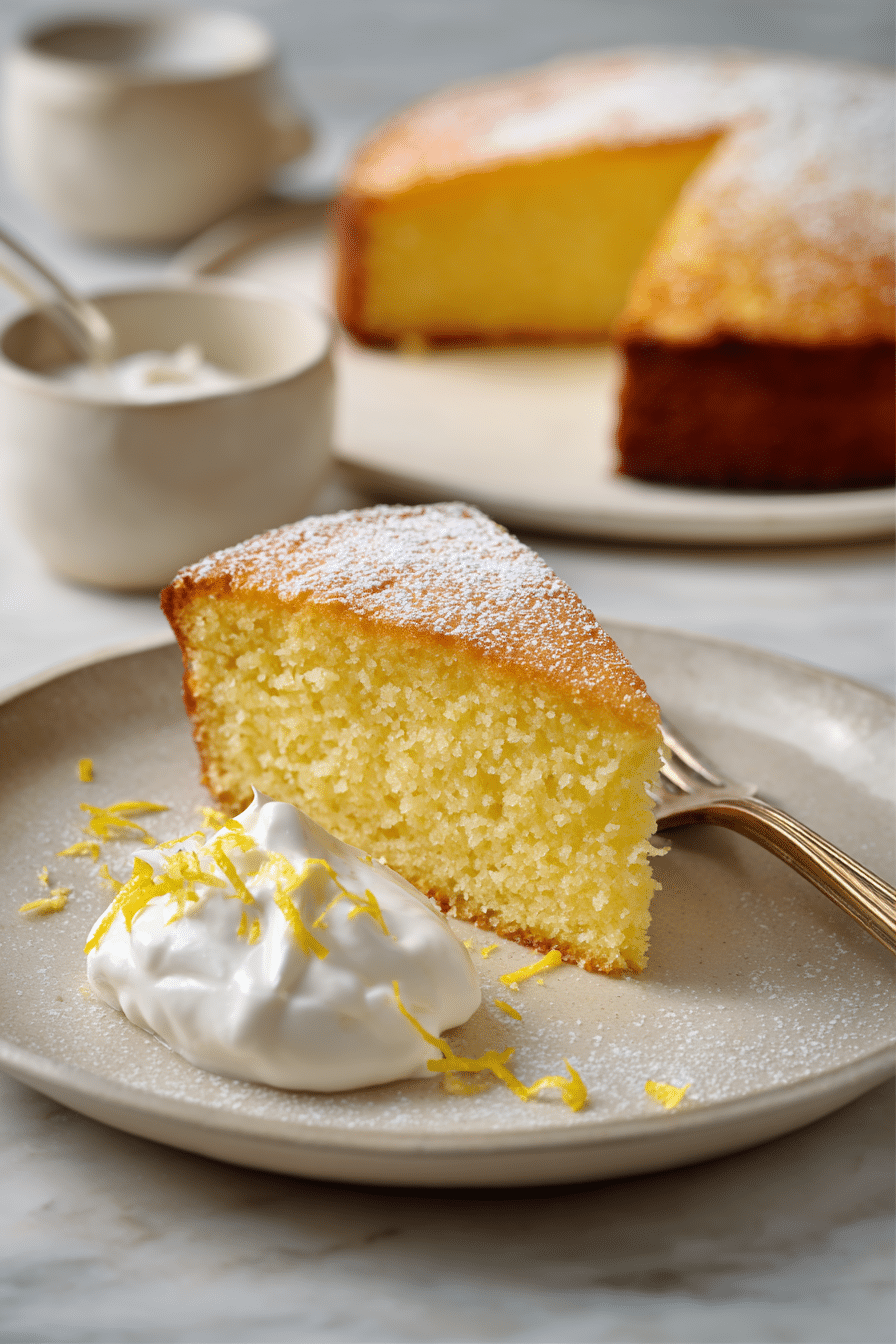
Serving of Yogurt Cake
Conclusion
Making this yogurt cake can turn an average afternoon into something special. Imagine the joyful moments shared as you slice into its tender crumb, surrounded by loved ones. It’s more than just a cake; it’s a delicious excuse to bring people together, filling your home with laughter and the comforting aroma of fresh baking.
Whether you’re a seasoned baker or just starting your journey, this recipe is here to be your trusty companion. You’ll find that baking this cake isn’t just about the end result—it’s about the process, the memories created, and the smiles shared over each bite.
I encourage you to dive in and give this yogurt cake a try. Let it become a cherished part of your dessert repertoire, just like it has in mine. For more delightful recipes and baking inspiration, be sure to follow us on social media. Let’s continue this delicious journey together!
**What type of yogurt is best for making Yogurt Cake?
** Greek yogurt is ideal for this Yogurt Cake due to its thick, creamy texture. It creates a delightfully moist crumb. Opt for full-fat Greek yogurt for the richest flavor and the best structure. If you’re watching your calorie intake, low-fat Greek yogurt can be used, but keep in mind the cake may be slightly less rich.
**Can I use flavored yogurt in the Yogurt Cake Recipe?
** While plain Greek yogurt is recommended to maintain control over the cake’s sweetness and flavor, you can experiment with flavored yogurt. Keep in mind that flavored yogurts add extra sugar, which might alter the final taste. If you’re after a particular flavor profile, such as vanilla or berry, you might find it a fun variation, though it won’t be as predictable as the classic version.
**How should I store leftover Yogurt Cake?
** Store leftover Yogurt Cake in an airtight container at room temperature for up to 2 days. For extended freshness, refrigerate it for up to 5 days. Before serving, allow the cake to come to room temperature to enjoy its best texture. If you prefer a warm slice, a quick zap in the microwave can bring back that fresh-baked feel.
Recipe
Yogurt Cake
Ingredients
Ingredients
- 1½ cups Greek yogurt
- 3 medium eggs
- ¼ cup olive oil
- 1 tsp vanilla bean paste
- ¾ cup erythritol
- 1¼ cups all-purpose flour
- 2 tsp baking powder
- ¼ tsp salt
- Zest of 1 lemon optional
Instructions
- Preheat oven to 350°F. Line a 9-inch round cake pan with parchment and grease sides.
- In a bowl, whisk yogurt, eggs, olive oil, vanilla, and erythritol until smooth.
- In another bowl, mix flour, baking powder, salt, and lemon zest.
- Fold dry ingredients into wet until just combined.
- Pour batter into prepared pan and smooth top.
- Bake for 40–45 minutes until golden and a toothpick comes out clean.
- Cool 10 minutes in pan, then transfer to a wire rack to cool completely.
Notes
- Olive oil adds a subtle aroma; use light olive oil for lower calories.