The Memory Behind This Treat
The first time I made Valentine’s Day Heart-Shaped Cake Pops was as a sweet surprise for my kids’ school party. It was the kind of day where the kitchen was filled with the aroma of vanilla cake, and the counters were cluttered with sprinkles and candy melts. I remember the excitement in the air as we transformed a simple cake into adorable heart-shaped treats that screamed “Happy Valentine’s Day!”
These cake pops were more than just a dessert; they were a project of love. My little helpers eagerly took on the task of dipping and decorating, leaving us with a few chocolatey messes here and there. But those sticky fingers and colorful sprinkles scattered everywhere are what made the experience so memorable. It was a reminder that baking together can turn an ordinary day into a celebration.
Every bite of these cake pops takes me back to that day—the laughter, the fun, and the anticipation of sharing something homemade. Whether you’re crafting these for a school event or just to surprise someone special, they promise a burst of joy with every bite. If you’re looking for other creative treats, you might enjoy exploring my recipes for festive cupcakes or delightful cookies. Just remember, the magic of these cake pops lies in the love and care you put into making them, turning simple ingredients into something truly special.
How To Make It (Mix & Ingredients)
Creating these Valentine’s Day Heart-Shaped Cake Pops is a delightful process that combines a bit of baking magic with a touch of artistry. Start by preparing your favorite vanilla cake mix. Follow the instructions on the box—typically involving oil, water, and eggs—and bake until your kitchen is filled with the sweet, comforting aroma of vanilla. Once baked, let the cake cool completely. This is crucial to ensure the cake is firm enough to crumble without becoming mushy.
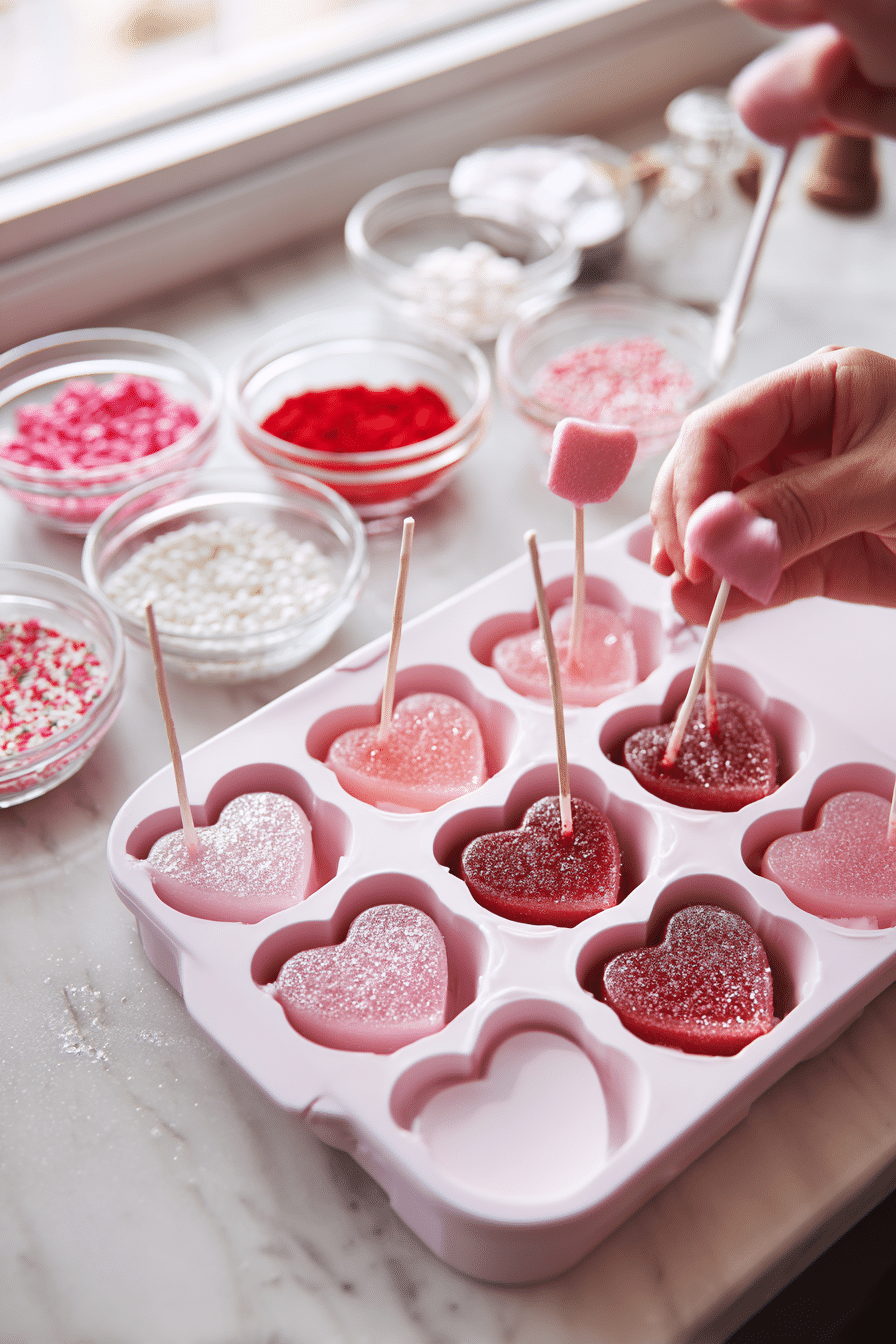
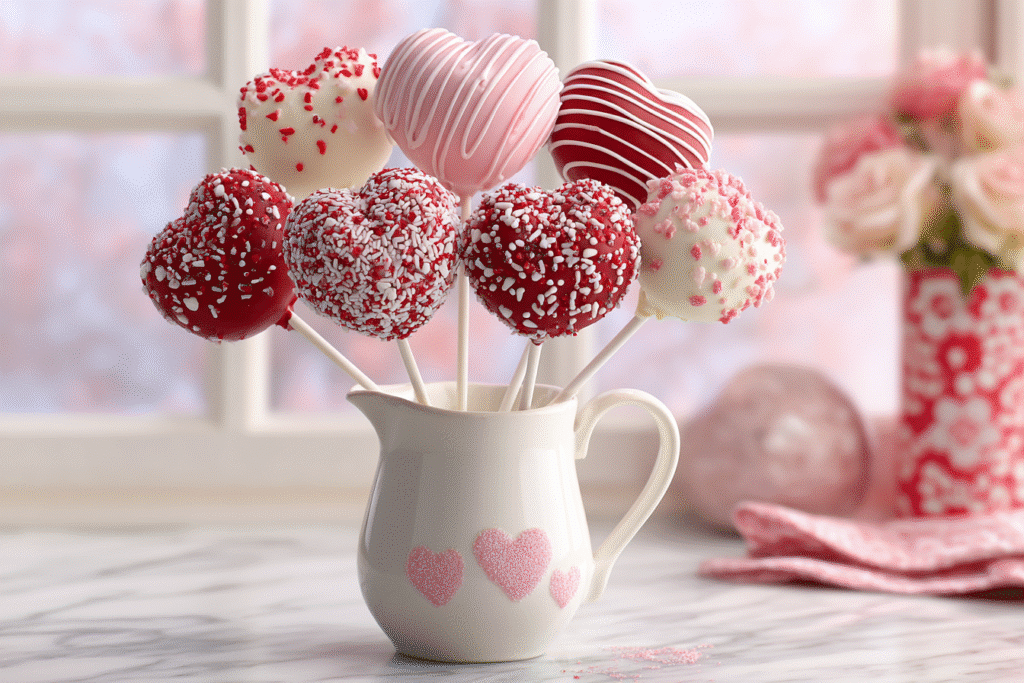
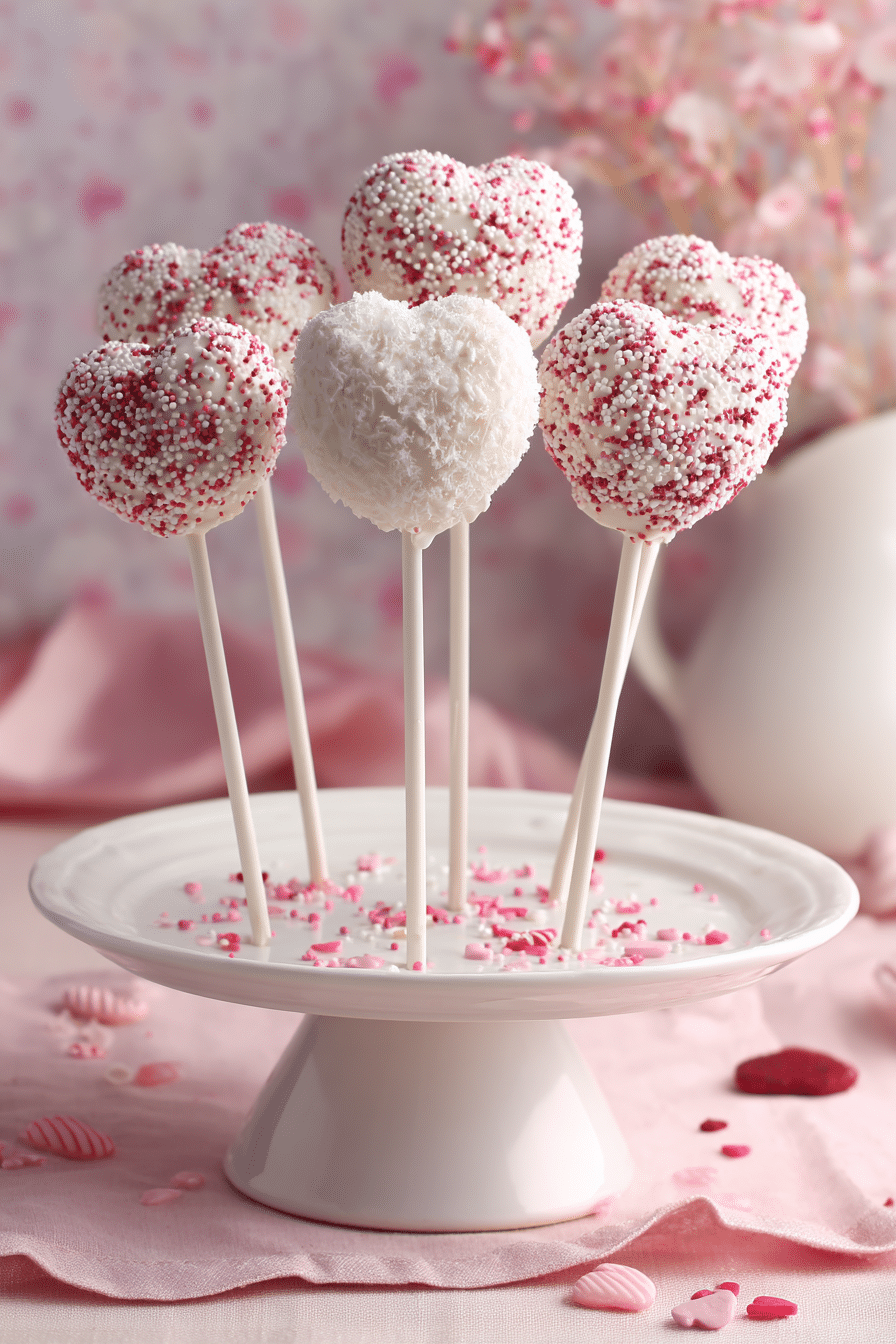
Instructions Process of Valentine’s Day Heart-Shaped Cake Pops
Next, it’s time to get your hands into the mix! Crumble the cooled cake into fine crumbs in a large mixing bowl. Add about 1/3 cup of softened frosting to the crumbs. Using your hands or a spatula, mix until it all comes together into a dough-like consistency. Feel free to add a bit more frosting, a tablespoon at a time, if the mixture needs to be more cohesive. Aim for a texture that holds its shape but isn’t sticky.Now, for the fun part—shaping! Grab your heart-shaped silicone mold and press the cake mixture firmly into each cavity, ensuring the mixture captures every curve of the heart. Once all the hearts are formed, insert a lollipop stick into each one, making sure it’s secure. Pop them into the fridge to set, allowing them to chill while you melt your candy coating. This step ensures the cake pops retain their shape during the coating process. For more creative dessert ideas, check out our “Chocolate Truffle Delights” or “Rainbow Sugar Cookies” for some diversity in your baking adventures!
Make-Ahead & Storage
Valentine’s Day Heart-Shaped Cake Pops are perfect for planning ahead, making them a stress-free treat for your special celebration. If you’re looking to get a jump on your Valentine’s Day preparations, these cake pops can be made in stages. Bake the cake and crumble it a day or two in advance, then store the crumbles in an airtight container at room temperature. You can also mix the crumbs with frosting, shape them, and refrigerate for up to 2 days before adding the candy coating.
For longer storage, completed cake pops, once coated and decorated, can be kept fresh in the fridge for up to a week. Simply place them in an airtight container, ensuring they’re spaced out to avoid any smudging of decorations. If you’re like me and enjoy having a batch ready for unexpected sweet tooth cravings, you can even freeze these cake pops. Wrap each individually in plastic wrap, then store them in a freezer-safe bag for up to 3 months. Just allow them to thaw in the fridge overnight before serving.
A little tip from my heart to yours: Avoid refrigerating before coating—the candy melts may crack! Take the time to thaw them properly, and you’ll have perfectly adorable, irresistible Valentine’s Day Heart-Shaped Cake Pops ready to impress your loved ones. Consider pairing them with a batch of my Chocolate-Covered Strawberries for a truly decadent dessert spread.
Best Ingredients & Party Variations
When creating Valentine’s Day Heart-Shaped Cake Pops, choosing the right ingredients is key to making these sweet love bites truly unforgettable. Start with a reliable vanilla cake mix—it’s a time-tested base that ensures your cake pops have a consistent texture and flavor. For the frosting, using unsalted butter provides a creamy finish, allowing the vanilla to shine through. If you’re in a pinch, a cup of store-bought frosting works perfectly well. For the candy coating, select vibrant candy melts in shades of red, white, and pink to give your cake pops that Valentine’s Day sparkle.
Now, let’s talk about party variations! Creativity is your best friend here. Consider using different cake flavors—imagine a rich chocolate or a tangy strawberry cake as the foundation. You could also experiment with colored candy melts to match different party themes or preferences. Add some pizzazz with heart-shaped sprinkles or a white chocolate drizzle for a touch of elegance. Feeling adventurous? Incorporate a dash of edible glitter to make them truly stand out on your dessert table.
Whether you’re making these for a cozy family gathering or a lively Valentine’s Day party, these cake pops are versatile enough to fit any occasion. Let your imagination run wild, and don’t be afraid to mix and match flavors and decorations. After all, each pop should be as unique and delightful as the loved ones you’re sharing them with.
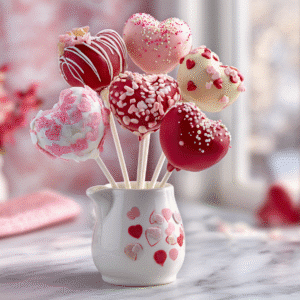
Serving of Valentine’s Day Heart-Shaped Cake Pops
Conclusion
Making these Valentine’s Day Heart-Shaped Cake Pops is more than just creating a sweet treat; it’s about crafting special moments with those you love. As you roll the cake, shape the hearts, and dip them into luscious chocolate, you’re not just making dessert—you’re making memories. Whether it’s a fun project with the kids or a romantic surprise for that special someone, these little love bites have a way of bringing everyone closer.
Don’t let the simplicity of this recipe fool you. The joy it brings is as grand as the love it celebrates. So, grab your mixing bowls and let your kitchen fill with the sweet aroma of cake and chocolate. I promise, your loved ones will adore these heart-shaped delights.
For more heartwarming recipes and to stay inspired in the kitchen, follow Taste to Rate on social media. Let’s continue to share the love, one recipe at a time!
Can I prepare Valentine’s Day Heart-Shaped Cake Pops in advance?
Yes, you can make these adorable cake pops ahead of time. After decorating, store them in an airtight container in the refrigerator for up to 5 days. If you want to plan even further ahead, freeze the undipped cake hearts for up to a month. Just decorate them close to your event for the freshest taste and appearance.
What type of coating is best for these cake pops?
Candy melts are ideal because they melt smoothly and come in a variety of festive colors. If you prefer, you can also use white or milk chocolate chips. Adding a bit of vegetable shortening can help achieve a silky, dippable consistency.
Is a heart-shaped silicone mold necessary for this recipe?
A heart-shaped silicone mold ensures consistent and well-defined heart shapes. If you don’t have one, you can shape the cake mixture by hand. However, be aware that the results might vary in uniformity, adding a rustic touch to your treats.
Recipe
Valentine’s Day Heart-Shaped Cake Pops
Ingredients
Ingredients
- 1 box of vanilla cake mix
- Ingredients listed on the box usually oil, water, and eggs
- 1/2 cup unsalted butter softened
- 1 1/2 cups powdered sugar
- 1 tsp vanilla bean paste
- 1 –2 tbsp milk
- OR 1 cup store-bought frosting
- Heart-shaped silicone mold
- Lollipop sticks
- Candy melts red, white, pink
- 1 –2 tsp vegetable shortening optional, for thinning
- Heart-shaped sprinkles
- Edible glitter
- Colored sugar
- White chocolate drizzle
Instructions
- Prepare the cake mix according to the package instructions. Cool completely.
- Crumble the cooled cake into a large bowl. Add 1/3 cup of frosting and mix until dough-like.
- Press the mixture into heart molds. Insert a lollipop stick. Freeze for 1 hour.
- Melt candy melts in a microwave-safe bowl until smooth. Add shortening if needed.
- Dip each pop into the melted coating. Tap off excess and allow to dry upright.
- Decorate with sprinkles, glitter, or drizzle. Let them set.
Notes
- Add frosting gradually to achieve the right consistency.