Why This One Delivers
This Salted Caramel Cake brings that tall, glossy bakery style layer cake straight to your kitchen, without fussy techniques or special equipment. You get soft, moist layers that stay tender for days and a real salted caramel flavor that tastes deep and toasty, not just sweet.
The batter uses a mix of sour cream, oil, and butter, which gives you height and moisture at the same time. The oil keeps the crumb soft, the butter brings flavor, and the sour cream adds richness and structure so the cake slices cleanly. A little cornstarch in the dry mix keeps the texture fine and delicate, like the cakes you see in a glass bakery case. Vanilla bean paste adds those pretty specks and a warm flavor that actually stands up to the caramel instead of getting lost.
Here, you cook a true salted caramel from scratch, then let it cool so it turns thick, glossy, and spoonable. You fold that caramel into both the filling and the buttercream, so every bite carries layers of nutty, buttery caramel instead of just a sugary frosting hit on top. The method gives you clear visual cues for each stage, from what the caramel should smell like to how the batter should fall from the spatula, so you do not feel like you are guessing at any point.
This recipe also leans into real life. You can bake the cake layers one day, then fill and frost the next. The crumb is sturdy but still tender, so it handles generous swoops of caramel and buttercream without collapsing or squishing out the middle. Because the caramel has enough salt to balance the sweetness, the finished Salted Caramel Cake tastes indulgent but never heavy, even with a creamy American style buttercream. It looks like a bakery showpiece, but it feels like something you can pull off on a cozy weekend afternoon.
From Prep to Finish
From the first swirl of sugar in the saucepan to the last ribbon of frosting, this cake follows a calm, step by step rhythm. Start with the caramel so it has plenty of time to cool. Stir the sugar and water just to help them combine, then leave the pan alone and watch the color more than the clock. You are aiming for a deep amber that smells toasty, not pale gold. Once the sugar reaches that color, carefully whisk in the cream and butter. Let it bubble for a minute or two, then pour the caramel into a shallow bowl so it cools quickly into a thick, glossy sauce that will not melt your buttercream or soak into your layers.
While the caramel chills, move to the cake batter. Whisk the dry ingredients together so the leavening distributes evenly and you avoid any sneaky pockets of baking soda that could create tunnels. In a separate bowl, cream the butter and sugar until the mixture looks very pale and fluffy, about 3 minutes, scraping down the bowl once or twice. Add the eggs one at a time so the batter stays smooth and satiny, then work in the sour cream, oil, and vanilla for that moist, tender crumb. The finished batter should be thick but soft and fall off a spatula in heavy ribbons that briefly sit on the surface before sinking back in.
Divide the batter into your prepared pans and bake until the layers turn a light golden color and spring back gently when you touch the center. A toothpick should come out mostly clean, with just a few moist crumbs. Let the layers cool in the pans for about 10 to 15 minutes, then turn them out onto racks to cool completely. A slightly warm cake will slide around once you add the caramel, so patience really pays off here.
Once cool, level any domes with a long serrated knife. To build your Salted Caramel Cake, pipe or spread a ring of buttercream around the edge of the first layer to create a little dam that will hold the caramel in the center. Spoon some cooled caramel into that ring, spreading it gently without breaking through the buttercream border. Stack the next layer and repeat. If your kitchen feels warm, chill the cake briefly between layers so everything firms up and stays tidy.
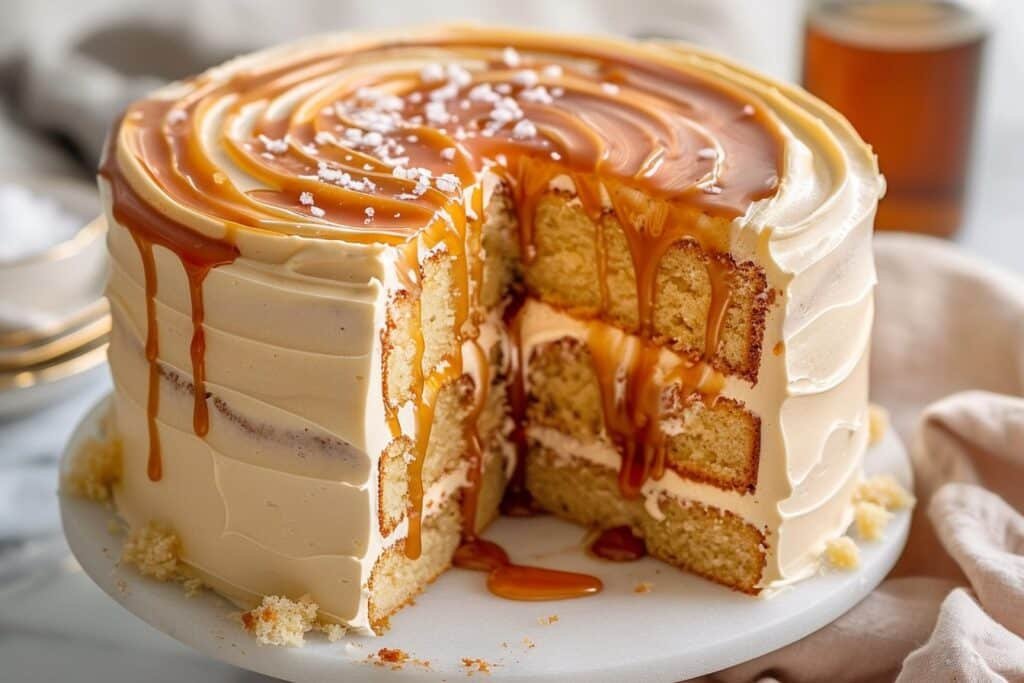
Finish with a generous coat of salted caramel buttercream over the top and sides. Use the back of a spoon or an offset spatula to create soft swoops and ridges. Drizzle any leftover caramel over the top, letting it drip lazily down the sides, and sprinkle a pinch of flaky sea salt just before serving. The result is a tall, glossy Salted Caramel Cake that looks as good as it tastes.
Timing, storage, and make ahead
You can treat this Salted Caramel Cake as a relaxed weekend project instead of a sprint. Plan about 45 minutes to make the caramel and cake batter, plus around 20 minutes of baking time, then give yourself plenty of cooling time before stacking. For the neatest slices and the most stable layers, let the baked cakes cool completely at room temperature, then chill them for at least 45 to 60 minutes. Cold layers are much easier to level, fill, and frost, and they help keep the caramel and buttercream from sliding.
Once assembled, the cake keeps beautifully in the refrigerator for up to 4 days. Store it in an airtight cake container, or press plastic wrap gently against any cut sides to keep them from drying out. Before serving, bring the cake out of the fridge 30 to 45 minutes in advance. This takes the chill off the buttercream, softens the crumb, and lets the caramel relax back into a silky texture.
Extra caramel stores well in a jar in the refrigerator for up to 2 weeks. It will thicken as it chills, which actually makes it perfect for controlled drips, swirls on top of desserts, or spooning over something simple like vanilla sheet cake or apple crumble pie. You can make the buttercream up to 3 days ahead and refrigerate it. When you are ready to use it, let it come back to room temperature, then re whip until it looks smooth and fluffy again. If your kitchen tends to run warm, keep the fully frosted cake chilled until close to serving time, and especially keep it cool if you need to transport it.
For longer make ahead prep, bake the cake layers up to 2 months in advance. Once they cool completely, wrap each layer snugly in plastic wrap, then in foil, and freeze. When you are ready to assemble your Salted Caramel Cake, move the wrapped layers to the refrigerator and thaw them overnight so they do not absorb any stray odors. You can also make the caramel the night before assembly day. Let it cool to room temperature, cover it, and chill it, then bring it out a little before you start frosting so it loosens to a spoonable consistency. That way, the final day feels like the fun part with stacking and decorating, not a marathon of measuring and mixing.
Ingredient Swaps and Serving Options
If you need to adapt this Salted Caramel Cake to what you already have on hand, you have plenty of room to play without losing that bakery style finish. Use plain Greek yogurt in place of the sour cream, same weight, for a slightly lighter but still moist crumb. If you do not have vanilla bean paste, use pure vanilla bean paste in a 1 to 1 ratio, or add a teaspoon of almond extract alongside the vanilla for a bolder bakery flavor. You can also use cake flour instead of all purpose flour. In that case, use about 10 percent more cake flour by weight and skip the cornstarch, since cake flour already has a softer, finer texture.
If you want to lean into the salty side a bit more, finish the top of the cake with a light sprinkle of flaky sea salt just before serving. If your crowd prefers things less sweet, fold a handful of finely chopped toasted nuts, like pecans or walnuts, into the buttercream for some crunch and a deeper flavor that balances the caramel. You can also skip caramel between every layer and just use it in the filling and on top, which gives you a slightly lighter eat while still keeping that salted caramel character.
To turn this Salted Caramel Cake into an easy party centerpiece, bake it in a sheet pan and cut it into small rectangles for a caramel snack cake platter. Top each piece with a swoop of caramel buttercream and a drizzle of sauce. For a plated dessert, serve each slice with a scoop of vanilla ice cream and a warm spoonful of leftover caramel, or add a cloud of lightly sweetened whipped cream if you want something softer and airier. You can tuck thinly sliced bananas or roasted apple slices between the layers for a sundae style twist that feels cozy and nostalgic, a bit like a caramel apple crisp in cake form.
For everyday snacking, leave the sides of the cake bare for a semi naked look and concentrate the buttercream and caramel on top. Add a scatter of flaky salt or crushed pretzels for that sweet and salty crunch. However you serve it, the structure of this cake holds up well, so you can slice it small for a big dessert spread or cut generous wedges for a simple family treat.
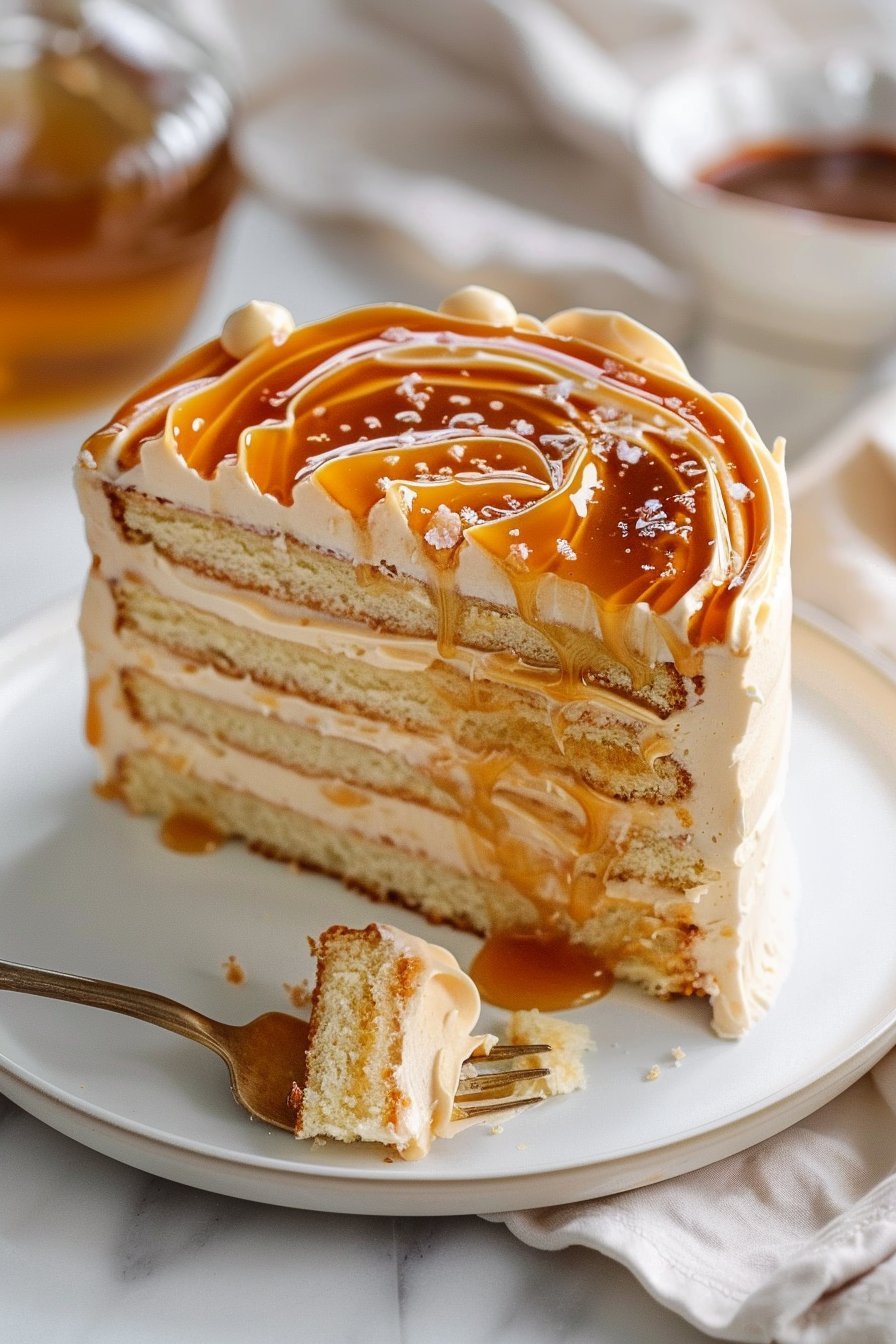
Serving Image of Salted Caramel Cake
Conclusion
The first time I tested this Salted Caramel Cake, my whole kitchen smelled like toasted sugar and warm vanilla, and neighbors just happened to wander by at dessert time. This is one of those bakes that quietly turns an ordinary day into a little celebration, whether you are lighting birthday candles or just setting out plates for whoever is around the table.
I hope this recipe feels doable and inviting, even if layer cakes usually intimidate you. Take your time, taste the caramel as it cools, swipe a little frosting with your finger, and enjoy the process as much as the final slice. When you cut into those tall, caramel layered pieces and hear the soft clink of forks on plates, you are not just serving dessert, you are making a memory that people will ask you to repeat.
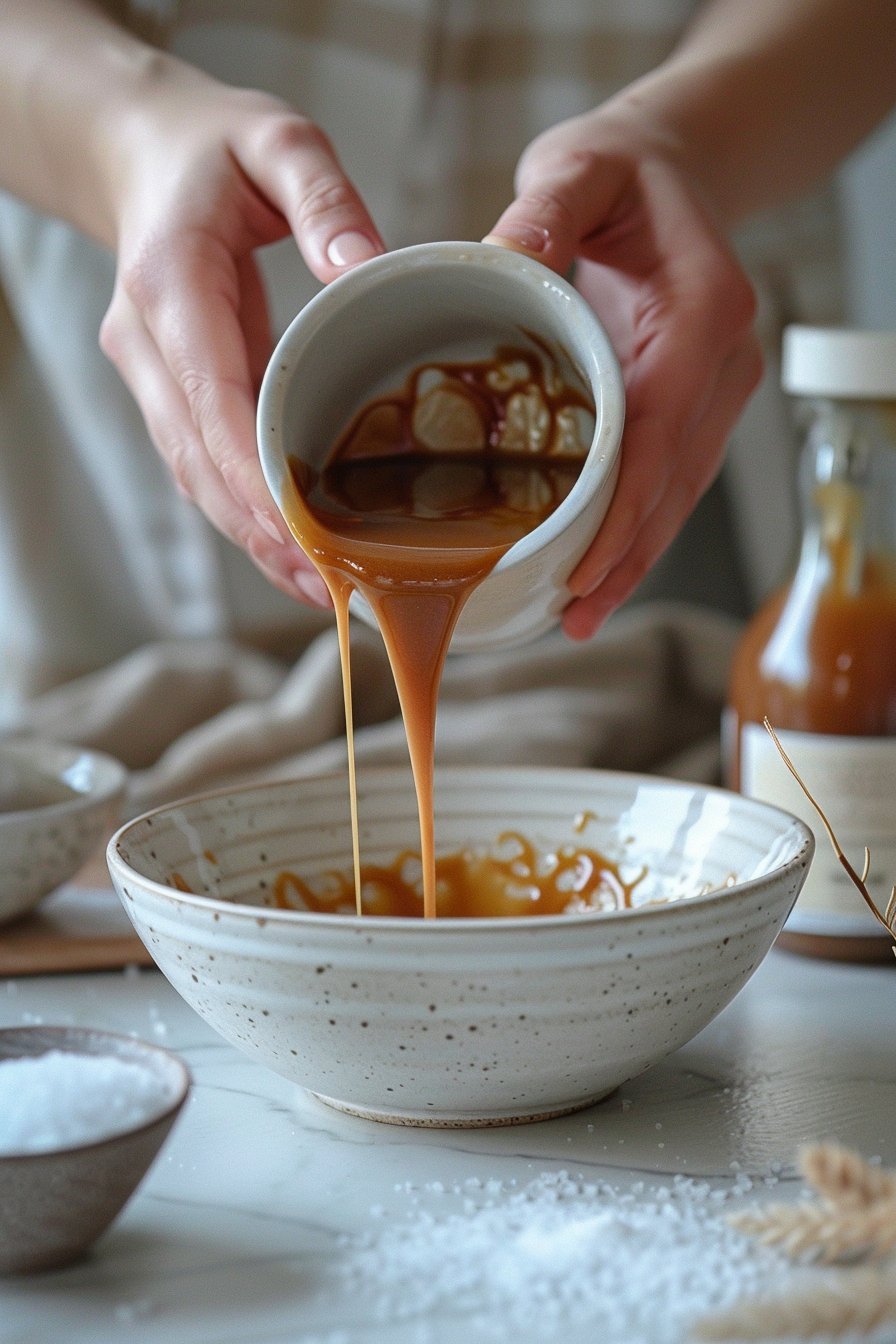
Process Image of Salted Caramel Cake
Recipe

Salted Caramel Cake
Ingredients
Ingredients
- 140 g granulated sugar for caramel
- 1 1/2 tbsp water
- 40 g unsalted butter cubed (for caramel)
- 150 g heavy cream at room temperature
- 1/2 tsp fine sea salt
- 340 g all-purpose flour
- 2 tbsp cornstarch
- 3/4 tsp baking powder
- 3/4 tsp baking soda
- 3/4 tsp salt
- 180 g unsalted butter room temperature (for cake)
- 300 g granulated sugar for cake
- 4 large eggs room temperature
- 240 g sour cream room temperature
- 60 g vegetable oil
- 2 tsp vanilla bean paste
- 400 g unsalted butter room temperature (for buttercream)
- 660 g powdered sugar
- 3 tbsp cooled salted caramel from above for buttercream
- 1 tsp vanilla bean paste
- Additional cooled salted caramel for filling and drizzling
- Flaky sea salt for garnish optional
Instructions
- Make the salted caramel by adding 140 g sugar and 1 1/2 tbsp water to a medium heavy saucepan and cook over medium heat, swirling occasionally, until the sugar melts and turns a deep amber color.
- Remove the pan from the heat and carefully whisk in 150 g heavy cream, then 40 g butter, whisking until smooth.
- Stir in 1/2 tsp fine sea salt, then pour the caramel into a shallow bowl and refrigerate until thickened and at room temperature, about 30 to 60 minutes.
- Preheat the oven to 340°F and line three 8 inch round cake pans (20 cm) with parchment paper on the bottoms and lightly grease the sides.
- In a medium bowl sift together the flour, cornstarch, baking powder, baking soda, and salt, then set aside.
- In a large mixing bowl beat 180 g butter and 300 g sugar on high speed for 3 minutes until light and fluffy, scraping the bowl once.
- Add the eggs one at a time, beating on medium after each addition until fully combined.
- On low speed mix in half of the dry ingredients just until combined.
- Add the sour cream, vegetable oil, and vanilla bean paste and mix on low until just combined.
- Add the remaining dry ingredients and mix on low until the batter is smooth with no dry streaks.
- Use a rubber spatula to gently fold the batter once or twice to make sure everything is evenly combined.
- Divide the batter evenly among the three prepared pans and smooth the tops.
- Bake for 19 to 22 minutes, or until the centers spring back lightly to the touch and a tester inserted in the center comes out clean.
- Cool the cakes on a rack for 10 minutes, then run a knife around the edges, turn them out onto the rack, and let them cool completely.
- For the buttercream, sift the powdered sugar into a large bowl and set aside.
- In a stand mixer fitted with the paddle, beat 400 g butter on medium high speed for 4 minutes, scraping down the sides once, then beat 2 minutes more until very light and creamy.
- On low speed add half of the powdered sugar, then the vanilla bean paste and 3 tbsp cooled salted caramel, mixing until fully incorporated.
- Add the remaining powdered sugar and mix on low until combined, then beat 1 minute on low to smooth the buttercream.
- If needed, level the cooled cake layers with a serrated knife so the tops are flat.
- Place the first cake layer on a serving plate and spread a thin layer of buttercream over the top.
- Pipe or spread a buttercream border around the edge of the layer, then spoon some cooled caramel inside the border and spread it gently.
- Top with the second cake layer and repeat the buttercream and caramel filling.
- Place the third cake layer on top and spread a thin crumb coat of buttercream over the top and sides of the cake.
- Chill the crumb coated cake in the refrigerator for 20 minutes to set the frosting.
- Add the remaining buttercream over the top and sides of the chilled cake and smooth or swirl as desired.
- Drizzle additional cooled salted caramel over the top, letting some drip down the sides, and garnish with flaky sea salt just before serving.
Notes
- The caramel should be a deep amber color, not pale, for the best flavor.
- If the buttercream feels too soft, chill it for 10 minutes and beat briefly before using.
- Chilling the stacked but unfrosted cake for 20 to 30 minutes helps keep the caramel filling from squeezing out.
- Store the finished cake covered in the refrigerator for up to 3 days and let it sit at room temperature for 20 to 30 minutes before serving.