What Makes This Recipe Reliable
You get bakery style Roasted Chocolate Cherry Brownies without any fussy techniques or special equipment, just smart steps that work every time. I tested these the same way I tested recipes in my food styling days: multiple pans, different ovens, and a few intentional “whoops” moments so I could see how forgiving the batter really is.
Whipping the eggs, egg yolk, and sugar for a full 5 minutes is not a show off step, it is your built in insurance policy for that shiny, crinkly top and dense, fudgy middle. You will see the mixture turn pale, thicken, and fall off the whisk in ribbons that slowly disappear back into the bowl. That is your cue that you have trapped enough air for lift without turning the brownies cakey. The combination of melted butter for flavor and neutral oil for moisture keeps the brownies soft on day 2 and 3, while still giving you that rich chew around the edges.
The ingredients and steps are written for real home kitchens, not just perfect test labs. Dutch process cocoa gives a deep, reliable chocolate flavor and that dark, almost inky color. A spoonful of cornstarch acts like pastry flour and keeps the crumb tender so the brownies stay fudgy instead of dry or crumbly at the edges. Roasting the cherries first does two important things. It concentrates their flavor so they taste jammy and intense, and it drives off excess liquid so the batter does not bake up gummy in the center. I also have you cool the cherries before folding in half and saving the rest for the top. This keeps the batter from turning streaky pink and guarantees juicy bits of fruit in almost every bite of your Roasted Chocolate Cherry Brownies.
Baking times are calibrated in a basic 8 by 8 inch metal pan, since that is what most of you have at home, and I include clear doneness cues so you do not have to guess. The edges should look set and just begin to pull away from the sides of the pan, while the center should still look slightly soft and glossy. A toothpick test near the edge is helpful here. You want a few moist, chocolatey crumbs, not wet batter. Cooling and a brief chill are not just drama for photos, they let the chocolate set so you can slice clean squares without tearing the brownies or losing those glossy pockets of cherry. All of these details work together to give you Roasted Chocolate Cherry Brownies that feel bakery style but bake up calmly in your own oven.
The Method (Step by Step)
Start by getting those cherries luxurious and jammy. Toss the halved cherries with sugar, then spread them in a single layer on a lined baking sheet. Roast until they look glossy and slightly wrinkled at the edges, and you see a little puddle of syrup around them. They should smell deeply fruity and taste concentrated but still feel soft, not shriveled. Near the end of roasting, peek every few minutes so they do not scorch. Let them cool completely on the pan so they do not melt your batter later. While they cool, lower the oven temperature, then grease and line your 20 by 20 centimeter pan with parchment, letting the paper overhang for easy lifting once your Roasted Chocolate Cherry Brownies are baked.
Next, whisk together the flour, Dutch process cocoa, cornstarch, and salt so there are no streaks of cocoa hiding at the bottom of the bowl. Break up any little lumps with the back of your spoon so the dry mix feels even and light. In a separate mixing bowl, beat the eggs, yolk, and sugar on high until the mixture turns pale and thick and leaves ribbons that slowly dissolve back into the bowl. This is where you build that classic bakery style sheen and crackly top, so give it the full time. Turn the mixer to low and slowly stream in the warm melted butter, oil, and vanilla until just blended and smooth.
Gently fold the dry ingredients into the egg mixture in two additions, scraping along the bottom of the bowl so no pockets of flour hide underneath. Stop as soon as the flour disappears and the batter looks thick and glossy. Stir in all the chocolate chips and about half of the cooled roasted cherries, trying not to crush the fruit too much so you keep those juicy pops of flavor.
Pour the batter into your prepared pan and nudge it into the corners, smoothing the top with an offset spatula or the back of a spoon. The batter will be thick and spread slowly, which is exactly what you want for fudgy brownies. If you want extra drama, press a few reserved chocolate chips on top. Bake until the edges look set and slightly pull from the pan, and a toothpick near the edge comes out with a few moist crumbs. The very center should still look a bit soft and shiny, which keeps your Roasted Chocolate Cherry Brownies fudgy instead of cakey once they cool. Set the pan on a rack and let the brownies cool completely, then chill for at least 30 minutes so they slice into neat squares. Just before serving, spoon the remaining roasted cherries over the top for a glossy, bakery style finish and a clear cue that cherries are the star.
Keep It Fresh: Timing and Storage
Roasted chocolate cherry brownies taste their very best the day you bake them, once they have cooled and had at least 30 minutes to 1 hour to set. The flavor is deepest once they reach room temperature and the crumb has had a little time to firm up. If you want those clean, bakery style edges, let the pan cool to room temperature, then chill it for another hour before slicing with a sharp knife. Wipe the blade between cuts for picture worthy squares.
At room temperature, these brownies keep well for about 2 days, covered tightly with foil or in an airtight container. Because of the juicy roasted cherries, I do not recommend leaving them uncovered on the counter, or the top will dry and the center can turn a bit gummy. If your kitchen runs warm, keep them in the refrigerator and bring slices to room temperature for 15 to 20 minutes before serving so the chocolate flavor blooms and the texture softens back to fudgy.
For longer storage, refrigerate your brownies in a single layer, or stack them with pieces of parchment between layers, for up to 5 days. The texture will firm as they chill, which some people love for a denser bite, so you can warm individual squares in the microwave for about 10 to 15 seconds if you want them softer and extra gooey. For freezing, wrap each square tightly in plastic, then place them in a freezer bag or airtight container for up to 2 months. Press out extra air from the bag to prevent freezer flavor. Thaw on the counter for 30 to 45 minutes, or overnight in the refrigerator, before serving. If you plan a dessert board with these plus something like my chocolate strawberry swirl cheesecake bars or mini cherry cheesecake tacos, freezing in advance can save you a lot of last minute stress and keep everything tasting fresh.
Swaps, Variations, and Serving Ideas
Think of these Roasted Chocolate Cherry Brownies as your base recipe and your pantry as the playground. For the cherries, you can use frozen cherries straight from the bag. No need to thaw, just spread them on the tray and roast them a few extra minutes until the juices bubble and they look glossy. If fresh cherries are out of season, canned sour cherries also work. Drain them very well, pat them dry, and then roast to drive off excess liquid so your batter does not bake up watery.
You can swap some or all of the semisweet chips for dark chocolate chunks for a slightly more grown up flavor, or use milk chocolate if you prefer a softer, candy bar style sweetness. If you only have natural cocoa on hand, the brownies will still work. The color will be lighter and the flavor a touch less intense, so a small extra handful of chocolate chips helps deepen the chocolate profile.
To play with texture, fold in a half cup of toasted nuts along with the cherries, such as chopped pecans, walnuts, or hazelnuts. The nuts add a buttery crunch that pairs beautifully with the tender crumb and soft fruit. Turn them into Roasted Chocolate Cherry Brownie sundaes by serving warm squares with vanilla ice cream, a drizzle of hot fudge, and a spoonful of extra roasted cherries on top. For a dinner party plate, cut the chilled brownies into small squares or slim bars, dust lightly with cocoa powder, and serve with espresso or a cherry kissed cocktail.
If you love contrast, add a swirl of cream cheese batter on top for a cheesecake brownie effect, similar to how you might marble my pumpkin cheesecake swirl brownies. Or finish the cooled slab with a thin layer of ganache for a glossy bakery style look, like the finish on mini cherry cheesecake tacos. These brownies also travel beautifully. Pack slices in parchment for picnics, potlucks, or a very lucky friend who texted you about a chocolate craving. They sit happily next to treats like chocolate chip cookie rolls and chocolate cherry cheesecake bars on any dessert table.

Ingredients of Roasted Chocolate Cherry Brownies
Conclusion
I can almost smell the tray cooling on your counter already, with little pools of melted chocolate and glistening cherries catching the light. There is something quietly celebratory about sliding a pan of Roasted Chocolate Cherry Brownies from the oven and knowing dessert is handled.
Share them after a family dinner, tuck one into a lunch box, or wrap a few pieces in parchment for a friend who needs a sweet surprise. These are the kinds of treats that turn into traditions without much fanfare. If your brownies crack a bit on top or a few cherries sink deeper into the batter, that is all part of the homemade charm and the proof that you baked them yourself.
When you are ready, grab your pan, roast those cherries, and give this recipe a try. Then come back and tell me how you served them, who you shared them with, and whether they made your kitchen feel just a little more like your own cozy bakery.

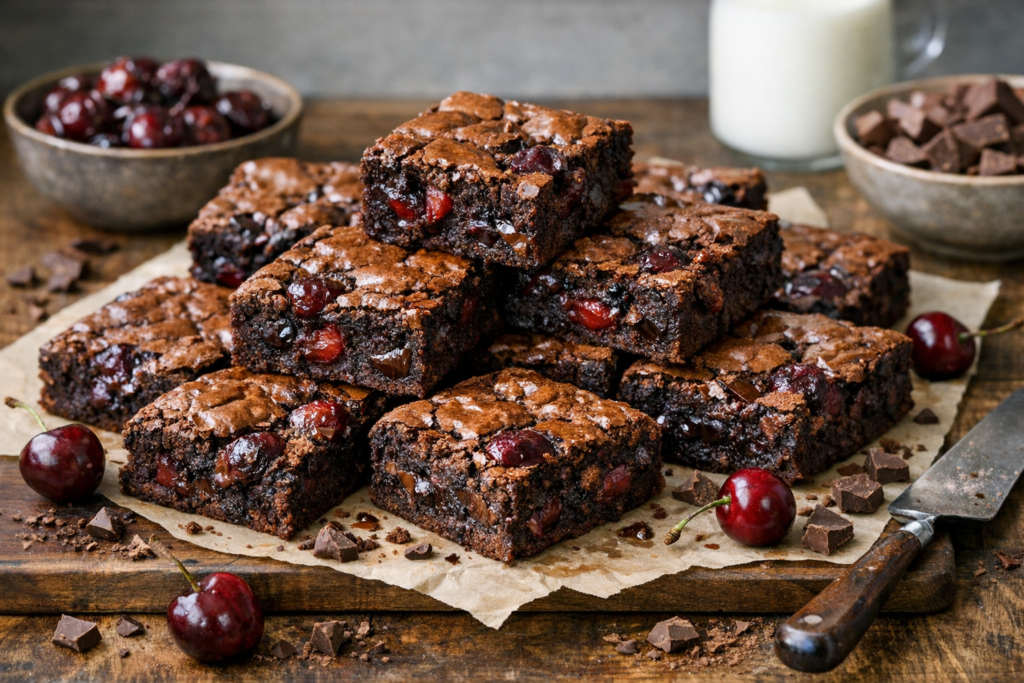
Instructions Process of Roasted Chocolate Cherry Brownies

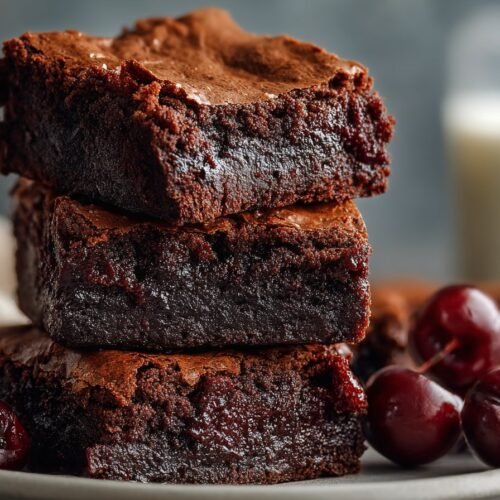
Serving of Roasted Chocolate Cherry Brownies
Recipe
Roasted Chocolate Cherry Brownies
Ingredients
Ingredients
- 2 cups fresh cherries washed, pitted, and halved
- 1 teaspoon white granulated sugar for roasting cherries
- 1 1/3 cups white granulated sugar
- 2 large eggs at room temperature
- 1 large egg yolk at room temperature
- 5 tablespoons unsalted butter melted and slightly cooled
- 1/3 cup neutral oil such as canola or vegetable
- 1 teaspoon pure vanilla bean paste or vanilla bean paste
- 3/4 cup all-purpose flour
- 3/4 cup Dutch-process cocoa powder
- 1 tablespoon cornstarch
- 1 teaspoon fine sea salt
- 1 cup semi-sweet chocolate chips
Instructions
- Preheat the oven to 400°F. Line a baking sheet with parchment paper. Toss the halved cherries with 1 teaspoon of sugar, spread in a single layer on the sheet, and roast for 15 to 18 minutes until glossy, softened, and surrounded by syrupy juices. Cool completely on the pan.
- Reduce the oven temperature to 350°F. Grease an 8x8 inch metal baking pan and line it with parchment paper, leaving an overhang on two sides for easy lifting.
- In a medium bowl, whisk together the flour, Dutch-process cocoa powder, cornstarch, and salt until well combined and no cocoa streaks remain.
- In a large mixing bowl, combine the 1 1/3 cups sugar, eggs, and egg yolk. Using a hand mixer or stand mixer on high speed, beat for about 5 minutes, until the mixture is pale, thick, and falls from the beaters in ribbons.
- With the mixer on low speed, slowly stream in the melted butter, oil, and vanilla, mixing just until smooth and fully combined.
- Using a spatula, gently fold the dry ingredients into the egg mixture in two additions, stopping as soon as no dry spots remain and the batter looks thick and glossy.
- Reserve about half of the roasted cherries for topping. Gently fold the remaining cherries and all of the chocolate chips into the batter, being careful not to crush the fruit too much.
- Scrape the batter into the prepared pan and spread it evenly to the corners, smoothing the top with a spatula.
- Bake at 350°F for 25 to 30 minutes, until the edges are set and just beginning to pull away from the sides and a toothpick inserted near the edge comes out with a few moist crumbs, not wet batter; the center should still look slightly soft and shiny.
- Place the pan on a wire rack and let the brownies cool completely in the pan. Chill in the refrigerator for at least 30 minutes to firm.
- Lift the brownies out of the pan using the parchment overhang. Spoon the reserved roasted cherries evenly over the top, then slice into 16 squares and serve.
Notes
- Be sure the roasted cherries are fully cooled before folding into the batter to avoid warming and thinning the mixture.
- Whipping the eggs and sugar for the full 5 minutes helps create the shiny, crinkly top and dense fudgy middle.
- For clean slices, chill the brownies well and wipe the knife blade between cuts.