Why This One Delivers
Red Velvet Dessert Cups With Vanilla Mousse hit that sweet spot between impressive and practical. You bake a simple, one bowl red velvet sheet of cake, then crumble it into soft, sandy rubies that tuck perfectly into cups. No fussy layers to level, no sculpting, no time spent worrying if your cake will release from the pan in one piece. The mousse skips egg yolks and agar-agar powder and leans on cream cheese, cold milk, and instant vanilla pudding mix, so it thickens reliably even if you do not bake often. It tastes like a cross between cheesecake and whipped cream, which means every spoonful feels rich but still light enough to want seconds.
These Red Velvet Dessert Cups With Vanilla Mousse also love a schedule. You can bake the cake in the morning, let it cool, and assemble the cups hours before guests arrive, or even the night before. The crumbs soften just slightly against the vanilla mousse as they sit, which gives you that classic trifle texture without sogginess. Because everything lives in individual cups, they travel easily for holidays, potlucks, or Valentine dinners, and you do not need to slice or serve at the table. You get built in portion control, which is helpful when you have a full dessert spread that also includes treats like mini cheesecakes or chocolate mousse cups.
From a flavor angle, this combo really earns its place on your dessert list. A touch of cocoa in the red velvet cake keeps it from tasting flatly sweet, and the buttermilk and vinegar give you that gentle tang that pairs so well with the plush vanilla mousse. The mousse itself uses real vanilla bean paste, so you see tiny specks and get a deeper aroma than basic extract alone. Texturally, you get a little crunch from the decorative crumbs on top, softness from the baked cake layer, and cloud like cream from the mousse in each bite. It is the kind of make ahead dessert that feels party worthy, but the actual process is straightforward enough for a casual Sunday baking session.
From Prep to Finish
You will start these Red Velvet Dessert Cups With Vanilla Mousse by getting the cake in the oven first, so it has plenty of time to cool. Whisk your dry ingredients together, then whisk the sugar, buttermilk, oil, egg, vanilla, vinegar, and food coloring until the color looks even and glossy. Gently combine the two bowls, just until you no longer see streaks of flour. Pour the batter into your prepared pan, smooth the top, and bake until the center springs back and a toothpick comes out clean. Let the cake cool completely in the pan, then lift it out and crumble it with your hands into fine, soft crumbs. I like to set aside the prettiest, most even crumbs for garnish so the tops of the cups look bakery ready.

Process Image of Red Velvet Dessert Cups With Vanilla Mousse
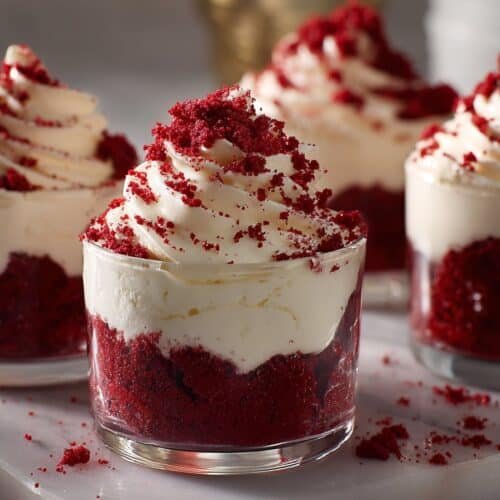
While the cake cools, you will make the vanilla mousse layer for your Red Velvet Dessert Cups With Vanilla Mousse. Beat the softened cream cheese until it is completely smooth with no tiny lumps, then blend in the cold milk and instant pudding mix. The mixture will thicken as you go and should look like a very creamy custard. Add the powdered sugar and beat until you have a silky, lightly sweet base. In a separate bowl, whip the heavy cream to soft peaks that curl at the tips rather than standing straight up, then gently fold it into the cream cheese mixture. To finish, layer cake crumbs and mousse in cups, ending with mousse, then chill for at least 1 hour so the layers set and the flavors meld before you add your reserved crumbs on top.
Timing, Storage, and Make-Ahead
Red Velvet Dessert Cups With Vanilla Mousse have a flexible timeline, which makes them perfect for parties and holidays. Bake the red velvet cake layer up to 2 days ahead, then cool it completely and crumble it into fine crumbs before you store it. I like to keep the crumbs in an airtight container at room temperature for up to 24 hours, or in the fridge if you need them longer. You can prepare the vanilla mousse base the night before serving, cover the bowl tightly, and give it a quick whisk before layering so it looks smooth and fluffy again. If you want a very clean layered look, assemble the cups 2 to 4 hours before serving, then chill so the crumbs settle a bit and the mousse firm ups nicely.
Once you assemble your Red Velvet Dessert Cups With Vanilla Mousse, store them in the refrigerator, covered, for up to 3 days. The cake crumbs slowly soften as they sit against the vanilla mousse, almost like a trifle, which is delicious but does mean the texture becomes more tender with each day. If you love a distinct crumb layer, plan to serve them within 24 hours, and hold back the final sprinkle of red velvet crumbs until just before serving. I do not recommend freezing the assembled dessert cups, since the mousse can weep and the cream can turn grainy after thawing, though you can freeze extra baked cake for another batch of dessert cups or even to turn into cake pops. For the smoothest entertaining routine, bake and crumble the cake on day one, make your mousse and assemble the cups on day two, then chill until you are ready to bring them to the table beside something like my layered brownie parfaits or chocolate cookie crumble cups.
Ingredient swaps and serving options

Ingredients Image of Red Velvet Dessert Cups With Vanilla Mousse
You can bend these Red Velvet Dessert Cups With Vanilla Mousse to fit what you have on hand, or to meet different needs, without losing that pretty layered look. If you are out of buttermilk, stir 1 tablespoon of white vinegar or lemon juice into 1 cup of regular milk, then measure the 1/2 cup you need after it sits for about 5 minutes. You can also swap the vegetable oil for melted butter for a slightly richer, more traditional cake texture. If you need a red food coloring alternative, use beet powder or a natural liquid coloring, just know the shade will be softer and a little more rustic. For a cocoa forward flavor, increase the cocoa powder to 2 tablespoons and add 1 extra tablespoon of sugar to balance the bitterness.
The mousse layer in these Red Velvet Dessert Cups With Vanilla Mousse is flexible too, so truly use it as your template dessert. You can choose regular, lactose free, or plant based milk, though plant based pudding does set a bit softer so chill the cups a bit longer. Cream cheese can be swapped for mascarpone to make a more delicate, almost tiramisu style flavor, and the vanilla pudding can become cheesecake or white chocolate pudding for a fun twist. To lighten things up, fold in extra whipped cream and cut the powdered sugar by a couple of tablespoons. If you love a little crunch, sprinkle in mini chocolate chips, toasted coconut, or crushed cookies between the layers, similar to how I build texture in my individual trifle style custard desserts.
Serving these red velvet cups is where you can really play. Layer the cake and mousse in small mason jars for picnic ready treats, or use tiny shot glasses for an elegant tasting dessert table. For holidays or Valentine sleepovers, set out bowls of toppings along with your chilled Red Velvet Dessert Cups With Vanilla Mousse, and let everyone add chocolate curls, fresh berries, or extra red velvet crumbs. A drizzle of warm chocolate sauce or raspberry sauce right before serving makes them feel restaurant worthy in about ten seconds. You can even freeze the cups for about 30 minutes before serving for an almost semifreddo texture, just let them sit at room temperature for 5 to 10 minutes so the mousse softens again.

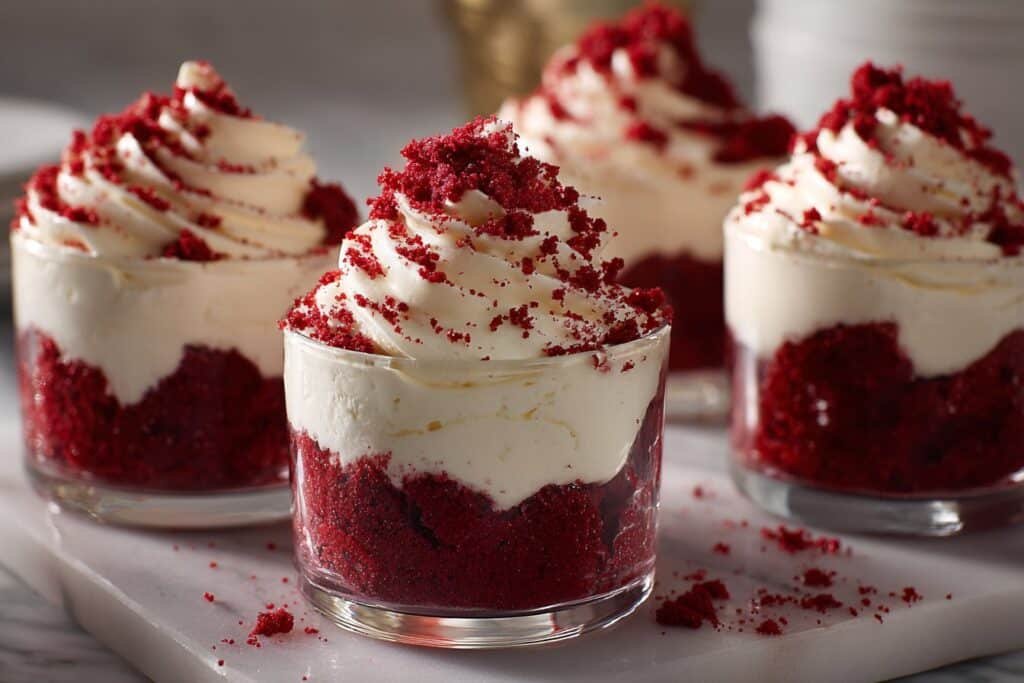
Serving Image of Red Velvet Dessert Cups With Vanilla Mousse
Conclusion
When I pull a tray of these little cups from the oven and top them with that cloud of mousse, the whole kitchen feels softer and happier. There is something sweetly nostalgic about cracking into a tender red velvet base and scooping up a bite filled with creamy vanilla. It is the kind of dessert that makes people lean in a little closer, linger at the table a little longer, and say, “Okay, maybe just one more.”
I love how a simple batch of Red Velvet Dessert Cups With Vanilla Mousse can turn an ordinary evening into a tiny celebration. You do not need a birthday or a holiday on the calendar, just a bit of time, some basic ingredients, and the willingness to treat yourself and the people you love. If you have been hesitating, consider this your gentle nudge to tie on an apron and give this recipe a try. I have a feeling it will become one of your “bring out the good spoons” desserts.
For more delicious recipes like this, follow us on Facebook and Pinterest!

Recipe Card Image of Red Velvet Dessert Cups With Vanilla Mousse
Recipe
Red Velvet Dessert Cups With Vanilla Mousse
Ingredients
Ingredients
- 1 1/4 cups all-purpose flour
- 1 tablespoon unsweetened cocoa powder
- 1/2 teaspoon baking soda
- 1/4 teaspoon salt
- 3/4 cup granulated sugar
- 1/2 cup buttermilk at room temperature
- 1/2 cup vegetable oil
- 1 large egg at room temperature
- 1 teaspoon vanilla bean paste
- 1 teaspoon white vinegar
- 1 tablespoon red food coloring
- 8 ounces cream cheese softened
- 1 cup cold whole milk
- 1 package instant vanilla pudding mix 3.4 ounces
- 1/2 cup powdered sugar
- 1 1/2 cups heavy whipping cream cold
- 1/2 cup red velvet cake crumbs reserved for garnish
Instructions
- Preheat the oven to 350°F and lightly grease an 8 inch square baking pan.
- In a medium bowl whisk together the flour, cocoa powder, baking soda, and salt.
- In a separate large bowl whisk the granulated sugar, buttermilk, vegetable oil, egg, vanilla bean paste, white vinegar, and red food coloring until completely smooth.
- Add the dry ingredients to the wet ingredients and stir gently just until no streaks of flour remain.
- Pour the batter into the prepared pan, smooth the top, and bake for 18 to 22 minutes, or until a toothpick inserted in the center comes out clean.
- Let the cake cool completely in the pan, then lift it out and crumble it with your hands into fine, soft crumbs, reserving 1/2 cup of the prettiest crumbs for garnish.
- In a large bowl beat the softened cream cheese with a mixer on medium speed until completely smooth and creamy.
- Add the cold milk and instant vanilla pudding mix to the cream cheese and beat until the mixture is thick, smooth, and well combined.
- Add the powdered sugar and beat again until the mousse base is silky and slightly thickened.
- In a separate bowl whip the cold heavy cream on medium high speed until soft peaks form that curl at the tips.
- Gently fold the whipped cream into the cream cheese pudding mixture in 2 to 3 additions until the mousse is light, fluffy, and no streaks remain.
- Spoon a layer of red velvet cake crumbs into the bottom of each dessert cup, using about 1/4 cup crumbs per cup for the first layer.
- Add a layer of vanilla mousse over the crumbs, using a spoon or piping bag to create an even layer.
- Repeat the layers of cake crumbs and mousse until the cups are filled, finishing with a smooth layer of mousse on top.
- Cover the cups and chill for at least 2 hours, or until the mousse is set and the flavors meld.
- Just before serving, sprinkle the reserved red velvet cake crumbs evenly over the tops of the cups for garnish.
Notes
- For neat layers, transfer the mousse to a piping bag or zip top bag and pipe it into the cups instead of spooning.