The Memory Behind This Treat
The very first time I tested these Red Velvet Cheesecake Cookies, it was one of those gray winter afternoons when the only logical answer is to turn on the oven. I remember standing at my counter with red food coloring on my fingers, wondering if the dough looked too bright and if the cream cheese centers would actually stay tucked inside. My daughter walked through the kitchen, stole one of the frozen cream cheese scoops from the tray, and announced, “This tastes like the middle of a cheesecake!” That was the exact moment I knew I was on the right track. I wanted a cookie that felt like a cross between a bakery-style red velvet cookie and a slice of cheesecake you’d order on a special night out.
These Red Velvet Cheesecake Cookies quickly became a holiday tradition, right up there with my red velvet cake and classic thumbprint cookies. I still remember the first Christmas I served them: a plate of deep red cookies with little cracks on top, everyone hovering, waiting to see how the inside looked. When someone broke one open and that tangy cream cheese filling stretched just a bit before melting back into the center, the room went quiet for a second—then I heard, “Okay, you have to make these every year.” What I love most is how simple they are behind the scenes: freeze the filling, chill the dough, then wrap one around the other like a little present. They look fancy on the plate, but they feel cozy and familiar, like something your grandma would have made if red velvet had been her thing.
Now, these cookies come out anytime I want something that feels a little romantic but still down-to-earth—Valentine’s Day, anniversaries, or just a Friday when the week’s been too long. The rich red velvet cookie with its hint of cocoa and a slight tang from the vinegar reminds me of old-fashioned layer cakes I used to style on set, but with far less fuss and a lot more fun. Every time I tuck those cream cheese scoops into their red velvet “blankets,” I think of that first test batch and the powdered sugar all over my counters, and I hope your kitchen feels just as happily messy and full of anticipation when you bake them.
How To Make It (Mix & Ingredients)
To make Red Velvet Cheesecake Cookies that actually hold their shape and don’t leak filling, you’ll prepare this recipe in two simple parts: the cheesecake center and the red velvet cookie dough. Start with the cream cheese filling, because it needs plenty of time to firm up. Beat the brick-style cream cheese, powdered sugar, and that spoonful of flour until completely smooth and glossy—no lumps hiding at the bottom of the bowl. Then scoop tiny mounds (about 2 teaspoons each) onto a wax paper–lined tray and freeze them solid for at least 2 hours. Don’t rush this; if the centers aren’t fully frozen, they’ll ooze out instead of staying as a creamy pocket inside the cookie.
Instructions Process of Red Velvet Cheesecake Cookies
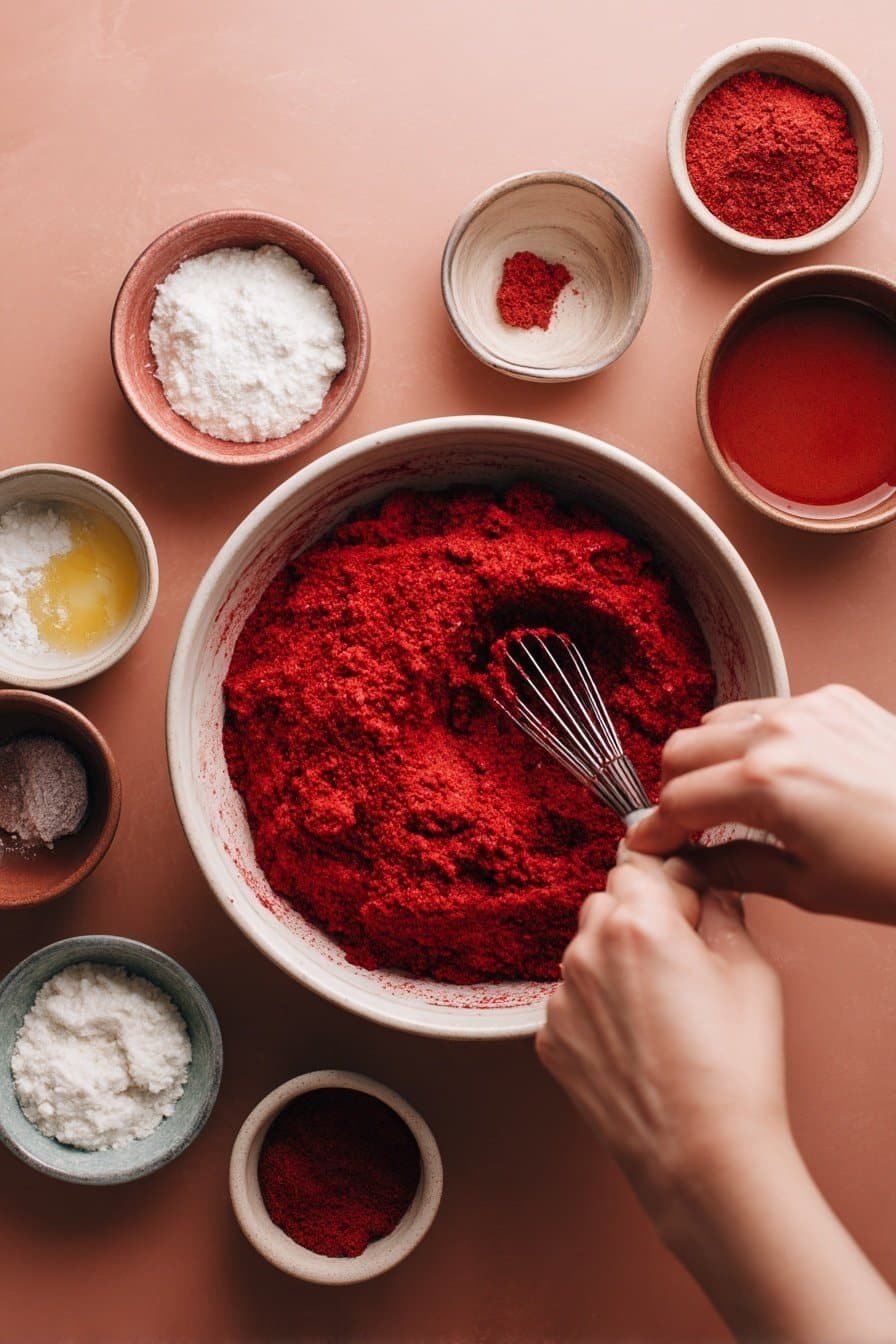
While the filling chills, you’ll move on to the red velvet cookie dough. Whisk together the dry ingredients: all-purpose flour, cocoa powder, baking soda, and salt, making sure there are no streaks of cocoa. In a separate large bowl, cream the softened butter with the brown sugar and granulated sugar until the mixture looks light and fluffy—this step gives your Red Velvet Cheesecake Cookies that soft, chewy texture. Beat in the egg, vanilla bean paste, vinegar, and red food coloring; the dough will look almost too bright at this stage, but it will calm down once you add the dry ingredients. Gently mix in the flour mixture just until no dry spots remain, then cover the bowl tightly and refrigerate the dough for at least 2 hours (or up to 48) so it firms up and the flavors develop. When you’re ready to bake, you’ll scoop, wrap the chilled dough around the frozen cream cheese balls, and, if you love a sparkly edge like on my sugar cookie bars, roll in extra granulated sugar before baking.
Make-Ahead & Storage
Red Velvet Cheesecake Cookies are a great make-ahead dessert because both the cheesecake center and the cookie dough love a good chill. The cream cheese filling can be scooped and frozen on a parchment-lined tray for up to 2 months; once solid, transfer the scoops to a freezer bag and squeeze out extra air. For the cookie dough, follow the recipe through mixing, then cover the bowl tightly and refrigerate for up to 48 hours. If you’d like to get even more ahead, you can fully assemble the stuffed cookie dough balls, freeze them on a tray until firm, then store in an airtight container or bag for 1–2 months. When baking from frozen, add 2–3 extra minutes to the bake time and keep an eye on the edges for doneness.
Once baked, let your Red Velvet Cheesecake Cookies cool completely before storing, or the steam will cause the cookies to turn soggy and the filling to weep. Store the cookies in a single layer in an airtight container in the fridge for 4–5 days; if you need to stack them, separate layers with parchment so the tops don’t stick. Because of the cream cheese filling, I don’t recommend leaving them at room temperature for more than 2 hours—treat them like mini cheesecakes. To serve, you can enjoy them cold for a firmer, fudge-like bite, or let them sit at room temperature for about 15–20 minutes for a softer center. If you love planning holiday trays in advance, you can pair a batch of these with something simple and sturdy like classic chocolate chip cookies for easy, low-stress entertaining.
Best Ingredients & Party Variations
For the very best Red Velvet Cheesecake Cookies, start with brick-style full-fat cream cheese. The low-fat tubs are great on bagels, but they make the filling too soft and prone to leaking. Use real unsalted butter, softened just until you can press a thumb in but still see some resistance—if it’s shiny or greasy, it’s too warm and your cookies will spread. A good-quality cocoa powder gives that classic red velvet flavor, so don’t skip it or you’ll end up with red sugar cookies instead of true red velvet. Gel red food coloring works best here; it gives rich color without watering down the dough, so a teaspoon or two is usually plenty. And if you want a prettier finish, use powdered sugar for the outer coating instead of granulated sugar—it gives a soft, snow-dusted look that’s perfect for Christmas cookie plates.
Once you’ve nailed the base, these Red Velvet Cheesecake Cookies are a dream for parties and holidays. For Christmas, roll the dough balls in red and green sanding sugar before baking, or drizzle cooled cookies with a simple white chocolate ganache like you might for holiday sugar cookies. For Valentine’s Day, press a few heart-shaped sprinkles into the tops right after baking, or add a tiny drop of strawberry jam on the cream cheese center for a “red velvet cheesecake thumbprint” feel. If you’re feeding a crowd, make the cookies smaller—about 1 tablespoon of dough per cookie with a slightly smaller cream cheese center—and reduce the bake time by 1–2 minutes. You can also build a dessert board with these cookies, dark chocolate brownies, and something bright like lemon bars so everyone gets a little sweet-and-tangy variety.
Serving of Red Velvet Cheesecake Cookies
Conclusion
Every time I pull a tray of these Red Velvet Cheesecake Cookies from the oven, I’m reminded that some of the sweetest moments in life are also the simplest: friends hovering by the counter, kids sneaking a still-warm cookie, someone closing their eyes for that first creamy, tangy bite. These little red gems aren’t just cookies; they’re an invitation to slow down, share a plate, and linger in the kitchen a little longer with the people you love.
I hope this recipe becomes one of those “go-to” traditions for you—the kind you pull out for Valentine’s Day, birthdays, office parties, or just because Tuesday needed a little extra sparkle. Don’t worry if they’re not picture-perfect the first time. The swirl, the filling, the shapes—they all tell the story that you made something with your own hands, in your own kitchen, for your favorite people.
When you’re ready, gather your ingredients, preheat your oven, and give this recipe a try. Then snap a photo, share your cookie magic, and tag us—For more delicious recipes like this, follow us on social media!
What makes these Red Velvet Cheesecake Cookies different from regular red velvet cookies?
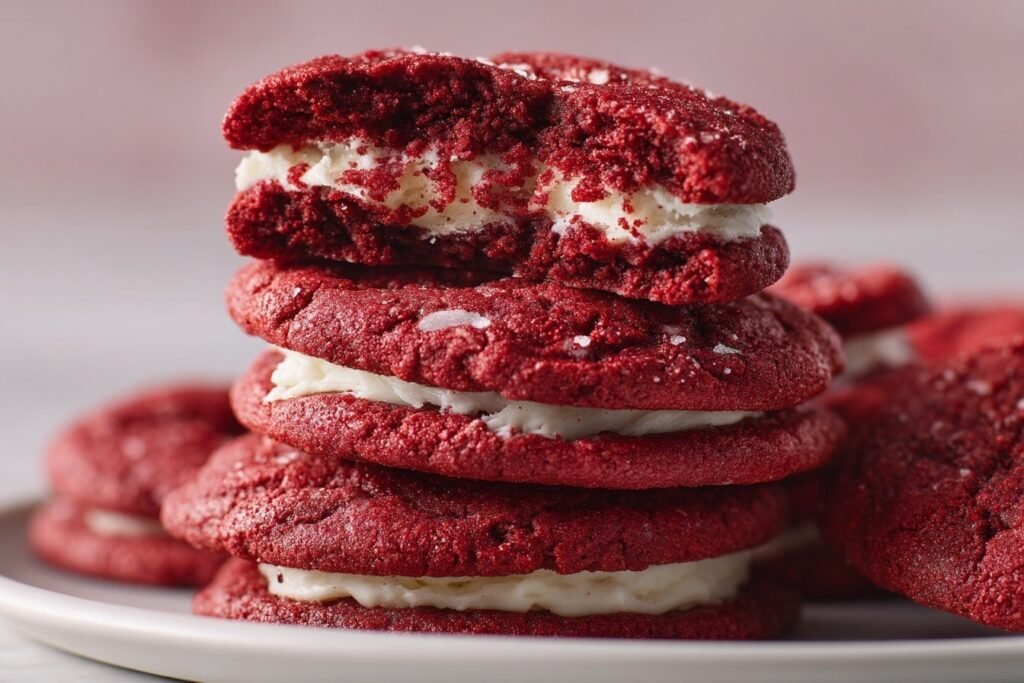
Red Velvet Cheesecake Cookies have a **hidden cream cheese center**, so you get the best of both worlds: soft red velvet cookie on the outside and tangy cheesecake on the inside. The cookie itself is chewy with cocoa and vanilla notes, while the chilled cream cheese filling bakes up creamy instead of runny. That contrast in flavor and texture is what makes them feel bakery-level special. They also hold their shape nicely thanks to chilling both the dough and the filling. If you love red velvet cake with cream cheese frosting, think of these as the handheld, extra-festive version.
How should I store Red Velvet Cheesecake Cookies and how long do they stay fresh?
Because of the cream cheese filling, always store these cookies in an airtight container in the **refrigerator**. Arrange them in single layers and separate layers with parchment so they don’t stick together. Properly stored, Red Velvet Cheesecake Cookies stay fresh for about 4–5 days. Let them sit at room temperature for 10–15 minutes before serving so the centers soften and the flavors bloom. If your kitchen is warm or you’re serving them at a party, keep a small plate out and the rest chilled, then replenish as needed.
Can I freeze Red Velvet Cheesecake Cookies or the dough for later?
Yes, these cookies freeze beautifully both **unbaked and baked**. For unbaked, freeze the scooped cream cheese centers separately and the stuffed dough balls on a parchment-lined tray, then transfer to a freezer bag for up to 2 months; bake from frozen, adding 2–3 minutes to the bake time. For already baked cookies, cool them completely, layer with parchment in a freezer-safe container, and freeze for up to 2 months. Thaw in the fridge, then let them sit at room temp briefly before serving. Freezing is a great way to have “just baked” Red Velvet Cheesecake Cookies ready for holidays or last-minute guests.
Recipe

Red Velvet Cheesecake Cookies
Ingredients
Ingredients
- 4 ounces brick-style full-fat cream cheese softened
- 3/4 cup powdered sugar
- 1 tablespoon all-purpose flour
- 1 2/3 cups all-purpose flour
- 3 tablespoons unsweetened cocoa powder
- 1/2 teaspoon baking soda
- 1/4 teaspoon salt
- 1/2 cup unsalted butter softened
- 1/2 cup light brown sugar packed
- 1/3 cup granulated sugar
- 1 large egg room temperature
- 1 teaspoon vanilla bean paste or vanilla bean paste
- 1 teaspoon distilled white vinegar
- 1 1/2 teaspoons red gel food coloring
- 1/3 cup granulated sugar for rolling (optional)
- 1 –2 tablespoons milk or heavy whipping cream
- 1 –2 cups powdered sugar for glaze
Instructions
- In a medium bowl, beat the cream cheese, 3/4 cup powdered sugar, and 1 tablespoon flour until smooth and creamy.
- Line a cookie sheet or plate with wax paper and scoop 2-teaspoon mounds of the cream cheese mixture onto the lined surface.
- Place the tray in the freezer and freeze the cream cheese scoops for at least 2 hours, or until very firm.
- In another medium bowl, whisk together 1 2/3 cups flour, cocoa powder, baking soda, and salt until well combined; set aside.
- In a large bowl, beat the softened butter, brown sugar, and 1/3 cup granulated sugar until light and creamy.
- Add the egg, vanilla bean paste, vinegar, and red food coloring to the butter mixture and beat until fully combined.
- Add the dry ingredients to the wet ingredients and beat on low speed just until no dry streaks remain.
- Cover the bowl tightly with plastic wrap and refrigerate the cookie dough for at least 2 hours or up to 48 hours, until firm.
- Once the dough is chilled and the cream cheese scoops are frozen, line baking sheets with parchment paper and set aside.
- Scoop about 1 to 1 1/2 tablespoons of cookie dough and roll it into a ball, then flatten it slightly and press the center to create a shallow bowl shape.
- Working with one cream cheese scoop at a time, remove a frozen scoop from the freezer and place it in the center of the dough.
- Scoop another 1 to 1 1/2 tablespoons of dough, flatten it slightly, and place it on top of the cream cheese filling.
- Pinch the edges of the top and bottom dough pieces together to fully seal in the cream cheese, then gently roll into a smooth ball, making sure no filling shows.
- If desired, roll each dough ball in the additional 1/3 cup granulated sugar to coat the outside.
- Place the filled dough balls on a parchment-lined tray, cover lightly, and freeze for at least 30 minutes, or until firm.
- When ready to bake, preheat the oven to 350°F and arrange the frozen dough balls on prepared baking sheets, spacing them at least 2 inches apart; do not thaw.
- Bake one sheet at a time in the center of the oven for 12–14 minutes, or until the tops look set and the edges are just firm.
- Allow the cookies to cool completely on the baking sheet so the centers can set before glazing.
- For the glaze, whisk 1 tablespoon milk with 1 cup powdered sugar until smooth, then add more milk or powdered sugar as needed until the glaze is white, smooth, and thin enough to drizzle.
- Drizzle the glaze over the cooled cookies using a spoon or by transferring it to a small bag with the tip snipped off, then let the glaze set before serving.
Notes
- Make sure the cookie dough fully seals the cream cheese center to prevent any leaking during baking.
- Chilling the dough and freezing the stuffed dough balls helps the cookies keep their shape and the filling stay creamy.
- These cookies store well in an airtight container in the refrigerator for up to 4 days; bring to room temperature before serving.