The Memory Behind This Treat
The first time I encountered a Red Velvet Cake was in my grandmother’s cozy kitchen, the air heavy with the scent of vanilla and a hint of cocoa. It was a Sunday afternoon, and the rain tapped a gentle rhythm on the windows, making the warmth inside feel even more inviting. My grandmother, with her flour-dusted apron and wise eyes, insisted on showing me her secret technique. She emphasized the importance of buttermilk to achieve that tender, moist crumb and how a touch of vinegar brought all the flavors together in perfect harmony.
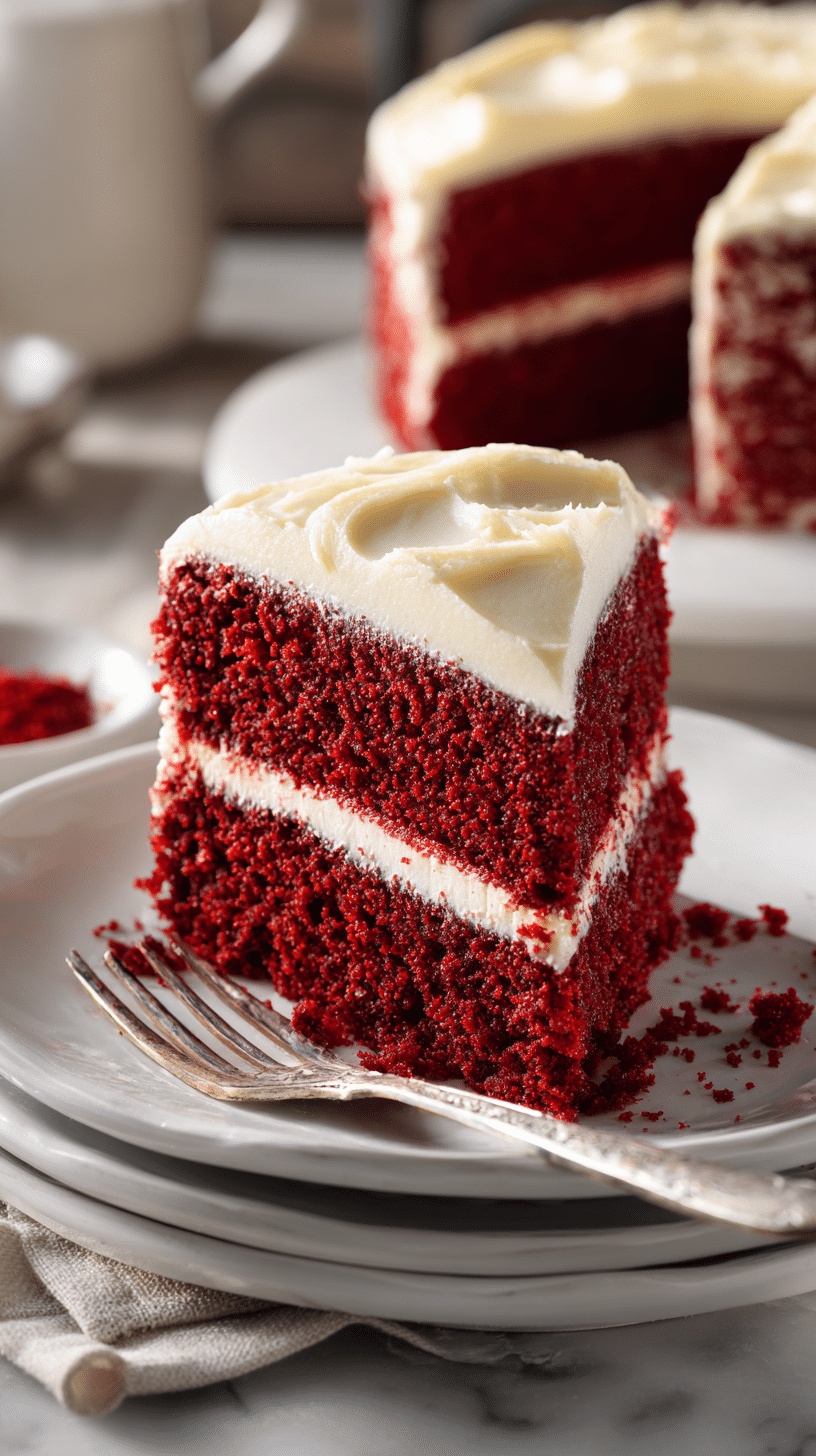
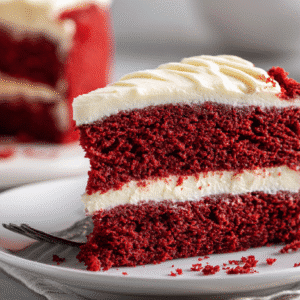
As she sliced into the cake, revealing its vibrant red layers, I remember the anticipation that filled the room. The cake was a masterpiece, crowned with a generous layer of tangy cream cheese frosting. Each bite was a revelation—a balance of flavors that danced on the palate. That day, I learned that the key to a perfect Red Velvet Cake wasn’t just in the ingredients, but in the love and history baked into each layer.
When I prepare this cake now, I’m transported back to those cherished afternoons. It’s more than just dessert; it’s a piece of family legacy. The recipe has been passed down, retaining its classic appeal while adapting to modern kitchens. Whether you’re a novice baker or a seasoned pro, this cake is a delightful journey into nostalgia, and perhaps, like me, you’ll find yourself making memories with each slice.
How To Make It (Mix & Ingredients)
Creating the perfect Red Velvet Cake involves a simple yet rewarding process, and I’m here to guide you through it with a bit of cozy kitchen wisdom. We’ll start by preheating your oven to 350°F (175°C). Get those two 9-inch round cake pans ready by greasing and flouring them, ensuring your cake layers release effortlessly.
First, in a large mixing bowl, whisk together the dry ingredients: 2 ½ cups all-purpose flour, 1 ½ cups granulated sugar, 1 teaspoon baking soda, 1 teaspoon salt, and 1 tablespoon unsweetened cocoa powder. The cocoa powder is subtle but essential for that classic red velvet flavor.
In a separate bowl, combine the wet ingredients: 1 cup buttermilk, 1 cup vegetable oil, 2 large eggs, 2 tablespoons red food coloring, 1 teaspoon white vinegar, and 1 teaspoon vanilla extract. Buttermilk is your secret weapon here, adding a tangy richness that keeps your cake irresistibly moist.

Step-by-step preparation of the Red Velvet Cake.
Now, gently blend the wet ingredients into the dry mixture. Use an electric mixer on low speed or mix by hand until everything is just combined. Be careful not to overmix; we want a tender crumb, not a tough one! Divide your batter evenly between the prepared pans and bake for 30-35 minutes. You’ll know they’re done when a wooden skewer inserted into the center comes out clean.
While the cakes cool, prepare the cream cheese frosting—this part is both fun and rewarding. Beat together the softened cream cheese and butter until fluffy, then gradually add 4 cups of sifted powdered sugar. A bit of vanilla extract and a pinch of salt tie it all together, creating a frosting that’s as delightful as a warm hug.
Once cooled, layer and frost your cakes with the cream cheese frosting, and there you have it—a classic Red Velvet Cake ready to impress. Enjoy every delightful bite!
Also Read: Indulge in Decadent Cherry Pistachio Cheesecake Bars Today
Make-Ahead & Storage
Making a Red Velvet Cake ahead of time can be a real lifesaver, especially when you’re expecting a crowd or planning a special occasion. Fortunately, this classic cake is quite forgiving and retains its delightful flavor and texture even after a few days.
Storing the Cake
Once your Red Velvet Cake is frosted with that luscious tangy cream cheese frosting, you can store it in an airtight container. It will keep well in the refrigerator for up to 5 days. The frosting helps lock in moisture, ensuring each slice remains as tender and delectable as the day you made it.
Freezing Tips
If you’re thinking long-term, this cake is a great candidate for freezing. Wrap individual unfrosted cake layers in plastic wrap and then aluminum foil before placing them in the freezer. They’ll last for up to 3 months. When you’re ready to enjoy, simply thaw the layers overnight in the fridge and frost with the cream cheese goodness. If you opt to freeze the cake after frosting, a quick chill in the freezer first will firm up the frosting, making it easier to wrap without smudging.
Quick Make-Ahead Guide
For those who love planning ahead, you can also prepare your frosting up to 5 days in advance. Store it in an airtight container in the refrigerator and give it a quick whip to restore its fluffiness before spreading onto the cake. This way, when the cake craving hits, you’re just a frosting session away from enjoying a slice of heaven.
Best Ingredients & Party Variations
When it comes to making the perfect Red Velvet Cake, choosing the right ingredients is key. Let’s start with the basics: buttermilk and vinegar. These two are the unsung heroes that give your cake its unique tenderness and slight tang. Buttermilk brings an irresistible moistness, while a splash of vinegar enhances the cake’s texture and brightens the red color. Don’t skimp on the cocoa powder either; just a tablespoon is enough to add that hint of chocolatey depth we all love.
Now, let’s talk about making your Red Velvet Cake the star of any celebration. For a birthday twist, consider adding a surprise layer. You can swirl in some raspberry jam between the cake layers for a sweet surprise that complements the tangy cream cheese frosting wonderfully. Or, if you’re hosting a holiday gathering, try incorporating some festive flair by dusting the top with crushed peppermint candies for a wintery touch.
For those who enjoy a little experimentation, why not try an almond extract in the frosting for a nutty kick, or even a hint of orange zest to lift the flavors and leave your guests guessing your secret ingredient? Remember, baking is all about creativity and fun. Each variation can transform your classic Red Velvet Cake into a unique culinary experience, perfect for any occasion.
FAQ’s About Red Velvet Cake
What is the flavor profile of red velvet cake?
Red velvet cake has a unique flavor that’s a delightful blend of mild cocoa and a slight tang from buttermilk. It’s not as intensely chocolatey as a traditional chocolate cake, which is part of its charm. The cream cheese frosting adds a rich, tangy contrast that complements the cake beautifully. The subtle cocoa, combined with the acidity from vinegar and buttermilk, creates a complex taste that’s both sweet and slightly sharp. It’s this delicate balance that makes red velvet cake so irresistible.
How is red velvet cake different from chocolate cake?
Although both cakes share cocoa as an ingredient, red velvet cake uses much less, resulting in a subtler chocolate flavor. The addition of buttermilk and vinegar gives red velvet its tender crumb and slight tanginess, setting it apart from the denser, richer chocolate cake. The signature red color, achieved with food coloring, doesn’t affect the taste but adds to its visual appeal. This unique combination of ingredients creates a cake that’s lighter in texture and flavor compared to a classic chocolate cake.
Why is red velvet cake so popular?
Red velvet cake’s popularity stems from its vibrant appearance and its creamy, tangy frosting that perfectly complements the cake’s mild sweetness. The color provides a dramatic presentation that makes it a favorite for special occasions and celebrations. Its flavor profile is versatile and pleasing to many palates, striking a balance between chocolate and vanilla. The nostalgia associated with its Southern roots also adds to its wide appeal, making it both a visual and taste sensation.
Is red velvet cake considered unhealthy?
Like most desserts, red velvet cake should be enjoyed in moderation. It contains sugar, flour, and vegetable oil, and the cream cheese frosting adds additional sugar and fat. However, it’s no more or less unhealthy than other cakes of its kind. You can make small adjustments, like using less sugar or a reduced-fat cream cheese, to tweak its nutritional profile. Remember, a slice of cake enjoyed occasionally can certainly fit into a balanced diet.
Conclusion
Baking a Red Velvet Cake isn’t just about achieving that perfect shade of red or the velvety texture. It’s about the joy it brings into your kitchen and the smiles it creates around your table. This cake is a celebration in itself—moist layers, tangy cream cheese frosting, and that mysterious secret ingredient that makes it unforgettable.
Every time I bake this cake, I’m reminded of the countless birthdays, anniversaries, and simple Sunday afternoons it’s graced in my home. There’s something magical about gathering loved ones and watching them savor each bite, creating memories that linger long after the last crumb is gone.
I hope this recipe inspires you to create your own special moments. Don’t hesitate to dive in and give it a try—you might just discover a new family favorite! For more delicious recipes like this, follow us on social media and join our cozy baking community.
Red Velvet Cake: Unveiling the Secret Ingredient for Moist Perfection
Ingredients
- 2 ½ cups all-purpose flour
- 1 ½ cups granulated sugar
- 1 teaspoon baking soda
- 1 teaspoon salt
- 1 tablespoon unsweetened cocoa powder
- 1 cup buttermilk
- 1 cup vegetable oil
- 2 large eggs
- 2 tablespoons red food coloring
- 1 teaspoon white vinegar
- 1 teaspoon vanilla bean paste
- 1 8-ounce package cream cheese, softened
- ½ cup unsalted butter softened
- 4 cups powdered sugar sifted
- 1 teaspoon vanilla bean paste
- Pinch of salt
Instructions
- 1. Preheat oven to 350°F (175°C). Grease and flour two 9-inch round cake pans.
- 2. In a large bowl, whisk together flour, sugar, baking soda, salt, and cocoa powder.
- 3. In a medium bowl, whisk together buttermilk, oil, eggs, food coloring, vinegar, and vanilla.
- 4. Gradually add wet ingredients to dry ingredients, mixing until just combined.
- 5. Divide batter evenly between prepared pans. Bake for 30-35 minutes until a skewer comes out clean.
- 6. Cool cakes in pans for 10 minutes, then invert onto a wire rack to cool completely.
- 7. For frosting, beat cream cheese and butter until fluffy. Gradually add powdered sugar, beating until smooth.
- 8. Mix in vanilla bean paste and salt.
- 9. Frost cooled cakes with cream cheese frosting. Serve and enjoy.