The Practical Why Behind It
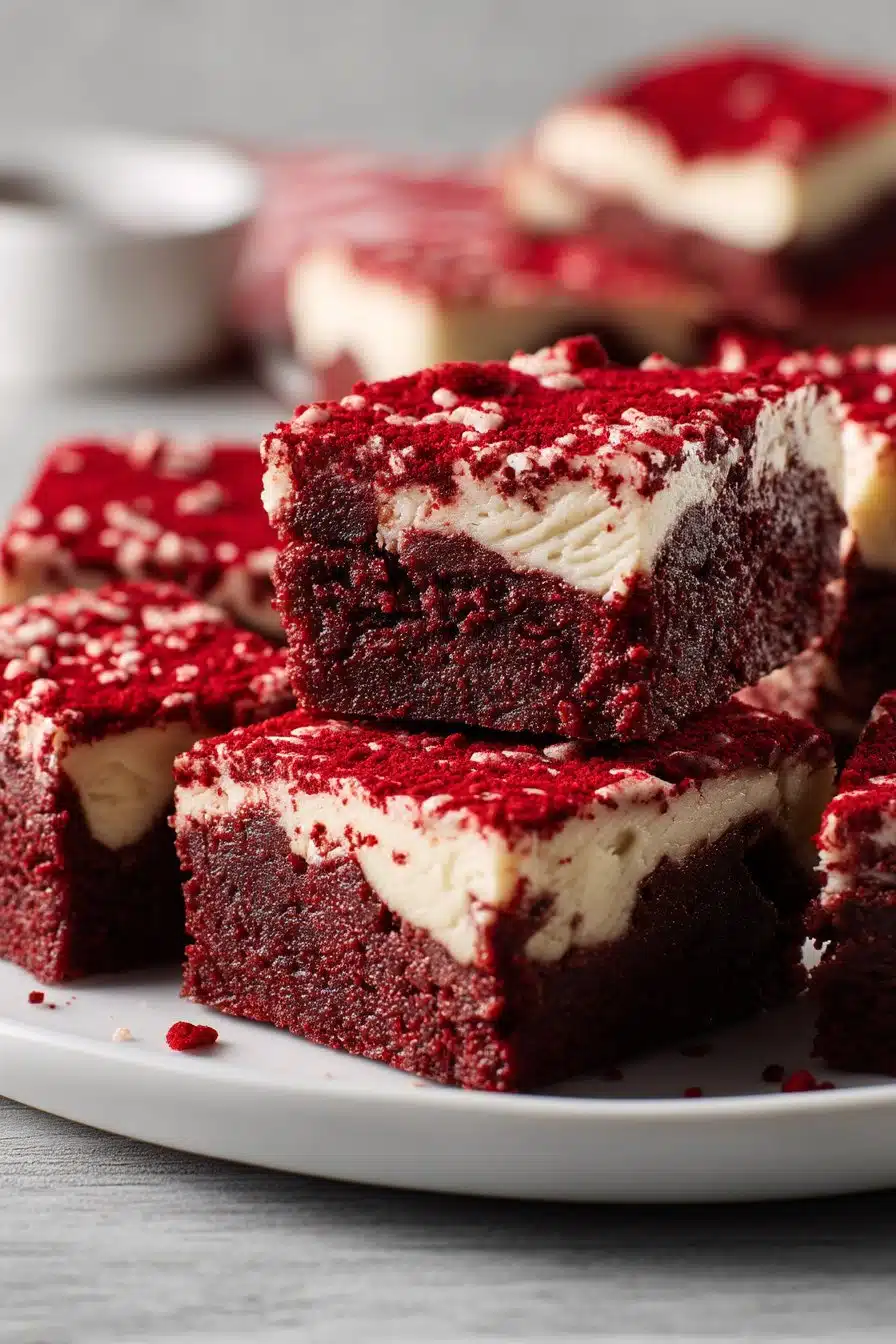
These Red Velvet Brownies give you that bakery style crackly top and thick fudgy middle without any fussy steps. You get all the drama of a pretty marbled cream cheese swirl, but you still only use one main bowl and an everyday 8 by 8 inch pan.
Melting the butter instead of creaming it with sugar helps create that shiny, delicate crust on top and keeps the texture dense and chewy instead of light and cakey. A small spoonful of cocoa powder is enough to bring that gentle red velvet flavor while letting the red color stay bright instead of turning brown. The vanilla bean paste works in both the brownie batter and the cream cheese swirl, so every bite tastes layered and intentional instead of random. Swirling the cream cheese in two stages gives you clear, creamy pockets that stay soft and tangy instead of disappearing into the batter.
From a practical weeknight angle, this batter skips chopped chocolate and long mixing. You whisk, fold, and you are done. You only need one bowl for the brownie layer and a quick separate mix for the swirl. Baking in an 8 by 8 inch pan gives your Red Velvet Brownies enough height to feel indulgent, but they still bake through in about 25 to 30 minutes. Pull them from the oven when a toothpick shows a few moist crumbs instead of wet batter, and the center will set into a rich, fudgy texture as it cools while the cream cheese stays creamy at the edges.
The ingredients stay close to pantry basics, so you can say yes to last minute bake sales, holiday dessert trays, or cozy Sunday baking without a special store run. If you fall in love with this method, you can use the same idea of melted butter, light cocoa, and a creamy swirl in cheesecake bars or blondies for other easy desserts that still feel a little dressed up.
Step-by-Step Method
Heat your oven to 350°F (175°C). Line an 8 by 8 inch metal baking pan with parchment paper, letting the paper hang over the sides so you can lift the Red Velvet Brownies out in one clean move. Lightly mist the parchment with cooking spray if your pan tends to stick.
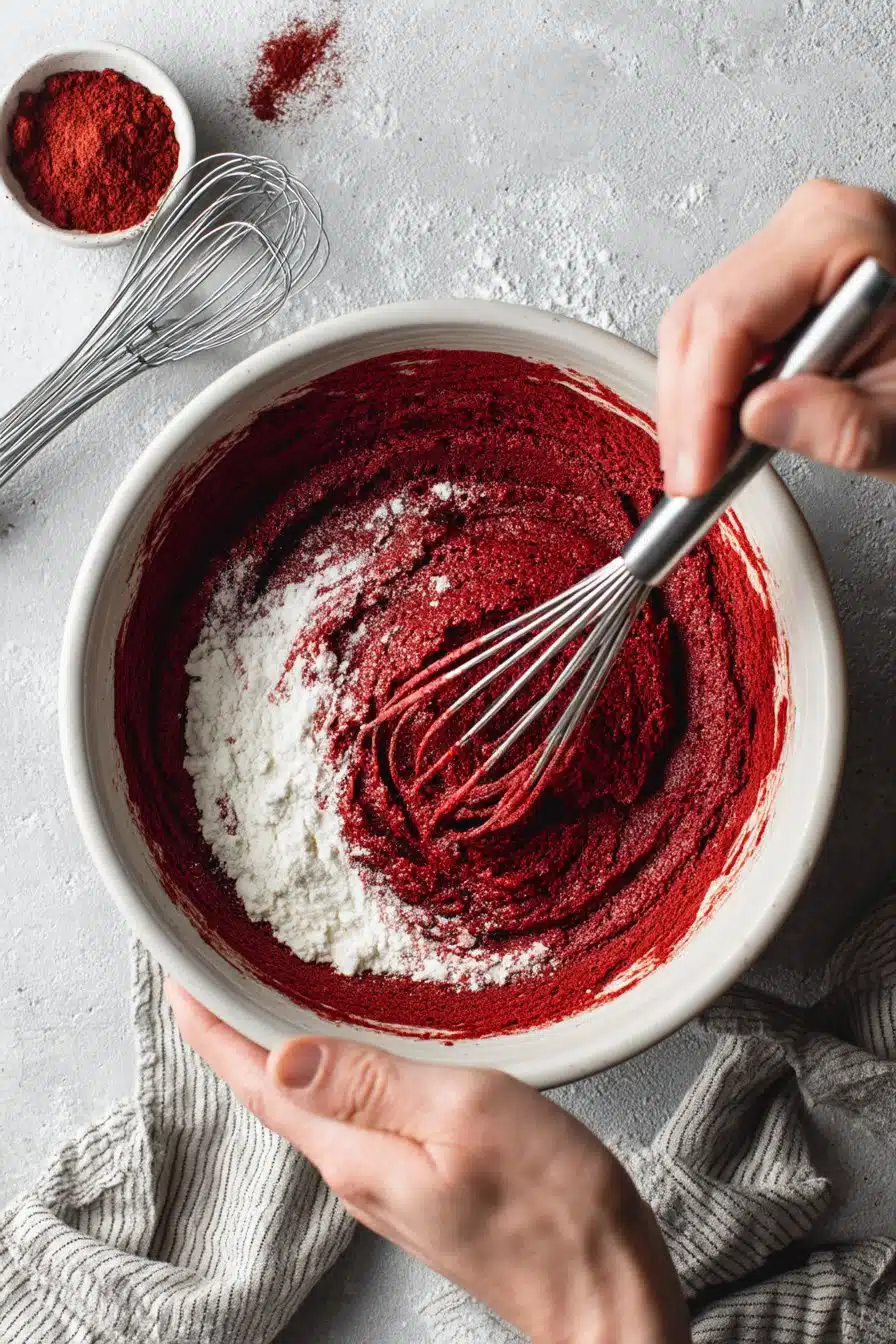
In a large mixing bowl, whisk the melted butter and sugar together until the mixture looks thick, glossy, and slightly lighter in color, about 1 to 2 minutes of steady whisking. The sugar should start to dissolve and the mixture will feel a bit heavy on the whisk. Add the eggs one at a time, whisking well after each so the batter looks smooth and satiny. Whisk in the vanilla bean paste, cocoa powder, and red food coloring until the color is even and the batter looks like liquid red velvet cake with no streaks.
Switch to a spatula and gently fold in the flour, baking powder, and salt just until you no longer see dry flour. Scrape the bottom and sides of the bowl as you go, but stop as soon as everything is combined. The batter should feel thick and ribbon off the spatula in slow folds. Overmixing here can make the brownies more cake like instead of fudgy.
For the cream cheese swirl, place the softened cream cheese in a medium bowl. Beat with a hand mixer or a sturdy whisk until smooth and lump free. Add the sugar, vanilla bean paste, and egg. Mix again until the mixture looks creamy and pourable with no visible bits of cream cheese. Scrape the bowl so everything blends evenly.
Pour half of the red velvet brownie batter into your prepared pan and spread it into an even layer that reaches all four corners. Take your time to smooth the surface so the swirl can sit nicely on top. Drop spoonfuls of half the cream cheese mixture over the batter, spacing them a couple of inches apart. Use a butter knife or skewer to gently swirl the two together in loose figure eights. Aim to drag through the batter just enough to pull the colors together while still seeing clear ribbons of red and white.
Pour the remaining brownie batter over the top and spread it carefully, trying not to disturb the first swirl too much. Repeat with the remaining cream cheese mixture, dropping spoonfuls over the surface. Swirl lightly again, this time making fewer passes so you keep bold marbled streaks instead of blending everything into one pinkish color. When it looks like a marbled cheesecake top, you are there.
Slide the pan into the oven and bake for 25 to 30 minutes. The edges should look set and slightly pulled away from the parchment, and the center should puff just a bit. Insert a toothpick or thin skewer near the center. You want to see a few moist, fudgy crumbs clinging to it, not wet batter and not a completely dry pick. The top will look shiny with a few small cracks.
Place the pan on a wire rack and let the Red Velvet Brownies cool completely in the pan. For neat bakery style squares, chill the cooled pan for at least 30 minutes to 1 hour. Use the parchment overhang to lift the whole slab out, then cut with a long, sharp knife, wiping the blade clean between each cut so the cream cheese swirl stays sharp and pretty. Serve them as they are, or finish with a light dusting of powdered sugar or a thin drizzle of melted chocolate for an extra special tray.
Make-Ahead and Storage Notes
Red Velvet Brownies actually taste even better a few hours after baking, once the fudgy center has time to settle and the cream cheese swirl firms up slightly in the fridge. If you plan to make them ahead for a party or potluck, bake as directed and let the pan cool completely at room temperature. Cover the pan tightly with plastic wrap or a fitted lid and refrigerate for up to 3 days before slicing.
For the cleanest bakery style squares, chill the whole pan for at least 2 hours. Then lift the brownies out by the parchment and cut with a long, sharp knife. Run the knife under hot water, dry it, and wipe between each cut. If fridge space is tight, you can cut the brownies first, then store them in a single layer in an airtight container. If you need to stack them, place a sheet of parchment or wax paper between layers to protect the cream cheese tops.
Because of the cream cheese swirl, avoid leaving these Red Velvet Brownies at room temperature longer than about 4 hours. For serving, I like to pull them from the fridge 15 to 20 minutes before dessert. This takes the chill off, softens the texture, and lets the vanilla and cocoa flavors open up.
If you want to freeze them, chill the baked slab completely, cut into squares, then wrap each brownie tightly in plastic wrap. Place the wrapped squares in a freezer bag or container and freeze for up to 2 months. To serve, thaw the brownies in the refrigerator overnight, then let them come to room temperature for that same rich, fudgy bite you get on day one. They hold their color and swirl beautifully, so they are perfect for make ahead dessert trays next to cheesecake bars, cookie assortments, or classic brownies.
Variations and How to Serve It
You can take these Red Velvet Brownies in a few fun directions without losing that rich, tangy character. For an extra indulgent pan, fold ½ cup of white chocolate chips or mini semi sweet chips into the brownie batter before you add it to the pan. The chips will melt into little pockets and give you extra sweetness against the tangy swirl.
If you love a deeper cocoa flavor, increase the cocoa powder by 1 tablespoon and reduce the red food coloring slightly so the batter does not go too dark. A light sprinkle of flaky sea salt over the top right after baking adds a lovely contrast that cuts the sweetness and makes the chocolate notes stand out.
For holiday Red Velvet Brownies, shower the top with red and white sprinkles as soon as the pan comes out of the oven, while the surface is still warm. You can also swirl a spoonful or two of raspberry jam into the cream cheese mixture before adding it to the pan for a pretty berry ribbon that tastes like cheesecake and red velvet together.
If you need something easy to serve at a party, bake the batter in a lined muffin tin for individual brownie bites. Fill each cup about two thirds full and add small dollops of cream cheese mixture on top, then swirl gently with a toothpick. Start checking for doneness around 16 to 18 minutes. The tops should look set, and a toothpick should come out with a few moist crumbs.
These Red Velvet Brownies already feel party ready, but a few serving tricks make them feel truly bakery worthy at home. For clean, sharp edges, always chill before cutting and wipe your knife often. Serve them slightly chilled for a firmer, cheesecake like bite, or let them sit out until they are closer to room temperature if you want the center to taste extra fudgy and almost truffle like.
For a simple plated dessert, warm a square in the microwave for 10 to 15 seconds, then add a scoop of vanilla ice cream, a drizzle of chocolate or salted caramel sauce, and a handful of fresh berries. If you are planning a dessert bar with treats like classic brownies, chewy sugar cookies, or chocolate chip blondies, cut these into smaller 1½ inch squares so guests can sample a bit of everything. They tend to be the first plate to empty.
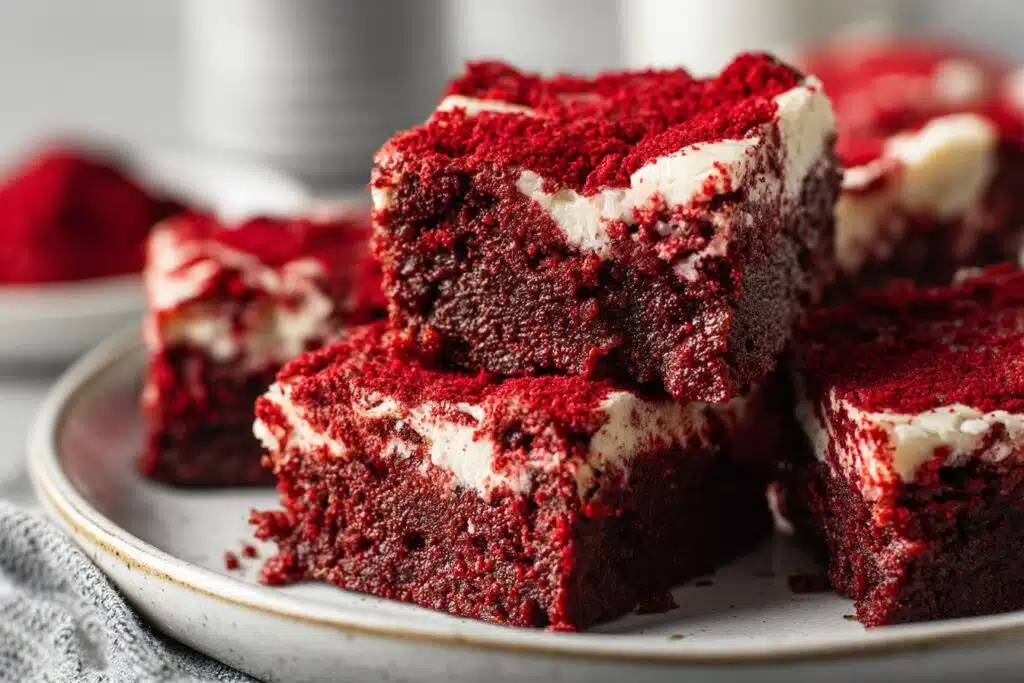
Serving of Red Velvet Brownies
Conclusion
When I pull a pan of these Red Velvet Brownies from the oven, the whole kitchen seems to lean in a little closer. The top crackles softly as it cools, the air smells like warm vanilla and cocoa, and suddenly everyone has a reason to wander through and ask, “Are they ready yet?”
Whether you serve them still slightly warm with melting scoops of ice cream or slice them into neat squares for a birthday, bake sale, or office surprise, these brownies have a way of making people linger at the table just a bit longer. I hope this recipe finds a spot in your regular rotation, tucked into a binder with a few smudges of red batter along the edges.
When you make a batch, let it be an excuse to slow down, share a plate with someone you love, and savor that first fudgy, tangy bite together.
Instructions Process of Red Velvet Brownies
Recipe

Red Velvet Brownies
Ingredients
Ingredients
- 1 cup unsalted butter melted
- 1 1/2 cups granulated sugar
- 2 large eggs
- 2 teaspoons vanilla bean paste divided
- 1 tablespoon unsweetened cocoa powder
- 1 1/2 cups all-purpose flour
- 1/2 teaspoon baking powder
- 1/4 teaspoon salt
- 3 tablespoons liquid red food coloring
- 8 ounces cream cheese softened
- 1/4 cup granulated sugar
- 1 large egg
Instructions
- Preheat the oven to 350°F. Grease or line an 8x8 inch baking pan with parchment paper.
- In a large bowl, whisk together the melted butter and 1 1/2 cups granulated sugar until thick and glossy.
- Whisk in 2 eggs, 1 teaspoon vanilla bean paste, cocoa powder, and red food coloring until smooth and evenly colored.
- Using a spatula, fold in the flour, baking powder, and salt just until no dry streaks remain.
- In a separate bowl, beat the cream cheese until smooth, then add 1/4 cup granulated sugar, 1 teaspoon vanilla bean paste, and 1 egg and mix until creamy.
- Pour half of the red velvet brownie batter into the prepared pan and spread into an even layer.
- Drop spoonfuls of half of the cream cheese mixture over the batter and gently swirl with a knife.
- Pour the remaining brownie batter over the swirled layer and spread carefully to cover.
- Drop spoonfuls of the remaining cream cheese mixture over the top and swirl lightly to create a marbled pattern.
- Bake for 25 to 30 minutes, until a toothpick inserted near the center comes out with a few moist crumbs.
- Let cool completely in the pan on a wire rack, then cut into 16 squares and serve.
Notes
- For cleaner slices, chill the cooled pan of brownies in the refrigerator for 30 to 60 minutes before cutting.