What Makes This Recipe Reliable
I built this Princess Fudge recipe the same way I test my low carb treats, by repeating it until it behaves the exact same way every time. The ingredient ratios are carefully balanced so the fudge sets firm enough to slice cleanly, yet still feels soft and creamy on your tongue. Using a full bag of white chocolate chips with condensed milk creates a stable base, and the added cake mix thickens the mixture just enough to hold those pretty swirls without turning grainy. I also keep the cooking temperature low and the stirring frequent, which protects the chocolate from scorching and keeps the texture silky instead of chalky.
You can trust this Princess Fudge to look party ready, even if you do not consider yourself a confident baker. The instructions tell you exactly when to stop heating, how long to stir in the cake mix, and how to pour the two colors so the swirls form naturally. Because the fudge self levels, you do not need to fuss with spreading or smoothing, which removes a big source of stress for newer cooks. The overnight chill time might feel long, but it is what guarantees clean edges and neat squares, instead of a sticky, half set mess.
I also wrote this recipe with real life kitchens in mind, not just picture perfect test studios. If your stovetop runs hot, keeping the heat on low and using a heavy saucepan gives you a buffer, so the chocolate melts gently instead of seizing. The measurements are flexible enough that if your bag of chips is a gram or two off, your Princess Fudge will still set beautifully. With clear visual cues, simple tools, and a forgiving method, this is the kind of recipe you can make ahead for a birthday, a holiday tin, or a unicorn themed movie night and know it will turn out the same way every single time.
The Method (Step-by-Step)
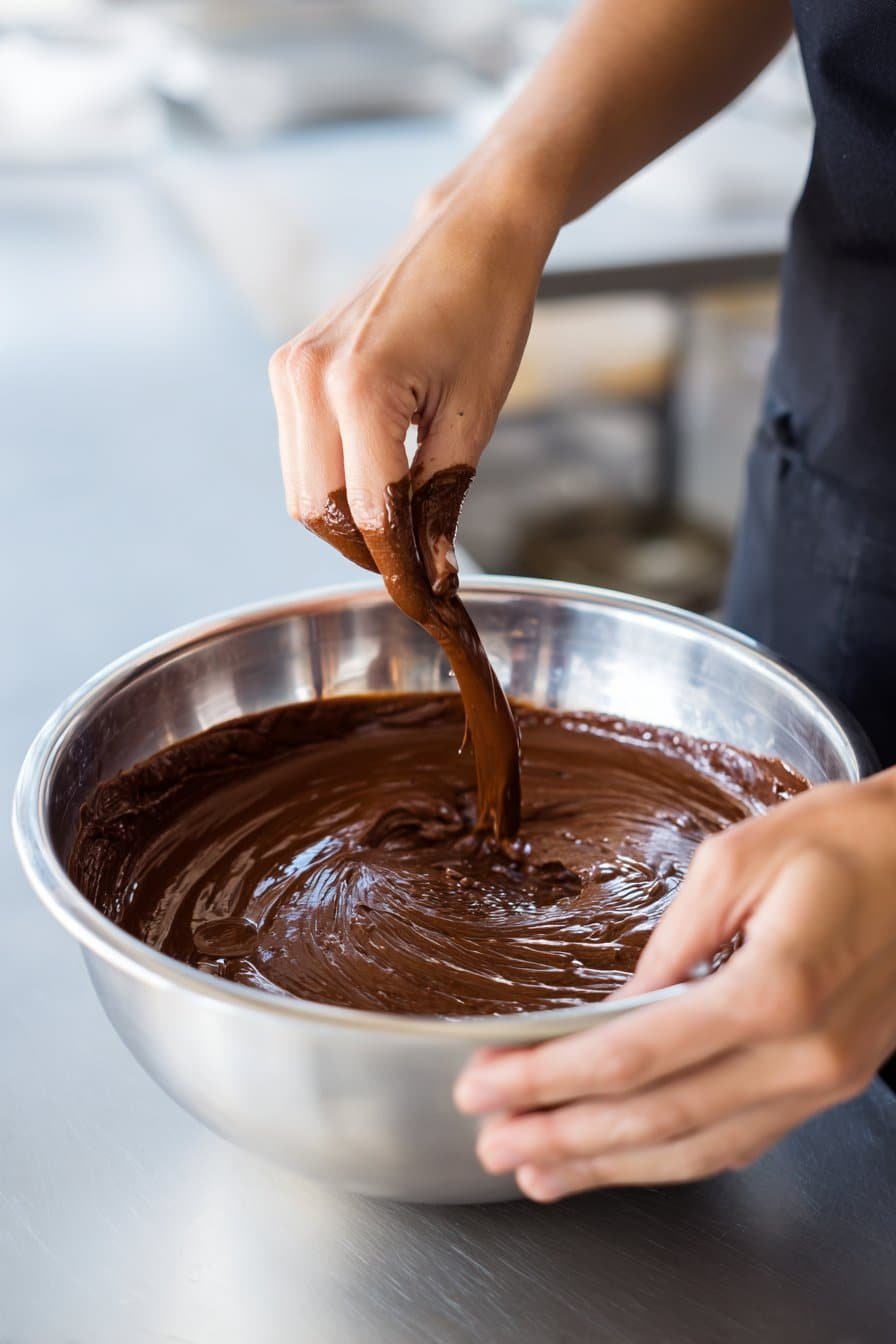
Start by lining an 8 by 8 inch pan with parchment, letting some overhang so you can lift the Princess Fudge out later without a wrestling match. In a large, heavy saucepan, add the white chocolate chips, condensed milk, and softened butter, then set the heat to low. Stir slowly but constantly with a rubber spatula, scraping the bottom and sides so nothing scorches, until the mixture turns smooth, glossy, and fully melted, which usually takes about 8 to 10 minutes. If you see tiny unmelted bits, take the pan off the heat and keep stirring for another minute or two, letting the residual heat finish the job instead of cranking the burner higher.
Once the mixture is silky, remove it from the heat and quickly stir in the heat treated cake mix until no streaks remain and the fudge base looks uniform and thick. Now divide the mixture into two heat safe bowls, tint one with a few drops of neon pink gel food coloring and the other with purple, stirring each until the color is even. Sprinkle about half of your unicorn sprinkles into the two bowls and gently fold them in so they stay mostly intact. Working fairly quickly, spoon the colored mixtures into the prepared pan in alternating blobs and ribbons, which helps create those magical swirls that make Princess Fudge so party perfect.
Take a thin knife and drag it through the fudge in gentle back and forth lines, then rotate the pan and repeat side to side to create a pretty marbled pattern without over mixing into one muddy color. The fudge should settle and self level, so resist the urge to press or spread it too much. Immediately scatter the remaining sprinkles over the top and lightly tap the pan on the counter so they set into the surface. Chill the pan in the refrigerator for at least 6 hours, or overnight for the cleanest cuts, then lift the slab out by the parchment and slice into 12 neat squares with a sharp knife, wiping the blade between cuts for picture ready pieces.
Keep It Fresh: Timing and Storage
Princess Fudge looks like a party on a plate, but it behaves a lot like any soft, rich candy. Once your pan has chilled overnight and you have cut it into neat squares, you will want to think about air, warmth, and moisture. For the best texture, let the fudge sit at room temperature for about 10 to 15 minutes before serving, especially if it has been in the refrigerator. This takes the chill off and brings back that creamy, melt in your mouth feel. If you are serving it at a party, keep the Princess Fudge on a cool counter and avoid setting it near the oven or a sunny window, since the swirls can soften and smudge.
For short term storage, place the squares in a shallow airtight container, and separate layers with parchment so the sprinkles do not stick together. In the refrigerator, Princess Fudge keeps its flavor and color for about 7 to 10 days, as long as you keep the lid on tight and avoid strong smelling foods like onions or garlic nearby. For longer storage, you can freeze it for up to 2 months. Wrap each piece in parchment or plastic, then tuck them into a freezer safe container. To thaw, move the fudge to the refrigerator overnight, then let it rest on the counter for 15 minutes before serving, so the texture stays smooth instead of turning crumbly or sweaty on the surface.
If you plan to gift this pretty dessert, pack the Princess Fudge in small parchment lined boxes and remind your lucky recipient to refrigerate it once they get home. It can sit out at room temperature for about 2 to 3 hours during a party or in a lunchbox, but any longer and you risk soft edges and dull colors. I like to set out only what we will eat in one sitting, then keep the rest chilled so every square stays bright, creamy, and party ready. This simple timing and storage routine protects the flavor, keeps the pink and purple swirls vibrant, and helps you enjoy every bite without waste.
Swaps, Variations, and Serving Ideas
If you want this Princess Fudge to lean more low carb and higher protein, start with your base. Swap regular white chocolate chips for no sugar added white chocolate chips, and use a thick unsweetened condensed milk alternative made from cream, almond milk, or coconut cream sweetened with an erythritol blend. You can also whisk 1 to 2 scoops of unflavored or vanilla whey or egg white protein powder into the warm mixture after it melts, then loosen it with a tablespoon or two of heavy cream if it feels too thick. For a softer set and fewer carbs, replace part of the cake mix with fine almond flour plus a teaspoon of vanilla and a few drops of cake batter flavoring. Choose sugar free sprinkles or colored shredded coconut instead of regular unicorn sprinkles to keep your Princess Fudge more blood sugar friendly.
For flavor twists, think about the princess at the party. Add a half teaspoon of strawberry or raspberry extract to the pink portion for a berry wand version, or use almond extract and a pinch of salt for a marzipan style Princess Fudge that feels extra grown up. You can also split the batch into three bowls and create pink, purple, and teal swirls for a full unicorn effect, just work quickly so the fudge does not start to set before you pour and swirl. If you love crunch, fold in chopped toasted pecans or macadamias to half the batch and leave the other half smooth for picky eaters. A sprinkle of unsweetened coconut flakes or crushed freeze dried berries on top adds color and texture without piling on sugar.
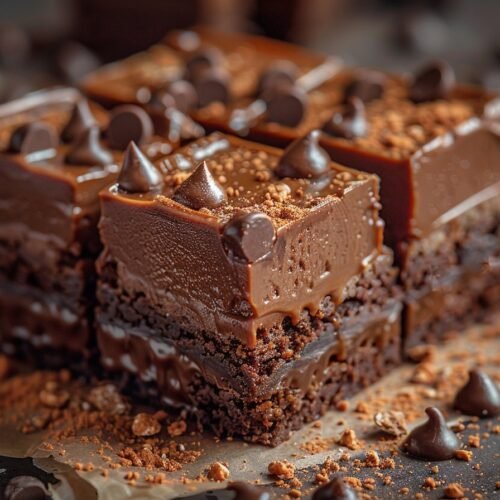
For serving, cut the chilled Princess Fudge into very small squares or rectangles so you get built in portion control, especially if you are watching carbs or managing diabetes. I like to tuck pieces into mini paper candy cups and arrange them on a tiered stand for a birthday or baby shower, or pack them into a parchment lined tin for gifting. You can also create a simple Princess Fudge platter with fresh berries, cheese cubes, and a few nuts so there is protein and fiber on the table along with the sweetness. If you have leftovers, chop them into tiny cubes and use them as a topping over low carb vanilla yogurt or a small scoop of sugar free ice cream for a very royal sundae.
Serving of Princess Fudge
Conclusion
I still smile thinking about the first time I set a tray of this fudge on the table and watched everyone’s faces soften into that “oh wow” expression. There is something quietly magical about a treat that feels nostalgic and indulgent, yet still supports your blood sugar and low carb goals. It reminds us that we do not have to step away from joy to take care of our bodies. We can have both, one creamy square at a time.
I hope this Princess Fudge becomes one of those recipes you pull out for birthdays, movie nights, holidays, and those random Tuesday evenings when you just need a little comfort. Let it be the thing you share with your kids or grandkids while you tell old family stories, or the dessert you bring to a gathering that surprises everyone when they find out it is low carb and high protein. Food has such a beautiful way of pulling us close, and this little pan of sweetness fits right into that story.
If you have been craving a treat that loves you back, this is your sign to head into the kitchen and give it a try. You deserve something delicious that also supports your health. And if you enjoy it, I would love for you to stick around and bake, stir, and taste with me again.
For more delicious recipes like this, follow us on Facebook and Pinterest!
Instructions Process of Princess Fudge
Recipe
Princess Fudge
Ingredients
Ingredients
- 11 oz white chocolate chips
- 14 oz sweetened condensed milk
- 2 tbsp salted butter softened
- 1/4 cup white cake mix heat treated and cooled
- 1 cup unicorn sprinkles divided
- Neon pink gel food coloring
- Purple gel food coloring
- Nonstick spray or extra butter for greasing pan optional
- Parchment paper for lining pan
Instructions
- Line an 8x8 inch baking pan with parchment paper, leaving overhang on two sides for easy lifting. Lightly grease the parchment if desired.
- In a large heavy saucepan, combine the white chocolate chips, sweetened condensed milk, and softened butter.
- Set the pan over low heat and cook, stirring constantly with a rubber spatula, until the mixture is completely melted, smooth, and glossy, about 8 to 10 minutes. Do not increase the heat.
- Remove the saucepan from the heat and immediately stir in the heat treated white cake mix until fully dissolved and no streaks remain.
- Divide the warm fudge mixture evenly between two heat safe bowls.
- Tint one bowl with neon pink gel food coloring and the other with purple gel food coloring, stirring each until the color is uniform.
- Add about 1/2 cup of the unicorn sprinkles, divided between the two bowls, and gently fold them into each colored mixture.
- Working quickly, spoon the pink and purple fudge mixtures into the prepared pan in alternating blobs and ribbons to create a random pattern.
- Use a thin knife to gently swirl the colors together by dragging the knife back and forth across the pan, then side to side, without over mixing the colors.
- Sprinkle the remaining 1/2 cup unicorn sprinkles evenly over the top of the fudge and lightly tap the pan on the counter so they adhere.
- Refrigerate the pan for at least 6 hours, or overnight, until the fudge is firm and fully set.
- When ready to serve, lift the fudge slab out of the pan using the parchment overhang and place it on a cutting board.
- Use a sharp knife to cut the fudge into 12 equal squares, wiping the blade between cuts for clean edges.
Notes
- Keep the heat on low while melting the chocolate to prevent scorching or seizing.
- Store fudge squares in an airtight container in the refrigerator for up to 1 week, separating layers with parchment paper.
- Let chilled fudge sit at room temperature for 10 to 15 minutes before serving for the creamiest texture.