The Memory Behind This Treat
The first time I tasted a Pineapple Upside-down Cheesecake, I was in my grandmother’s sunny kitchen, where the scent of caramelized pineapple and sweet butter always floated through the air. She would pull out her cherished cast iron skillet, carefully arranging pineapple rings and cherries in perfect circles before pouring in her golden cake batter. As a child, my job was to sneak the cherries (and maybe a little brown sugar) while she wasn’t looking. That classic pineapple upside-down cake was the star of every summer birthday, but it wasn’t until years later—after a visit to The Cheesecake Factory—that I realized you could combine two beloved desserts into something even more magical.
Inspired by that memory, I started tinkering in my own kitchen. The idea for Pineapple Upside-down Cheesecakes came from wanting to create a dessert that was both nostalgic and a little unexpected—a treat that would make my family pause after the first bite and say, “Wait, is that cheesecake in the middle?” There’s something irresistible about the way the buttery pineapple topping melts into the pillowy cake, but when you add a creamy pineapple cheesecake layer, it becomes a showstopper. I remember the first time I flipped the cake out of the pan, holding my breath, hoping the pineapple rings would stay perfectly in place. Spoiler: They did, and the maraschino cherries gleamed like little jewels.
This recipe quickly became a favorite at every family gathering, from backyard barbecues to cozy winter potlucks. It’s the kind of dessert that sparks conversation and brings generations together—my dad reminiscing about his first slice of pineapple upside-down cake, my niece asking for “extra pineapple, please.” If you love classics with a twist, like my Banana Pudding Cheesecake Bars or Old-Fashioned Coconut Cream Pie, you’ll adore these Pineapple Upside-down Cheesecakes. They’re a little tropical, a little retro, and absolutely unforgettable.
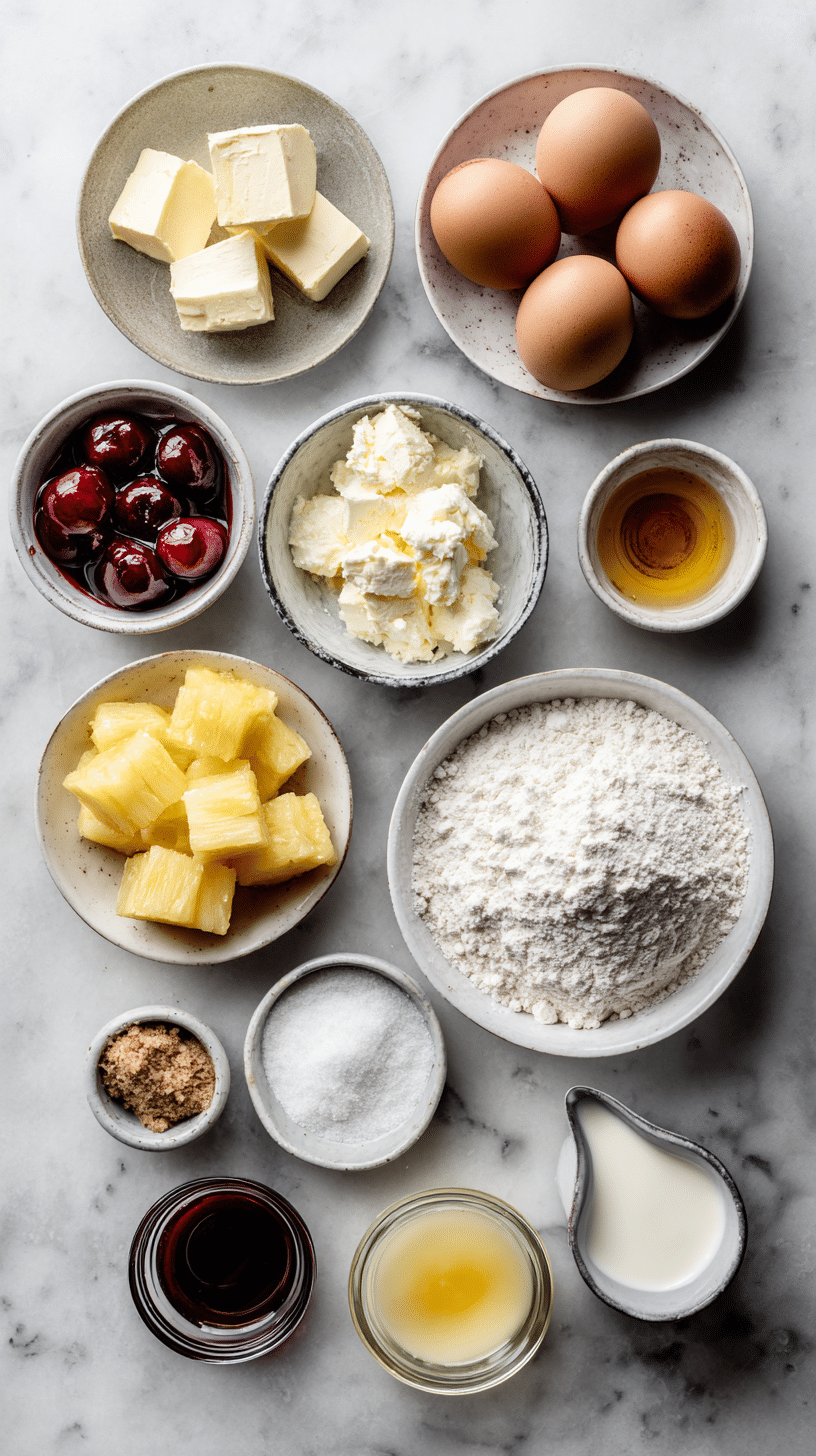
Fresh ingredients for making Pineapple Upside-down cheesecakes
How To Make It
Pineapple Upside-down cheesecakes: step 1 technique in action
(Mix & Ingredients)
Let’s dive right into the magic of Pineapple Upside-down cheesecakes. This recipe is a beautiful marriage of two beloved classics: the caramelized, fruity comfort of pineapple upside-down cake and the luscious tang of New York cheesecake. If you’ve ever found yourself torn between a creamy slice of cheesecake and a slice of golden pineapple cake, this is your sweet spot. The process is easier than you’d think, especially if you gather all your ingredients before you start. I like to line up my pineapple rings and cherries on a little tray, just like my grandma did, to make assembly a breeze.
First, you’ll whip up the pineapple cheesecake filling. Start with room-temperature cream cheese—cold blocks just won’t blend smoothly, and you want that filling as silky as a tropical sunset. Add in granulated sugar and eggs, mixing until everything is glossy and lump-free. A splash of pineapple juice and a dollop of sour cream bring brightness and tang, while vanilla rounds out the flavor. This creamy mixture is poured into a foil-wrapped springform pan, which will protect it from water
Pineapple Upside-down cheesecakes: step 2 technique in action
as it bakes gently in a water bath. Don’t skip the water bath! It helps the cheesecake bake evenly and keeps those dreaded cracks at bay.
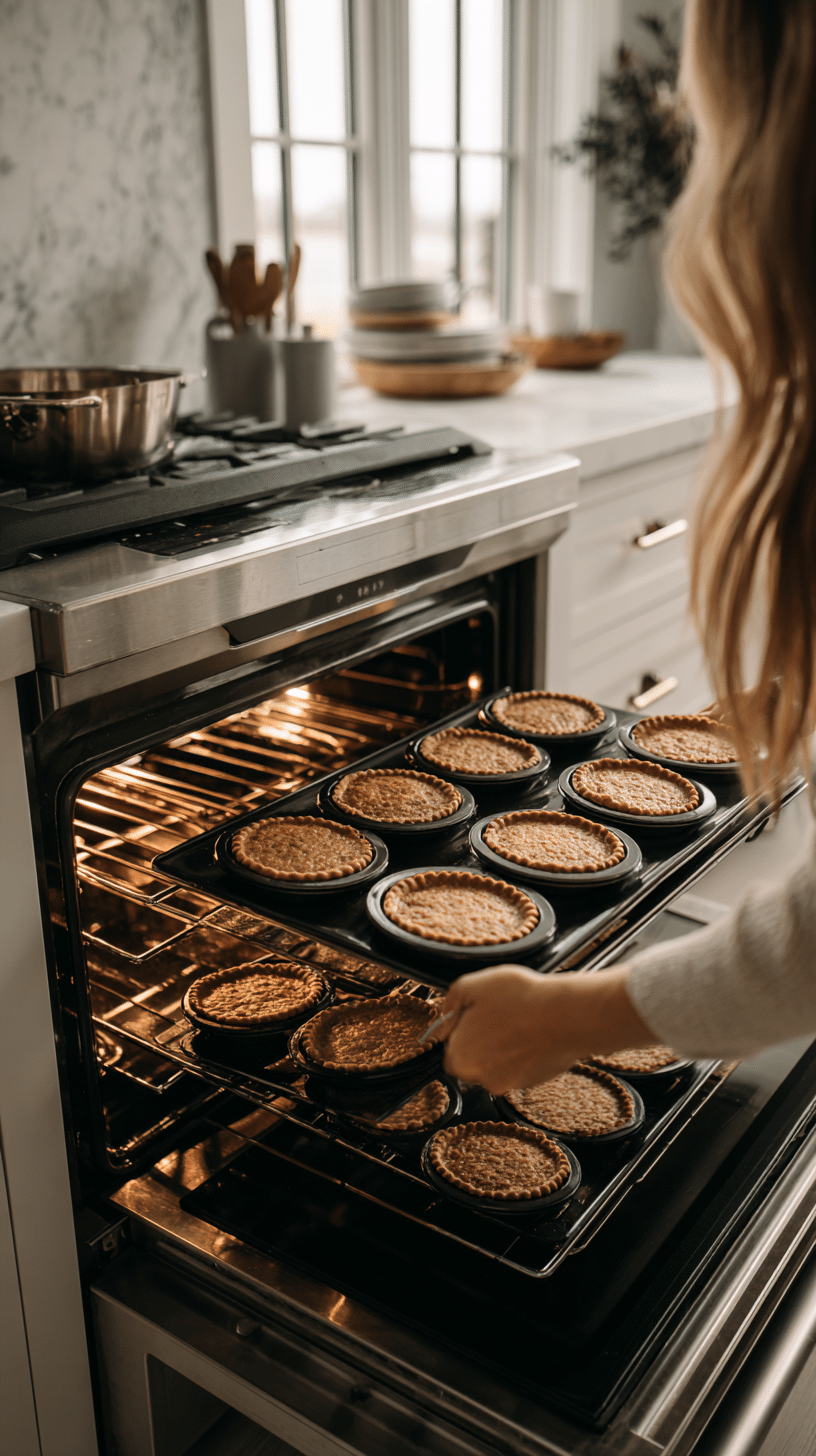
Now, for the showstopping upside-down cake layer. Melted butter and packed brown sugar form that signature sticky base. Carefully nestle pineapple rings and maraschino cherries in the sugar mixture—this is where the nostalgia kicks in, and little hands can help if you have eager kitchen assistants. The cake batter itself is a quick mix of all-purpose flour, baking powder, baking soda, salt, more melted butter, brown and granulated sugar, an egg, sour cream, milk, another splash of pineapple juice, and vanilla. It’s a forgiving batter, so don’t fret if it looks a bit thick. Spoon it gently over the fruit, and smooth it out for even baking. Once layered together, you’ll bake everything until golden, fragrant, and slightly wobbly in the center—a sign that the cheesecake is just set. If you love this sort of hybrid dessert, you might also enjoy my Lemon Meringue Pie Bars or Strawberry Shortcake Trifle, both of which offer a playful twist on nostalgic treats.
The result is a Pineapple Upside-down cheesecake that’s both showstopping and soul-soothing. The hardest part? Waiting for it to cool before flipping and slicing into those golden, caramelized layers. Trust me, it’s worth every minute.

Pineapple Upside-down cheesecakes: step 3 technique in action
Make-Ahead & Storage
One of the joys of Pineapple Upside-down cheesecakes is just how well they fit into a busy baker’s schedule. If you’re planning ahead for a celebration or simply want to save yourself some last-minute stress, these cheesecakes are wonderfully make-ahead friendly. I often bake the cheesecake and cake layers a day in advance, letting them chill overnight in the fridge. This not only deepens the flavors but also makes assembly a breeze—plus, a cold cheesecake is much easier to slice and layer without crumbling. If you’re prepping for a party, assemble the full Pineapple Upside-down cheesecake the night before and keep it covered in the refrigerator; it’ll taste even better the next day as all those pineapple juices soak in.
When it comes to storing leftovers, Pineapple Upside-down cheesecakes are delightfully low-maintenance. Keep any remaining slices tightly wrapped or stored in an airtight container in the fridge. They’ll stay fresh for up to 5 days, though I confess, they rarely last that long in my house! The pineapple topping keeps its shine and the cake stays moist, thanks to the juicy fruit and buttery brown sugar. If you have a big gathering and need to make multiple desserts, you can also bake the individual layers ahead and freeze them—just wrap each layer well in plastic wrap and foil. Thaw overnight in the fridge before assembling, and your cheesecake will taste as fresh as the day you baked it.
For those who like a little taste of summer in the dead of winter, Pineapple Upside-down cheesecakes freeze beautifully. Wrap whole or sliced cheesecake tightly in plastic wrap, then foil, and freeze for up to 2 months. Thaw in the refrigerator overnight before serving, and the texture will remain creamy and luscious. If you love prepping ahead, you might also enjoy my Mini Pineapple Upside Down Cakes or Classic No-Bake Cheesecake, which both store well and are crowd-pleasers! Just remember: always let your cheesecake come to fridge temperature before slicing for the cleanest, most beautiful slices every time.
Best Ingredients & Party Variations
When it comes to Pineapple Upside-down cheesecakes, the magic truly starts with your ingredient choices. For the cheesecake layer, I always insist on using full-fat cream cheese at room temperature—trust me, it makes for that dreamy, velvety texture you want in every bite. Sour cream adds both tang and silkiness, while a splash of pineapple juice in both the cheesecake and cake batter amplifies the tropical notes. If you can get your hands on fresh pineapple, use it for a brighter, more vibrant flavor, but canned pineapple rings work beautifully and are a nod to the classic. Don’t skip the maraschino cherries! Their sweet pop of color and flavor is the signature of every great Pineapple Upside-down cheesecake. And for the cake layer, sifted flour and melted butter ensure a tender crumb that soaks up all that luscious caramelized brown sugar.
Now, let’s talk about party-worthy Pineapple Upside-down cheesecake variations. For a crowd, I love making these as mini cheesecakes in muffin tins—no slicing, no fuss, just individual servings that look adorable on any dessert buffet. If you’re hosting a summer bash, try swapping in coconut milk for some of the dairy in the cake batter, or add a sprinkle of toasted coconut between the layers for a piña colada twist. For a more decadent spin, swirl a bit of rum or dark spiced rum into the caramel topping before baking. And if you’re feeling adventurous, you could even layer in a little crushed macadamia or pecan for crunch.
Want to serve something truly memorable? Pair these cheesecakes with my [Lemon Bar Cheesecake Squares] or [Coconut Cream Pie Bars] for a sunny dessert trio. Pineapple Upside-down cheesecakes are as flexible as they are festive—play with flavors, shapes, and toppings to suit your crowd or occasion. Don’t be afraid to get creative; the best desserts always have a little personality baked in!
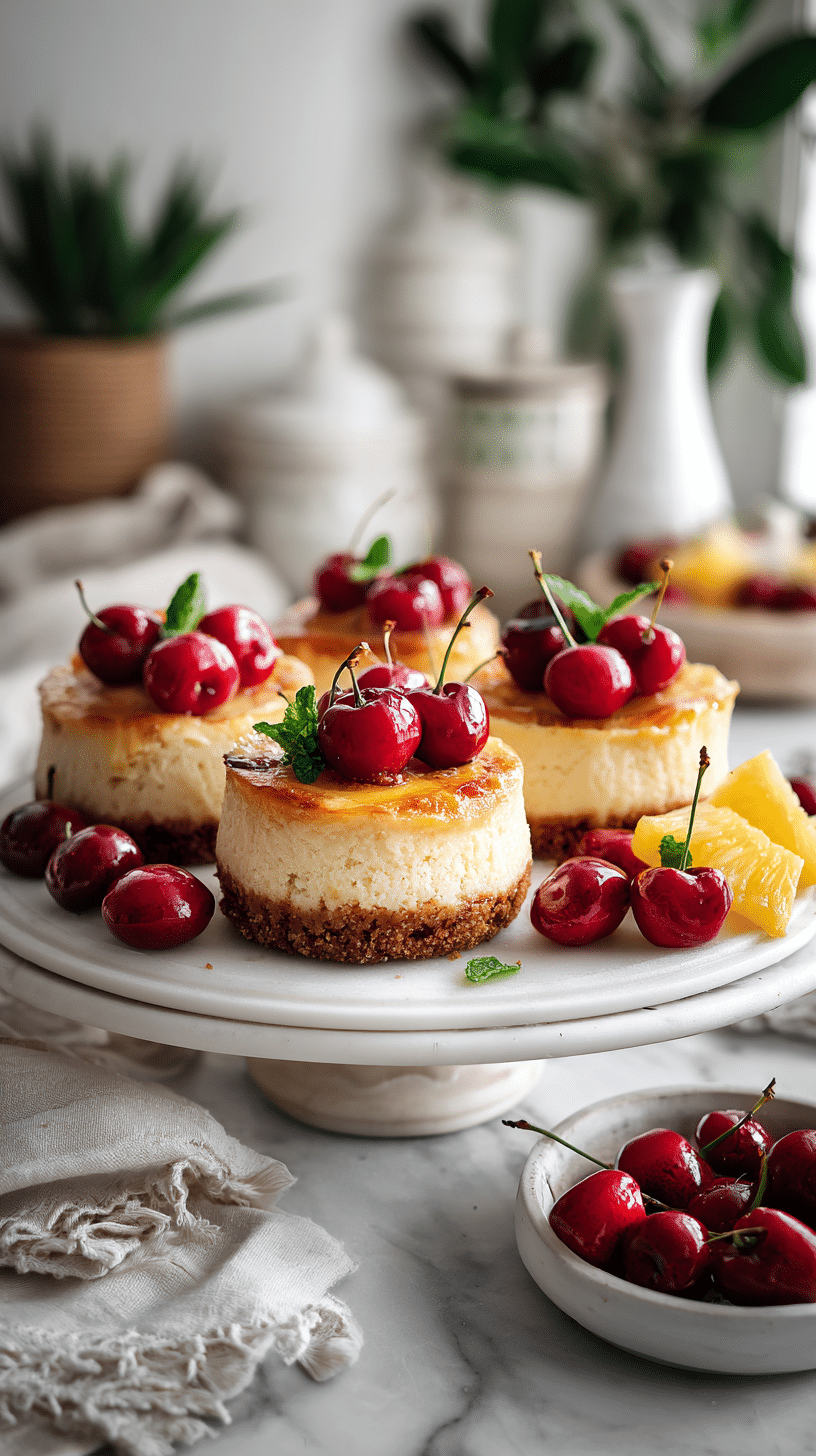
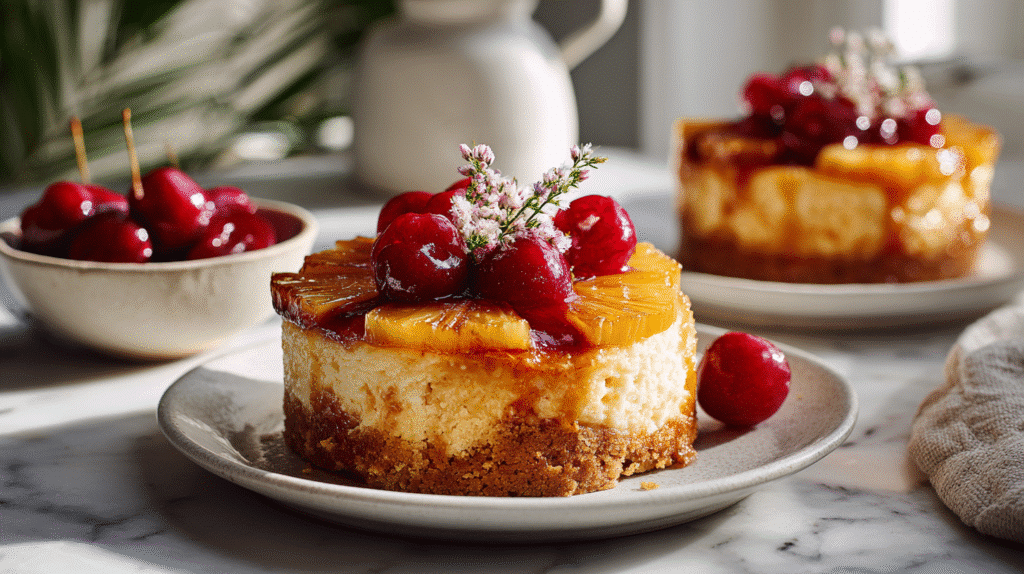
Serving the finished Pineapple Upside-down cheesecakes
FAQ
Can I make Pineapple Upside-down cheesecakes ahead of time?
Absolutely! Pineapple Upside-down cheesecakes are perfect for making ahead. In fact, they benefit from a long chill in the fridge, allowing the flavors to meld and the texture to set beautifully. After the cheesecake cools completely, cover it tightly and refrigerate for at least 8 hours or overnight. This makes them an ideal dessert for parties or holidays when you want to get a head start. Just remember to add any fresh toppings right before serving for the prettiest presentation.What’s the best way to prevent the pineapple topping from sticking to the pan?
To keep your pineapple and cherry topping picture-perfect, start by generously greasing your springform pan with butter or nonstick spray. Pour the melted butter and brown sugar mixture evenly over the bottom before arranging the pineapple rings and cherries. This creates a caramelized layer that not only prevents sticking but also gives that signature glossy finish. When it’s time to unmold, run a knife around the edge and invert the cheesecake onto a plate with confidence. If any fruit sticks, just gently nudge it back in place—no one will know!Can I use fresh pineapple instead of canned for Pineapple Upside-down cheesecakes?
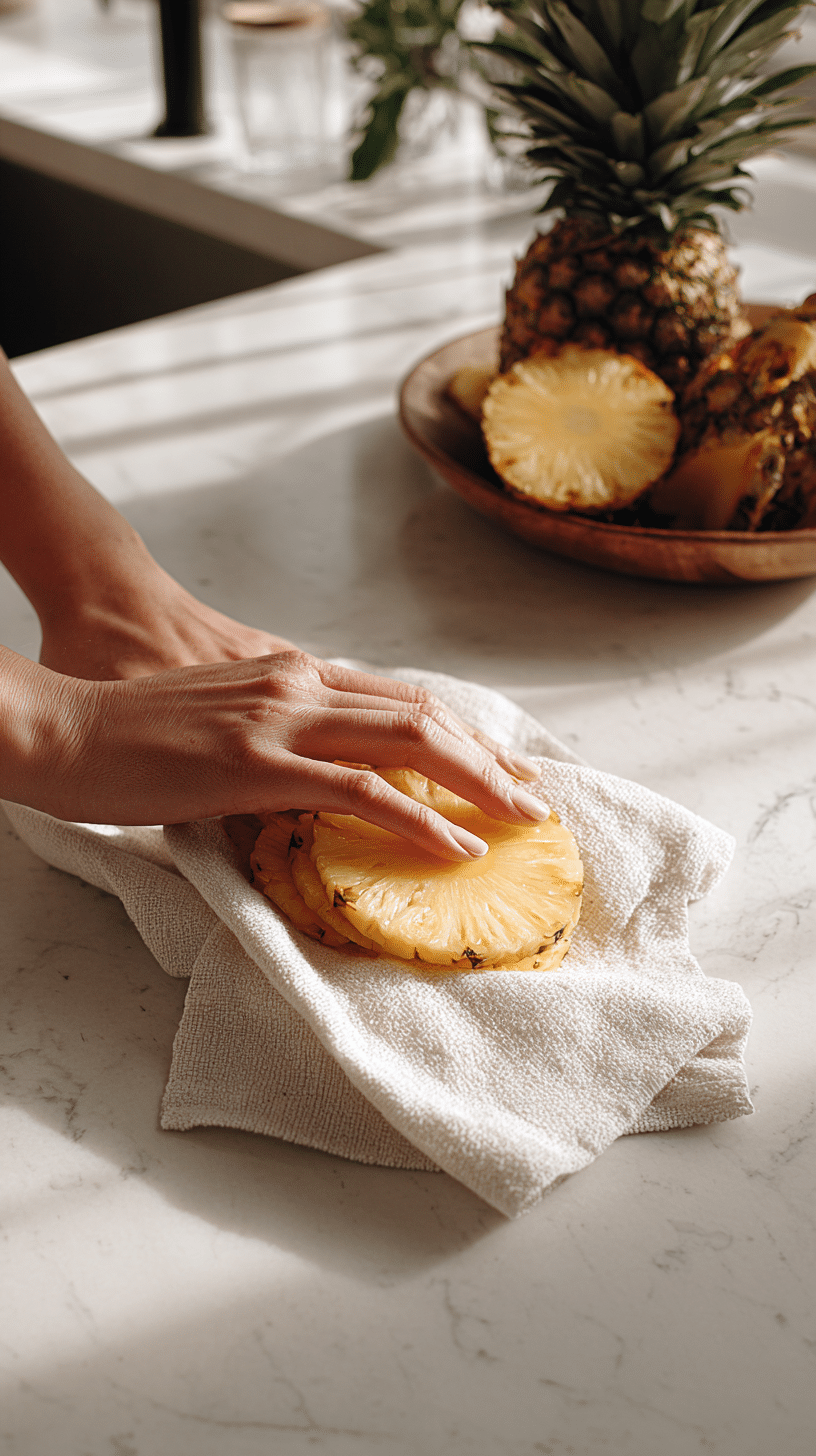
Yes, you can use fresh pineapple! Just slice it into rings that are about the same thickness as canned slices. Fresh pineapple gives a slightly tangier, brighter flavor and a lovely texture. Be sure to pat the rings dry with paper towels to avoid excess moisture, which can make the cake soggy. If your pineapple is very tart, you might sprinkle a little extra sugar over the rings before baking.How do I know when my Pineapple Upside-down cheesecake is fully baked?
The cheesecake layer should look set at the edges but still have a slight jiggle in the very center when you gently shake the pan. Insert a toothpick just off-center—if it comes out mostly clean with a few moist crumbs, it’s ready. Overbaking can dry out both the cake and cheesecake, so keep a close eye during the last 10–15 minutes. The cake will continue to set as it cools and chills in the fridge. Patience is key—let it cool completely before unmolding for clean, beautiful slices.
Conclusion
There’s something magical about pulling a tray of Pineapple Upside-down cheesecakes from the oven—the buttery scent, the caramelized fruit, and the promise of a treat that feels both familiar and brand new. Every time I serve these at a family gathering or bring a few to a neighbor’s porch, I’m reminded how food is a connector. These little cheesecakes spark conversations, bring smiles, and turn even an ordinary weeknight into a celebration of sunny flavors and shared memories.
Baking, to me, is all about creating those small, sweet moments that linger long after the last crumb is gone. Whether you’re whipping up a batch for a potluck or surprising your kids after school, I hope these Pineapple Upside-down cheesecakes bring a little extra joy into your kitchen. Don’t be afraid to put your own spin on them—baking is as much about the journey as the result.
If you loved this recipe, I’d be thrilled to see your creations or hear your stories. For more cozy desserts and baking inspiration, follow along on Facebook and Pinterest! Let’s keep making sweet memories, one bite at a time.

Pineapple Upside-down Cheesecakes: A Tropical Twist in Every Bite
Ingredients
- 16 ounces cream cheese room temperature
- 1/2 cup granulated sugar
- 2 large eggs
- 1/2 cup sour cream
- 2 tablespoons pineapple juice
- 1 teaspoon vanilla bean paste
- 1/2 cup unsalted butter melted (for topping)
- 1 cup packed light brown sugar for topping
- 14 slices canned or fresh pineapple rings
- 14 maraschino cherries
- 1 1/2 cups plus 3 tablespoons all-purpose flour sifted
- 1/2 teaspoon baking powder
- 1/4 teaspoon baking soda
- 1/2 teaspoon salt
- 1/2 cup unsalted butter melted (for cake batter)
- 3/4 cup light brown sugar packed
- 1/4 cup granulated sugar
- 1 large egg
- 1/4 cup sour cream
- 1/2 cup milk
- 1/4 cup pineapple juice
- 1 tablespoon vanilla bean paste
Instructions
- 1. Preheat oven to 325°F. Grease a 9-inch springform pan and wrap it in heavy-duty foil. Set aside.
- 2. In a large bowl, beat cream cheese and 1/2 cup granulated sugar until smooth.
- 3. Mix in eggs one at a time, then add 1/2 cup sour cream, 2 tablespoons pineapple juice, and 1 teaspoon vanilla bean paste. Beat until smooth.
- 4. Pour cheesecake batter into prepared pan. Place pan in a large roasting dish.
- 5. Reduce oven to 300°F. Place roasting dish with cheesecake in oven and fill roasting pan with hot water halfway up the sides of springform pan.
- 6. Bake cheesecake for 45 minutes. Turn off oven and leave cheesecake inside for 20 minutes.
- 7. Remove cheesecake from oven and water bath. Cool to room temperature, cover, and refrigerate at least 8 hours.
- 8. For the topping, divide 1/2 cup melted butter between two 9-inch cake pans. Sprinkle 1/2 cup brown sugar in each pan.
- 9. Arrange 7 pineapple rings and 7 cherries in each pan over the sugar. Set aside.
- 10. Preheat oven to 350°F. In a large bowl, whisk flour, baking powder, baking soda, and salt.
- 11. In another bowl, whisk 1/2 cup melted butter, 3/4 cup brown sugar, and 1/4 cup granulated sugar until smooth.
- 12. Whisk in 1 egg, 1/4 cup sour cream, milk, 1/4 cup pineapple juice, and 1 tablespoon vanilla.
- 13. Add wet mixture to dry and stir until just combined.
- 14. Divide batter evenly between the two prepared pans, spreading gently over fruit.
- 15. Bake cakes for 25-30 minutes, until a toothpick comes out clean and tops are golden brown.
- 16. Cool cakes in pans on a rack for 10 minutes.
- 17. Carefully invert cakes: one onto a cutting board, one onto serving plate.
- 18. Remove cheesecake from springform pan. Place cheesecake on first cake layer, then top with second cake layer.
- 19. Chill assembled cake in refrigerator for several hours before serving. Garnish with whipped cream if desired.