

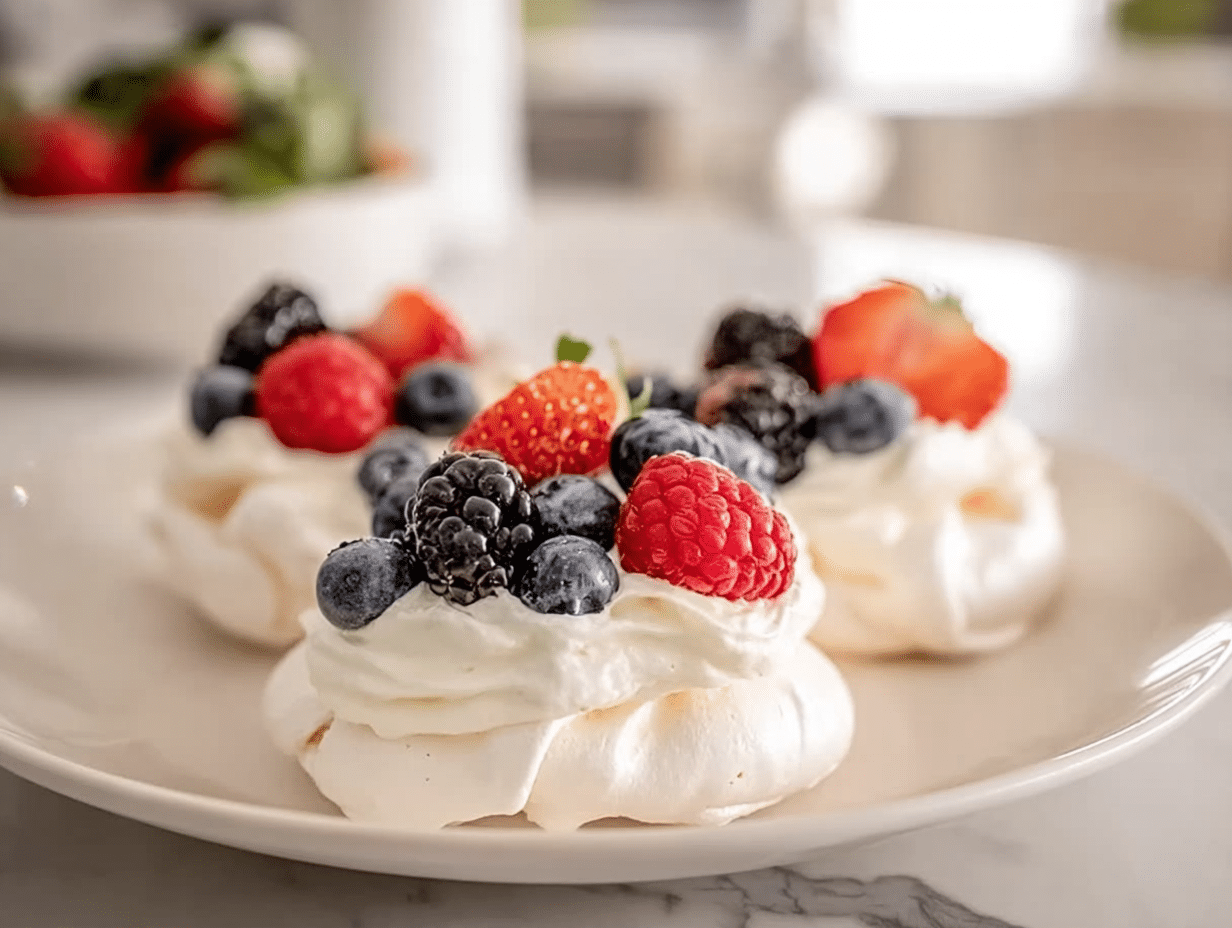
Pavlova cookies are the kind of dessert that look fancy but feel effortless. Imagine a delicate, crisp shell giving way to a soft, marshmallow-like center, crowned with a swirl of sweetened whipped cream and a rainbow of fresh fruit. Inspired by the classic Australian pavlova, these individual cookies are perfect for parties, showers, or simply treating yourself on a sunny afternoon.
In this guide, we’ll dive into the history, the simple science behind perfect pavlova, step-by-step baking tips, and endless topping ideas so you can create these cloud-like treats at home without a hint of stress.
A Family Gathering and My First Bite of Pavlova
The first time I tasted pavlova, it wasn’t in a restaurant or at a fancy afternoon tea—it was on a breezy summer afternoon at my cousin’s backyard barbecue. Among the burgers and potato salad sat this towering, snow-white dessert topped with a crown of glossy berries. One bite in and I was smitten: the crisp shell gave way to a pillowy, marshmallow-like center, and the sweetness was balanced by fresh, tart fruit. It was love at first crunch.
Years later, I wanted to bring that same magic to smaller gatherings without the commitment of a full-sized pavlova. That’s when pavlova cookies became my go-to. They capture all the texture and flavor of the original but in perfect little portions you can pick up and enjoy. Whether it’s an afternoon coffee with friends or a dessert table at a baby shower, these cookies always disappear fast.
What Makes Pavlova Cookies So Special
If you’ve never had pavlova cookies before, imagine the best parts of a meringue and a cloud having a dessert baby. The outside is delicate and crisp, the inside soft and marshmallowy—never dry or crumbly like some meringues. Their petite size makes them less intimidating than a full pavlova, and they’re endlessly versatile. I love topping them with sweetened whipped cream and seasonal fruit, but you could easily add tropical twists like mango and passion fruit or keep it classic with strawberries and blueberries.
And the best part? They’re make-ahead friendly. Bake the pavlova bases a day in advance, store them in an airtight container, and assemble right before serving for that just-made freshness. If you’re already dreaming up your next batch, you might also enjoy my easy fruit pizza cookies for another fruity crowd-pleaser or these strawberry cheesecake cookies for a richer, creamier option that still feels light and fresh.
Understanding Pavlova & Its Variations
The Origin of Pavlova and How It Became Cookies
Pavlova has a sweet and slightly controversial history. Both Australia and New Zealand claim to have invented this airy dessert in honor of Russian ballerina Anna Pavlova during her 1920s tour. Traditionally, it’s a single, large meringue base topped with whipped cream and fresh fruit, often served on special occasions.
Transforming this classic into pavlova cookies was a natural evolution for home bakers wanting something easier to serve at parties without slicing into a large dessert. These mini versions offer the same magical texture contrast—crispy exterior, marshmallowy center—but in bite-sized form. They’re also more forgiving to store and transport compared to a full pavlova, making them ideal for potlucks and afternoon tea spreads. Unlike regular meringue cookies, which are dry all the way through, pavlova cookies retain that signature soft center.
Ingredients That Make All the Difference
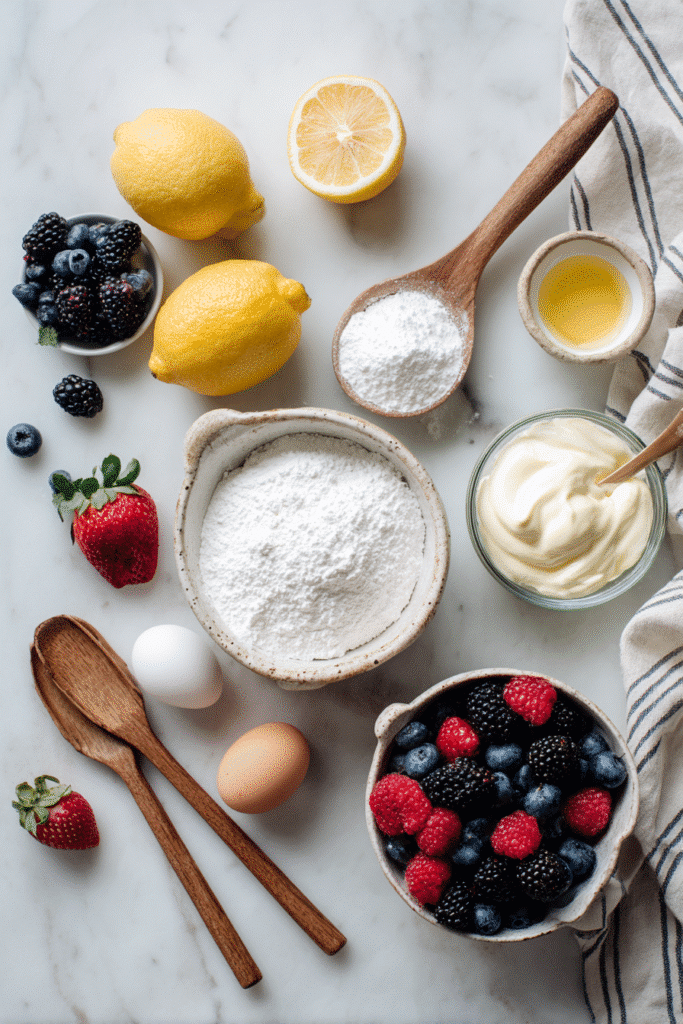
Great pavlova cookies start with simple ingredients, but each one plays a big role. Egg whites must be at room temperature so they whip to maximum volume. Fine sugar dissolves more easily, creating a glossy, stable meringue. Cornstarch helps maintain the soft, marshmallowy middle, while a touch of acid—like lemon juice—stabilizes the egg whites during whipping. Vanilla adds warmth, though you can swap it for almond extract or even citrus zest for a flavor twist.
If you’re new to working with meringues, check out my black raspberry and lemon shortbread cookies for another recipe where balance between tart fruit and sweetness is key—it’s a great flavor inspiration for experimenting with pavlova toppings.
How to Make Pavlova Cookies Like a Pro
Step-by-Step Pavlova Cookie Method
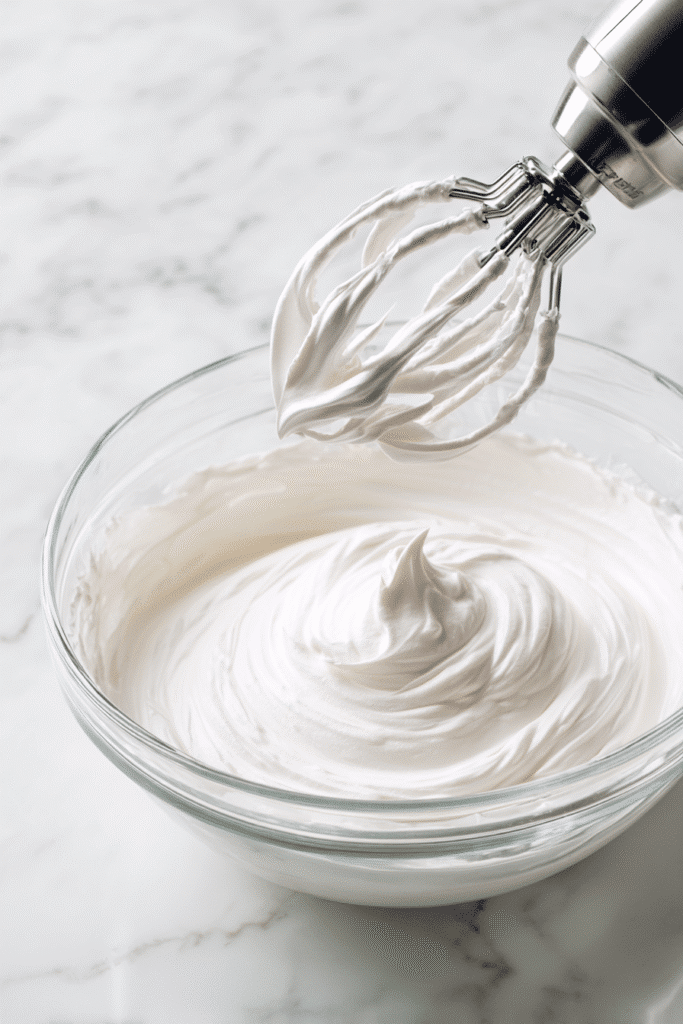
The secret to perfect pavlova cookies is in the mixing. Start by whipping room-temperature egg whites at medium speed until they’re foamy—this usually takes about a minute. Then, gradually add sugar in a slow stream; rushing this step can leave undissolved sugar crystals that ruin the texture. Keep whipping until the mixture reaches stiff, glossy peaks and you can’t feel any sugar when you rub it between your fingers.
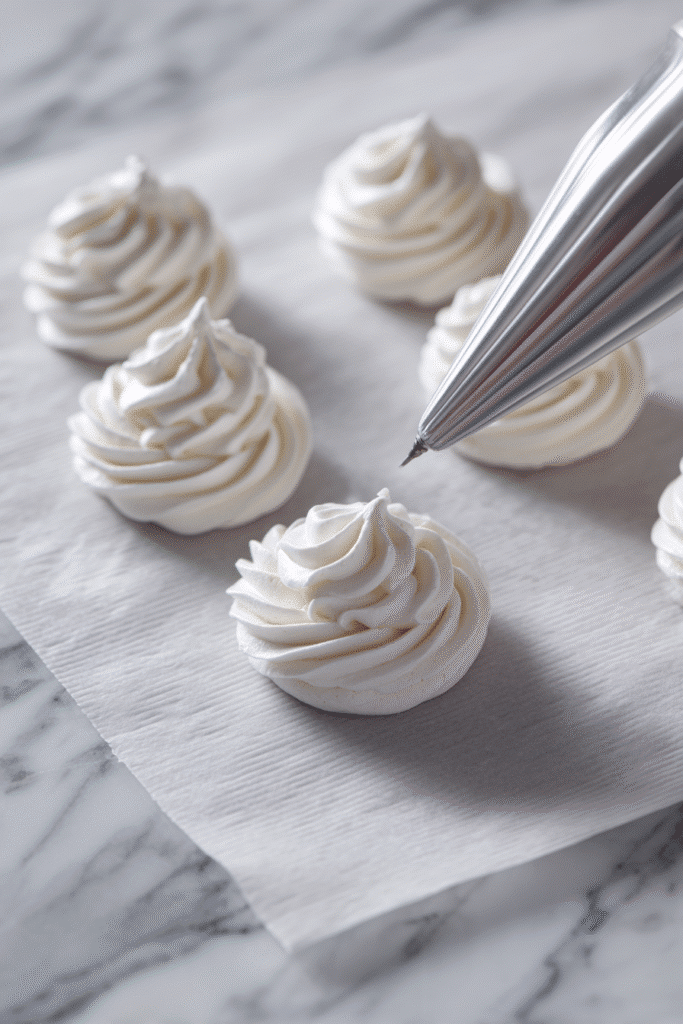
Gently fold in lemon juice, vanilla, and cornstarch, being careful not to deflate the meringue. Use a piping bag with a large star tip to pipe uniform rounds, about 3 to 3.5 inches in diameter, onto parchment-lined baking sheets. The consistent size ensures even baking, much like when making caramel cheesecake cookies, where precision gives the best results.
Baking and Cooling for Perfect Texture
Pavlova cookies bake best at a low temperature—around 225°F—for 70 minutes. This slow bake allows the outside to set without browning while keeping the inside soft. Once baked, turn off the oven but leave the cookies inside with the door closed for 30 minutes. This gradual cooling helps prevent cracks and weeping.
Cool the cookies completely before topping them. If you need to make them ahead, store the plain bases in an airtight container at room temperature for up to two days. Assemble just before serving to preserve the crisp shell and fluffy center. For more tips on getting that perfect crisp-meets-soft balance, you might like my strawberry pop tart pie, which also relies on careful baking and cooling for the right texture.
Serving, Topping & Troubleshooting
Topping Combinations to Try
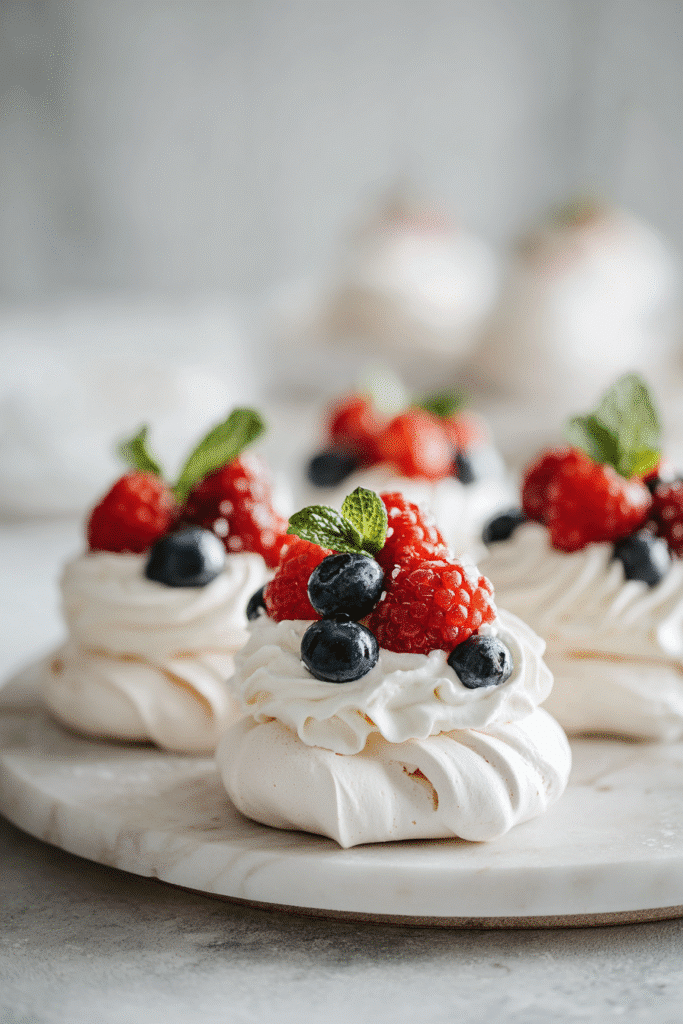
One of the best things about pavlova cookies is how they act as a blank canvas for flavor. The classic choice is a swirl of sweetened whipped cream topped with mixed berries—strawberries, blueberries, raspberries, and blackberries for a jewel-toned finish. For a tropical twist, try mango slices, kiwi, and passion fruit pulp for a sweet-tart pop. In cooler months, pomegranate seeds, fresh figs, or orange segments bring a seasonal sparkle.
If you’re feeling indulgent, add a drizzle of chocolate sauce or a spoonful of lemon curd before piling on the fruit. You can even swap the whipped cream for a lighter topping like blueberry Greek frozen yogurt for a refreshing summer treat.
Avoiding Common Pavlova Pitfalls
Humidity is pavlova’s biggest enemy—it can cause the shell to soften and weep. Always bake on a dry day if possible, and store the cooled cookies in an airtight container away from moisture. Overbeating the egg whites can make them grainy and cause the structure to collapse, while baking at too high a temperature can lead to cracks.
If your cookies turn out too soft, they may have been underbaked; return them to the oven at low heat for an extra 10–15 minutes. And don’t forget to cool them slowly in the oven to avoid sudden temperature shocks. For a dessert that’s just as show-stopping and requires similar care, try my chocolate mousse—its smooth, airy texture will make you a believer in gentle preparation.
FAQs About Pavlova Cookies
What is pavlova?
Pavlova is a meringue-based dessert with a crisp shell and a soft, marshmallow-like center. It’s typically topped with sweetened whipped cream and fresh fruit. Originating in Australia and New Zealand, it’s named after Russian ballerina Anna Pavlova.
What’s the difference between meringue cookies and pavlova?
Meringue cookies are dry and crisp all the way through, while pavlova has a crisp exterior and a soft, fluffy center. This difference comes from the addition of cornstarch and the low, slow baking method.
What does a pavlova taste like?
Pavlova tastes sweet and light, with a delicate crunch on the outside and a melt-in-the-mouth, marshmallowy texture inside. The whipped cream and fruit add freshness and balance the sweetness.
Is pavlova soft or crunchy?
It’s both—crunchy on the outside and soft inside. That textural contrast is what makes it so special.
Can I eat raw pavlova?
No. Pavlova is made from egg whites, which are fully baked at a low temperature, making them safe to eat.
Conclusion
Pavlova cookies are a perfect example of how a classic dessert can be reimagined into something even more versatile and party-friendly. With their crisp shells, soft centers, and endless topping possibilities, they’re ideal for everything from afternoon coffee dates to special celebrations. By following the steps we’ve covered—whipping, baking, cooling, and assembling—you’ll have a dessert that looks as good as it tastes.
If you try this recipe, I’d love to see your creations. Share them with me on Facebook or save them to your dessert inspiration boards on Pinterest. Whether you go classic with berries or bold with tropical flavors, pavlova cookies are sure to be the star of the table.
Pavlova Cookies – Light, Crisp & Absolutely Irresistible
Ingredients
- 6 egg whites room temp.
- 1 1/2 cups sugar
- 1 Tbs lemon juice
- 1/2 Tbs vanilla
- 2 tsp cornstarch
- 1 1/2 cups whipping cream
- 2 Tbs powdered sugar
- Assorted fresh fruit berries, mango, kiwi, etc.
Instructions
- 1. Preheat oven to 225°F and prepare a parchment-lined baking sheet.
- 2. Whip egg whites until foamy; gradually add sugar until stiff and glossy.
- 3. Fold in lemon juice, vanilla, and cornstarch.
- 4. Pipe meringue circles onto baking sheet (3–3.5″ diameter).
- 5. Bake for 70 minutes; turn off oven and leave cookies inside for 30 minutes.
- 6. Whip cream with powdered sugar until stiff peaks form.
- 7. Top cooled pavlova bases with whipped cream and fruit.
- 8. Serve immediately.

https://ipn.md/ru/%d0%b2%d0%be%d0%b9%d0%bd%d0%b0-%d0%b2-%d1%82%d0%b5%d0%bd%d0%b8-%d1%81%d0%b5%d1%80%d0%b2%d0%b5%d1%80%d0%be%d0%b2-%d0%ba%d0%b0%d0%ba-%d1%80%d1%83%d1%81%d1%81%d0%ba%d0%b0%d1%8f-%d0%ba%d0%be%d0%bc%d0%bf/
https://ipn.md/atac-tehnic-si-discreditare-publica-companie-it-din-moldova-impinsa-in-afara-pietei-europene/
virtual number with crypto
salalah international airport car rental
Certainly. It was and with me. Let’s discuss this question. Here or in PM.
_ _ _ _ _ _ _ _
airport tirana rent a car
Casual concurrence
_ _ _ _ _ _ _ _
car rental morocco agadir
Do not despond! More cheerfully!
_ _ _ _ _ _ _ _
https://carfyfethiye.com/