The Memory Behind This Treat
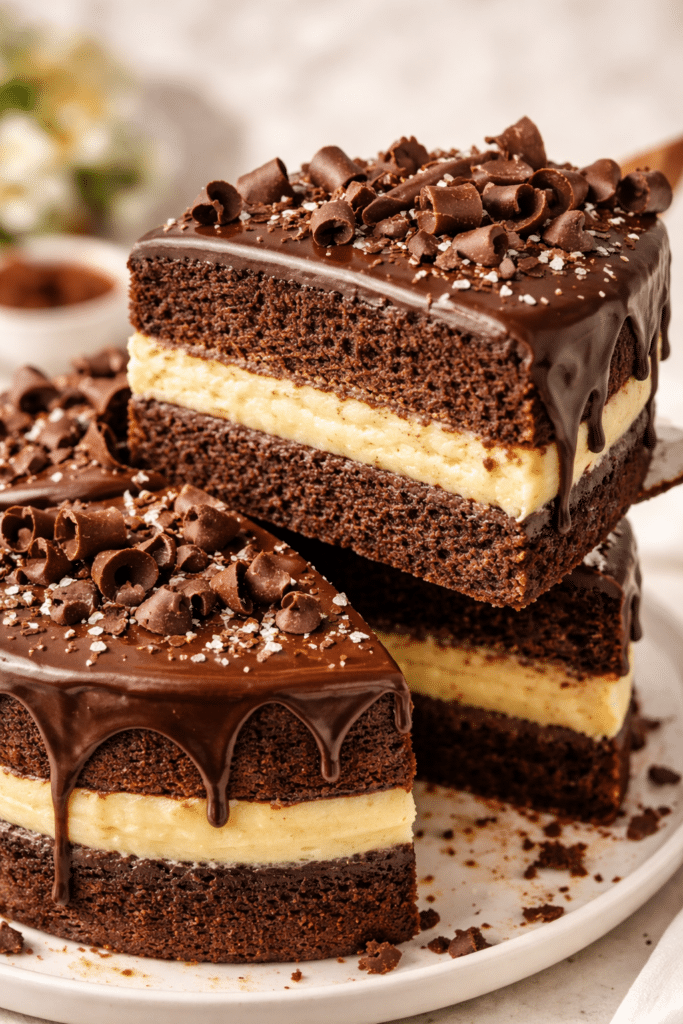
The first time I made these Oreo truffles for Valentine’s Day, I wasn’t trying to be fancy at all—I was trying to save a dessert emergency. I had planned a layered chocolate cake, the kind with three pans, a sink full of dishes, and lofty expectations. The cake broke coming out of the pan, the frosting split, and it all looked like a heart-shaped disaster. I remember staring at a package of Oreos on the counter, cream cheese in the fridge, and a bag of white chocolate melts that were supposed to be “just in case.” That’s when these Oreo truffles were born—less grand, more cozy, and exactly what the night needed.
Now they’ve become our non-negotiable Valentine’s tradition. My kids help crush the Vanilla Oreos (in theory with a food processor… in reality with a lot of “taste-testing”), and we always end up with powdered cookie crumbs on every surface. We roll the Oreo cheesecake mixture into soft, smudgy balls while the white chocolate melts slowly on the stove, making the kitchen smell sweet and a little bit like a candy shop. Some years we color the shell the palest pink, other years we go bright red with extra sprinkles, just like I do on my strawberry shortcake bars. No matter how polished—or perfectly imperfect—they turn out, these Oreo truffles remind me that desserts don’t need to be complicated to feel special, they just need to be made with a little patience, a little mess, and someone you like sharing them with.
How To Make It (Mix & Ingredients)
For these Valentine’s Day Oreo truffles, you only need a short, friendly ingredient list. Start with vanilla Oreos—about 36 cookies, or a 15-ounce package. You’ll blitz them into fine crumbs in a food processor; you want the texture of slightly damp sand, with no big chunks, so the centers stay smooth. Next comes softened cream cheese. Make sure it’s truly room temperature; if it’s still cool in the center, you’ll get streaky bits that don’t fully mix in. I usually poke it with a finger—if it dents easily with no resistance, it’s ready to go.

Instructions Process of Oreo Truffles
Combine the cookie crumbs and cream cheese in a mixing bowl and stir (or squish with very clean hands) until it feels like a soft, Play-Doh-style dough that holds together when you press it. If the mix seems too crumbly, you probably need a bit more mixing rather than more cream cheese, so keep working it until no dry streaks remain. Scoop the mixture with a 1.5-tablespoon cookie scoop for even portions, then roll them into smooth balls between your palms. If your kitchen runs warm, chill the dough for about 10 minutes before rolling so it doesn’t stick. Once they’re all shaped, pop the tray into the freezer for at least 30 minutes; this helps them keep their shape when you dip them in chocolate and gives you that firm shell over a creamy center that makes Oreo truffles so irresistible.
Make-Ahead & Storage
Valentine’s Day is busy enough, so the happy news is that these Oreo truffles are very make-ahead friendly. You can roll the Oreo cheesecake balls, place them on a parchment-lined sheet, and freeze them uncoated for up to 2 months. Once they’re firm, transfer them to a zip-top freezer bag or airtight container, layering with parchment so they don’t stick together. When you’re ready to dip, let them sit at room temperature for about 10–15 minutes so they’re not rock-hard, then coat in melted white chocolate as directed. This little head start makes them perfect if you’re also prepping chocolate-covered strawberries or another Valentine dessert platter.
If you want to fully prep the Oreo truffles ahead, make and dip them completely, then let the white chocolate shell set. Store them in a single layer in an airtight container in the fridge for 5–7 days. For stacking, separate layers with parchment to protect the smooth coating and any sprinkles. They taste best served slightly chilled but not icy cold, so pull them out of the fridge about 10 minutes before serving for that creamy, fudgy center. If your kitchen runs warm or you have them out for a party, I’d keep them on a cool tray and aim for a 2-hour window at room temp for the best texture and food safety.
You can also freeze fully finished Oreo truffles for longer storage. After the coating sets, freeze them on a sheet pan until solid, then move them to a container or freezer bag (again, parchment between layers helps keep them pretty). They’ll keep for about 2 months this way. To serve, thaw them in the fridge for a few hours or overnight—thawing at room temperature can lead to condensation on the chocolate shell. If you notice a little cloudiness on the coating after freezing, don’t worry; they’re still safe and delicious, just slightly less glossy.
Best Ingredients & Party Variations
The beauty of these Valentine’s Oreo Truffles is that they only need a handful of ingredients, so choosing the best ones really pays off. I like full-fat cream cheese for the creamiest center—reduced fat can make the filling softer and a bit gummy. Stick with classic sandwich cookies: vanilla Oreos give you that pale, pretty center, but you can swap in regular chocolate Oreos if you like a darker, richer middle. For coating, use good-quality white chocolate melts or wafers that are made for candy making; they set smoother and crack less than basic chips. And when you’re tinting the chocolate, always choose oil-based or powdered food coloring so the coating doesn’t seize up on you mid-dip.
Once you have your base Oreo truffles, you can dress them up to match any party platter. For a Valentine’s dessert board, try making half the batch coated in white, and tint the rest soft pink and deeper rose for a pretty ombré effect. You can also roll a few in finely crushed freeze-dried strawberries or raspberries before the shell sets for a berry-cheesecake twist. For a kids’ party, use colorful heart sprinkles or mini M&M-style candies pressed lightly into the tops. Hosting a more grown-up celebration? Drizzle some with dark chocolate, sprinkle with a pinch of flaky sea salt, or add a drop of espresso extract to the Oreo filling to make “mocha” Oreo truffles that disappear first from the dessert table.

Serving of Oreo Truffles
Conclusion
Whenever I roll the last little chocolate-dipped truffle onto the tray, I always think about who’s going to eat it first. A partner after a long day. A friend who “doesn’t like dessert” but somehow reaches for seconds. A kid with a smudge of chocolate right on the nose. That’s the real magic tucked inside these simple Oreo truffles—tiny bites that turn into big, sweet moments.
I hope this recipe feels like an invitation to slow down, melt some chocolate, and make something special with (or for) someone you love. You don’t need fancy skills or equipment, just a bit of time and a willingness to get your hands a little messy. The memories you’ll wrap up in these bite-sized treats will be far richer than anything you can buy in a store.
When you have a quiet evening or a cozy weekend coming up, pull out this recipe and give it a try. Snap a photo, share it with the people you love, and most of all—enjoy every bite.
For more delicious recipes like this, follow us on social media!
What exactly are Oreo truffles made of?
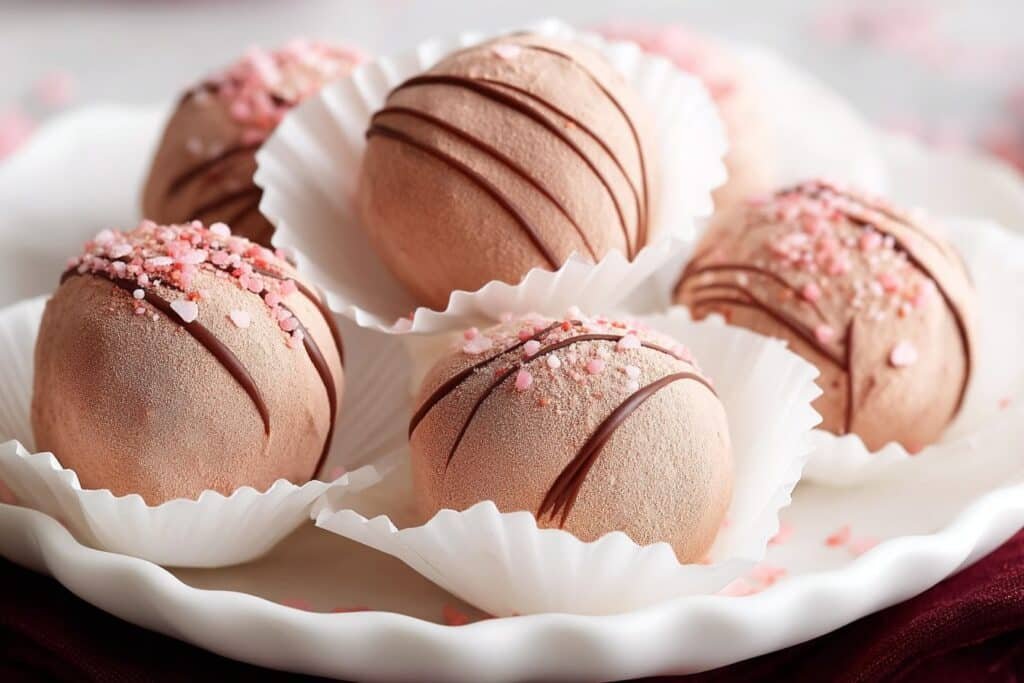
Oreo truffles are made from just a few simple ingredients: crushed Vanilla Oreos, softened cream cheese, and melted white chocolate for the outer shell. The cookies and cream cheese create a rich, truffle-like Oreo cheesecake center once mixed together. You can tint the white chocolate with red oil-based or powdered food coloring to give them a Valentine’s Day look. Sprinkles are optional, but they add a fun crunch and make the truffles look extra festive. Everything is rolled into balls, chilled, then dipped in the melted chocolate so they set up with a smooth, glossy finish.
Can I use different Oreos or chocolate for these Oreo truffles?
Yes, you can easily swap Vanilla Oreos for regular chocolate Oreos, double-stuf, or even seasonal flavors to change the taste and color. The method stays exactly the same; only the flavor profile shifts. For the coating, you can use white chocolate melts, almond bark, or good-quality white chocolate chips. If you prefer a richer, less sweet finish, try dipping some in dark or milk chocolate instead. Just remember: whatever chocolate you use should melt smoothly and set firmly.
How should I chill, store, and freeze Oreo truffles?
After rolling the Oreo truffles, chill them on a parchment-lined baking sheet for 30 minutes in the freezer or about 1 hour in the fridge before dipping. This helps them hold their shape and makes dipping much easier. Once coated and fully set, store the truffles in an airtight container in the refrigerator for up to 1 week. To freeze, place them in a single layer in a container, then stack with parchment between layers and freeze for up to 2 months. Thaw them in the fridge for several hours or overnight so the centers stay creamy, not sweaty or cracked.
Recipe

Valentine’s Day Oreo Truffles
Ingredients
Ingredients
- 36 vanilla Oreo cookies about 15 oz
- 8 oz cream cheese softened
- 14 oz white chocolate melts or white candy melts
- Red oil-based or powdered food coloring optional
- Sprinkles optional
Instructions
- Line a sheet pan that fits in your fridge or freezer with parchment paper and set aside.
- Place the vanilla Oreo cookies in a food processor and pulse in 10-second intervals until you have fine, even crumbs with no large pieces.
- Transfer the Oreo crumbs to a mixing bowl, add the softened cream cheese, and mix by hand or with a spoon until a smooth, soft dough forms with no visible streaks of cream cheese.
- Use a 1.5-tablespoon cookie scoop to portion the mixture, then roll each portion between your palms into a smooth ball and place on the prepared baking sheet.
- Chill the tray of truffle centers in the freezer for 30 minutes or in the refrigerator for 1 hour, until firm.
- Place the white chocolate melts in a microwave-safe bowl and microwave in 20-second intervals, stirring well between each, until fully melted and smooth, or melt gently in a double boiler over low heat.
- If coloring the white chocolate, stir in a small drop of red oil-based or powdered food coloring at a time until you reach your desired shade.
- Working one truffle at a time, place a chilled truffle on a fork, dip it into the melted chocolate, spooning chocolate over the top to coat completely, then tap the fork gently on the edge of the bowl to remove excess coating.
- Slide the coated truffle back onto the parchment-lined sheet and repeat with the remaining truffles, reheating or stirring the chocolate as needed to keep it smooth.
- If you plan to drizzle a second color or extra chocolate on top, chill the coated truffles for about 10 minutes until the first layer is just set, then drizzle with additional melted chocolate.
- If adding sprinkles, add them immediately after dipping or drizzling while the chocolate is still wet so they stick.
- Let the truffles sit at room temperature for about 2 hours, or until the chocolate shell is fully set, then serve or store covered in the refrigerator.
Notes
- Make sure to use oil-based or powdered food coloring, not water-based, to avoid seizing the melted white chocolate.