The Practical Why Behind It
No Bake Preacher Cookies exist for those days when you need something sweet, fast, and fuss free, but still a little nostalgic. Because they cook on the stove instead of in the oven, you do not need to preheat, rotate pans, or babysit bake times. You only need one pot and one mixing bowl, which keeps cleanup simple and makes this a great recipe for kids or beginner bakers. The mixture sets as it cools on wax paper, so your fridge stays free for the important things, like keeping the milk cold for cookie dunking.
There is also a very practical reason for the ingredients in these No Bake Preacher Cookies. The sugar and milk boil long enough to form a soft candy base, which helps the cookies firm up without eggs or baking powder. Peanut butter brings protein and richness, while quick oats add chewy texture and keep the cookies from turning into pure fudge. Vanilla bean paste gives deep flavor without extra liquid, and the chocolate topping acts like a built in frosting without any piping bags. The whole process feels much easier than classic baked goods like layered cakes or rolled sugar cookies, but the finished treats still look special enough to share with guests, tuck into lunchboxes, or serve next to a plate of old fashioned fudge.
Step-by-step method
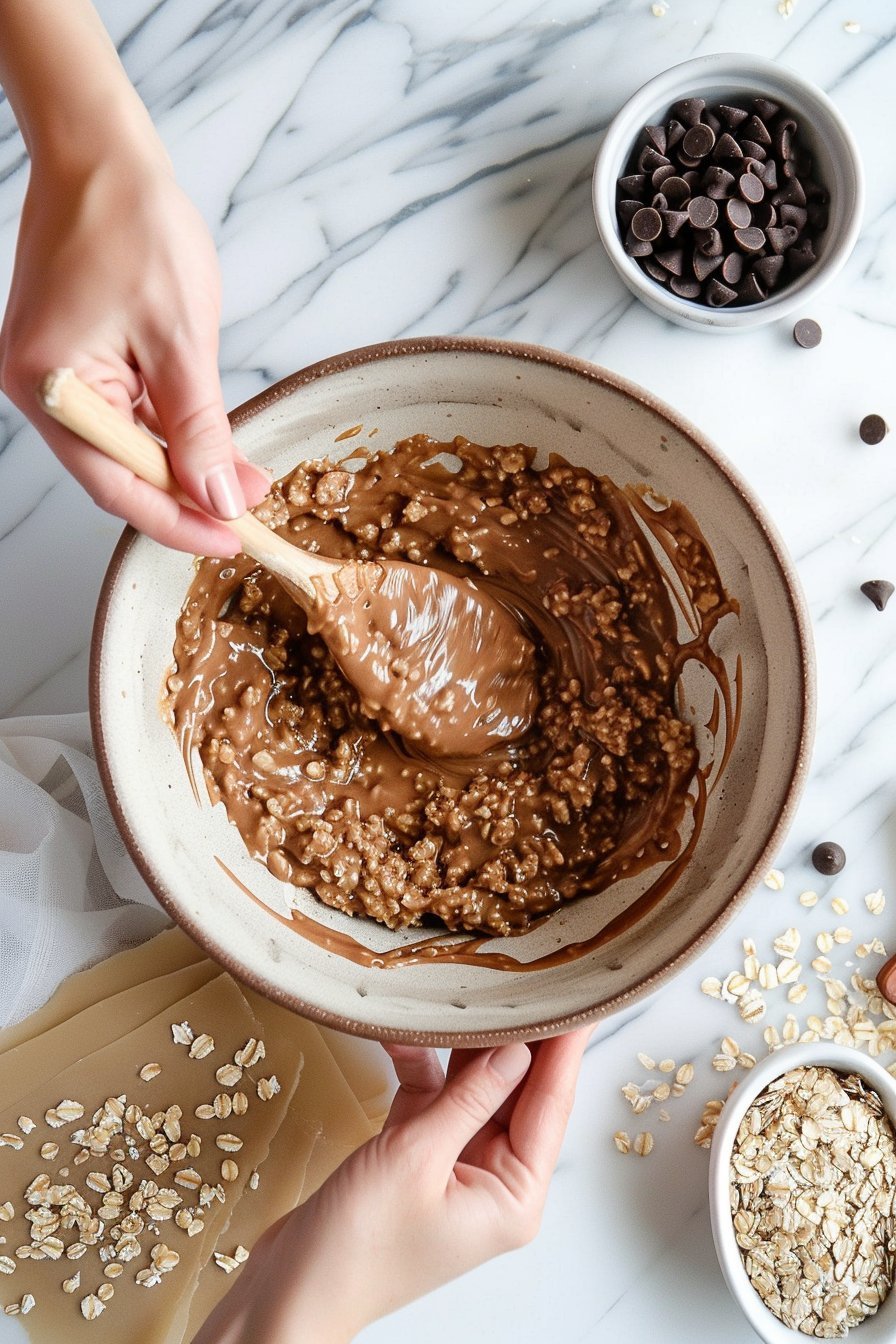
Start by getting your oatmeal ready, because once the hot mixture is cooked you will need to move fast. Pour the quick cooking oats into a large heat safe bowl and set out a big sheet of wax paper or parchment on your counter for scooping. In a medium saucepan, combine the sugar, 1 stick of unsalted butter, salt, and milk, then set the pan over medium high heat and stir gently as the butter melts and the sugar dissolves. When the mixture reaches a full rolling boil, start a timer and let it boil for one full minute, stirring so it does not bubble over, then remove it from the heat right away so your No Bake Preacher Cookies do not turn dry or crumbly. Off the heat, stir in the vanilla bean paste and creamy peanut butter until the mixture turns glossy, thick, and completely smooth with no peanut butter streaks.
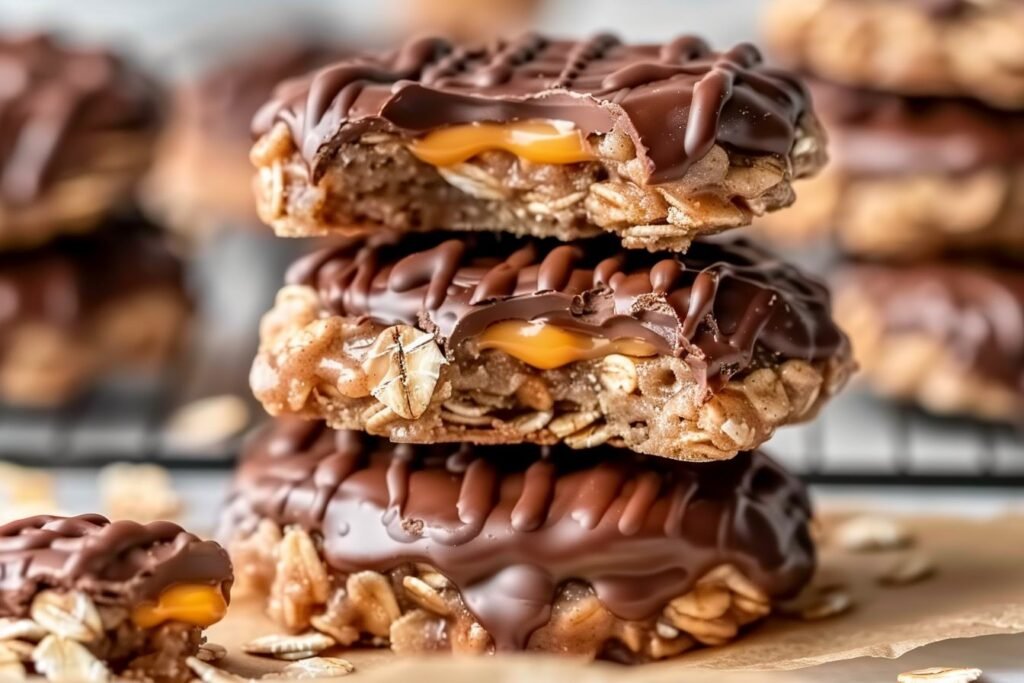
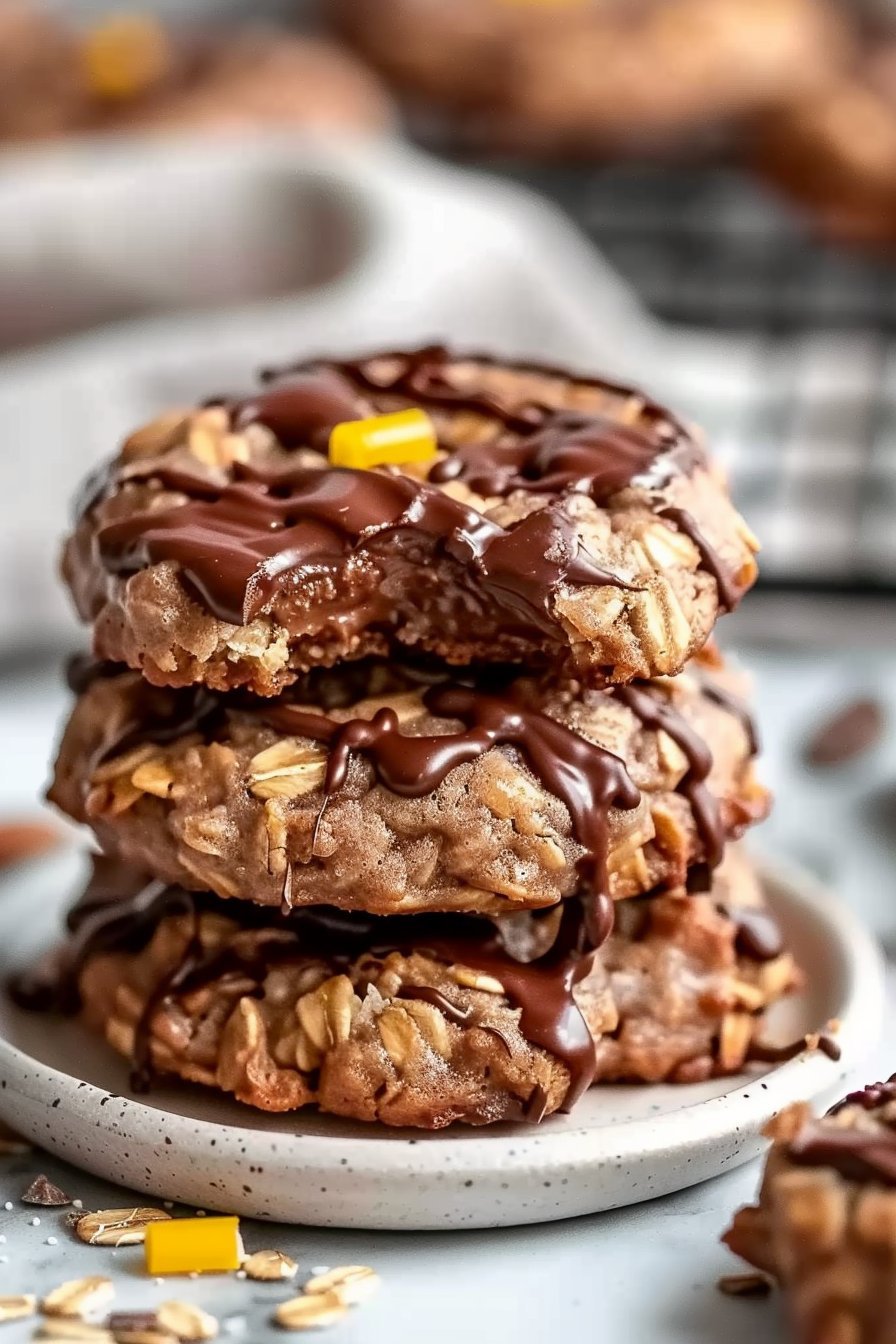
Quickly pour this hot peanut butter mixture over the bowl of oatmeal and stir from the bottom up, scraping the sides, until every oat is coated and the mixture looks uniform and scoopable. Use a tablespoon or a small cookie scoop to portion mounds of the mixture onto your prepared wax paper, spacing them slightly apart, and gently press the tops if you like a flatter, more bakery style look. For the chocolate topping, place the milk chocolate chips and the extra tablespoon of butter in a microwave safe bowl and heat in 20 second bursts, stirring between each, just until the chocolate is melted and silky. Spoon or drizzle the warm chocolate over the tops of the cookies, letting it naturally drip over the sides for that classic old fashioned candy look you see on church potluck trays. Allow the No Bake Preacher Cookies to set at room temperature until firm to the touch, or slide the trays into the fridge for quicker setting if your kitchen is warm.
Make-Ahead and Storage Notes
No Bake Preacher Cookies practically define make ahead friendly. Once the cookies have fully set, keep them in an airtight container at room temperature for 4 to 5 days. I like to layer the cookies between sheets of parchment or wax paper so the chocolate topping stays neat and does not stick. If your kitchen runs warm, you can chill the container in the fridge, just know the texture will firm a bit more and the oats will feel slightly chewier. Let refrigerated cookies sit on the counter for about 10 to 15 minutes before serving so the peanut butter and chocolate can soften back to their fudgy selves.
For longer storage, these No Bake Preacher Cookies freeze beautifully, which makes them a great option for holidays or busy weeks. Arrange the set cookies on a baking sheet, freeze until solid, then transfer to a freezer bag or lidded container with parchment between layers. They keep well in the freezer for up to 3 months without losing flavor, though the chocolate may develop a faint white bloom from temperature changes, which is harmless and only cosmetic. Thaw at room temperature for 20 to 30 minutes before serving, or enjoy them slightly frosty if you love a firmer, almost candy like bite, similar to the chilled texture of my chocolate peanut butter bars. If you pack these in a lunchbox, slip them in straight from the fridge or freezer and they will be perfectly set by snack time.
Variations and How to Serve It
No Bake Preacher Cookies are wonderfully forgiving, so you can play a little without losing their classic bakery style charm. For a stronger peanut flavor, swap half the creamy peanut butter for crunchy, which gives each bite a little surprise. If you need a peanut free version, try creamy almond butter or sunflower seed butter, just know the cookies may set a touch softer. You can also fold in a handful of toasted chopped pecans or peanuts with the oatmeal for extra texture. For a prettier finish, sprinkle a pinch of flaky sea salt over the warm chocolate topping so it sticks and adds that sweet salty punch.
You can serve these No Bake Preacher Cookies in a few different ways, depending on the moment. For a bake sale plate or dessert tray, let them firm up completely, then tuck them into mini paper liners so the chocolate top stays neat. If you want a cozy movie night dessert, chill the cookies in the refrigerator until very firm, then serve them cold with a glass of milk or alongside a scoop of vanilla or my small batch chocolate chip ice cream. For a party dessert board, make the cookies slightly smaller, using a scant tablespoon, and arrange them with fresh berries, pretzels, and a few caramel candies. Leftovers keep well in an airtight container at room temperature, or you can refrigerate them if your kitchen runs warm, which also helps the chocolate stay beautifully glossy.
Serving of No Bake Preacher Cookies
Conclusion
When I think about a tray of these cookies cooling on the counter, I do not just see chocolate and oats. I see after school stories, late night kitchen chats, and that quiet pause when everyone takes the first bite and the room gets wonderfully, happily silent. These little drops of chewy comfort have a funny way of turning an ordinary day into a tiny celebration.
I hope you feel how wonderfully low pressure and inviting this recipe is. A pot, a spoon, and a few pantry staples are all you need to pull people into the kitchen and make something sweet together. Whether you whip up a batch for a busy weeknight, a last minute get together, or just because you want a little nostalgia, these No Bake Preacher Cookies are ready when you are.
So tie on your favorite apron, grab a saucepan, and give this recipe a try. Then share a plate with someone you love and let the crumbs and conversation linger a little longer.
For more delicious recipes like this, follow us on social media!
Instructions Process of No Bake Preacher Cookies
Recipe

No Bake Preacher Cookies
Ingredients
Ingredients
- 3 cups quick cooking oatmeal uncooked
- 2 cups granulated sugar
- 1 stick unsalted butter cut into pieces
- 1/8 teaspoon salt
- 1/2 cup whole milk
- 1 teaspoon vanilla bean paste
- 1 cup creamy peanut butter
- 1/2 cup milk chocolate chips
- 1 tablespoon unsalted butter
Instructions
- Line a large section of countertop or a few baking sheets with wax paper and set aside.
- Place the quick cooking oatmeal in a large heat safe mixing bowl and keep it near the stove.
- In a medium saucepan, combine the sugar, 1 stick of unsalted butter, salt, and milk.
- Set the pan over medium high heat and cook, stirring frequently, until the butter melts and the sugar dissolves.
- Bring the mixture to a full rolling boil and boil for 1 minute, stirring constantly so it does not scorch.
- Remove the saucepan from the heat and immediately stir in the vanilla bean paste and creamy peanut butter until the mixture is smooth and glossy with no streaks.
- Pour the hot peanut butter mixture over the oatmeal in the bowl.
- Stir well, scraping the bottom and sides of the bowl, until all of the oats are evenly coated and the mixture thickens and holds its shape.
- Using a tablespoon or small cookie scoop, drop rounded portions of the mixture onto the prepared wax paper, spacing them slightly apart.
- Gently flatten the tops of the mounds with the back of the spoon if you prefer a flatter cookie shape.
- Place the milk chocolate chips and 1 tablespoon of unsalted butter in a small microwave safe bowl.
- Microwave in 20 second intervals, stirring after each interval, until the chocolate is completely melted and smooth.
- Spoon or drizzle the melted chocolate over the tops of the cookies, letting a little run down the sides.
- Let the cookies stand at room temperature until fully set and firm to the touch before serving or storing.
Notes
- For warmer kitchens, refrigerate the cookies and let them sit at room temperature for 10 to 15 minutes before serving.
- Freeze set cookies in a single layer, then transfer to an airtight container with parchment between layers for up to 3 months.
- Make sure the sugar mixture boils for the full 1 minute so the cookies set properly and are not too soft.