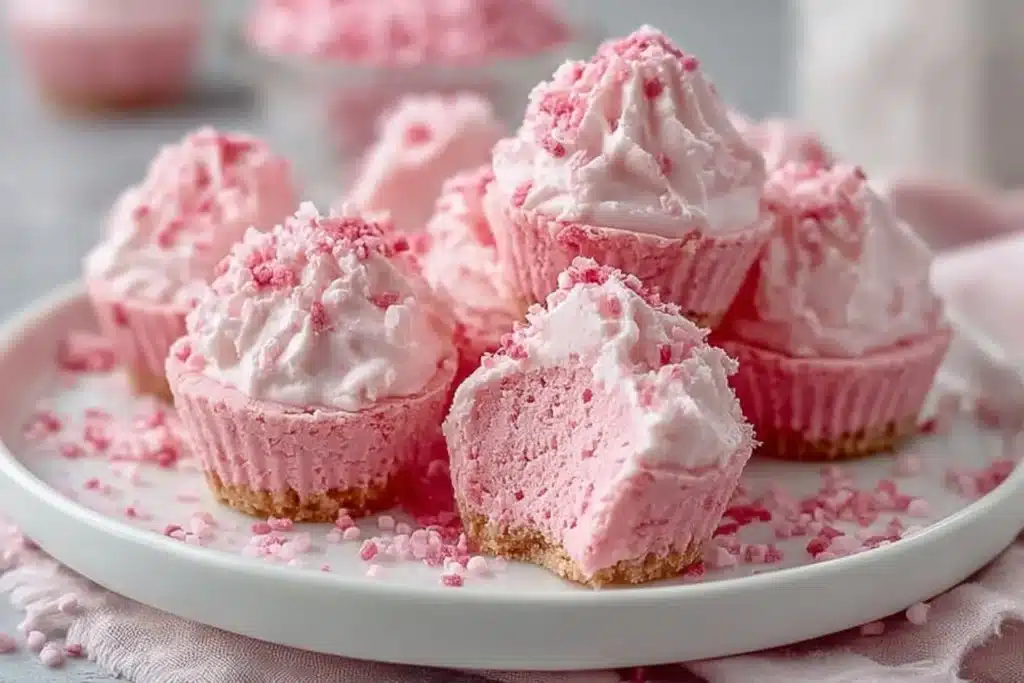
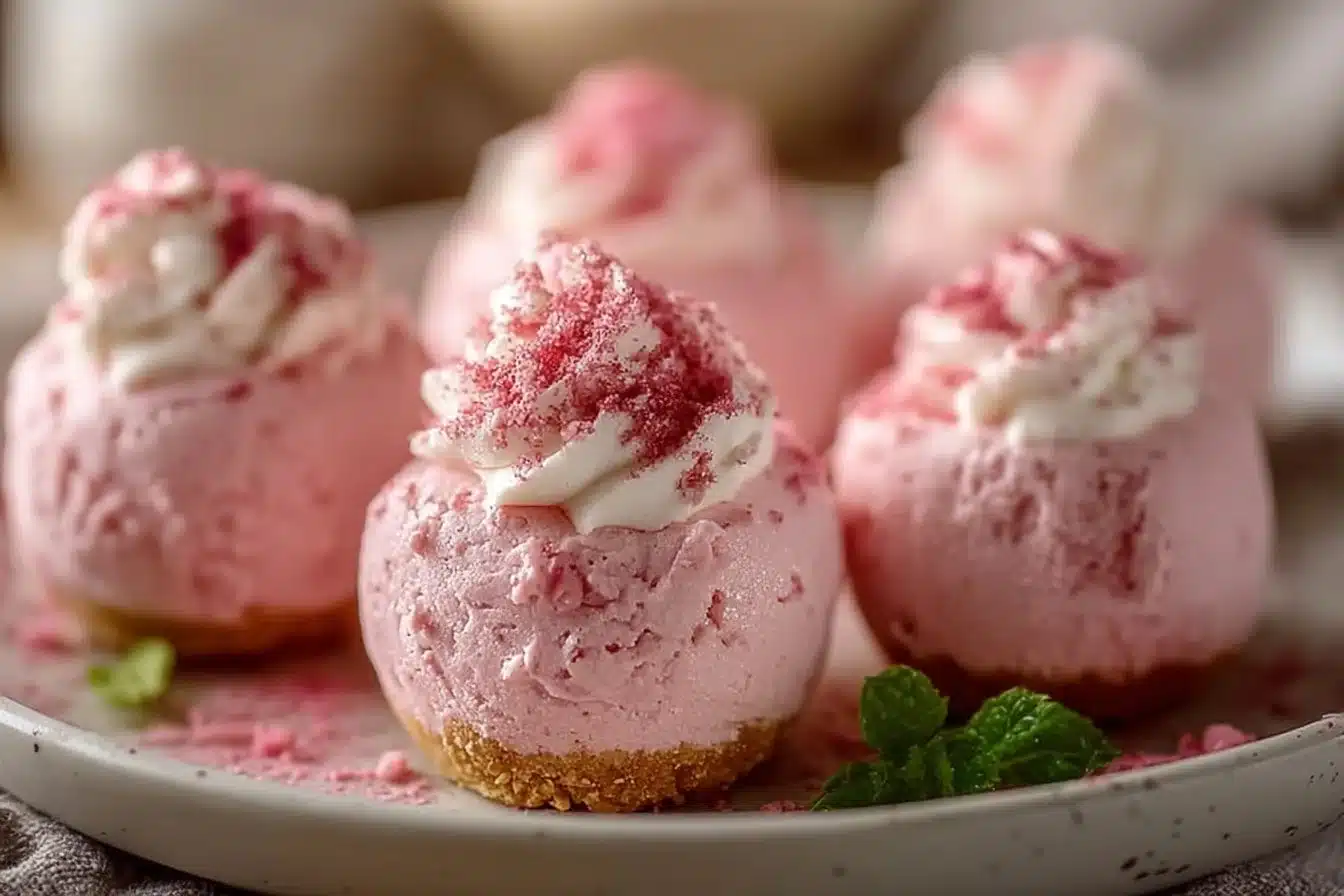
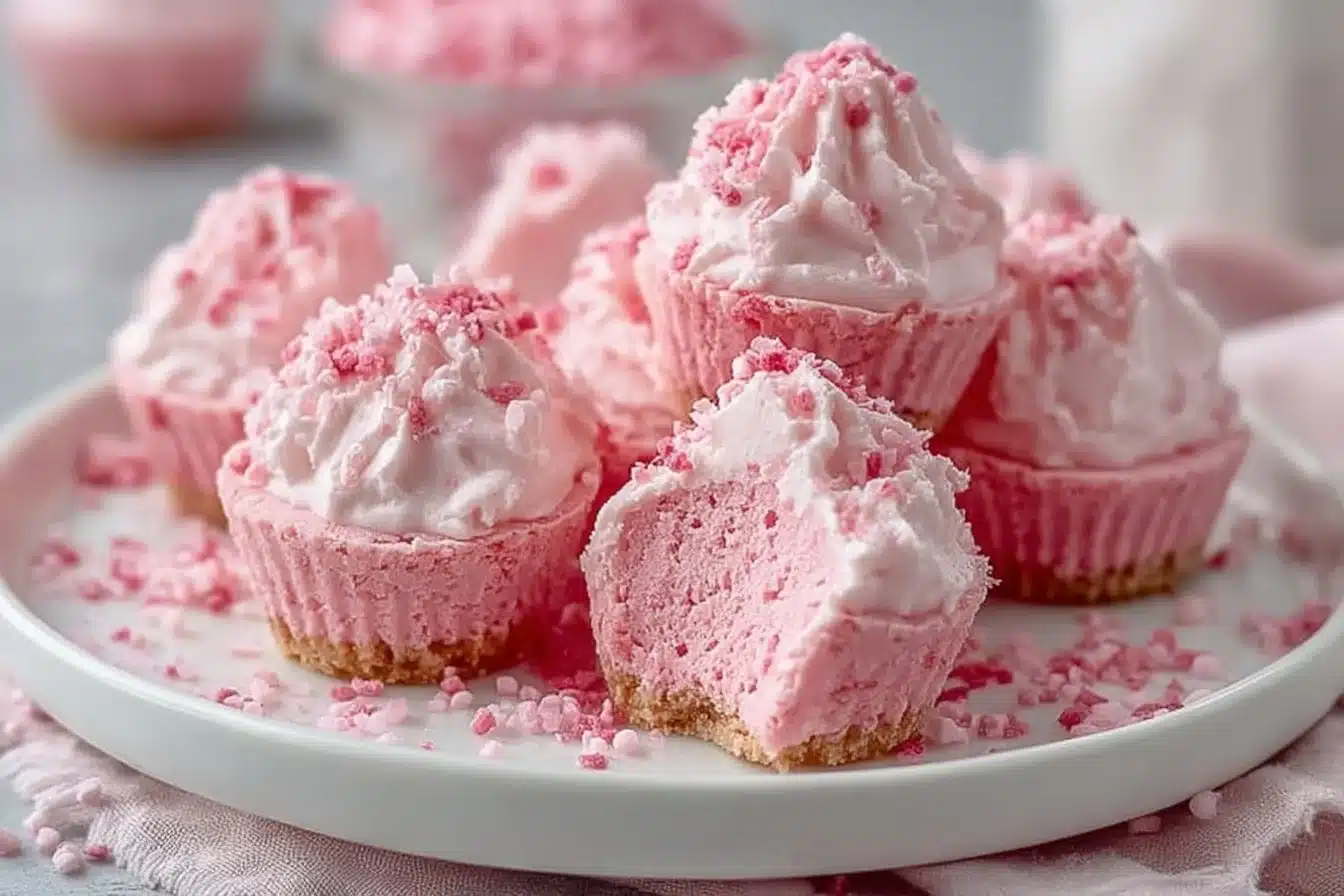
The first time I made these No Bake Pink Velvet Cheesecake Bites I was aiming for something that felt celebratory but didn’t require turning on the oven. What you get is a tiny, silky cheesecake with a tender graham shell and a soft, blush-pink filling that holds its shape but still yields like a mousse when you bite in.
They’re fast to put together — the crumb shells only need 10–15 minutes to set — and the filling comes together in minutes if your cream cheese is truly softened. If you like small, party-ready desserts you can prep ahead, take a look at my full Pink Velvet Cheesecake Bites post for more photos and serving ideas.
Why You’ll Love This Recipe
- Little bites, big payoff: each mini cheesecake is one tidy mouthful — a buttery graham base followed by a pillowy, pink filling that’s creamy without being heavy.
- Speed and ease: no baking, no water baths — the crust firms in the fridge in 10–15 minutes and the whole platter is ready after an hour of chilling.
- Pretty without fuss: a tiny sprinkle of mini chocolate chips, red velvet crumbs, or a single raspberry makes each bite look finished and festive.
- Texture play: the slightly crunchy crumb shell contrasts with an airy whipped-cream-lifted cream cheese filling for a clean, light mouthfeel.
- Make-ahead friendly: you can assemble the shells and the filling separately and combine them when you’re ready to serve.
One bite-sized alternative to try later: if you want a spicier profile, my Carrot Cake Cheesecake Bites use a similar method with warm spices and a tender crumb.
The Story Behind This Recipe
This came from a simple desire: a fuss-free, pink cheesecake that looks as good on a dessert tray as it tastes, built from pantry-friendly ingredients and a method that keeps the texture light — much like my approach in the chocolate chip no-bake cheesecake.
What It Tastes Like
Sweetness is moderate: the powdered sugar smooths the cream cheese without making the filling cloying. The aroma is faintly vanilla with a hint of butter from the crust. Richness comes from the cream cheese and whipped cream, but the lifted whipped cream keeps it airy rather than dense. You’ll notice a clean contrast between the crunchy, buttery crumb and the soft, slightly tangy pink filling.
Ingredients You’ll Need
A quick note on ingredients: use full-fat cream cheese for the silkiest filling; room temperature is key so the mixture is lump-free. Whipped heavy cream lightens the texture — fold it in gently so the filling stays airy. If you prefer a natural tint, beet juice concentrate gives pink color with a subtle vegetal note; red food coloring gives a clearer candy-pink shade. For a different crust flavor, vanilla wafer crumbs swap in easily and keep the shell crisp.
- 1 ½ cups graham cracker crumbs or vanilla wafer crumbs
- 5 tbsp unsalted butter, melted
- Pinch of salt
- 8 oz cream cheese, softened
- ½ cup powdered sugar
- 1 tsp vanilla extract
- Red food coloring or 1 tbsp beet juice concentrate
- 1 cup heavy whipping cream, whipped
- Mini chocolate chips or red velvet cake crumbs for garnish (optional)
- Fresh raspberries or white chocolate ganache (optional)
If you like the biscoff flavor profile, see how a crunchy cookie crust changes the texture in my Creamy No-Bake Biscoff Cheesecake.
How to Make No Bake Pink Velvet Cheesecake Bites
- Prepare your pan: line a mini muffin pan with paper liners or use silicone mini molds so the bites pop out cleanly. Lining makes it easier to remove and serve.
- Make the crumb shells: combine the graham cracker or vanilla wafer crumbs with the melted butter and a pinch of salt. Work it with a fork until the crumbs feel like damp sand — they should clump when pressed between fingers.
- Press shells into cups: press about 1 tablespoon of the crumb mix into each liner and push down firmly to compact the base and a tiny rim. The shells should hold together when you press the top; if they crumble, add a few drops more butter. Chill the pan in the fridge for 10–15 minutes so the butter firms and the shells set.
- Beat the cream cheese: in a medium bowl, beat the softened cream cheese until smooth and free of lumps. Scrape down the bowl so the texture is silky before adding anything else.
- Sweeten and flavor: add the powdered sugar and vanilla extract to the cream cheese and beat until fully incorporated — the mixture will be thick and slightly glossy.
- Color the filling: add red food coloring one drop at a time and stir until you reach a soft pink. If using beet juice concentrate, stir in the tablespoon and adjust to taste; the beet will give a subtler, deeper pink and a touch of earthiness.
- Fold in whipped cream: gently fold the whipped heavy cream into the cream cheese mixture in two additions. Stop folding when the mixture is smooth, light, and homogenous — you want it airy, not dense. Overmixing will deflate the whipped cream and yield a heavier filling.
- Fill the shells: spoon or pipe the pink filling into each chilled crumb shell, filling to the top and smoothing the surface with the back of a spoon. A piping bag makes tidy, even tops; a spoon is fine for a rustic finish.
- Chill until firm: place the filled bites back in the fridge and chill for at least 1 hour. They’re done when the filling holds its shape and feels set to a gentle touch — not liquid or very jiggly.
- Garnish and serve: just before serving, top each bite with mini chocolate chips, a sprinkle of red velvet crumbs, a fresh raspberry, or a small drizzle of white chocolate ganache. The contrast of a single bright raspberry or dark mini chip makes each bite visually striking.
Small warning: if your cream cheese isn’t properly softened, you’ll get lumps. Soften on the counter for 30–60 minutes or microwave in 5–7 second bursts if you’re in a rush.
For another no-bake take that uses a similarly simple assembly but a different cookie base, see my Decadent No-Bake Biscoff Cheesecake.
Tips for Best Results
- Soften cream cheese fully: room temperature cream cheese makes for a smooth, lump-free filling — it should give slightly when pressed.
- Whip cream to soft peaks: stop whipping when peaks hold but still bend at the tip; this gives lift without making the filling grainy.
- Pack the crust firmly: compacting the crumb shell well prevents sogginess and helps the base hold when you eat the bite.
- Chill sufficiently: at least 1 hour is necessary; for a snappier set, chill 2–3 hours. They should feel set to the touch, not liquid.
- Garnish last minute: toppings like raspberries or ganache can weep or soften the crumb if added too early; add them right before serving for the best presentation.
Variations and Substitutions
- Crust swap: use vanilla wafer crumbs instead of graham for a sweeter, cookie-like base.
- Natural coloring: use the 1 tbsp beet juice concentrate as listed for a natural hue; expect a subtle earthy note.
- Chocolate topping: mini chocolate chips add a pleasant bitter-sweet pop against the sweet filling — no extra tools needed.
Avoid swapping the heavy cream for milk or low-fat alternatives; the whipped cream is what lightens the filling and keeps the texture airy.
How to Serve It
Serve chilled straight from the fridge on a small platter; they’re lovely grouped in clusters of 6–8 with a mix of garnishes — some with raspberries, some with chocolate chips. For a party, place a small doily under each mini liner or serve on a bed of fresh mint for color contrast.
How to Store It
- Fridge: store in an airtight container in a single layer for up to 3 days. Keep garnishes like raspberries separate and add them just before serving.
- Freezer: you can freeze un-garnished bites on a tray until solid, then transfer to a freezer bag for up to 1 month; thaw in the fridge for a few hours before serving.
- Make-ahead: prepare crusts and filling separately up to a day ahead; assemble and chill at least 1 hour before serving for best texture.
Final Thoughts
These pink velvet cheesecake bites balance simple technique with a high-impact result: a creamy, mousse-like filling and a crisp, buttery shell that makes them feel special without stress. They’re an easy, crowd-pleasing dessert to make for a small gathering or a last-minute celebration.
Conclusion
If you’d like a strawberry variation with a chocolate finish, try No Bake Mini Strawberry Cheesecakes with Chocolate Ganache for inspiration. For a red-velvet flavored full-size approach, see No Bake Red Velvet Cheesecake – Taste and Tell Blog. And for another pink, no-bake parfait-style dessert to compare textures, check out Pink Lemonade No Bake Cheesecake Parfaits – Cravings of a Lunatic.