Why This Danish Recipe Works
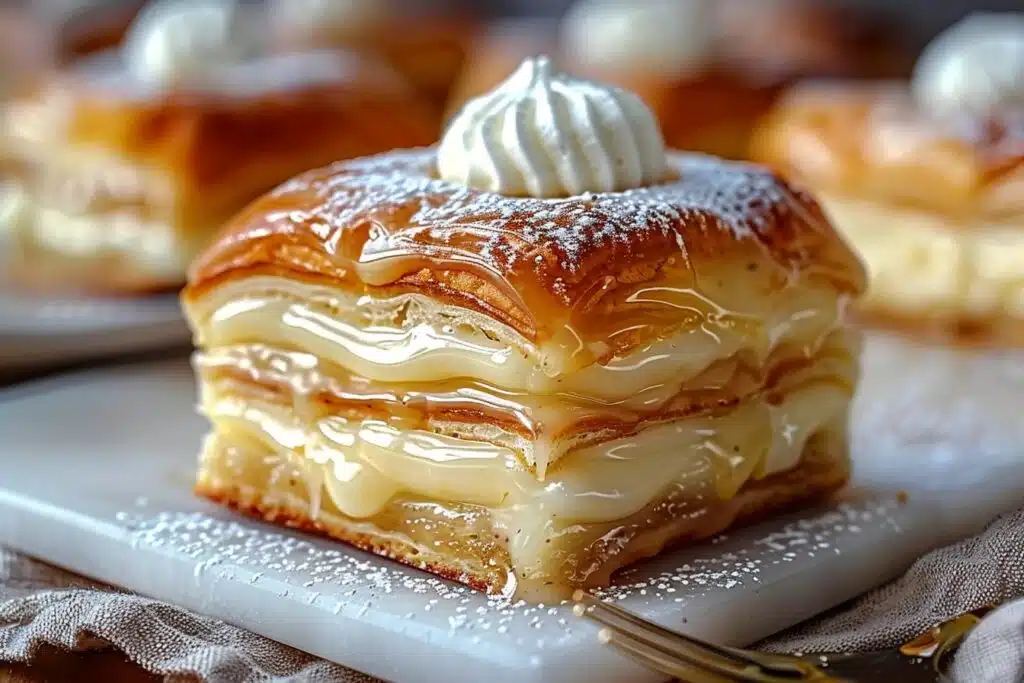
This Mouthwatering King’s Hawaiian Cheesecake Danish You’ll Love gives you bakery style pastry without any fussy dough or long chilling time. You start with soft, sweet King’s Hawaiian rolls, so you get that pillowy, brioche like base without touching yeast or a rolling pin. The rolls bake up golden on top and stay tender inside, which means the creamy cheesecake layer has a cozy little nest instead of oozing all over the pan.
Since the cream cheese filling uses only softened cream cheese, sugar, and vanilla bean paste, it bakes into a rich, tangy layer that sets softly instead of turning dry or chalky. You get that classic cheesecake flavor in a gentle, spoonable layer tucked between sweet bread. It tastes like a mash up of a cheese danish and a breakfast casserole, in the very best way.
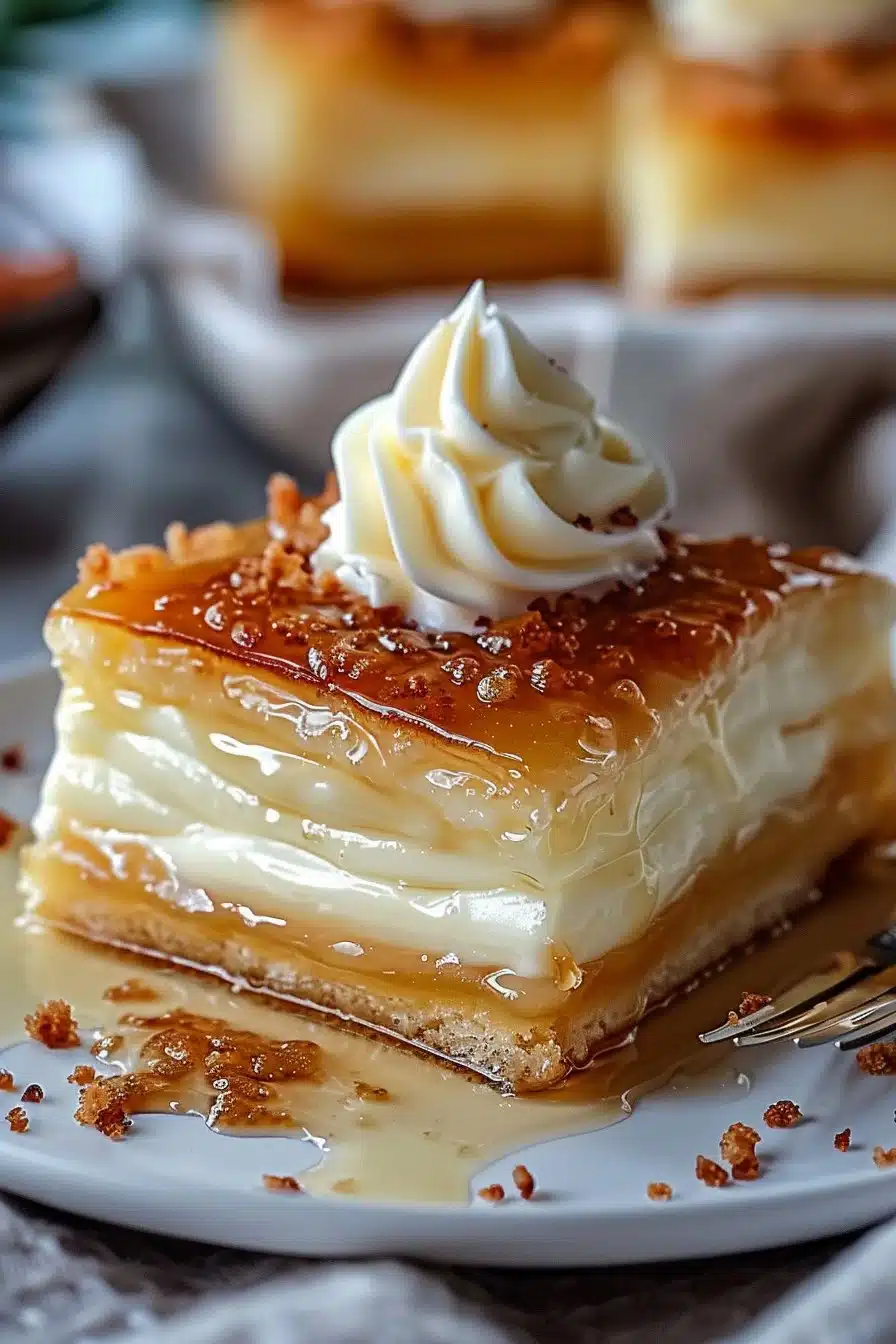
The structure of this Mouthwatering King’s Hawaiian Cheesecake Danish You’ll Love also makes it very forgiving. Splitting the rolls and building the danish in a 9 by 13 inch pan keeps the filling contained, so it does not leak out the way it can with individual pastries. The top layer of rolls shields the cream cheese mixture as it bakes, so it warms through gently and stays lush instead of overbaking. A simple powdered sugar glaze goes on before baking, which melts into the tops, caramelizes slightly, and gives you that shiny, lightly crisp finish you see in bakery cases.
You end up with 12 neat portions that slice cleanly, travel well for potlucks, and reheat beautifully for breakfast, dessert, or a late night kitchen snack. It feels special enough for holidays but easy enough to pull together on a sleepy Sunday morning.
On a practical level, this Mouthwatering King’s Hawaiian Cheesecake Danish You’ll Love fits real life. You use one bowl for the filling and one for the glaze, so cleanup stays quick. The ingredients are simple and familiar, so you can keep everything on hand for last minute guests or a brunch spread next to your favorite cinnamon rolls or stuffed French toast. The bake time is just long enough for the rolls to toast and the glaze to bubble, so you can prep, bake, and serve in about half an hour. It works for brand new bakers and seasoned home cooks who just want something low effort and high reward.
How to Make It
You will start this Mouthwatering King’s Hawaiian Cheesecake Danish You’ll Love by getting your pan and rolls ready. Preheat your oven to 350°F (175°C), then lightly grease a 9 by 13 inch baking dish so nothing sticks. Take your 12 King’s Hawaiian rolls and gently split each one in half horizontally, like you would for sliders, trying to keep the tops and bottoms in even sheets if you can. Nestle the bottom halves snugly into the dish, edges touching, to create one solid layer that will hold the cheesecake filling.
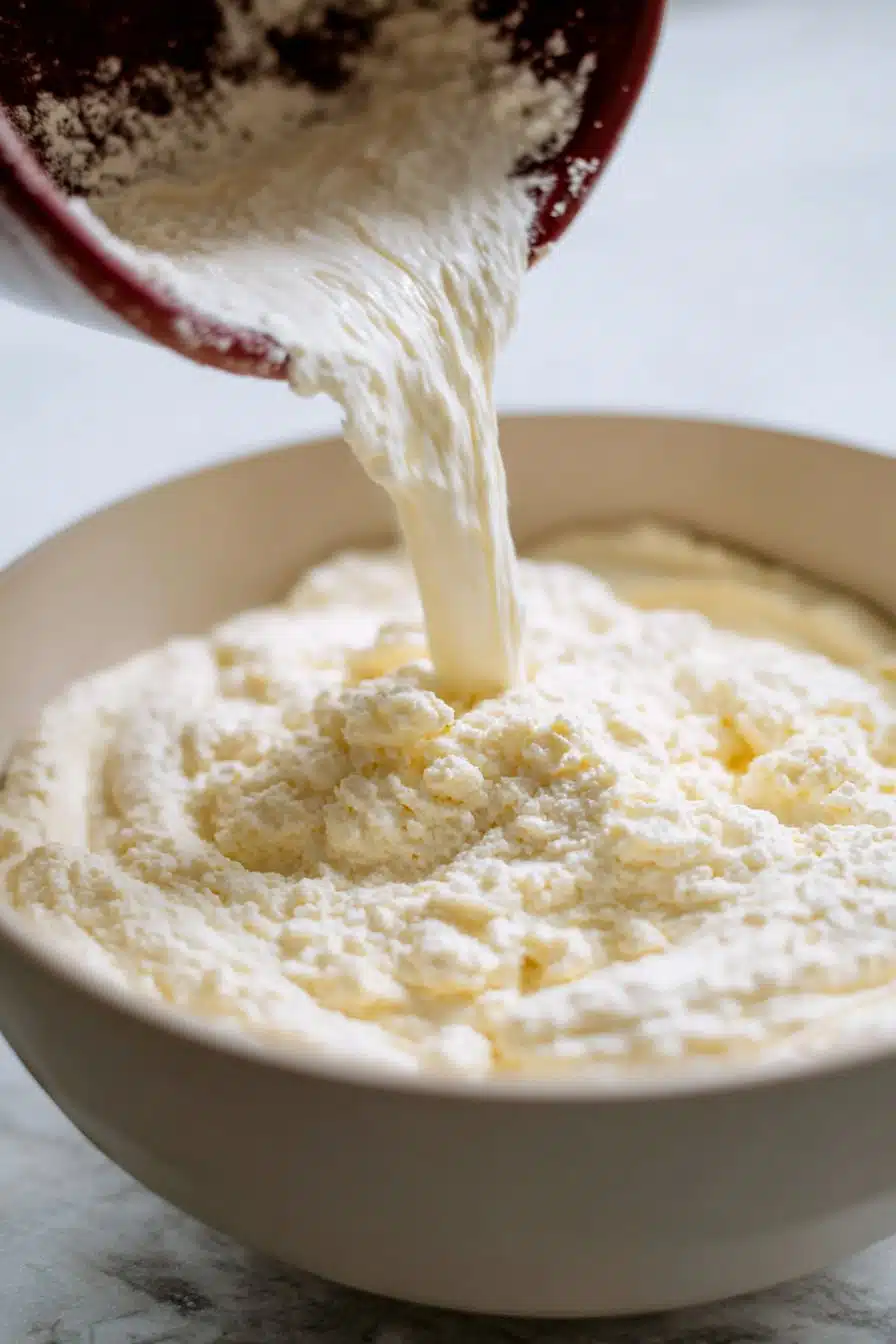
Next, make the creamy center that turns these sweet rolls into a Mouthwatering King’s Hawaiian Cheesecake Danish You’ll Love. In a medium bowl, beat the softened cream cheese, granulated sugar, and vanilla bean paste until the mixture looks completely smooth and a bit fluffy, with no visible lumps. If your cream cheese feels cool and stiff, let the mixer run a little longer and scrape down the sides and bottom of the bowl a couple of times, because stubborn bits will not smooth out in the oven. Spread this cheesecake mixture over the roll bottoms in an even layer, right up to the edges, so every square has that tangy sweetness.
Gently place the top halves of the rolls back on, lining them up with their bottoms, and press very lightly so the filling hugs the bread but does not squish out. You want a soft sandwich effect, not a pancake.
Instructions Process of Mouthwatering King’s Hawaiian Cheesecake Danish You’ll Love
Now give your danish its glossy finish. In a clean bowl, whisk together the powdered sugar, milk, and a little more vanilla bean paste until you have a smooth, pourable glaze that falls off the whisk in a thick ribbon. If it looks too thick and clings to the whisk in clumps, add milk a teaspoon at a time. If it runs like water, dust in a spoonful more powdered sugar and whisk again. Drizzle the glaze evenly over the tops of the rolls, letting it drip into the seams for extra sweetness.
Slide the pan into the oven and bake for 20 to 25 minutes, until the tops are golden, the glaze is bubbling around the edges, and your kitchen smells like a corner bakery. Let your Mouthwatering King’s Hawaiian Cheesecake Danish You’ll Love cool for at least 10 minutes so the filling can settle a bit and slice more cleanly. Serve warm or at room temperature, ideally with a cup of coffee and someone you like sharing dessert with.
Time, Prep, and Storage Plan
You can have this Mouthwatering King’s Hawaiian Cheesecake Danish You’ll Love on the table in about 35 minutes, which makes it perfect for last minute guests or a relaxed weekend brunch. Plan for about 10 minutes of hands on time to split the rolls, whip the cream cheese filling, and mix and drizzle the glaze, then 20 to 25 minutes of baking while your kitchen fills with that buttery, bakery style aroma.
If you want to make your morning even easier, you can split the rolls and mix the cream cheese filling the night before. Store the filling covered in the fridge and assemble right before baking. I like to set the cream cheese mixture on the counter while the oven preheats so it softens slightly and spreads smoothly without tearing the rolls.
Once baked, let your Mouthwatering King’s Hawaiian Cheesecake Danish You’ll Love cool for at least 10 to 15 minutes so the filling can thicken a bit and the glaze is no longer molten. For storage, keep leftovers covered in the fridge for up to 3 days since the filling is dairy based. You can store the pieces right in the baking dish wrapped tightly, or move them to an airtight container with parchment between layers to keep the tops from sticking.
To reheat, warm individual pieces in the microwave for 10 to 15 seconds or in a 300°F oven for about 8 to 10 minutes until just warmed through. The rolls should feel soft and warm, not toasted. The texture is best within the first 24 hours, when the rolls stay extra fluffy and the cheesecake center tastes like a soft, sweet cloud. If you are planning a brunch spread with items like baked French toast or a cozy cinnamon roll casserole, bake this danish last so it hits the table warm and fragrant.
Flexible Options and Serving Notes
This Mouthwatering King’s Hawaiian Cheesecake Danish You’ll Love can wear a lot of different outfits, so feel free to play a little. For a brunch crowd, I like to tuck a few spoonfuls of lemon curd or raspberry jam into the cream cheese layer, using a small offset spatula or butter knife to swirl it in without going all the way to the edges. If you want it a bit lighter, you can swap half the cream cheese for ricotta, just beat it very smooth so the filling still bakes up creamy instead of grainy.
For an extra indulgent dessert night, add a handful of mini chocolate chips over the cream cheese, or sprinkle the tops with sliced almonds in the last 10 minutes of baking for a toasty crunch. You can even cut the assembled rolls into individual pieces before baking if you want more caramelized edges on every portion.
Serving is where this Mouthwatering King’s Hawaiian Cheesecake Danish You’ll Love really shines, because it works warm, room temperature, or chilled. For a cozy weekend breakfast, serve it slightly warm with fresh berries and a dusting of powdered sugar on top, and maybe a side of crispy halal smoked turkey strips to balance the sweetness. If you are bringing it to a potluck, bake it fully, let it cool, then cover the pan and serve at room temperature so you are not juggling reheating.
For a more elegant dessert, chill the baked danish, slice it into neat squares, and plate with a drizzle of berry sauce or a spoonful of macerated strawberries, similar to how you might serve a simple strawberry shortcake. Leftovers keep well in the fridge for up to 3 days, and you can warm individual pieces in a low oven or the microwave for a few seconds until the center just softens again. If you love easy, shareable treats like this, you might also enjoy pairing it on a brunch table with my cinnamon roll casserole, pumpkin spice crumb bars, or a pan of soft sweet roll inspired desserts.
Serving of Mouthwatering King’s Hawaiian Cheesecake Danish You’ll Love
Conclusion
Some of my favorite mornings start with a pan of this danish on the counter, coffee brewing, and someone wandering in to ask, “Is it ready yet?” This cozy shortcut pastry has that kind of pull. It looks bakery fancy, but it feels like home.
I love how simple ingredients, a soft roll, and a creamy filling can turn an ordinary morning or late night craving into a tiny celebration. That is the heart of this recipe for me. It is not just about the golden tops or the tangy cheesecake center, it is about the smiles around the table, the sticky fingers, and the “save me one more” texts from friends. This Mouthwatering King’s Hawaiian Cheesecake Danish You’ll Love is the kind of treat that invites people to linger, share a story, and go back for seconds without apology.
I hope you feel ready and excited to bake this in your own kitchen. Take a quiet Sunday, a busy weekday, or a holiday morning and give it a try. Then come back and tell me how it went, what you added, and who you shared it with.
Recipe

Mouthwatering King's Hawaiian Cheesecake Danish You'll Love
Ingredients
Ingredients
- 12 King's Hawaiian rolls
- 8 oz cream cheese softened
- 1/4 cup granulated sugar
- 2 tsp vanilla bean paste divided
- 1 cup powdered sugar
- 2 tbsp milk
- Nonstick cooking spray or butter for greasing the pan
Instructions
- Preheat the oven to 350°F and lightly grease a 9x13 inch baking dish with nonstick spray or butter.
- Carefully split each King's Hawaiian roll in half horizontally and arrange the bottom halves in a single layer in the prepared baking dish.
- In a medium bowl, beat the softened cream cheese, granulated sugar, and 1 teaspoon vanilla bean paste until smooth and creamy.
- Spread the cream cheese mixture evenly over the roll bottoms, all the way to the edges.
- Place the top halves of the rolls back over the filling, aligning them with their bottoms and pressing gently so the filling spreads but does not squeeze out.
- In a separate bowl, whisk together the powdered sugar, milk, and remaining 1 teaspoon vanilla bean paste until smooth and pourable.
- Drizzle the glaze evenly over the tops of the rolls, letting it run into the gaps between rolls.
- Bake for 20 to 25 minutes, until the tops are golden brown and the glaze is bubbling around the edges.
- Remove from the oven and let cool for at least 10 minutes before slicing into 12 pieces and serving warm or at room temperature.
Notes
- For easier slicing, use a serrated knife and cut along the seams of the rolls after the danish has cooled slightly.