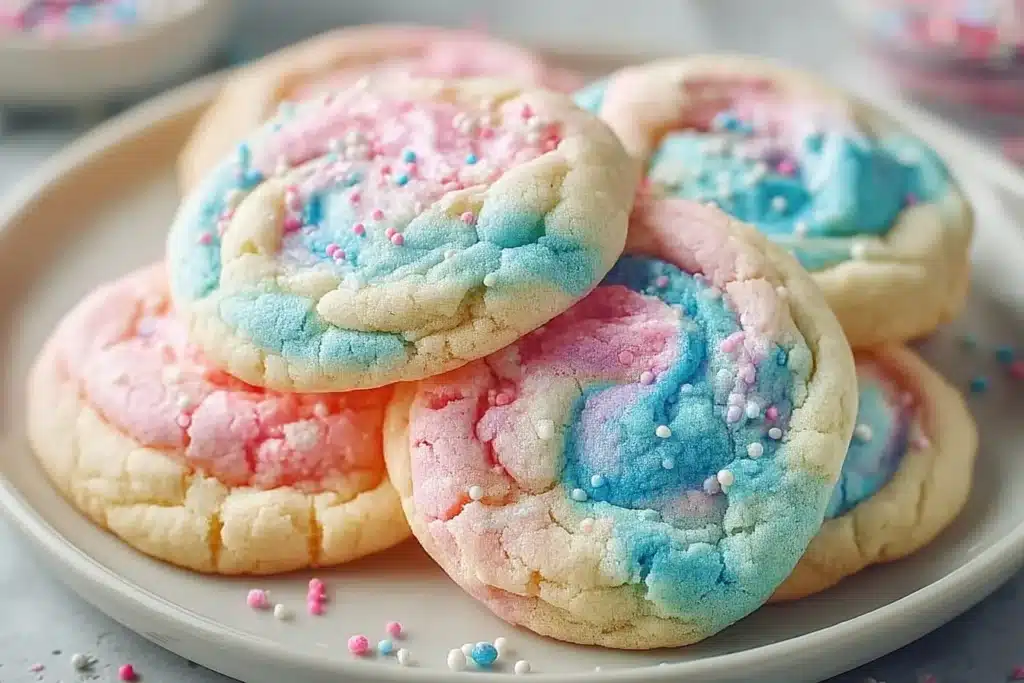
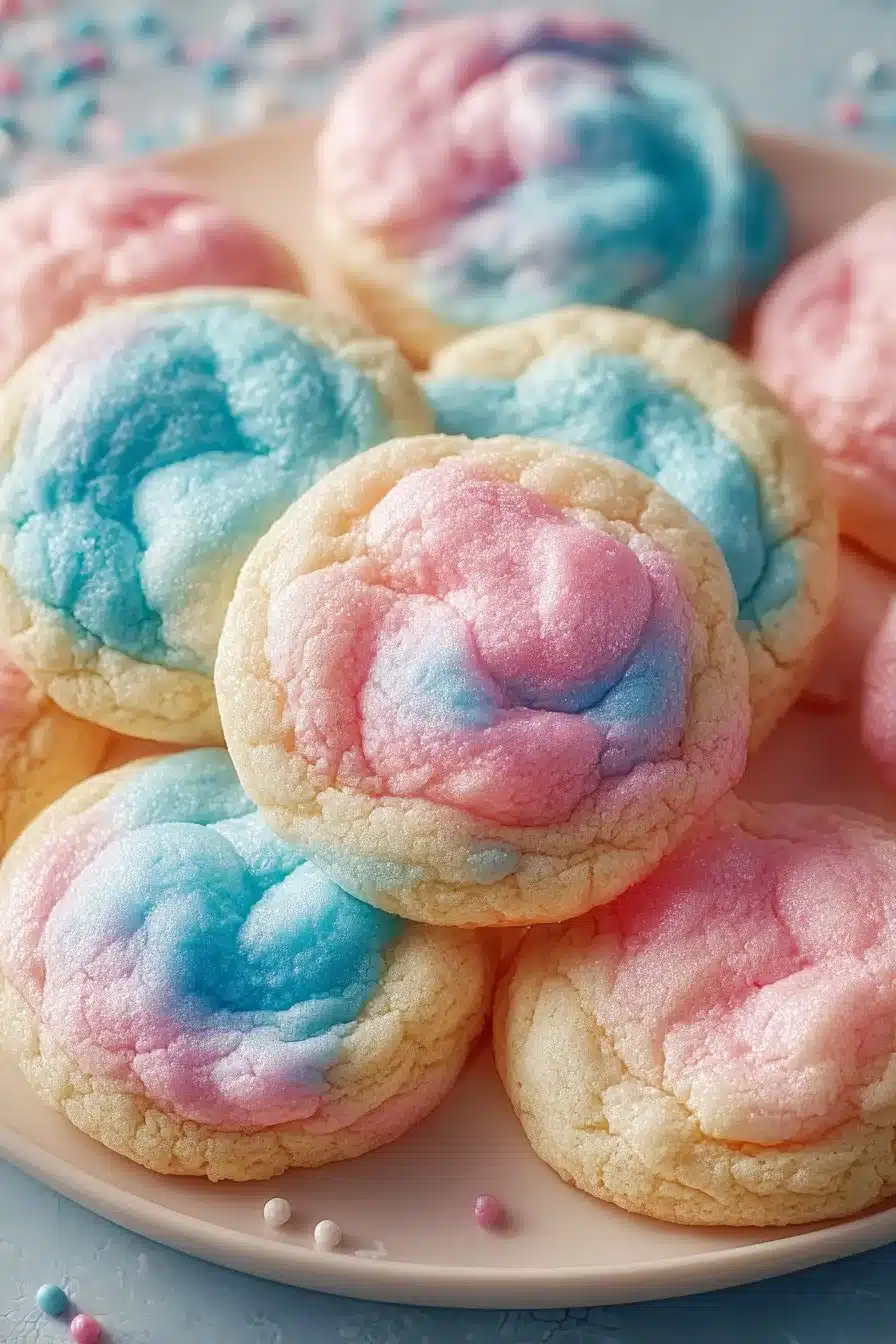
These cotton candy cookies are soft, pillowy rounds with a gentle marbled pink-and-blue look that actually tastes like a lightly sweet, buttery sugar cookie—only airier. They come together quickly and hold a tender, slightly underbaked center that keeps each bite chewy and nostalgic without feeling heavy.
They’re an easy choice for birthday platters, a weekend baking project with kids, or a bright addition to a cookie exchange. If you like a matching pastel treat, try pairing the plate with lighter-textured snacks like cotton candy Rice Krispy treats for a whimsical spread.
Why You’ll Love This Recipe
- Soft-crumb texture: the buttermilk and creamed butter give a tender crumb that holds a slightly underbaked center.
- Simple color play: gel colors give vibrant marbling without changing dough hydration.
- Fast to make: the dough comes together in one bowl and bakes in 10–12 minutes.
- Crowd-pleasing sweetness: not cloying—just a delicate, sweet sugar-cookie base that smells of vanilla.
- Portable and pretty: they stack well for gifting or picnic boxes, similar in appeal to my favorite banana bread cookies for grab-and-go treats.
The Story Behind This Recipe
I wanted a cookie that looked as fun as cotton candy but stayed soft for days, so I dialed the formula toward extra tenderness (hello, buttermilk) and avoided overbaking—no crisp shells, just soft, marbled centers that hold their shape.
What It Tastes Like
Bite into a slightly crisp outer edge that yields to a plush, cake-like center. The cookie is sweet but restrained, scented with warm vanilla and rich butter; the buttermilk keeps the crumb tender rather than dense, and the marbling is purely visual—no artificial flavor overload here.
Ingredients You’ll Need
A few key notes before the list: use softened (not melted) unsalted butter so the creaming traps air for lift; buttermilk keeps the crumb tender and slightly tangy—if you don’t have it, a quick sub is 1/4 cup milk + 1 teaspoon lemon juice (let sit 5 minutes). Gel food coloring gives vibrant streaks without thinning the dough like liquid colorings can.
- 2 1/4 cups all-purpose flour
- 1 teaspoon baking powder
- 1/2 teaspoon baking soda
- 1/2 teaspoon salt
- 1 cup unsalted butter, softened
- 1 cup granulated sugar
- 1 large egg
- 2 teaspoons vanilla extract
- 1/4 cup buttermilk
- pink gel food coloring
- blue gel food coloring
How to Make Irresistibly Soft Cotton Candy Cookies: A Nostalgic Treat
- Preheat and prep: Preheat your oven to 350°F (175°C). Line a baking sheet with parchment paper—parchment prevents sticking and encourages even browning.
- Whisk dry ingredients: In a medium bowl, whisk together the 2 1/4 cups all-purpose flour, 1 teaspoon baking powder, 1/2 teaspoon baking soda, and 1/2 teaspoon salt until thoroughly combined and aerated. This gives even lift and prevents pockets of leavener.
- Cream butter and sugar: In a large bowl, beat 1 cup softened unsalted butter and 1 cup granulated sugar for 2–3 minutes until light and fluffy—you should see the mixture pale and increase slightly in volume. This step traps the air that creates a tender texture.
- Add wet ingredients: Mix in 1 large egg, 2 teaspoons vanilla extract, and 1/4 cup buttermilk until smooth and uniform. The batter will be glossy and slightly loose from the buttermilk—don’t worry, that’s expected.
- Combine gently: Gradually add the dry ingredients to the wet mixture, folding with a spatula until just combined. Stop as soon as streaks of flour disappear—overmixing will make the cookies tougher. The finished dough should be soft, pliable, and slightly tacky rather than stiff.
- Color the dough: Divide the dough into two equal portions. Add pink gel coloring to one half and blue gel coloring to the other, kneading each portion until the color is evenly distributed. Use a toothpick-size amount at first; gel is concentrated.
- Marble and shape: Take small amounts of both pink and blue dough (about 1½-inch ball size total), gently roll them together once or twice to create a marbled effect—avoid overworking or you’ll blend to one color. Form into 1½-inch balls and place them 2 inches apart on the prepared sheet.
- Bake and judge doneness: Bake for 10–12 minutes. Look for edges that are just beginning to turn golden while the centers still look slightly underdone and glossy—that’s the cue to pull them. They’ll finish setting on the hot pan and remain soft.
- Cool: Let cookies rest on the baking sheet for 5 minutes, then transfer to a wire rack to cool completely. The exterior will firm just enough while the center stays tender.
A helpful resource for festive cookie-plating ideas is to reference seasonal collections like 20 delicious Easter treats if you’re serving these at a pastel-themed party.
Tips for Best Results
- Use soft, room-temperature butter—not melted. Creaming is what creates lift and the light crumb.
- Measure flour by spooning it into the cup and leveling—too much flour makes a dry cookie.
- If your kitchen is warm and the dough gets sticky, chill for 10–15 minutes; chilled dough spreads less and keeps marbling defined.
- Start with tiny amounts of gel color and add more until you get the intensity you want—gel is potent.
- Don’t overbake; the centers should look a touch underdone when removed. They’ll set as they cool and stay soft.
Variations and Substitutions
- Color swap: use any gel shades (lavender, mint) for different themes without changing texture.
- Buttermilk sub: if needed, make 1/4 cup by stirring 1 teaspoon lemon juice into 1/4 cup milk and resting 5 minutes—texture will be nearly the same.
- Extracts: swap half the vanilla for a small splash of almond or orange extract for a different aroma—start with 1/4 teaspoon so it doesn’t overpower.
- Make-ahead: shape dough balls and freeze on a sheet tray; transfer to a bag once firm and bake from frozen, adding 1–2 minutes to bake time.
For more kid-friendly pastel ideas, see 24 easy Easter treats for kids.
How to Serve It
Serve slightly warm so the centers are soft and yielding, paired with cold milk or a mild tea to balance the sweetness. For parties, stack in layers separated with parchment to maintain the marbled surface. They also make cheerful additions to lunchboxes when fully cooled.
How to Store It
- Room temperature: Store cooled cookies in an airtight container at room temperature for up to 3 days; a slice of bread in the container helps keep them soft.
- Refrigerator: Keep in an airtight container for up to 1 week if you prefer chilled cookies.
- Freezer: Freeze baked cookies in a single layer on a sheet tray, then transfer to a freezer-safe bag for up to 3 months. Thaw at room temperature for 30–60 minutes. You can also freeze shaped dough balls and bake from frozen (add 1–2 minutes to baking time).
Final Thoughts
These cotton candy cookies are an easy, reliable way to get bright, playful cookies that stay soft—great for gifts, celebrations, or any time you want a fun, tender bite. Give the dough a gentle hand when marbling and pull them from the oven when the centers still look a touch glossy for the best texture.
Conclusion
If you want a soft, indulgent breakfast companion to serve alongside these cookies, consider Mom’s Scratch Made Cinnamon Rolls – Kessler Baking Studio for a bakery-style treat. For another take on cotton candy–inspired cookies, see A Sweet Treat: How To Make Cotton Candy Cookies for extra inspiration. For broader dessert ideas and seasonal sweets, browse the Desserts & Sweets Archives – FoodTd.

Cotton Candy Cookies
Ingredients
Dry Ingredients
- 2 1/4 cups all-purpose flour Measure by spooning into the cup and leveling.
- 1 teaspoon baking powder
- 1/2 teaspoon baking soda
- 1/2 teaspoon salt
Wet Ingredients
- 1 cup unsalted butter, softened Use soft, room-temperature butter, not melted.
- 1 cup granulated sugar
- 1 large egg
- 2 teaspoons vanilla extract
- 1/4 cup buttermilk Substitute with 1/4 cup milk + 1 teaspoon lemon juice if needed.
Coloring
- pink gel food coloring Use a toothpick-sized amount to start.
- blue gel food coloring Use a toothpick-sized amount to start.
Instructions
Preparation
- Preheat your oven to 350°F (175°C). Line a baking sheet with parchment paper.
- In a medium bowl, whisk together the flour, baking powder, baking soda, and salt until well combined.
Mixing
- In a large bowl, beat the softened butter and granulated sugar for 2–3 minutes until light and fluffy.
- Mix in the egg, vanilla extract, and buttermilk until smooth and uniform.
- Gradually add the dry ingredients to the wet mixture, folding until just combined.
Coloring and Shaping
- Divide the dough into two portions. Add pink gel coloring to one half and blue gel coloring to the other, kneading until the color is evenly distributed.
- Take small amounts of both doughs, about 1½-inch ball size, and gently roll them together to create a marbled effect.
- Form into 1½-inch balls and place them 2 inches apart on the prepared sheet.
Baking
- Bake for 10–12 minutes, until the edges are just golden and the centers are slightly underdone.
- Let the cookies rest on the baking sheet for 5 minutes before transferring to a wire rack to cool completely.