The Memory Behind This Treat
The first time I whipped up a batch of Honeycomb Marshmallow Treats, I was transported back to a sunlit summer’s afternoon at my grandmother’s cozy kitchen. That particular day, the air was thick with the sweet scent of honey, and I remember her carefully drizzling it over freshly baked honeycomb candy. I watched in awe as the golden syrup transformed into delicate, crunchy pieces that she would sneak into our pockets before we ran off to play.
Years later, while experimenting with marshmallows for my own children, I felt a nudge of nostalgia and decided to combine these two beloved ingredients. The result was nothing short of magic! The soft, pillowy marshmallows melded beautifully with the crunchy honeycomb, creating a treat that made both kids and adults smile. The kitchen was filled with laughter and sticky fingers as my little ones eagerly helped mix and spread the gooey concoction into a pan lined with parchment paper.
These Honeycomb Marshmallow Treats have since become a family favorite, perfect for gifting or simply indulging on a cozy afternoon. They’re incredibly easy to make, which is always a bonus for busy parents or anyone looking for a quick, delightful dessert. Every bite brings back those cherished moments, reminding me of the joy found in simple ingredients and shared memories. Whether you’re new to making candy or a seasoned pro, this treat promises a sweet escape into nostalgia with every crunchy, soft bite.
How To Make It (Mix & Ingredients)
Creating these Honeycomb Marshmallow Treats is like conducting a sweet symphony right in your kitchen. Start by gathering your ingredients—this helps keep the process smooth and enjoyable. You’ll need 1 cup of granulated sugar, 1/4 cup of light corn syrup, and 2 tablespoons of honey. These form the golden, bubbly base. Combine them in a saucepan over medium heat, stirring until the sugar dissolves. Let it come to a boil and watch as it transforms into a golden amber color. This visual cue is your sign to swiftly remove the pan from the heat.
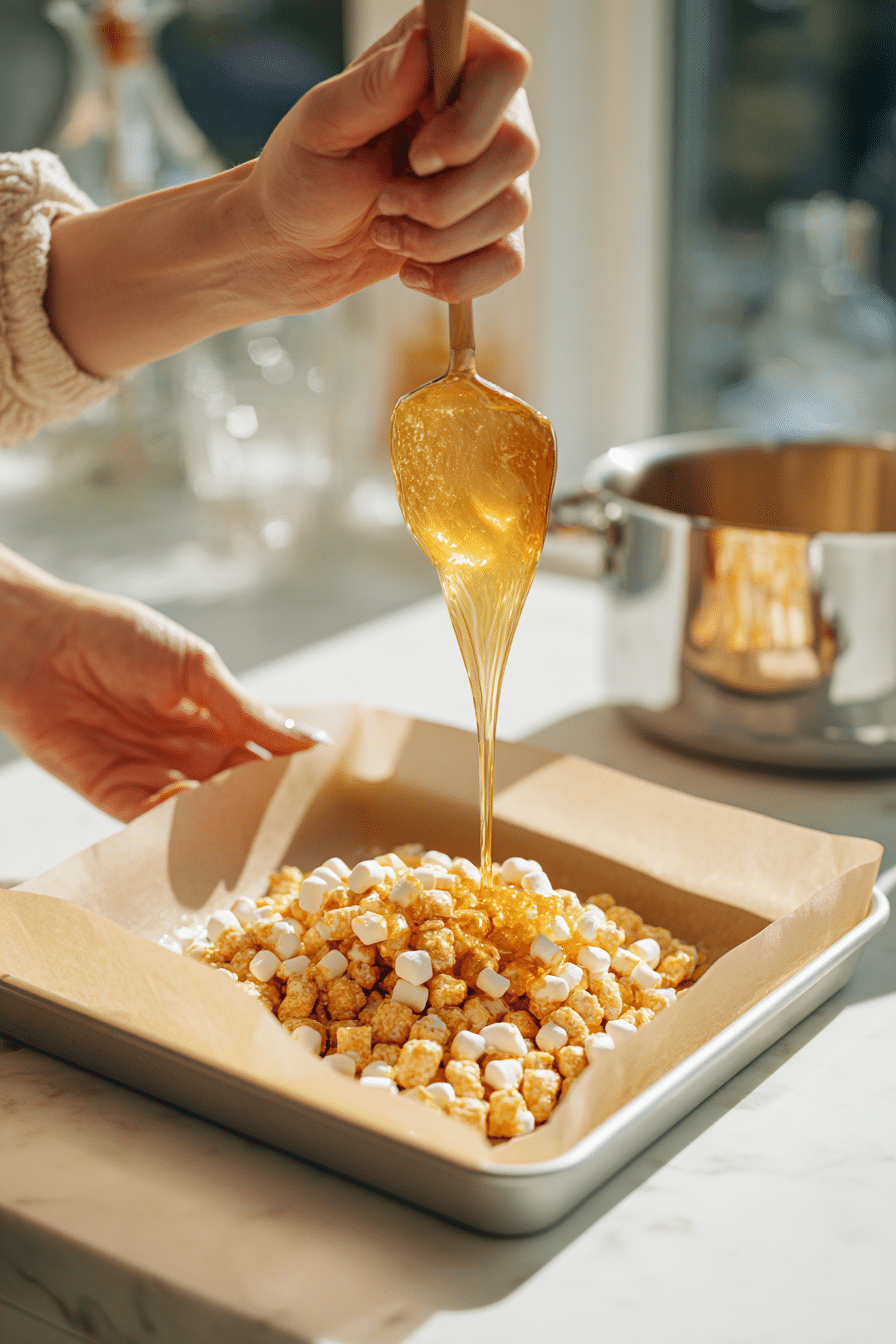
Instructions Process of Honeycomb Marshmallow Treats
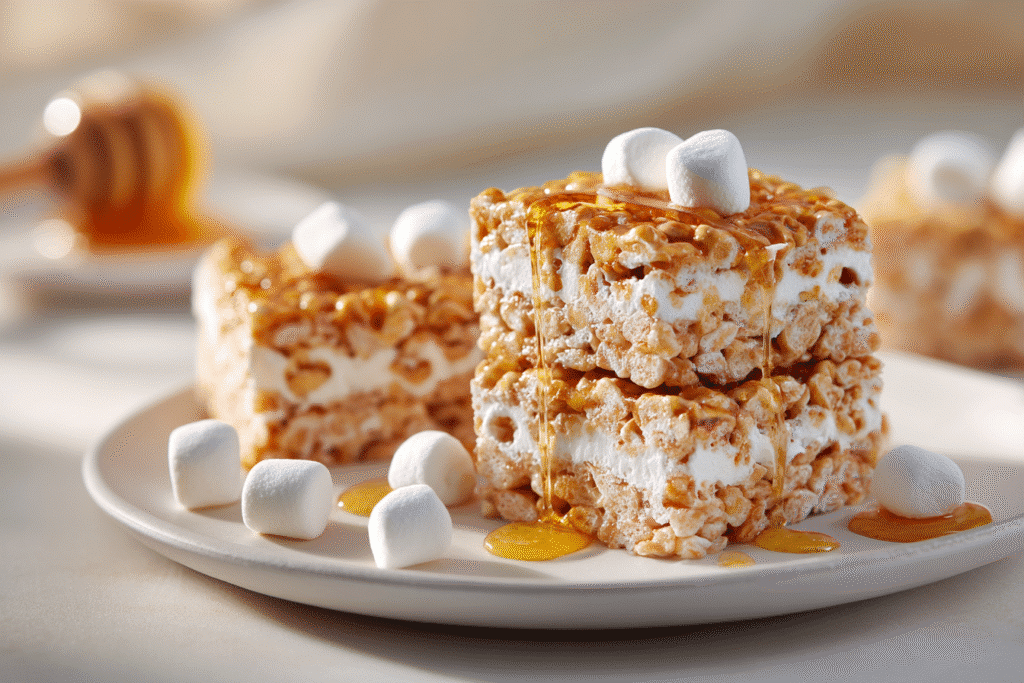
At this point, the magic truly happens. Stir in 1 teaspoon of baking soda, and watch it foam up like a school science experiment. Quickly fold in 3 cups of mini marshmallows and 2 tablespoons of unsalted butter—this is where the chewy, gooey magic begins. If you’re feeling adventurous, a teaspoon of vanilla extract can add a warm, aromatic touch. Stir until the marshmallows are evenly coated, ensuring every piece is enveloped in sweet buttery goodness.Finally, pour the mixture into a buttered or parchment-lined pan. Gently press it down, but be careful not to deflate the fluffy texture. Let it cool completely—a step that requires a bit of patience but is worth every minute. Once set, cut these delightful Honeycomb Marshmallow Treats into squares. Share them with friends or enjoy them alone, pondering the wonders of homemade sweetness. (For more marshmallow inspiration, check out my Marshmallow Chocolate Chip Cookies recipe!)
Make-Ahead & Storage
When it comes to Honeycomb Marshmallow Treats, you’re in luck because they store beautifully, making them perfect for prepping ahead of time. Once you’ve cut these golden squares of delight, store them in an airtight container at room temperature. They’ll stay fresh for up to a week. Be sure to layer them with parchment paper to prevent sticking—trust me, you’ll thank yourself later when you reach for a sweet fix and they’re not a gooey mess!
If you’re planning to make these treats ahead for a party or a cozy weekend snack, you can easily double the recipe. Just make sure to use a larger pan so everything sets evenly. These treats are also a great addition to a holiday gift box, paired with my favorite chocolate chip cookies for a delightful contrast.
Freezing Honeycomb Marshmallow Treats isn’t recommended, as the texture might change, losing that delightful crunch we all love. Instead, enjoy them fresh and make a new batch when cravings hit. This way, every bite remains as magical as the first! Remember, a few simple steps can make your treat time a breeze, leaving you more moments to savor the sweetness and maybe even share a few with friends—if you’re feeling generous!
Best Ingredients & Party Variations
When it comes to making Honeycomb Marshmallow Treats, the quality of your ingredients really shines through in every bite. The golden honeycomb candy owes its delightful crunch and flavor to the granulated sugar and honey—a combination that creates magic in your saucepan. I recommend using a light, floral honey to enhance the sweetness without overwhelming the palate. Mini marshmallows are your best friend here, as they melt just enough to create that dreamy, chewy texture. For those who love a hint of vanilla, a splash of vanilla extract can add a delightful depth.
Now, let’s talk party variations! These treats are perfect for customizing to suit your celebration. For a fun twist, try folding in some chocolate chips with the marshmallows—just be sure to let the honeycomb cool slightly first, or you’ll end up with a gooey mess. If you’re aiming for a more sophisticated touch, sprinkle in some sea salt flakes just before the mixture sets. This adds a lovely contrast to the sweetness and will have your guests reaching for seconds.
For themed parties, you can even add a few drops of food coloring to the marshmallow mix before combining with the honeycomb. This is an easy way to match your treats with any color scheme. And remember, these squares make for a fantastic gift! Just wrap them up with parchment paper and tie with a ribbon for a charming homemade present.

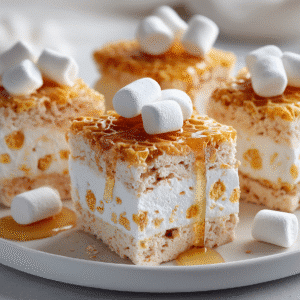
Serving of Honeycomb Marshmallow Treats
Conclusion
Making Honeycomb Marshmallow Treats is like crafting a little piece of happiness in your kitchen. There’s something truly magical about watching those golden sheets bubble up and transform into chewy, sweet perfection. It’s more than just a treat; it’s an experience that brings people together, whether you’re sharing them with family on a cozy night or wowing friends at a gathering.
I hope this recipe inspires you to create special moments of your own. It’s a delightful way to indulge your sweet tooth and make memories that last. So, roll up those sleeves and give it a try. You might just find a new favorite treat to share with loved ones.
For more delicious recipes like this, follow us on social media! Let’s keep baking and creating joyful memories together.
What makes Honeycomb Marshmallow Treats unique?
Honeycomb Marshmallow Treats combine the airy, bubbly texture of honeycomb candy with the softness of marshmallows. The baking soda creates air pockets, resulting in a delightful crunch that contrasts with the chewiness of the marshmallows. This combination makes them a fun and unique treat that’s both nostalgic and modern.
Can I use a different sweetener instead of corn syrup?
Yes, you can substitute corn syrup with golden syrup or light molasses if you prefer. Just keep in mind that this may alter the flavor slightly, giving it a richer taste. Ensure the consistency remains similar to achieve that perfect honeycomb texture.
What’s the best way to cut Honeycomb Marshmallow Treats?
To get clean cuts, let the mixture cool completely until firm. Use a sharp knife greased with a bit of butter or oil to prevent sticking. If the treats are particularly hard, warming the knife slightly can also help create smooth slices.
Recipe
Honeycomb Marshmallow Treats
Ingredients
Ingredients
- 1 cup granulated sugar
- 1/4 cup light corn syrup
- 2 tablespoons honey
- 1 teaspoon baking soda
- 2 tablespoons unsalted butter
- 3 cups mini marshmallows
- 1 teaspoon vanilla bean paste optional
Instructions
- Combine sugar, corn syrup, and honey in a saucepan and boil until golden amber. Remove from heat and stir in baking soda; mixture will foam.
- Quickly fold in marshmallows and butter until evenly coated. Add vanilla if desired.
- Pour into a buttered or parchment-lined pan, press gently, and let cool completely. Cut into squares and serve.
Notes
- Layer with parchment paper when storing to prevent sticking.