
What Makes This Recipe Reliable
I tested these Homemade Tim Tams the same way a bakery would test a new cookie. I baked batch after batch, adjusting the flour and cocoa so the cookies stay crisp enough to bite cleanly, but still soften a little once you add the filling and coating. The weights are given in grams and ounces, so whether you scoop with cups or use a scale, you can repeat the same texture I get in my own kitchen. I kept the ingredient list close to pantry basics, so you do not have to hunt for specialty flours or exotic chocolate just to get a proper Tim Tam style crunch.
The method is written for real home kitchens, not perfect test studios. I use specific sizes for cutting the dough, 1¼ by 2½ inch rectangles, so you know exactly how thick and long to shape the cookies for even baking and tidy sandwiches. The short bake time at 350 F keeps the cookies from drying out or turning bitter, while still building that deep cocoa flavor you expect in Homemade Tim Tams. The chocolate coating uses coconut oil for a smooth, snappy finish that sets up nicely at room temperature, so you can actually dip and cool them without a tempering degree in pastry arts. If you have already tried my chocolate sandwich cookies or no chill brownie cookies, you will recognize the same clear, step by step style here that takes the guesswork out of a fancy looking treat.

Serving Image of Homemade Tim Tams
The Method (Step-by-Step)
Start by making your cookie dough and giving it time to chill so it stays neat and sharp in the oven. Cream the room temperature butter and granulated sugar together until the mixture looks pale and fluffy, then beat in the egg until it disappears into the batter. Sift in the cocoa powder, flour, and a pinch of salt, then mix just until a soft, even dough forms. If it feels sticky, dust your hands lightly with flour and gently bring it together, then press it into a flat rectangle. Wrap it well and chill for at least 1 hour, so you can slice clean little rectangles for your Homemade Tim Tams instead of fighting a soft, slumpy dough.
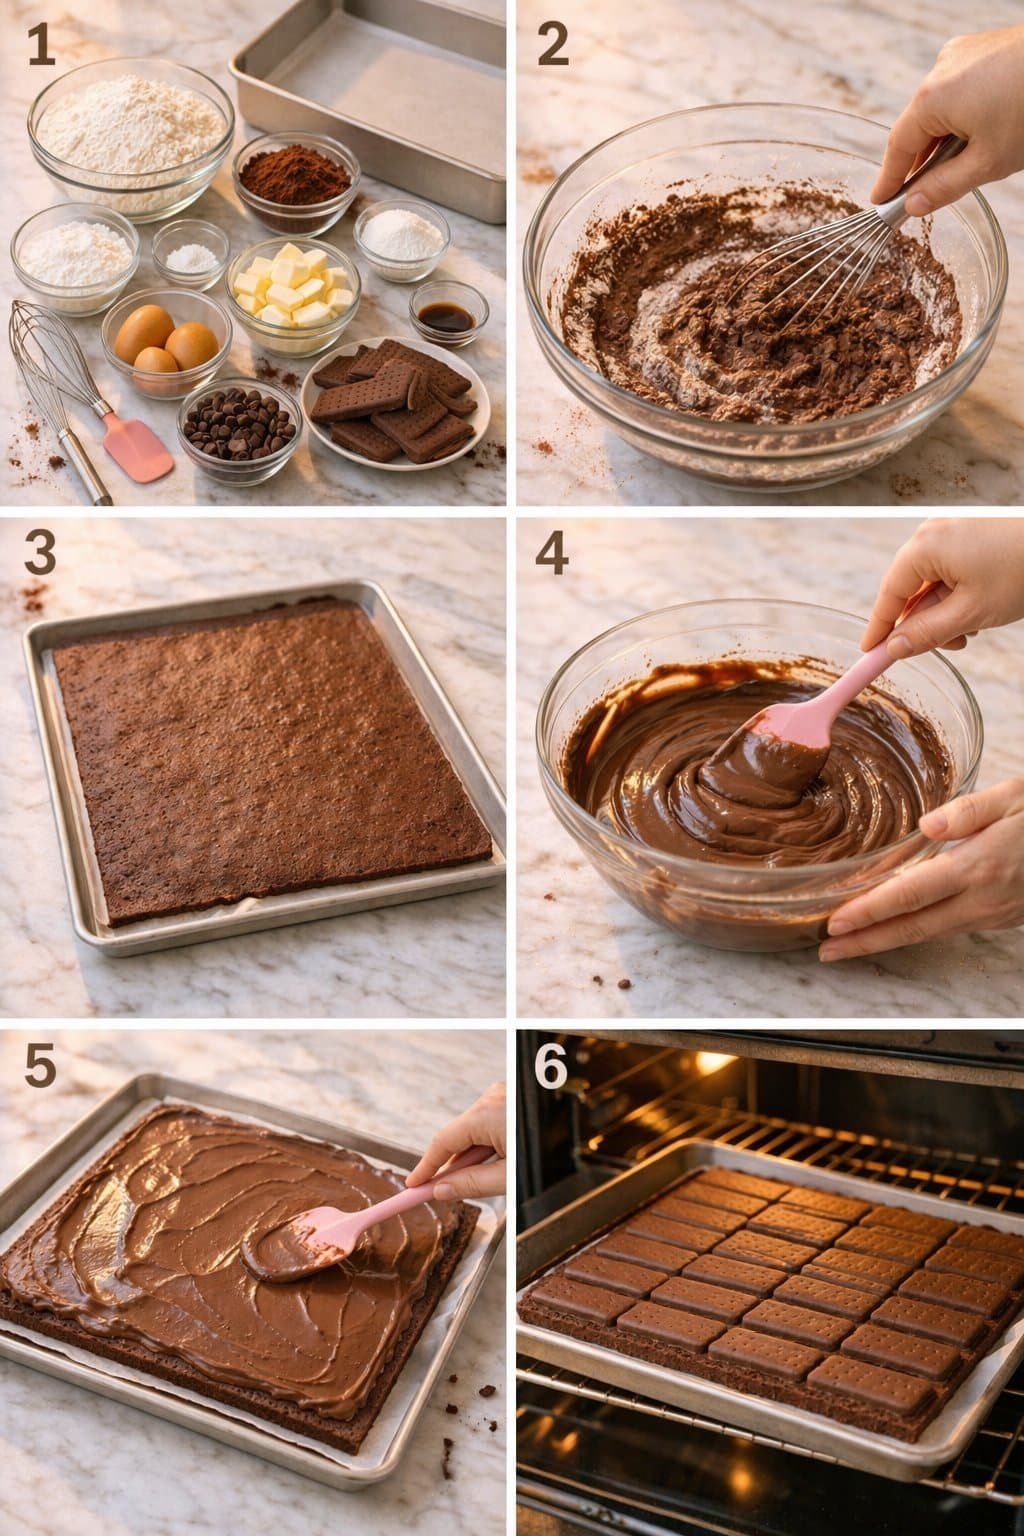
Process Image of Homemade Tim Tams
Once the dough is firm, preheat your oven to 350 F (180 C) and line two baking trays with parchment. Cut the dough into 28 rectangles, about 1¼ inch by 2½ inches each, and space them out on the trays so air can circulate. Bake for about 10 minutes, until the cookies look set and slightly dry on top, then let them cool completely on the trays. While they cool, beat together the powdered sugar, cocoa powder, and chocolate malted milk powder with softened butter to make a thick, spreadable filling. Spread a thin, even layer on half of the cookies, then press a second cookie on top to create neat little sandwiches. For the coating, melt your chocolate with coconut oil in short bursts in the microwave, stirring until smooth and glossy, then dip each cookie sandwich and place it on a parchment lined sheet. Let your Homemade Tim Tams set at room temperature or in the fridge until the chocolate is firm and has that classic snappable bite when you take your first taste.
Keep It Fresh: Timing and Storage
Homemade Tim Tams are at their absolute best in the first 24 hours, when the biscuit is crisp, the filling is set, and the chocolate shell still has that glossy snap. If you plan to serve them for guests, I recommend making them the day before, so the chocolate coating has plenty of time to firm up and the flavors can cozy up together. Once the chocolate is fully set, tuck your cookies into an airtight container in a cool, dry spot in your kitchen, layering them between sheets of parchment so they do not stick or scuff. Kept this way at room temperature, they will hold their texture and flavor for about 4 to 5 days. If your kitchen runs hot, pretend they are fancy truffles and move them to the fridge instead.
For longer storage, you can refrigerate Homemade Tim Tams for up to 10 days or freeze them for about 2 months. In the fridge, place them in a sealed container to keep the chocolate from picking up stray odors from last night’s onions. For the freezer, arrange the set cookies on a baking sheet to firm up, then transfer to a freezer bag or container with parchment between layers so the chocolate coating does not get bruised. When you are ready to enjoy, thaw them in the fridge, then move to room temperature for 15 to 20 minutes so the biscuit softens slightly and the filling loosens. If you use these in a dessert board or alongside other treats, like a no bake cheesecake or chocolate mousse pie, always bring them out at the last minute so the chocolate stays neatly intact.
Swaps, Variations, and Serving Ideas
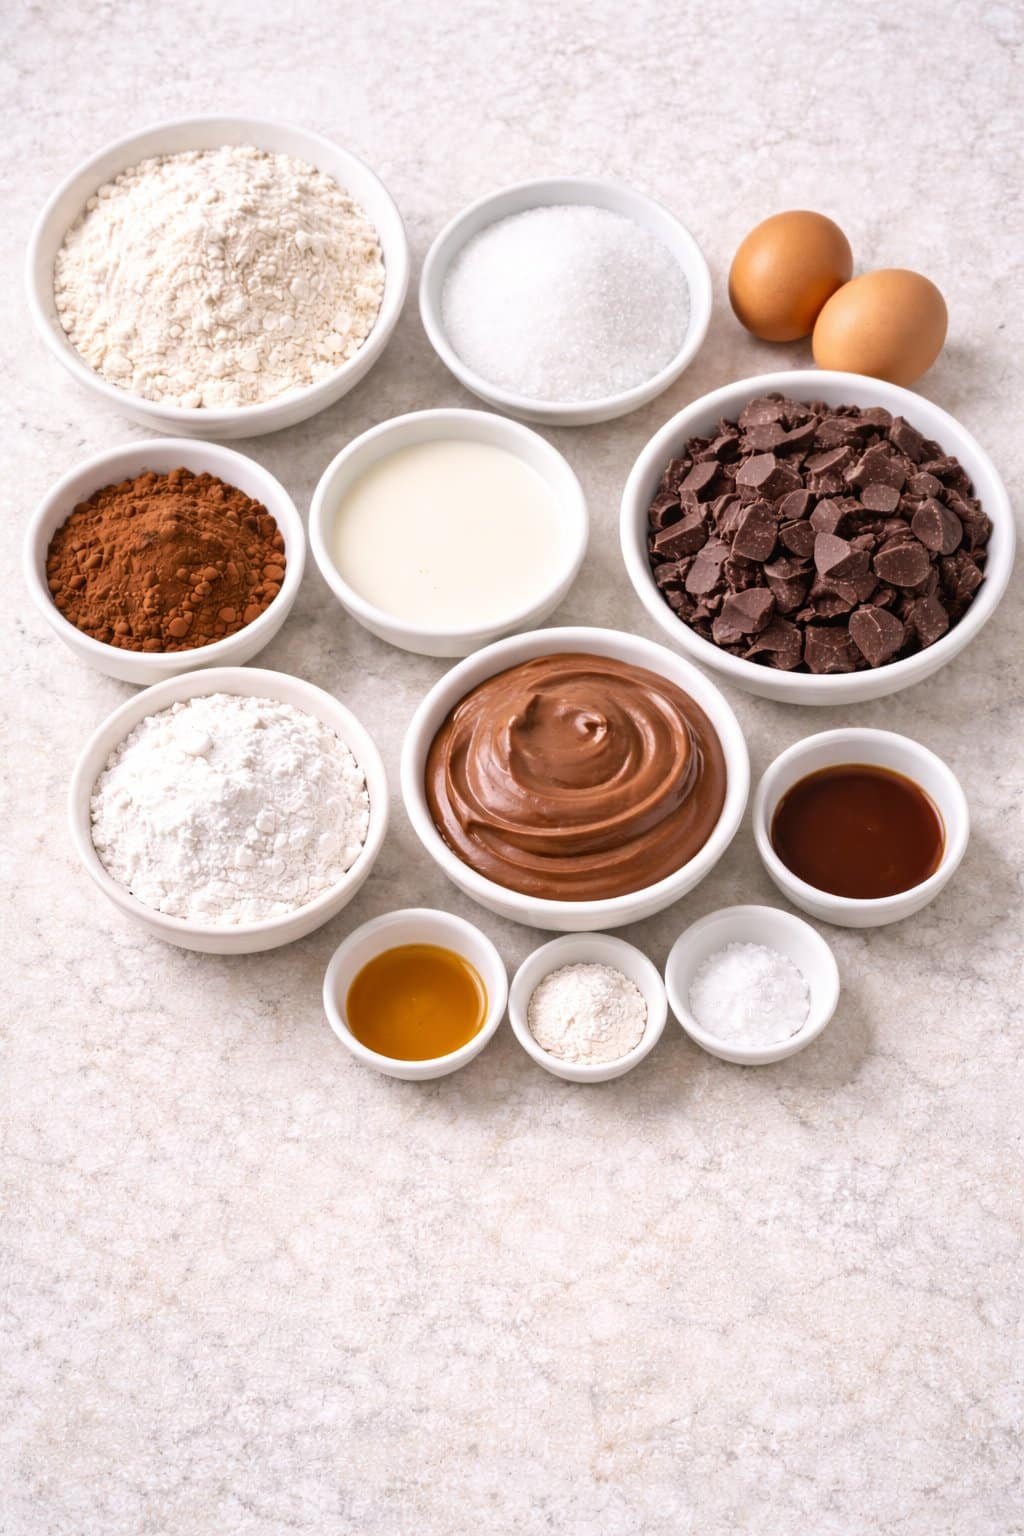
Ingredients Image of Homemade Tim Tams
Homemade Tim Tams are wonderfully flexible, so you can easily play with flavor while still keeping that crisp cookie, creamy filling, and smooth chocolate shell. For the filling, you can swap the chocolate malted milk powder for regular malted milk powder if that is what you have, or use instant espresso powder for a mocha twist. If malt is not your thing, leave it out and add a splash of vanilla bean paste or a teaspoon of Nutella to the frosting. Use dark chocolate instead of milk chocolate for a richer, less sweet finish, or try a mix of half milk and half dark for something in the middle. You can also replace the coconut oil with neutral vegetable oil, or even leave it out entirely, just know the coating will set a bit firmer and may look slightly less glossy.
For texture and holiday fun, sprinkle crushed peppermint candies, toasted coconut, or very finely chopped roasted nuts over the chocolate before it sets. You can cut mini rectangles for bite size Homemade Tim Tams to serve on a dessert board with brownies and peanut butter cookies, or make them longer and thinner for an elegant coffee treat. If you are baking for kids, brighten things up with colorful sprinkles on a few of the cookies. For serving, I love these straight from the fridge on warm days, and at cool room temperature when I want that classic crisp snap with a creamy middle. And of course, if you know about the famous Tim Tam slam, try biting off opposite corners of your Homemade Tim Tams, then use the cookie as a straw for hot coffee or cocoa before popping the softened cookie into your mouth.
Conclusion
Every time I pull a tray of glossy, chocolate coated biscuits from the oven, I am reminded that little rituals in the kitchen can turn any ordinary day into something worth remembering. There is something quietly magical about dipping, coating, and waiting for that chocolate to set, knowing you are about to share a plate of love disguised as cookies. Whether you set them out with coffee after dinner or pack them into a tin for someone special, you are creating a moment people will talk about later.
I hope this recipe inspires you to slow down, get a little messy, and enjoy the simple pleasure of making Homemade Tim Tams in your own cozy kitchen. Invite the kids to help, call a friend over for a tasting, or surprise your family with a “just because” treat night. However you share them, these biscuits have a funny way of bringing everyone to the table.
When you do make them, I would love to hear how they turned out and what memories you created around them.
For more delicious recipes like this, follow us on Facebook and Pinterest!
Recipe

Homemade Tim Tams
Ingredients
Ingredients
- 4 oz unsalted butter softened (115 g), plus 2 oz softened butter (55 g) for filling
- 4 oz granulated sugar 1/2 cup or 115 g
- 1 large egg at room temperature
- 1 oz unsweetened cocoa powder 1/3 cup or 30 g for cookies
- 5 oz all-purpose flour 1 cup or 150 g
- 1 pinch salt
- 4 oz powdered sugar 1 cup or 115 g
- 1 tbsp unsweetened cocoa powder for filling
- 1 tbsp chocolate malted milk powder such as Ovaltine or Horlicks
- 10 oz milk or dark chocolate 280 g, chopped
- 1 tbsp coconut oil
Instructions
- In a mixing bowl, beat 4 oz softened butter and granulated sugar together until pale and fluffy.
- Add the egg and beat until well combined and smooth.
- Sift in 1 oz cocoa powder, flour, and salt, then mix on low speed just until a soft dough forms.
- Shape the dough into a flat rectangle, wrap tightly, and chill in the refrigerator for at least 1 hour until firm.
- Preheat the oven to 350 F and line two baking trays with parchment paper.
- On a lightly floured surface, roll or press the chilled dough into an even slab about 1/4 inch thick.
- Cut the dough into 28 rectangles, each about 1 1/4 inches by 2 1/2 inches, and place them spaced apart on the prepared trays.
- Bake for 10 minutes, until the cookies look set and slightly dry on top, then cool completely on the trays.
- For the filling, beat 2 oz softened butter, powdered sugar, 1 tbsp cocoa powder, and malted milk powder together until thick, smooth, and spreadable.
- Spread a thin, even layer of filling over the flat side of 14 cookies, then top each with a second cookie to form sandwiches, pressing gently.
- For the coating, place the chopped chocolate and coconut oil in a heatproof bowl and microwave in 30 second bursts, stirring after each, until mostly melted.
- Stir the chocolate mixture gently until completely smooth and glossy.
- Dip each cookie sandwich in the melted chocolate, coating all sides, then lift out with a fork and let excess drip back into the bowl.
- Place dipped cookies on a parchment lined tray and let stand at room temperature or in the refrigerator until the chocolate coating is fully set.
Notes
- If the filling feels too stiff to spread, beat in 1 to 2 teaspoons of milk until smooth.
- For a more classic Tim Tam flavor, use milk chocolate for the coating instead of dark chocolate.
- Store finished cookies in an airtight container at room temperature for up to 5 days, or refrigerate for longer storage.