
What Makes This Recipe Reliable
I tested these Homemade Tim Tams the way a bakery would, in quiet batches on repeat, until every part felt dependable. The cookie base uses simple pantry ingredients and weight measurements, so you can recreate the same light, snappy texture every time without guessing. I built the dough to stay sturdy after baking, even once you sandwich it with filling and dip it in chocolate, which means no soggy or crumbling centers on day two. The dough also tolerates a little extra mixing, so if you are not a confident baker yet, you still get a tender, crisp bite instead of a tough cookie.
The filling and coating use easy to find ingredients like cocoa powder, malted milk powder, and milk chocolate, but the method is what really keeps this Homemade Tim Tams recipe reliable. The frosting has a specific balance of powdered sugar and butter so it sets firm enough to slice cleanly while still tasting creamy and rich. I give clear visual cues, like how thick the melted chocolate should look before dipping, and I bake at a straightforward 350 F so you can trust your home oven. Each step is written with a real kitchen in mind, from using parchment lined pans to quick microwave melting, so you do not need specialty tools, only a bit of patience and a good appetite.

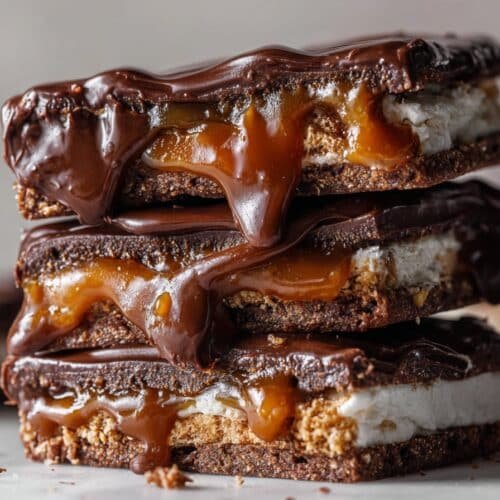
Serving Image of Homemade Tim Tams
The Method (Step-by-Step)
Start by creaming the butter and granulated sugar together until very light and fluffy, about 3 to 4 minutes on medium speed. Add the egg and beat until smooth, scraping down the bowl so no streaks remain. Sift in the flour, cocoa powder, and salt, then mix on low just until a soft dough forms and the dry bits disappear. The dough should feel supple, not sticky, a little like a firm brownie batter that holds its shape. Pat it into a flat rectangle, wrap it, and chill for at least 1 hour so your Homemade Tim Tams keep their sharp edges in the oven.
Once the dough is chilled, lightly flour your surface and roll it into a thin, even sheet, roughly the thickness of a coin. Use a ruler and a sharp knife or pastry cutter to cut 28 rectangles, about 3 cm by 6.5 cm, and transfer them to parchment lined trays, spacing them out so the heat can circulate. Bake at 350 F or 180 C for about 10 minutes until set and dry at the edges, then cool completely so the filling does not melt on contact. While they cool, make the filling by beating the softened butter with powdered sugar, cocoa, and malted milk powder until very smooth and spreadable, like a thick frosting. Pair up the cookies by similar size, spread or pipe the malt filling on one cookie, then gently sandwich with its partner to create that classic Homemade Tim Tams bite.

Process Image of Homemade Tim Tams
For the coating, melt the chopped chocolate with the coconut oil in the microwave in short 30 second bursts, stirring between each round until silky and lump free. Drop each filled sandwich into the melted chocolate, flip it with a fork, then lift it out and tap the fork on the bowl to shake off excess. Place the coated biscuits back on a parchment lined tray and smooth any big drips with the tip of the fork for a cleaner look. Let them set at room temperature or pop them in the fridge for 20 to 30 minutes until the chocolate shell is firm. Once set, your Homemade Tim Tams are ready to taste, and they will keep beautifully in an airtight container for several days, just like a bakery tin of chocolate covered treasures.
Keep It Fresh: Timing and Storage
Homemade Tim Tams taste their best in the first 3 to 4 days, when the biscuit layers are still crisp and the chocolate shell has that perfect snap. Once the chocolate coating is fully set, transfer the cookies to an airtight container in a cool, dry spot, away from sunlight or a warm oven. If your kitchen runs warm, I recommend refrigerating them, but let them sit at room temperature for about 10 to 15 minutes before serving so the filling softens slightly and the chocolate flavor blooms. Try not to stack the cookies while the coating is still the least bit tacky or you will end up with a very enthusiastic chocolate cluster.
For short term storage, you can keep your Homemade Tim Tams at room temperature for 2 days in cooler weather, or in the fridge for up to 1 week, layered between pieces of parchment so the chocolate does not scuff. For longer storage, these freeze beautifully for around 2 months. Place the finished cookies in a single layer on a baking sheet to freeze first, then move them into a container or freezer bag so they do not fuse together. When you crave one, thaw in the fridge for a few hours, then let it sit on the counter while you make tea or coffee, and it will taste wonderfully close to freshly dipped.
Swaps, Variations, and Serving Ideas

Ingredients Image of Homemade Tim Tams
If you want to play with flavor, these Homemade Tim Tams are a very forgiving canvas. Swap the milk chocolate coating for dark chocolate if you like a deeper, less sweet bite, or use half milk and half dark for a nice balance. Not a fan of malt or cannot find it locally. You can leave out the chocolate malted milk powder and add an extra teaspoon of cocoa plus a splash of vanilla, or stir in a teaspoon of instant espresso powder for a mocha twist. For a gluten free version, use a cup for cup style gluten free flour blend and chill the dough well so the rectangles hold their shape.
You can also have fun with the filling and finishing ideas. Add a spoonful of peanut butter or hazelnut spread to the frosting for a nutty Homemade Tim Tams variation, or mix in a pinch of sea salt flakes if you like that sweet and salty situation. For texture, sprinkle finely chopped toasted almonds or desiccated coconut over the freshly dipped cookies before the chocolate sets. If you want a party platter, serve these with simple vanilla ice cream or crumble them over a chocolate cheesecake or icebox cake. And if you have any left from earlier bakes, tuck a cookie into warm hot chocolate and use it like a stirrer, the way you might with a classic Tim Tam slam, just a bit less dramatic and a lot less messy.
Conclusion
The best part of baking, at least for me, has never just been the final cookie on the plate. It is the way people start drifting into the kitchen as the chocolate melts, the way conversations stretch a little longer over the last crumb, and the way a simple tray of biscuits can turn an ordinary afternoon into a tiny celebration. These little bakery style, oven baked Homemade Tim Tams have that kind of magic. They invite nibbling, sharing, and a lot of “Wait, you made these?” moments.
I hope this recipe gives you an excuse to slow down, turn on the oven, and create something a bit special. Make them for a movie night, a lunchbox surprise, or that friend who always brings the coffee but never expects anything in return. And if your chocolate coating is a bit rustic or your filling squishes out the side, keep going. That is what homemade looks like, and it tastes even better.
When you do try this recipe, I would love to hear how they turned out and who you shared them with. For more delicious recipes like this, follow us on Facebook and Pinterest!
Recipe
Homemade Tim Tams
Ingredients
Ingredients
- 4 oz unsalted butter at room temperature (115 g), plus extra for greasing if needed
- 4 oz granulated sugar 1/2 cup or 115 g
- 1 large egg at room temperature
- 1 oz unsweetened cocoa powder 1/3 cup or 30 g
- 5 oz all-purpose flour 1 cup or 150 g
- 1 pinch salt
- 4 oz unsalted butter softened (115 g) for filling
- 4 oz powdered sugar 1 cup or 115 g
- 1 tbsp unsweetened cocoa powder
- 1 tbsp chocolate malted milk powder such as Ovaltine or Horlicks
- 10 oz milk chocolate or dark chocolate chopped (280 g)
- 1 tbsp coconut oil
Instructions
- In a large mixing bowl, beat 4 oz room temperature butter and the granulated sugar together with a hand or stand mixer on medium speed for 3 to 4 minutes until very light and fluffy.
- Add the egg and beat until smooth, scraping down the sides and bottom of the bowl so no streaks remain.
- Sift the 1 oz cocoa powder, flour, and salt together, then add to the bowl and mix on low speed just until a soft dough forms and no dry patches remain.
- Pat the dough into a flat rectangle, wrap tightly in plastic wrap, and chill in the refrigerator for at least 1 hour until firm.
- Preheat the oven to 350 F. Line two baking trays with parchment paper.
- Lightly flour your work surface and roll the chilled dough into a thin, even sheet about the thickness of a coin.
- Use a ruler and sharp knife or pastry cutter to cut 28 rectangles about 1 1/4 inches by 2 1/2 inches. Transfer the rectangles to the prepared trays, spacing them slightly apart.
- Bake the cookies for 10 minutes, or until set and dry at the edges. Remove from the oven and let the cookies cool completely on the trays at room temperature.
- While the cookies cool, make the filling by beating the remaining 4 oz softened butter with the powdered sugar, 1 tbsp cocoa powder, and malted milk powder in a bowl until very smooth, thick, and spreadable.
- Once the cookies are cool, pair them up by similar size. Spread or pipe a layer of malt filling onto the flat side of one cookie in each pair, then top with its partner to form 14 sandwich cookies. Press gently to level the filling.
- For the coating, place the chopped chocolate and coconut oil in a microwave safe, heatproof bowl. Microwave in 30 second bursts, stirring after each burst, until the chocolate is mostly melted.
- Remove the bowl from the microwave and stir gently until the chocolate mixture is completely smooth and fluid.
- Working one at a time, drop each filled cookie into the melted chocolate, turn it to coat with a fork, then lift it out and tap the fork on the edge of the bowl to remove excess chocolate.
- Place the coated cookies on a parchment lined tray, smoothing any large drips with the tip of the fork. Let the cookies set at room temperature or refrigerate for 20 to 30 minutes until the chocolate shell is firm before serving.
Notes
- Let the cookies cool completely before filling so the frosting does not melt and slide.
- If the melted chocolate thickens as you work, warm it briefly in the microwave for 10 to 15 seconds and stir until smooth again.
- Store finished Homemade Tim Tams in an airtight container at room temperature in a cool spot for up to 2 days or in the refrigerator for up to 1 week.
- For longer storage, freeze the cookies in a single layer until firm, then transfer to an airtight container for up to 2 months.