The scent of homemade apple crisp always takes me back to my grandmother’s kitchen, where autumn seemed to linger a little longer than anywhere else. Every fall, she’d gather apples from the gnarled tree in her backyard—sometimes tart, sometimes sweet, but always imperfectly perfect. I’d perch on a stool, sneaking apple slices when I thought she wasn’t looking, while she mixed the filling with a practiced hand.
The kitchen would hum with the warmth of the oven and the promise of cinnamon, and soon that unmistakable aroma would drift through the house, luring everyone in for a taste. I remember the way the topping would crackle under my spoon, giving way to tender, syrupy apples below—pure, cozy magic in every bite.
Now, making homemade apple crisp in my own kitchen, I still chase that same feeling of comfort and togetherness. There’s something about layering crisp apples with a buttery oat topping that makes even an ordinary day feel special. Sometimes, I’ll use Honeycrisps or Granny Smiths, and other times I’ll toss in a handful of pears or cranberries for a twist—just like my grandma did when the mood struck. It’s a dessert that forgives a little extra cinnamon or a few uneven apple slices (honestly, who’s measuring?). As the crisp bakes, the kitchen fills with that nostalgic fall perfume, and suddenly, it feels like everyone is home again.
Whether you’re serving it warm with a scoop of vanilla ice cream or sneaking cold spoonfuls the next morning (no judgment here), homemade apple crisp is more than just a recipe—it’s a ritual. It’s the kind of baking that welcomes little hands to help, rewards you for using up those bruised apples in the fruit bowl, and turns any gathering into a celebration. If you love this, you might also enjoy my Classic Peach Cobbler or Old-Fashioned Pear Crumble, both born from the same spirit of simple, heartwarming desserts. This apple crisp isn’t just a treat; it’s a memory, ready to be made again and again.
How To Make It
(Mix & Ingredients)
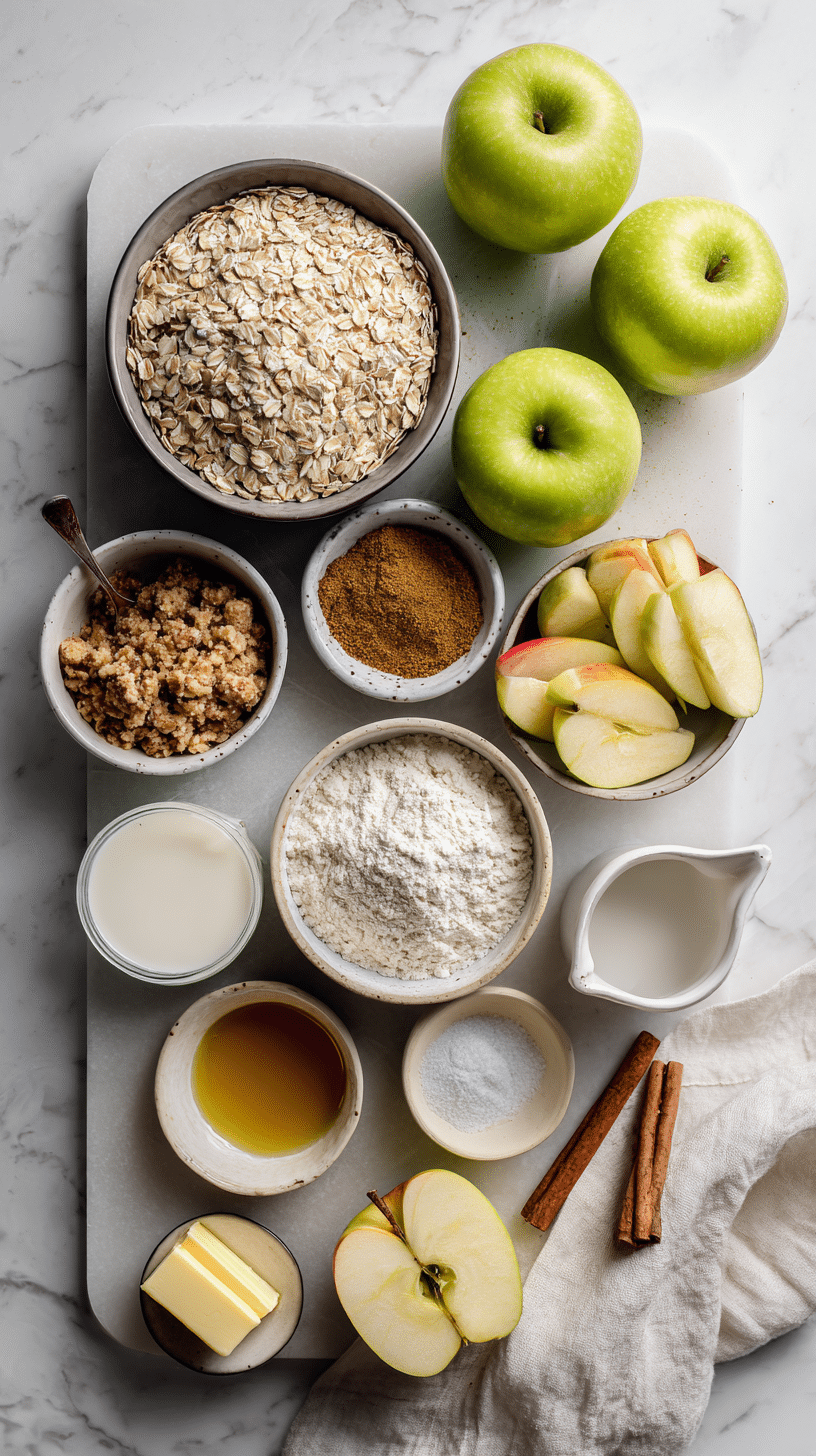
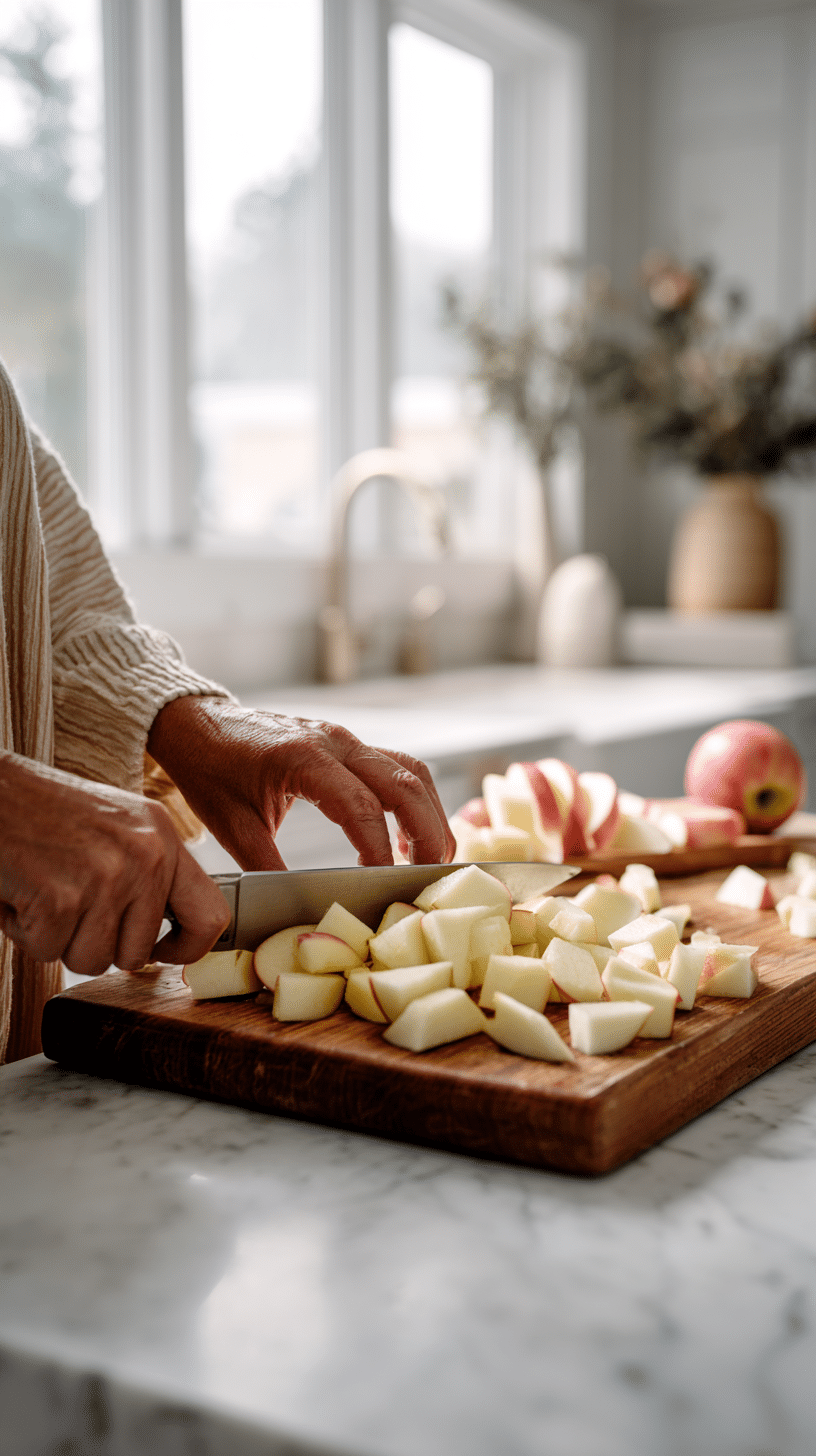
Making homemade apple crisp is all about the magic of simple, honest ingredients coming together in the coziest way. The first step is to gather your apples—about 5 cups, which is usually 5 or 6 medium apples. I reach for Granny Smith or Honeycrisp, but any firm, tart variety will do. Peel and slice them evenly (aim for ½-inch wedges), then toss them in a large mixing bowl with ½ cup of granulated sugar, ½ teaspoon cinnamon, and a teaspoon of vanilla extract. This mix gives your apples that signature sweet-tart flavor and a hint of warm spice. Stir everything gently until the slices are well coated, then spread them in a well-buttered deep pie dish or a roomy baking pan.
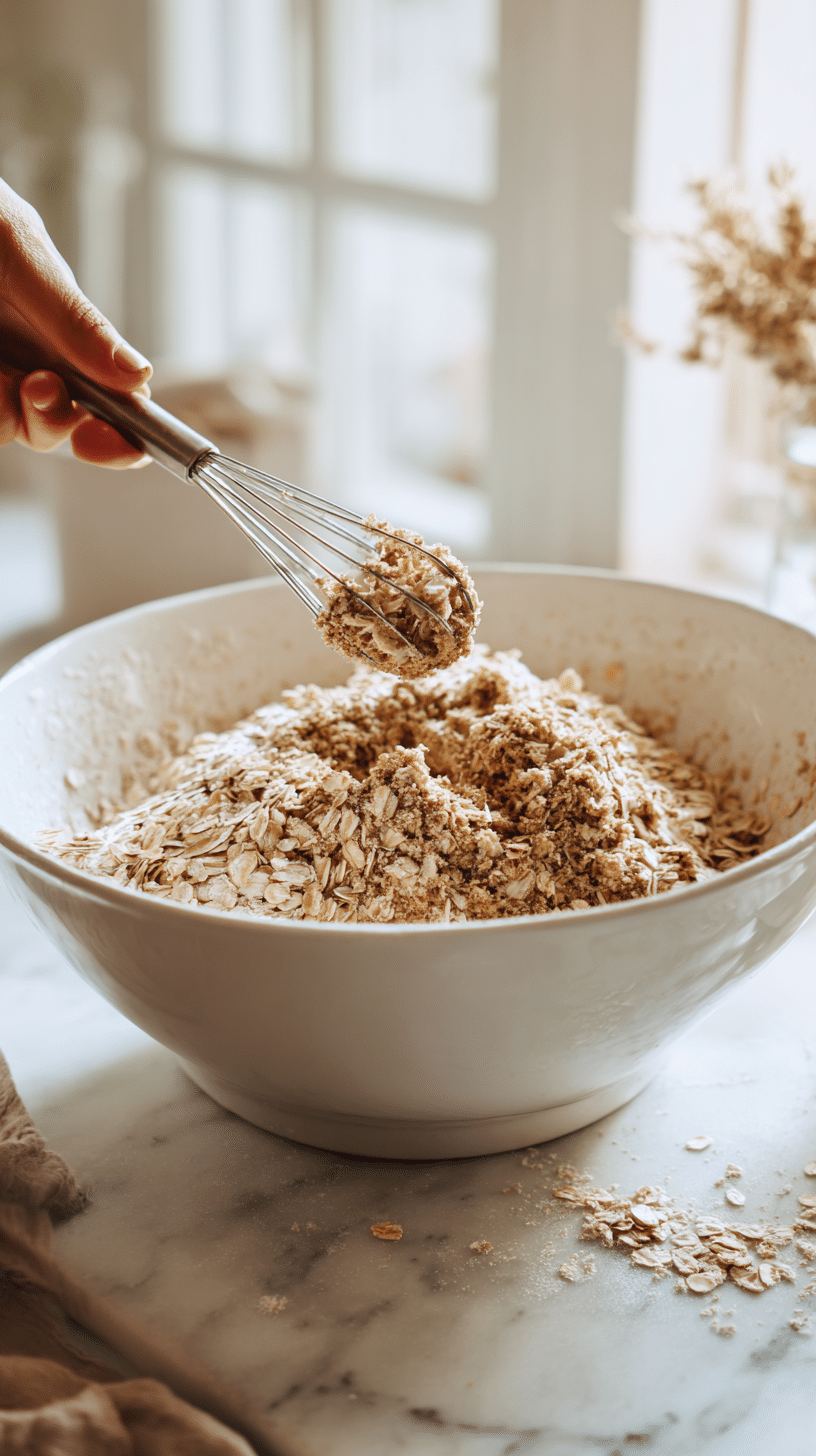
Now, let’s talk about the topping—the soul of any homemade apple crisp. In a separate bowl, combine ½ cup flour, ⅓ cup old-fashioned oats (not quick oats—th

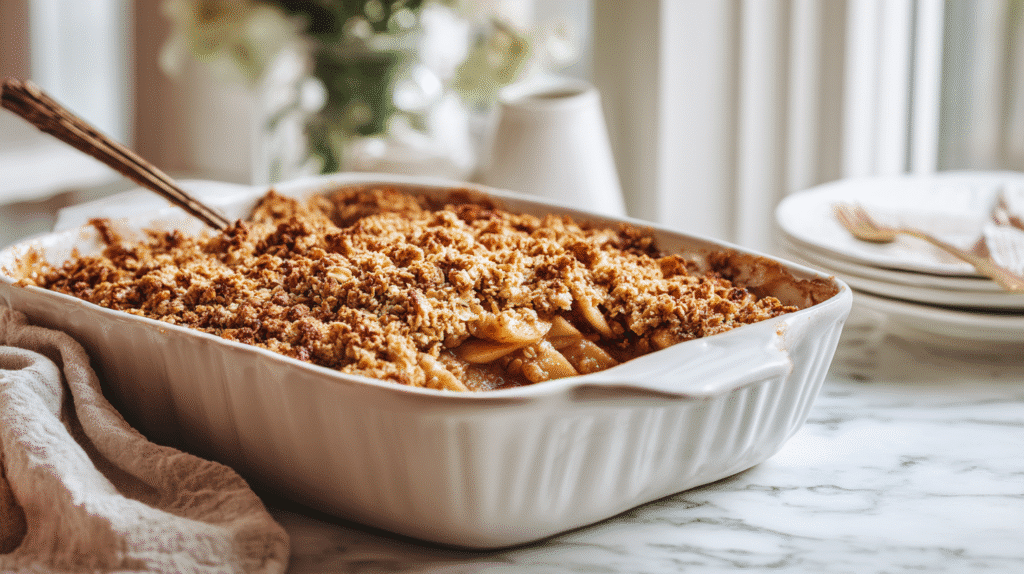
ey add the best chew), ⅔ cup packed brown sugar, ¼ teaspoon salt, and another ½ teaspoon cinnamon. Pour in ¼ cup melted butter and mix until you get a crumbly, sandy texture. Don’t be afraid to use your hands here; it’s half the fun and helps the topping clump up just right. Sprinkle this mixture generously over the apples, making sure you don’t miss any corners. The topping should look like chunky wet sand—this is what creates those golden, crisp nooks and crannies after baking.
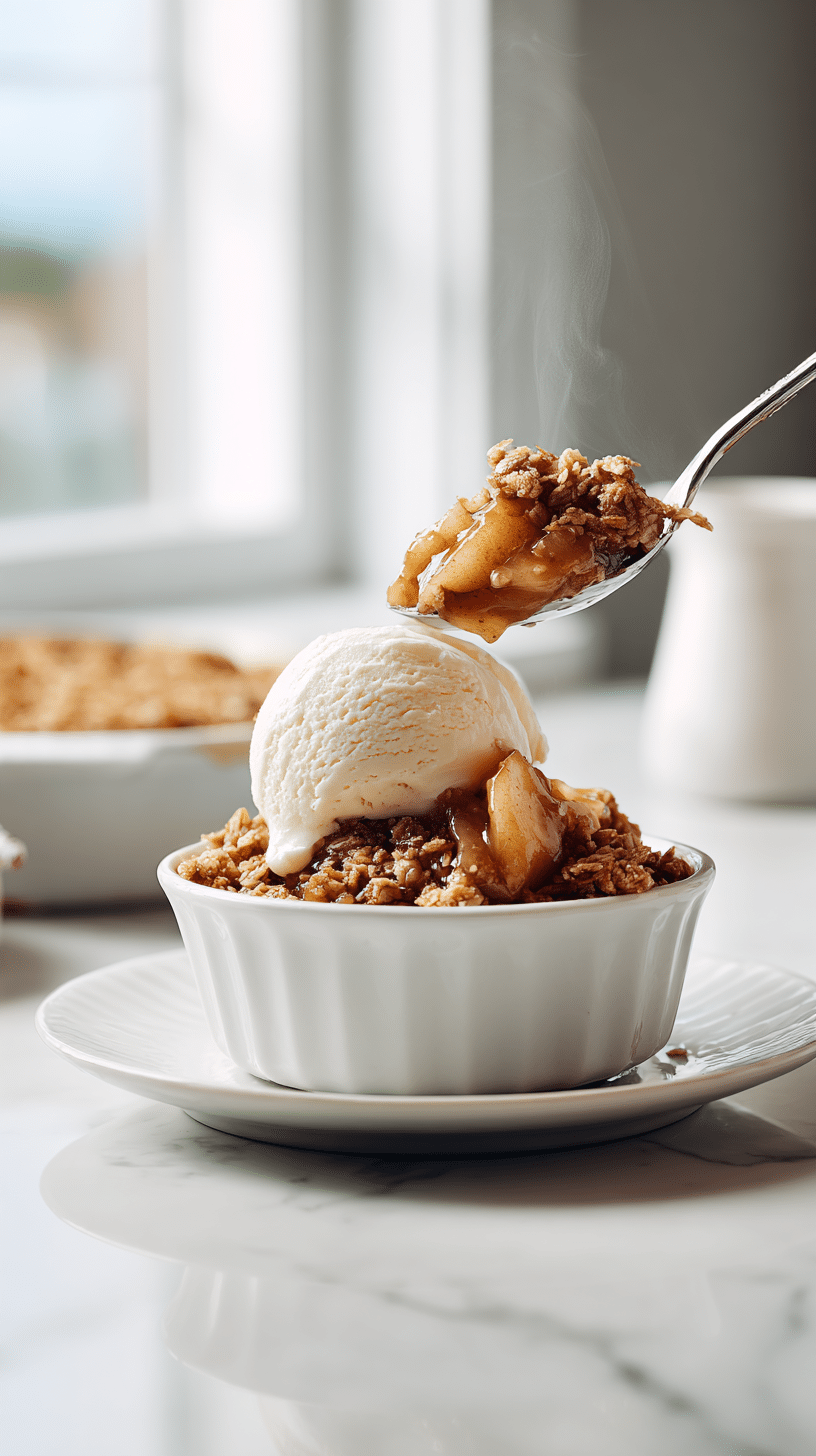
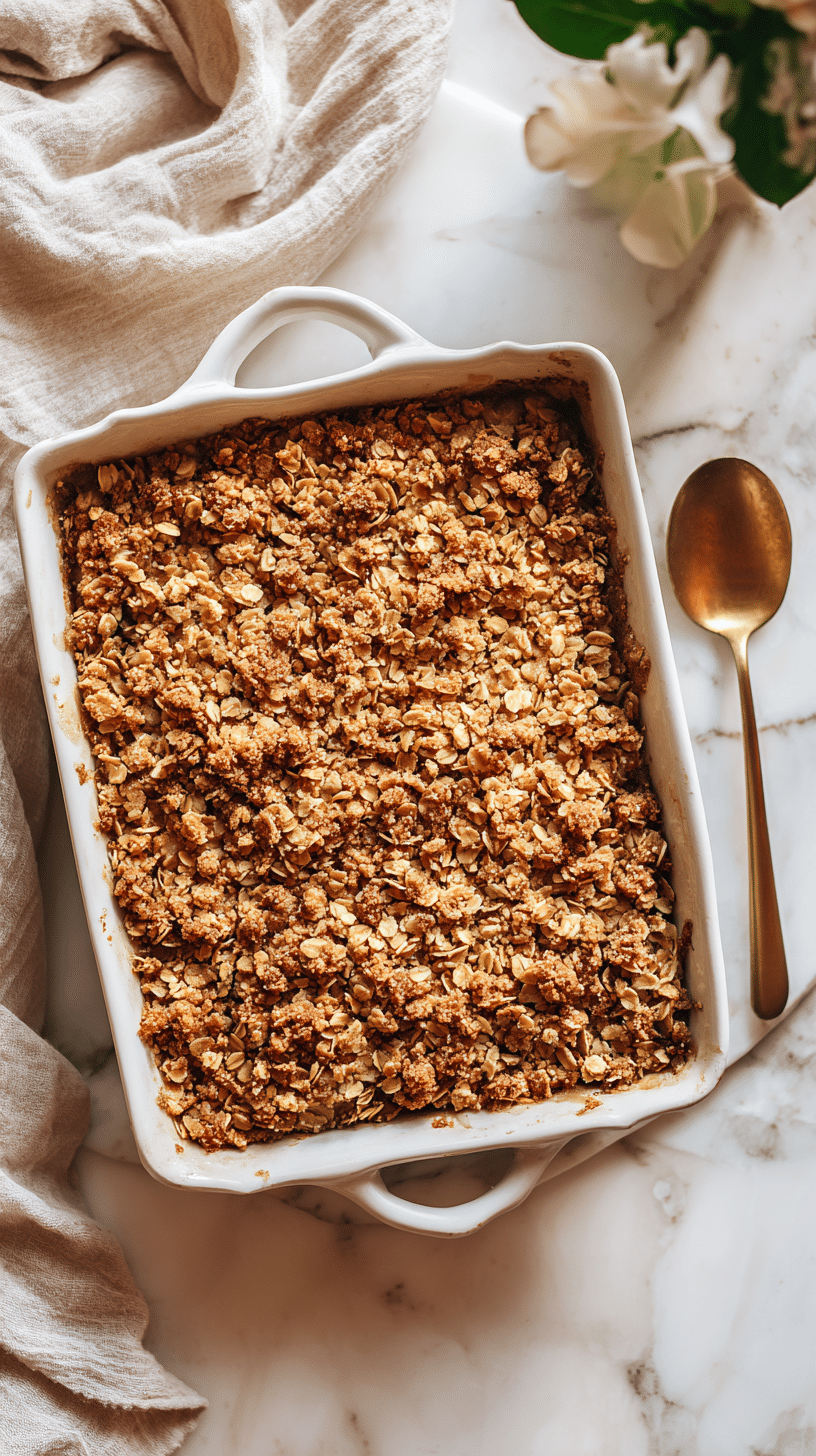
Pop your assembled crisp into a preheated 350°F oven. Bake for 45–60 minutes, until the topping is a deep golden brown and the apples are bubbling underneath. If the topping browns too quickly, just tent the dish loosely with foil. Let it cool for a few minutes before serving—this helps the juices thicken and keeps you from burning your tongue (ask me how I know). For an extra treat, top your homemade apple crisp with a scoop of vanilla ice cream or a drizzle of caramel sauce. If you love this process, you’ll probably enjoy my [Classic Peach Cobbler] or [Warm Cinnamon Streusel Muffins] for more cozy, fruit-filled baking adventures.
Make-Ahead & Storage
One of the sweetest things about Homemade Apple Crisp—besides its cinnamon-sugar aroma—is how beautifully it fits into your busy schedule. If you want to get ahead for a dinner party or simply love prepping on a quiet Sunday, you can assemble the apple filling and oat topping separately. Store each in airtight containers in the fridge for up to 24 hours. When you’re ready to bake, just spread the apples in your dish, sprinkle on the topping, and slide it into the oven. This not only saves time but also lets the flavors mingle for an even cozier bite. I often do this the night before Thanksgiving, and it’s a little gift to my future self.
Once your Homemade Apple Crisp is baked, it’s a champion when it comes to leftovers. Let it cool completely, then cover the dish tightly with foil or transfer portions to airtight containers. It will keep in the refrigerator for up to 4 days. When you’re ready for another taste of fall, simply reheat in a 350°F oven for about 15 minutes to revive that golden, crunchy topping. The microwave works in a pinch, but the oven keeps the crisp in “crisp.” If you’re planning to freeze, wrap the cooled crisp well and freeze for up to 2 months. Thaw overnight in the fridge before reheating. The apples may soften a bit more after freezing, but the flavor is still pure autumn comfort—especially with a scoop of vanilla ice cream. For more cozy desserts that store well, you might also love my Pumpkin Bread Pudding or Easy Snickerdoodle Bars.
No matter how you prep or store your Homemade Apple Crisp, you’ll always have a slice of fall magic ready to share.
Best Ingredients & Party Variations
When it comes to Homemade Apple Crisp, the magic truly begins with your choice of apples. I always reach for a mix of tart Granny Smith and sweet Honeycrisp or Fuji. This blend gives you the perfect balance of tang and sweetness, and the apples hold their shape beautifully under that golden, crumbly topping. If you only have one variety on hand, don’t stress—just aim for a firmer apple so your crisp doesn’t turn to applesauce. For the filling, real vanilla extract (not imitation!) makes a world of difference, and a dash of extra cinnamon never hurts in my book. For the topping, old-fashioned oats are key for that classic, hearty texture, while packed brown sugar adds a caramel note you’ll crave all season long.
Now, let’s talk party tricks. Homemade Apple Crisp is a chameleon of the dessert table—easy to dress up or down depending on the crowd. Hosting a cozy dinner? Stir in a handful of toasted pecans or walnuts to the oat topping for crunch. If you want to surprise kids or chocolate lovers, toss a few mini chocolate chips or butterscotch morsels into the topping before baking. For a crowd with dietary needs, you can easily swap the flour for a gluten-free blend or use coconut oil instead of butter for a dairy-free twist (just make sure it’s solid at room temp for the best texture). If you love warming spices, add a pinch of nutmeg or cardamom to the filling for extra autumnal flair—just like I do when I make my Pumpkin Bread Pudding or Spiced Pear Crumble.
For a true party moment, set up a DIY crisp bar with toppings like vanilla ice cream, salted caramel sauce, or even a dollop of whipped cream. I’ve even served homemade apple crisp in individual ramekins for easy grab-and-go portions at potlucks and family gatherings. No matter how you mix it up, this classic dessert invites creativity and guarantees smiles. The only rule? Serve it warm—preferably with friends, laughter, and plenty of seconds.
FAQs About Homemade Apple Crisp
What is the secret to a delicious homemade apple crisp?
The magic of a truly great homemade apple crisp lies in the balance between tender, juicy apples and a crisp, buttery topping. Using a mix of tart and sweet apples gives the filling depth and prevents it from tasting flat. Don’t skip the oats in the topping—they add wonderful texture and that signature golden crunch. A touch of cinnamon and a splash of vanilla round out the flavors, making your kitchen smell like pure fall. And finally, serve it warm with a scoop of vanilla ice cream for the ultimate cozy treat.
How is apple crisp different from apple crumble?
While both apple crisp and apple crumble celebrate baked apples with a sweet topping, the difference is all in the texture. Apple crisp usually includes oats and sometimes nuts in the topping, giving it a chunkier, crunchier finish. Apple crumble, on the other hand, relies on a simple flour, butter, and sugar mixture, resulting in a finer, more streusel-like texture. Both are delicious, but if you love a bit of chew and crunch, apple crisp is the way to go. Either way, you’ll get that irresistible combination of soft apples and golden topping.
What apples are best for making homemade apple crisp?
The best homemade apple crisp starts with the right apples. Choose firm varieties that hold their shape during baking, like Granny Smith, Honeycrisp, or Braeburn. A mix of tart and sweet apples gives the dessert more complexity and keeps it from becoming too sweet or too mushy. Slice your apples evenly to ensure they bake uniformly. If you love a little extra tang, use more tart apples—just adjust the sugar to taste.
Can I make apple crisp ahead of time or freeze it?
Absolutely! You can assemble your apple crisp a day ahead and keep it covered in the fridge until you’re ready to bake. If you want to freeze it, prepare the crisp right up to the baking step, then cover tightly and freeze for up to 3 months. Bake straight from the freezer, adding 10–15 minutes to the baking time (and tent with foil if the topping browns too quickly). Leftovers also reheat beautifully—just pop them in the oven to revive that crisp topping. Perfect for busy fall days or when you want dessert on demand!
Conclusion
There’s just something magical about a homemade apple crisp bubbling away in the oven—the way the cinnamon-sugar scent wraps around your home, inviting everyone to peek into the kitchen with anticipation. For me, it’s always been a recipe that signals togetherness. Whether it’s a regular Tuesday or a family gathering, this simple dish manages to spark laughter, conversation, and that feeling of being exactly where you belong.
Homemade apple crisp isn’t just a dessert; it’s a reason to gather, to share stories, and to linger a little longer around the table. Each spoonful is a reminder of cozy fall afternoons and the little joys we find in making something delicious with our own hands. I hope this recipe brings as much warmth and nostalgia to your home as it has to mine.
If you haven’t tried it yet, I encourage you to gather your apples, preheat the oven, and let your kitchen fill with those cozy fall aromas. And if you give it a go, I’d love to hear how it turned out! For more comforting treats and sweet inspiration, follow us on Facebook and Pinterest!
Homemade Apple Crisp That Fills Your Kitchen With Cozy Fall Magic
Ingredients
- 5 cups sliced apples Granny Smith, Honeycrisp, or a mix
- ½ cup granulated sugar
- 1 tsp vanilla extract
- 1 tsp ground cinnamon divided
- ½ cup all-purpose flour
- ⅓ cup old-fashioned oats
- ⅔ cup packed brown sugar
- ¼ tsp salt
- ¼ cup melted butter
Instructions
- 1. Preheat your oven to 350°F and butter a deep pie dish or baking pan.
- 2. Peel and slice apples into ½-inch wedges (about 5 cups).
- 3. In a large bowl, toss apples with granulated sugar, ½ tsp cinnamon, and vanilla extract.
- 4. Spread the apple mixture evenly in your prepared dish.
- 5. In another bowl, combine flour, oats, brown sugar, salt, and remaining ½ tsp cinnamon.
- 6. Stir in melted butter and mix until crumbly, using your hands to form clumps.
- 7. Sprinkle the topping over the apples, covering all corners.
- 8. Bake for 45–60 minutes, until topping is golden brown and apples are bubbly.
- 9. Let cool for 10 minutes before serving with vanilla ice cream or caramel sauce.