The Memory Behind This Treat
The first version of these High-Protein Cheesecake Jars didn’t appear on a polished shoot day. They started on a chaotic Tuesday night when I wanted cheesecake but also knew I had an early morning workout and a long to-do list staring me down. I remember standing in my kitchen in threadbare pajamas, stirring together Greek yogurt and cream cheese in a mixing bowl with a salad spoon because every whisk I owned was in the dishwasher. The craving was real, but so was the desire to not dirty 14 dishes or turn on the oven. When I finally dipped my spoon in, it tasted like the filling of my grandma’s Sunday cheesecake—only lighter, and just a tiny bit virtuous.
Those early jars became my “peace offering” dessert whenever friends came over after the gym. I’d line up clear glasses on the counter, crumble in a simple cookie layer, and let everyone assemble their own High-Protein Cheesecake Jars with whatever toppings we had—berries if we were feeling fresh, chocolate chips if we were honest about the kind of day we’d had. I loved how quickly they came together; it felt like the laid-back cousin of the impressive baked cheesecakes I used to style for photo shoots. No springform pans, no water baths—just a whisk, a bowl, and about 15 minutes. Over time, they became our in-between dessert: special enough to feel like a treat, simple enough to make on a weeknight without overthinking it.
How To Make It (Mix & Ingredients)
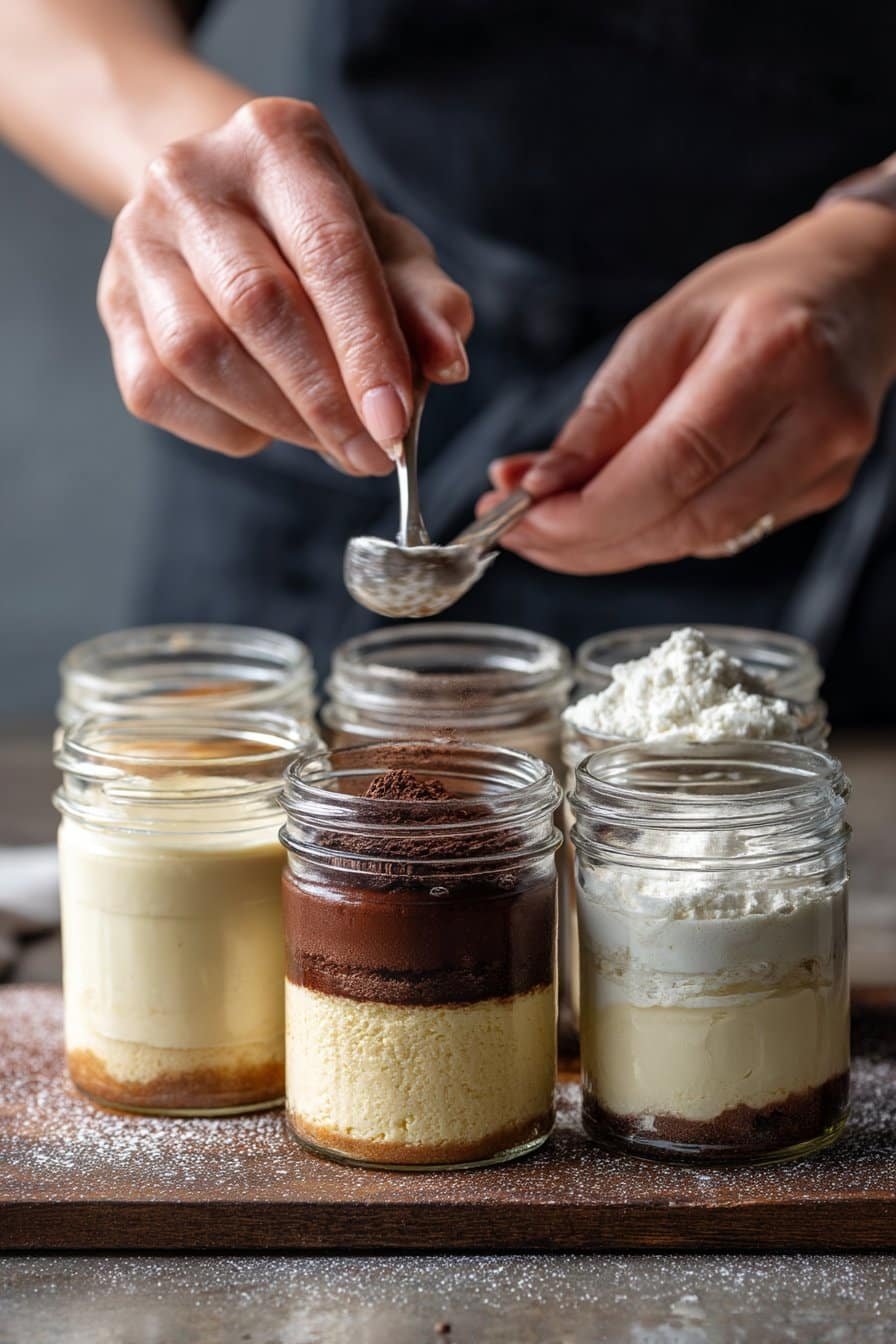
To make these Classic High-Protein Cheesecake Jars, you’ll start by building a really simple no-bake cheesecake base. In a medium bowl, whisk together your softened light cream cheese (or Neufchâtel), a scoop or two of vanilla or plain whey/casein protein powder, Greek yogurt, a touch of sweetener (like powdered sugar, maple syrup, or a zero-cal option), and a splash of vanilla extract. You want the cream cheese at room temperature so it mixes smoothly—cold cream cheese will give you stubborn little lumps. If your mixture looks too thick, loosen it with a tablespoon or two of milk; if it’s too loose, add another teaspoon of protein powder or chill it for 10 minutes so it can firm up.
Instructions Process of High-Protein Cheesecake Jars
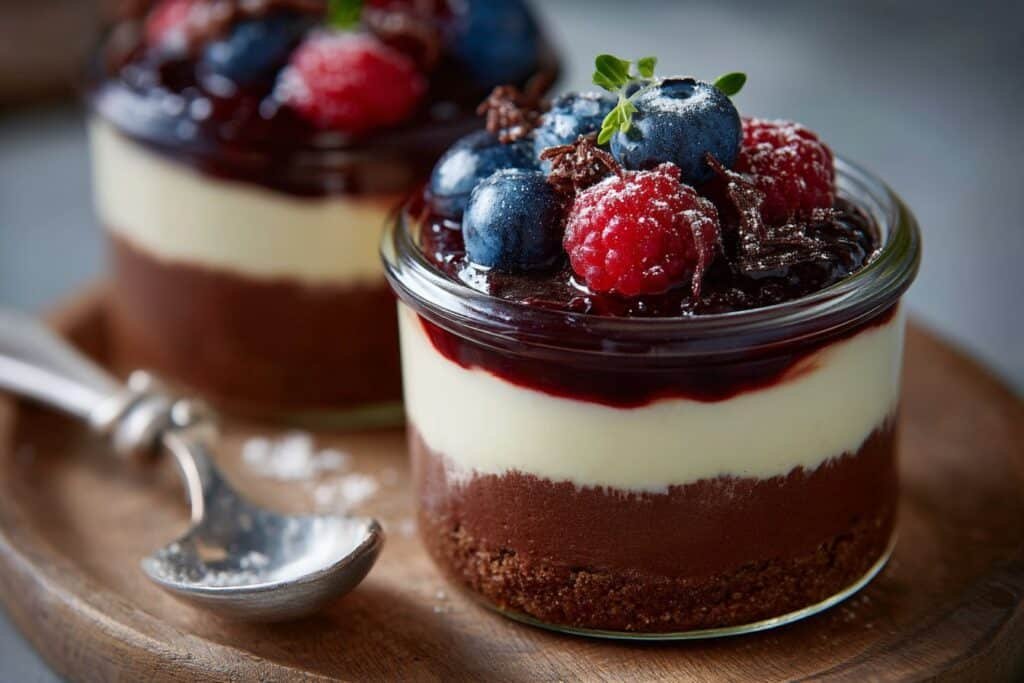
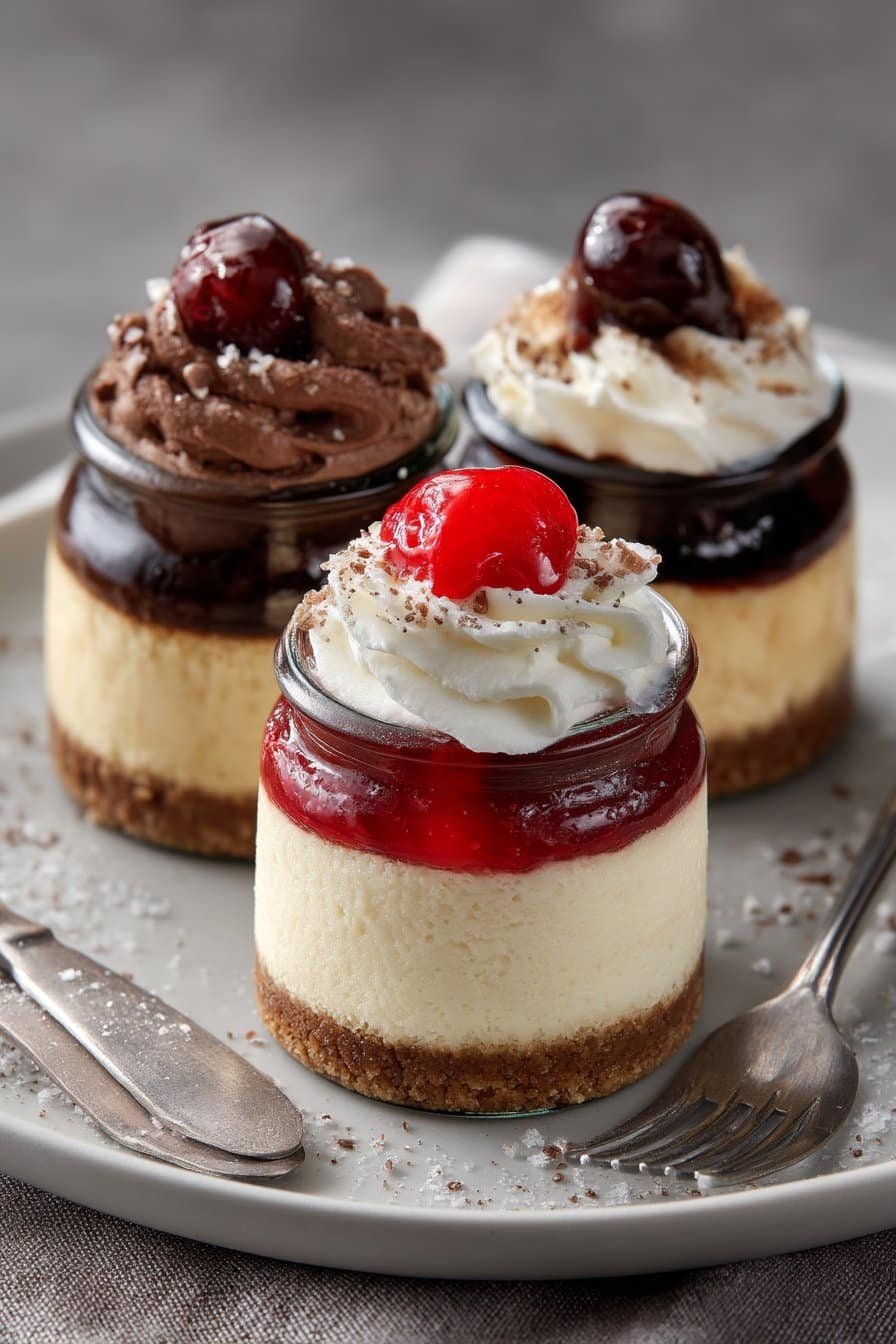
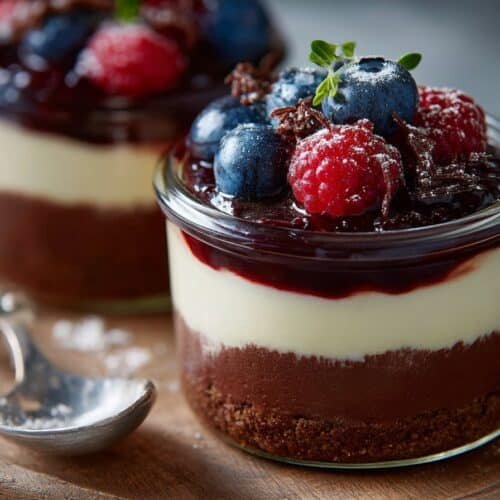
Next, you’ll layer everything into your jars. Crush your base—this can be graham crackers, a high-fiber cookie, or even a nutty granola—then spoon a tablespoon or two into the bottom of each jar and press it down lightly with the back of a spoon. Add a generous dollop of your high-protein cheesecake mixture, smoothing the top so it looks pretty from the sides. At this point, you can swirl in a spoonful of jam, sprinkle on berries, or add a drizzle of melted dark chocolate for a more decadent version that still feels lighter than traditional cheesecake. Pop the filled jars into the fridge for at least 1 hour to set; they’ll thicken slightly and the flavors will meld, giving you that classic cheesecake tang in a spoonable, High-Protein Cheesecake Jars format that’s perfect for snacks, dessert, or breakfast.
Make-Ahead & Storage
These High-Protein Cheesecake Jars are made for planning ahead, which makes weeknights and snack o’clock so much easier. You can prep the full batch, lids on, and store them in the fridge for up to 4 days. For the best texture, keep any crunchy toppings (like granola or crushed cookies) in a separate container and sprinkle them on right before serving so they don’t get soggy. If your base has a graham-style crumb layer, press it down firmly so it doesn’t go soft and muddy under the cheesecake mixture. I also like to label the lids with the prep date so you remember when they’re at their best.
Because these High-Protein Cheesecake Jars rely on dairy and protein-rich ingredients, they do not freeze well as a fully assembled dessert. Freezing can cause the creamy layer to turn grainy and the yogurt or cottage cheese to separate once thawed. If you love to batch prep, you can mix the cheesecake filling and store it in an airtight container in the fridge for 3–4 days, then assemble fresh jars with crumbs and fruit as needed. Give the filling a quick stir before spooning it into jars in case any liquid has separated. If you’re packing these in a lunchbox or gym bag, keep them chilled with an ice pack and aim to eat within 2 hours out of the fridge for food safety and the creamiest bite.
Best Ingredients & Party Variations
For the creamiest High-Protein Cheesecake Jars, start with a thick, high-quality Greek yogurt or skyr—at least 2% milk fat so the texture feels indulgent, not chalky. Choose an unflavored protein powder you actually enjoy solo; if it tastes weird in a shake, it won’t magically improve in dessert. I like vanilla whey or a neutral-tasting whey–casein blend for that classic cheesecake flavor and extra silkiness. Use block-style cream cheese, not the spreadable tub, so your filling sets up rich and smooth. A touch of lemon juice and real vanilla extract brightens everything and helps mimic that classic bakery cheesecake tang without adding extra sugar.
When you’re making these for a party, think “mini cheesecake bar” and let everyone build their own High-Protein Cheesecake Jars. Keep one large bowl of the vanilla base, then set out toppings: crushed graham crackers, chocolate cookie crumbs, chopped berries, tiny chocolate chips, and toasted nuts. For a birthday party, swirl a spoonful of strawberry jam or raspberry compote into the filling and finish with colorful sprinkles for a funfetti moment. For a more grown-up dessert spread, make a “cheesecake flight”: some jars with a cocoa-infused base and espresso powder, some with lemon zest and blueberries, and others with a salted peanut butter swirl that leans into that sweet–salty vibe you get from more nostalgic desserts. If you’re already in the mood for small, spoonable treats, you can pair these jars with bite-sized desserts like mini brownie cups or soft sugar cookie bars to round out your table without a lot of extra work.
Serving of High-Protein Cheesecake Jars
Conclusion
If you’re anything like me, the best memories are built around something sweet shared with people you love. These little jars are more than just dessert—they’re an invitation. An invitation to slow down after a long day, to linger at the table a little longer, to sneak a spoonful from the fridge at midnight and smile because you know you made something good for yourself. High-Protein Cheesecake Jars feel like a small everyday luxury, but with a wholesome twist that fits into real life.
I hope these jars find their way to birthday gatherings, weeknight dinners, lunchbox surprises, and cozy movie nights on the couch. Make them with your kids, prep them for a friend who needs a pick-me-up, or keep a few on hand just for you. However you enjoy them, I’m cheering you on from my kitchen.
For more delicious recipes like this, follow us on social media!
What makes these High-Protein Cheesecake Jars different from regular cheesecake?
High-Protein Cheesecake Jars swap part (or all) of the traditional cream cheese for proteins like Greek yogurt, cottage cheese, or a scoop of protein powder. This keeps the cheesecake filling creamy while boosting the protein in every spoonful. You still get that classic tang and richness, just with a more balanced macro profile. They’re also portioned into jars, which helps with serving size and makes them easy to grab and go. You end up with all the nostalgia of classic cheesecake, minus the food-coma crash.
Can I prep High-Protein Cheesecake Jars ahead and how long do they last?
Yes, these jars are perfect for making in advance. Assemble your High-Protein Cheesecake Jars, cover them tightly with lids or plastic wrap, and store them in the fridge. They keep well for about 3 days, staying creamy and set. If you’re adding juicy toppings like berries or compotes, add them close to serving time so the layers don’t get watery. For the best texture, let a chilled jar sit at room temperature for 5–10 minutes before digging in.
How can I customize High-Protein Cheesecake Jars for different diets?
These jars are easy to tweak. For gluten-free needs, use a nut-based crust or gluten-free graham-style crumbs. To keep them higher in protein and lower in sugar, use unsweetened Greek yogurt, low-fat cottage cheese, and a non-sugar sweetener you like. You can make them vegetarian by choosing a protein powder without gelatin and checking any toppings. For a lighter option, go heavy on fresh fruit and skip candy or cookie toppings.
Recipe
High-Protein Cheesecake Jars
Ingredients
Ingredients
- 4 graham cracker sheets about 1/2 cup crumbs
- 1 tablespoon unsalted butter melted
- 8 ounces light cream cheese softened to room temperature
- 1 cup plain nonfat Greek yogurt
- 2 scoops about 60 g vanilla whey or casein protein powder
- 3 tablespoons powdered sugar or granulated sweetener of choice
- 1 teaspoon vanilla bean paste
- 2 tablespoons milk dairy or unsweetened almond milk, plus more as needed
- 1/2 cup fresh berries or 4 tablespoons berry jam for topping
Instructions
- Place the graham crackers in a zip-top bag and crush them with a rolling pin until fine crumbs form.
- In a small bowl, stir together the graham cracker crumbs and melted butter until the crumbs are evenly coated and resemble wet sand.
- Divide the crumb mixture evenly among 4 small jars or glasses, adding about 2 tablespoons to each.
- Use the back of a spoon to press the crumbs firmly into the bottom of each jar to create a crust layer, then set the jars aside.
- In a medium mixing bowl, add the softened light cream cheese and beat with a whisk or hand mixer until smooth and creamy.
- Add the Greek yogurt, protein powder, powdered sugar, and vanilla bean paste to the cream cheese and whisk until fully combined and smooth, scraping down the sides of the bowl as needed.
- Add 2 tablespoons of milk and whisk again, checking the consistency; the mixture should be thick but spoonable and smooth. If it is too thick, whisk in an additional teaspoon of milk at a time until you reach a creamy, mousse-like texture.
- Taste the cheesecake mixture and adjust sweetness if needed by whisking in an additional teaspoon of powdered sugar at a time.
- Spoon the cheesecake mixture evenly over the prepared crusts in the jars, dividing it among the 4 jars and smoothing the tops with the back of a spoon.
- Top each jar with fresh berries or swirl 1 tablespoon of berry jam gently into the top of each cheesecake layer.
- Cover the jars with lids or plastic wrap and refrigerate for at least 1 hour to chill and set before serving.
- Serve the cheesecake jars cold, and keep any leftovers covered in the refrigerator for up to 4 days.
Notes
- If you prefer a higher-protein and lower-sugar version, replace the powdered sugar with a powdered zero-calorie sweetener and use a low-sugar protein powder.