The Memory Behind This Treat
The first time I tasted Hawaiian Guava Cake, I was barefoot on a lanai in Honolulu, balancing a flimsy paper plate and trying not to drop my fork through the slats of the deck. A neighbor had brought it over still slightly warm, the guava topping just set but not firm, so it wobbled when you walked. One bite in, and it stunned me—bright, tangy guava over a soft pink layer of cake, with that cool, creamy blanket in between. It wasn’t fussy or formal; it felt like the sort of dessert you make for a birthday, a backyard barbecue, or just because someone you love had a long week. That easy, shareable joy is exactly what I wanted to bring into this version.
When I came home, I tried to recreate that same Hawaiian Guava Cake feeling in my own very un-tropical kitchen, rain hitting the windows instead of ocean breeze. I started with a simple strawberry cake mix because it gave me that pretty color and soft crumb without demanding an afternoon of sifting and folding—one bowl, a hand mixer, and you’re halfway to vacation. Then I played with the guava juice: enough to keep the cake moist, but not so much that it turned gummy. The cream cheese layer came next, whipped until fluffy so it could hold its own under that shiny guava glaze, the way a good no-bake cheesecake holds its shape when sliced. I still remember the first time I cut into the chilled cake, the layers clean and bright, and thought, “Yes, this tastes like a plane ticket I didn’t have to buy.”
How To Make It (Mix & Ingredients)
To bring this Hawaiian Guava Cake to life, you’ll start with a simple strawberry cake mix and dress it up with tropical flavor. In a large bowl, whisk together the dry cake mix, 1 cup of guava nectar or guava juice, 3 large eggs, and melted coconut oil until the batter is smooth and slightly thick. If you’re going for a lighter or allergy-friendly version, this is where you can swap in a gluten-free cake mix, applesauce or flax eggs, and vegetable oil if coconut isn’t your thing. The batter should look glossy and pourable—thicker than pancake batter, thinner than brownie batter. Pour it into your greased 13 x 9-inch pan and bake until the top is lightly golden and a toothpick comes out with just a few moist crumbs.
Instructions Process of Hawaiian Guava Cake
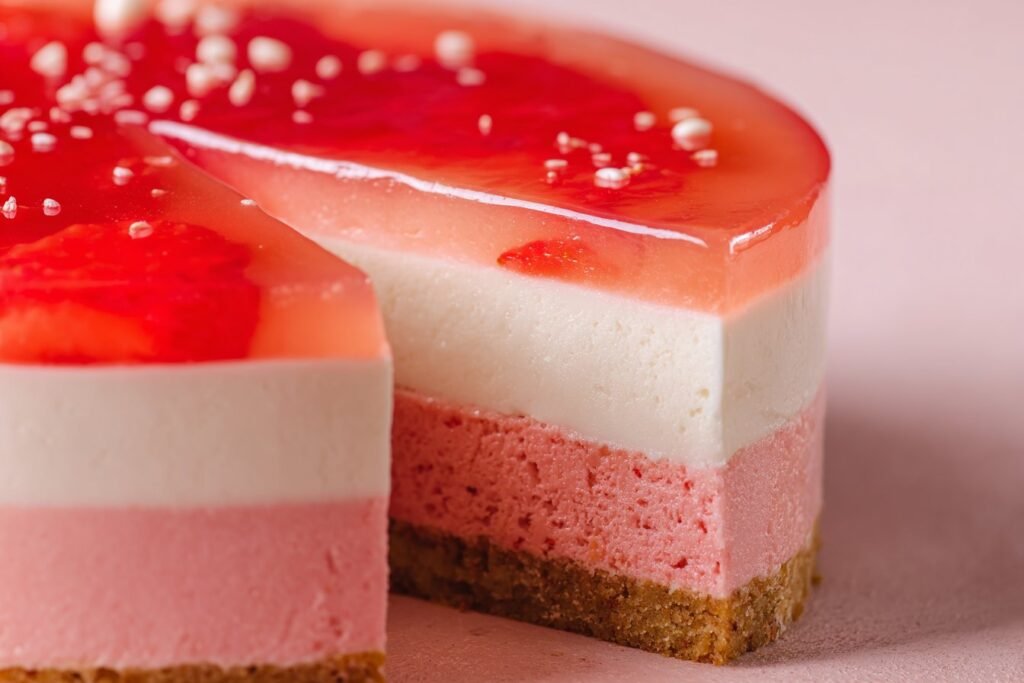
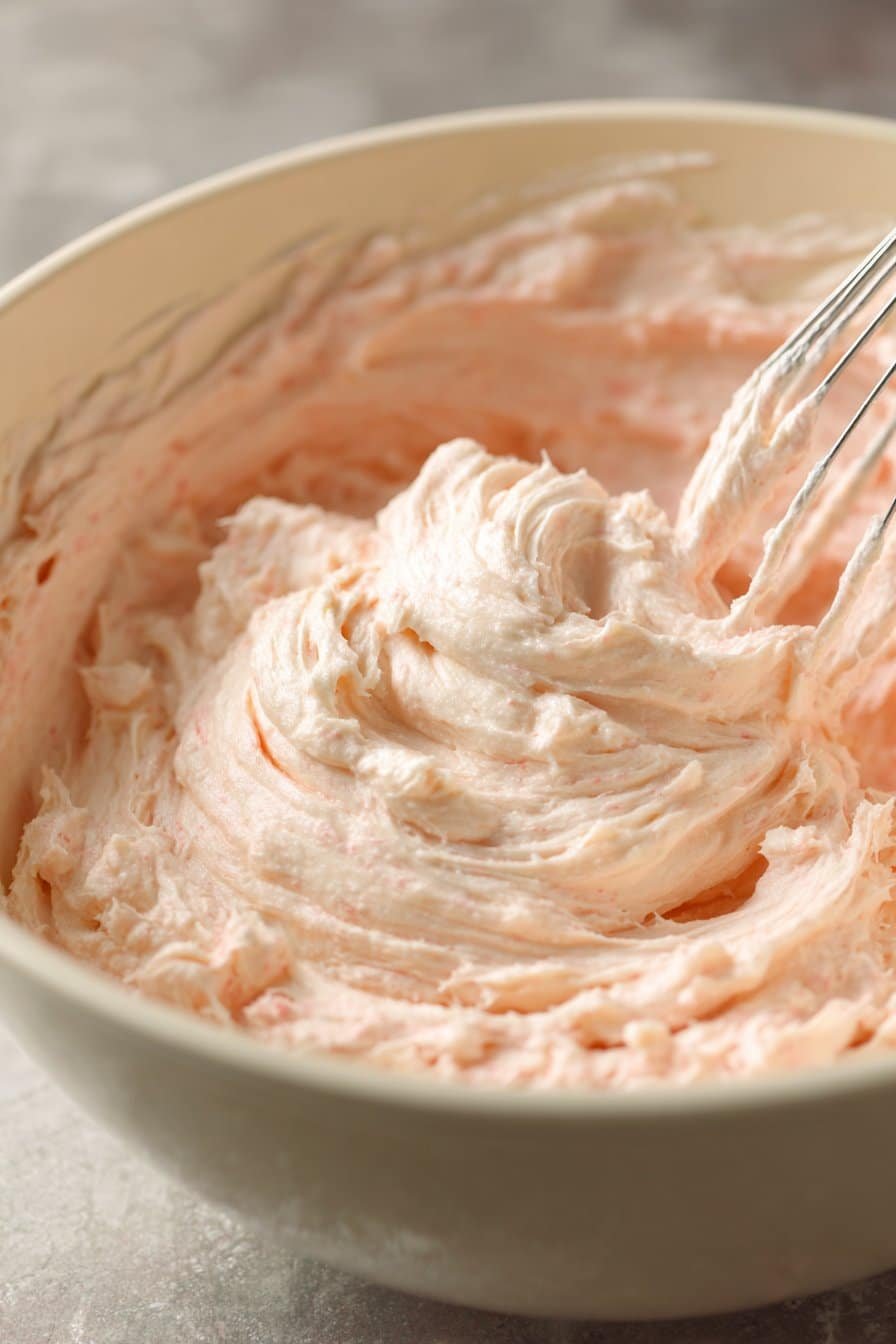
While the cake cools, you’ll mix up the creamy layer and guava topping that make this Hawaiian Guava Cake so special. Beat softened cream cheese, sugar, and vanilla until the mixture is silky and free of lumps—scrape the bowl a few times so you don’t get surprise chunks later. Gently fold in the Cool Whip (or whipped coconut cream if you’re keeping it dairy-free) until you have a cloud-like frosting; it should be thick enough to hold soft peaks but still spread easily over the cooled cake. For the guava layer, simmer guava juice with sugar, then whisk in a cornstarch-and-water slurry until it turns glossy and slightly thick, like a dessert sauce rather than a heavy jelly. Once that cools to room temperature, you’ll spread on the cream cheese mixture, pour the guava topping over, and finish with a sprinkle of toasted coconut flakes if you love extra texture.
Make-Ahead & Storage
One of my favorite things about Hawaiian Guava Cake is how beautifully it behaves as a make-ahead dessert. If you’re hosting, you can bake the strawberry cake layer 1–2 days in advance. Let it cool completely, then wrap the cake tightly in plastic wrap right in the pan, or remove and wrap it on a cardboard cake board. Store it at room temperature for up to 24 hours, or in the fridge for 2 days. You can also make the cream cheese layer and guava topping a day ahead, keep them in separate airtight containers in the refrigerator, and assemble everything a few hours before serving so the layers stay defined and gorgeous.
Once your Hawaiian Guava Cake is fully assembled, you’ll want to store it in the refrigerator because of the cream cheese and whipped topping. Cover the pan tightly with plastic wrap or a fitted lid so the cake doesn’t dry out or absorb fridge odors (no one wants guava cake that smells like last night’s garlic pasta). Properly covered, it keeps well for about 3–4 days; after that the guava glaze can start to weep a little and the whipped layer softens, though it’s still safe to eat. For the cleanest slices later, chill the cake for at least 2 hours before cutting so the layers firm up.
Freezing this cake fully assembled is possible, but I recommend a little strategy for best texture. For the neatest results, freeze just the baked cake layer (well-wrapped in 2 layers of plastic and 1 layer of foil) for up to 2 months, then thaw in the fridge overnight and add the cream cheese, Cool Whip, and guava topping fresh. If you do freeze leftovers, cut the Hawaiian Guava Cake into squares, place them on a parchment-lined tray to freeze until solid, then wrap each piece and store in a freezer bag for up to 1 month. Thaw in the refrigerator, then let sit at room temperature for 10–15 minutes before serving so the flavors and texture fully wake up.
Best Ingredients & Party Variations
For the brightest, most tropical Hawaiian Guava Cake, start with the guava. Look for guava nectar or guava juice that lists guava as the first ingredient and avoid anything that tastes mostly like sugar water. I like using a brand with a deep pink color because it gives the cake and glaze that cheery, sunset hue that just screams “vacation.” Full-fat cream cheese makes the filling ultra-smooth and stable, especially if you’re serving this cake at a party where it might sit out a bit. And while boxed strawberry cake mix keeps things easy, choose one you already like on its own—if it tastes artificial to you plain, it will show in the final cake. A fragrant pure vanilla extract and good-quality coconut oil round everything out with a warm, tropical aroma.
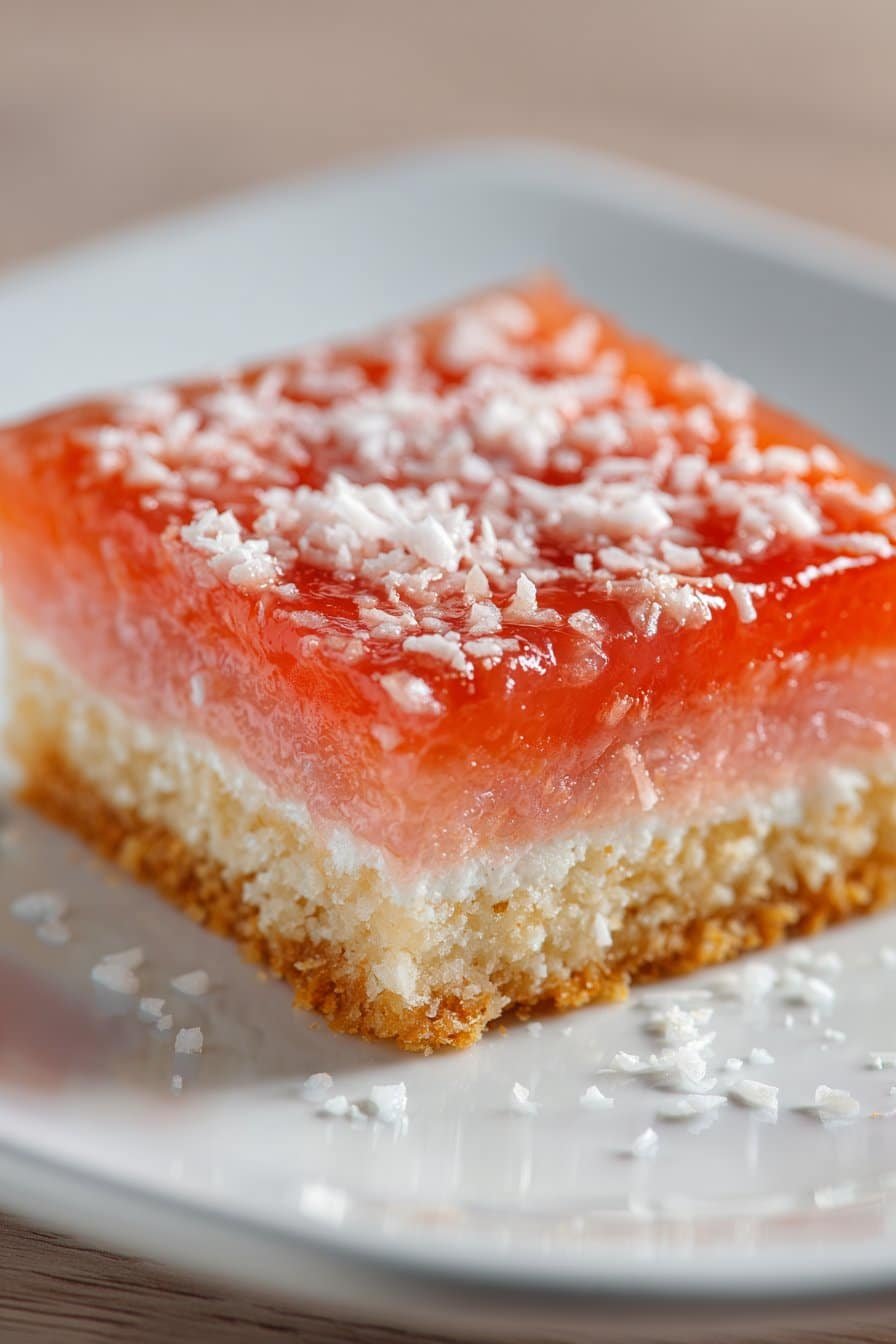
Once you’ve got your base nailed, this Hawaiian Guava Cake is a playground for party variations. For a luau-style dessert table, bake the cake in two 8-inch rounds, stack them with the cream cheese filling, and finish with the guava glaze dripping over the sides—extra dramatic and very “bring-on-the-confetti.” Making it for a kids’ birthday? Stir colorful sprinkles into the cooled guava glaze or top the finished cake with a ring of mini marshmallows and toasted coconut. For a lighter spin, fold fresh pineapple chunks or diced strawberries into the cream cheese layer, or swap Cool Whip for whipped coconut cream for a dairy-free but still fluffy finish. And if you love a dessert bar moment like my coconut dream poke cake or classic pineapple upside-down cake, you can bake this in a rimmed sheet pan, chill until firm, and slice into neat squares—perfect for potlucks, picnics, and “just one more piece” moments.
Serving of Hawaiian Guava Cake
Conclusion
If you’ve made it this far, you can probably tell how much this cake means to me. There’s just something magical about pulling a pan of soft, pink-tinted layers from the oven, frosting it in silky clouds, and showering the top with that glossy guava glaze. It feels like a little island vacation you can slice and share, no plane ticket required. Hawaiian Guava Cake has a way of turning an ordinary afternoon into a memory you’ll talk about for years.
I picture you cutting that first piece—maybe for a birthday, maybe after a long week, maybe just because—and watching everyone take that first bite. The table gets a little quieter, eyes light up, and suddenly you’re all connected over one bright, fruity, nostalgic dessert. That’s the part I love most: how a simple homemade cake can bring people together and create those “remember when…” moments.
I hope you’ll give this recipe a try, make it your own, and share it with someone you love.
For more delicious recipes like this, follow us on social media!
What makes Hawaiian Guava Cake different from other sheet cakes?
Hawaiian Guava Cake builds flavor in layers: fruity strawberry cake, tangy-sweet cream cheese filling, and a glossy guava topping. You taste guava in both the cake and the gel, so every bite feels bright and tropical. The whipped topping keeps it light instead of heavy like buttercream. Optional sweetened coconut flakes add a little crunch and extra island flair. It’s the kind of cake that feels party-ready even when you baked it on a Tuesday.
Can I bake Hawaiian Guava Cake ahead and store it safely?
Yes, this cake is actually better when it has time to chill and set. You can make the full Hawaiian Guava Cake up to 1 day in advance and refrigerate it, covered tightly so it doesn’t absorb fridge odors. For the best texture, let it sit at room temperature for about 10–15 minutes before serving. Store leftovers in an airtight container in the refrigerator for up to 4 days. The guava layer will stay glossy and the cream cheese layer will stay firm but creamy.
How can I adapt Hawaiian Guava Cake for dietary needs?
For a gluten-free version, simply use a gluten-free cake mix and double-check that your guava juice and other ingredients are certified gluten-free. To make it dairy-free, use dairy-free cream cheese and swap Cool Whip for whipped coconut cream. For an egg-free cake, use unsweetened applesauce or a flax egg to bind the batter and keep it moist. The flavor of guava is so bold that these swaps barely change the overall taste and joy of the cake. Just keep an eye on baking time, as some substitutes can slightly change how fast the cake bakes.
Recipe

Hawaiian Guava Cake
Ingredients
Ingredients
- 1 box strawberry cake mix about 15.25 oz
- 1 cup guava nectar or guava juice
- 3 large eggs
- 1/2 cup coconut oil melted
- 8 oz cream cheese softened
- 1 cup granulated sugar divided
- 1 tsp vanilla bean paste
- 8 oz Cool Whip thawed
- 2 1/2 cups guava juice
- 2 tbsp cornstarch
- 1/4 cup water
- 1 cup sweetened coconut flakes optional
Instructions
- Preheat the oven to 350°F and grease a 13x9-inch baking dish with vegetable spray.
- In a large bowl, combine the strawberry cake mix, 1 cup guava juice, eggs, and melted coconut oil. Beat on low speed for 30 seconds, then on medium-high speed for 2 minutes until smooth.
- Pour the batter into the prepared baking dish and spread it evenly. Bake for 24 to 26 minutes, or until a toothpick inserted in the center comes out with moist crumbs.
- Remove the cake from the oven and cool in the pan for 10 minutes, then transfer to a wire rack to cool completely.
- In a mixing bowl, beat the softened cream cheese for about 2 minutes until fluffy. Add 1/2 cup granulated sugar and the vanilla bean paste and beat until smooth.
- Fold the Cool Whip gently into the cream cheese mixture until fully combined and creamy. Refrigerate until ready to use.
- In a saucepan, combine 2 1/2 cups guava juice and the remaining 1/2 cup granulated sugar. Bring to a boil over medium heat, stirring occasionally.
- In a small bowl, whisk together the cornstarch and water until smooth to form a slurry.
- Once the guava juice mixture is boiling, slowly whisk in the cornstarch slurry, stirring constantly, and cook until the mixture thickens and becomes glossy. Remove from heat and cool to room temperature.
- When the cake is completely cool, spread the cream cheese mixture evenly over the top.
- Pour the cooled guava gel over the cream cheese layer and gently spread it to cover the surface.
- Refrigerate the cake for at least 1 hour to set the layers.
- Just before serving, sprinkle the sweetened coconut flakes evenly over the top, if using, then slice and serve chilled.
Notes
- Ensure the cake is fully cooled before adding the cream cheese layer to prevent melting and sliding.
- Let the guava gel cool to room temperature before pouring it over the cream layer so it sets cleanly without melting the topping.
- Store leftovers covered in the refrigerator for up to 4 days.