
Why This One Delivers
These Harry Potter Butterbeer Cookies really earn their bakery style title because they layer flavor the way a good pastry chef builds a cake. You are not just tossing in a handful of butterscotch chips and hoping for the best. You get caramel depth from packed light brown sugar, real butterscotch flavor from melted chips in both the dough and frosting, and that unmistakable butterbeer note from butter extract and a splash of cream soda. The extracts do most of the heavy lifting on flavor, while the cream soda adds a gentle sweetness and aroma without making the dough soggy. Every bite tastes like you just walked out of Honeydukes with warm cookies tucked into a napkin.
Texture is where these Harry Potter Butterbeer Cookies leave the basic versions behind. The mix of baking soda and baking powder gives you a cookie that spreads just enough to get crinkly bakery style edges, but stays thick and soft in the center. Melting part of the butterscotch instead of only using whole chips means it blends into the dough and bakes into a chewy, caramel scented interior instead of random hard bits. The centers should feel soft and slightly bouncy if you press them gently once cool. Then you crown everything with a fluffy butterscotch buttercream that you can mound high for drama, the way I do on my richer frosted vanilla bean sugar cookie bars. These are the cookies you bake when you want something that looks impressive on a party platter, tastes like a trip to Hogsmeade, and still comes together with simple pantry ingredients you can pronounce.
From Prep to Finish
Once you gather everything for these Harry Potter Butterbeer Cookies, think of your kitchen as a tiny Hogwarts kitchen, just with fewer house elves and more measuring spoons. Start by creaming your softened butter with both sugars until the mixture looks pale and a little fluffy. It should cling lightly to the sides of the bowl and leave soft ridges from the beaters, not sit like a heavy paste. This step usually takes about 3 to 4 minutes on medium speed. When you whisk the dry ingredients, really break up any flour clumps so your cookies bake with even, rounded tops rather than random flour pockets.
After you melt the butterscotch chips, let them cool until the bowl feels just slightly warm to the touch, not hot. Then stream them slowly into the butter mixture so they infuse flavor without scrambling or shocking the eggs. Add the eggs one at a time and mix just until they disappear and the batter looks smooth and glossy. That keeps the dough soft and prevents a tough, dry cookie.
When you add the vanilla bean paste, butter extract, molasses extract, and cream soda, the dough may look a bit looser than a classic chocolate chip cookie dough. That is exactly what you want for a butterbeer style cookie that bakes up soft and chewy. The dough should look thick but scoopable, like soft ice cream. Gently mix in the dry ingredients on low speed until you no longer see streaks of flour, then stop, even if you feel tempted to keep going. Overmixing will give you flat, tough cookies instead of pillowy bakery style Harry Potter Butterbeer Cookies.
Chill the dough for at least 30 minutes so the butter firms up and the flavors marry. Well chilled dough should feel cool and slightly firm when you scoop it, and it helps the cookies bake thick with those pretty crackly tops. Scoop the dough into even balls, spacing them at least 5 centimeters apart so they have room to spread.
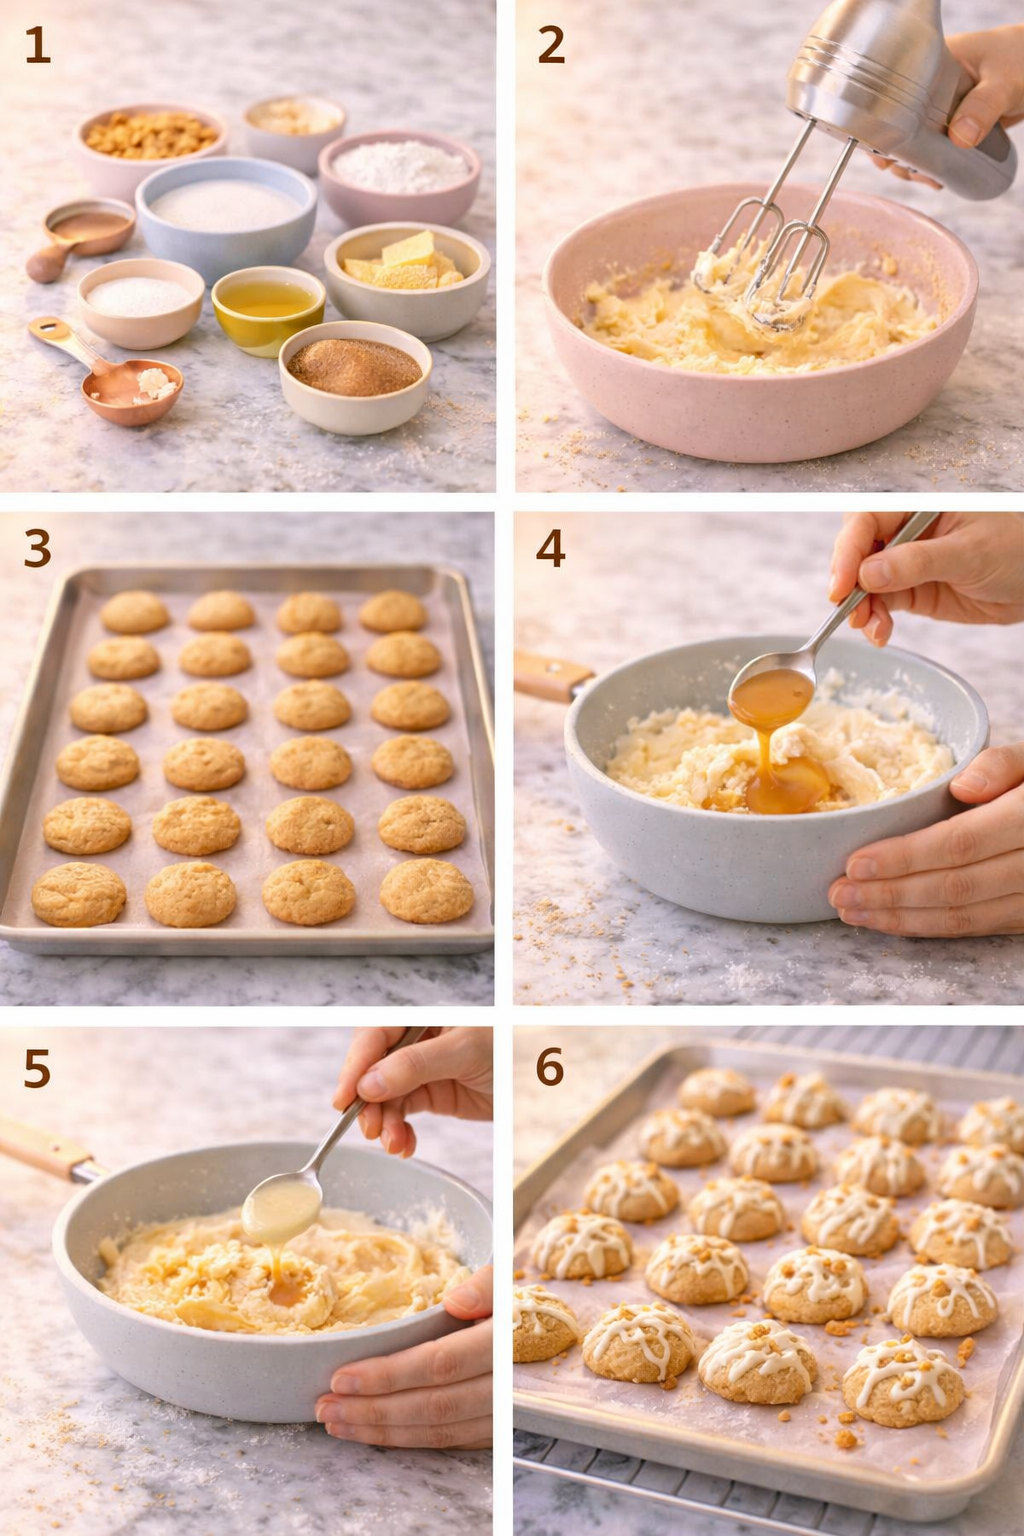
Process Image of Harry Potter Butterbeer Cookies
While the dough chills, make the frosting. Beat the softened butter until it looks smooth and creamy, then slowly add powdered sugar, melted butterscotch, cream, vanilla, and butter extract. Beat until you have a fluffy, pipeable cloud that holds soft peaks and feels light, not gritty. If the frosting feels too thick, add a teaspoon of cream at a time. If it feels too loose, add a couple of spoonfuls of powdered sugar.
Bake the cookies at 350°F on parchment lined baking sheets. They usually take about 10 to 12 minutes, depending on your oven and how cold your dough is. The edges should look lightly golden and set, while the centers still look slightly puffed and a touch underdone. They will deflate a bit as they cool and finish baking on the hot pan.
Let the cookies cool on the baking sheet for 5 minutes so they firm up, then move them to a wire rack to cool completely. The bottoms should feel dry and lightly golden, not pale and doughy. Once the baked cookies are completely cool, swirl each one with frosting, drizzle with butterscotch sauce, and you will have cookies that look like they came from a Hogsmeade bakery, ready to sit beside your next batch of cozy caramel apple bars.
Timing, Storage, and Make-Ahead
Once your Harry Potter Butterbeer Cookies are scooped and baked at 350°F, they usually need about 10 to 12 minutes in the oven. If you make larger bakery style scoops, they may need up to 13 minutes. Look for edges that are lightly golden and centers that still look a touch soft and slightly shiny. If the tops look totally dry, they are probably overbaked. Let them cool on the baking sheet for 5 minutes so they finish setting, then move them to a wire rack before you even think about frosting. If you like truly bakery style thickness, you can chill the scooped dough for 20 to 30 minutes before baking to help the cookies hold their shape and stay tall.
Store your frosted Harry Potter Butterbeer Cookies in an airtight container at room temperature for up to 3 days. I like to layer them with parchment so the frosting and butterscotch drizzle stay neat and do not weld together into one mega cookie. The texture stays soft and chewy, and the frosting stays fluffy instead of crusty.
For longer storage, refrigerate them for up to 5 days and let them come to room temperature before serving so the butterbeer flavor softens and blooms again. The frosting will firm in the fridge, so that 20 to 30 minutes at room temperature makes a big difference in both flavor and texture. You can also freeze baked, unfrosted cookies for about 2 months, then thaw and frost when you need a quick Hogwarts worthy dessert spread. Thawed cookies should feel soft in the center and slightly chewy around the edges.
To get ahead, you can make the cookie dough up to 48 hours in advance. Scoop the dough into balls, chill on a baking sheet until firm, then transfer to a zip top freezer bag and freeze for up to 2 months. Bake the dough balls straight from the freezer, adding 1 to 2 extra minutes to the bake time and watching for the same golden edges and soft centers. The frosting for these Harry Potter Butterbeer Cookies can be made up to 3 days ahead as well, stored in the fridge in a tightly covered container. Let it warm slightly on the counter, then beat or stir until fluffy again before piping or spreading on your cookies.
Ingredient Swaps and Serving Options
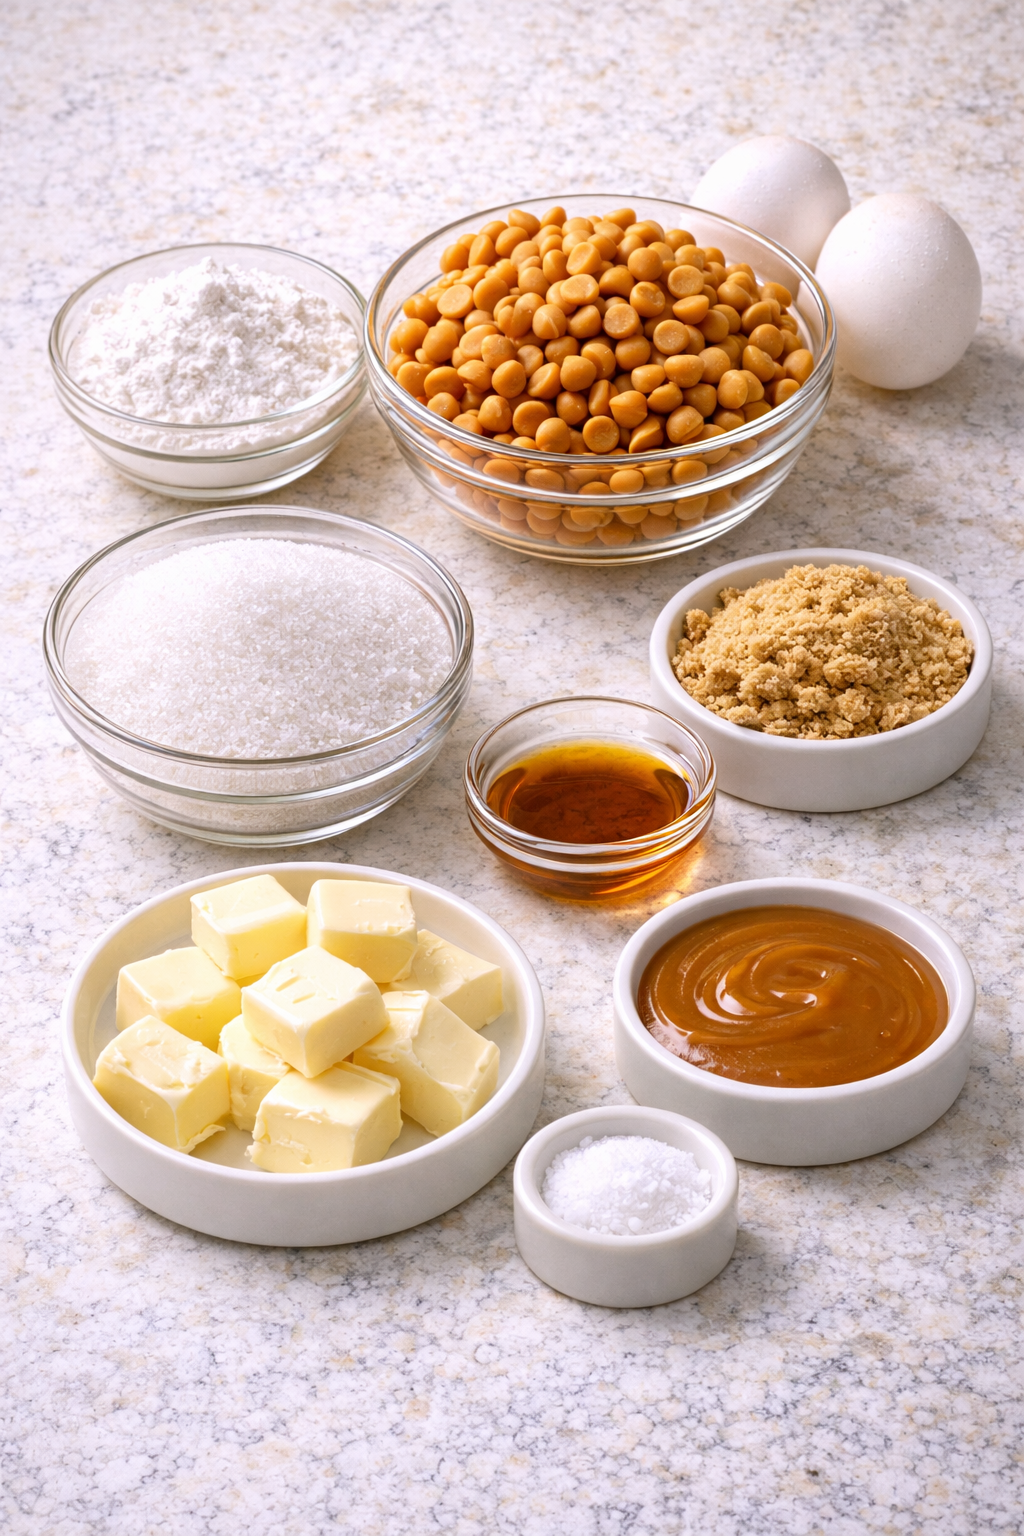
Ingredients Image of Harry Potter Butterbeer Cookies
If you need to tweak these Harry Potter Butterbeer Cookies, you have plenty of room to play without losing that magical flavor. You can swap up to half of the all purpose flour for cake flour for a softer, more tender bakery style texture, or use a measure for measure gluten free flour blend if needed. No vanilla bean paste on hand. Use an equal amount of regular vanilla bean paste and add an extra tablespoon of brown sugar to boost that caramel warmth. The butter extract really is key, but in a pinch you can combine half butter flavoring and half caramel or butterscotch extract to get closer to classic butterbeer. For the cream soda, you can use any vanilla cream soda or a mild store brand. Just avoid anything cherry or citrus because it fights the butterbeer flavor and can make the cookies taste a bit off.
On the frosting side, heavy cream will give you the fluffiest, tavern worthy topping, but whole milk or half and half both work if that is what you have in the fridge. If you are not a fan of super sweet frostings, start with 3 cups of powdered sugar and add more only if you want a thicker swirl that holds very defined peaks. You can swap the melted butterscotch chips in the frosting for caramel chips, or even a spoonful of store bought caramel sauce, if that is what you have. Just make sure it is a thicker sauce so the frosting does not turn runny.
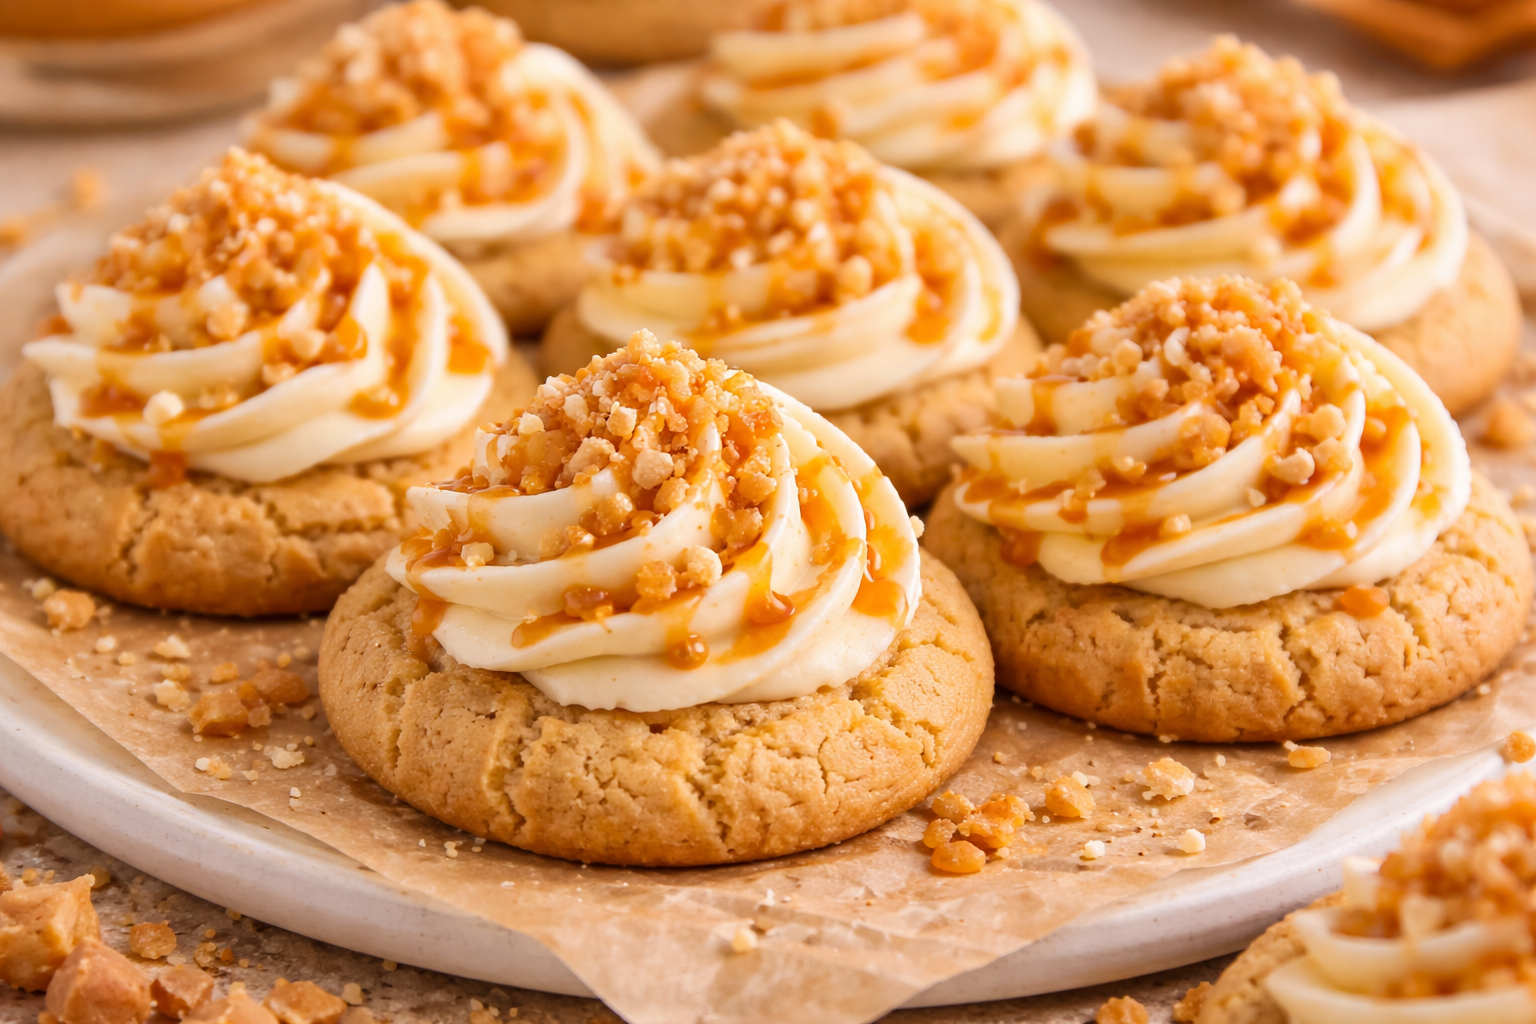
For serving, I love to drizzle the finished cookies with warm butterscotch sauce and a tiny pinch of flaky salt, then plate them with small glasses of chilled cream soda for the full Hogwarts treat cart vibe. They look beautiful on a platter with other cozy treats like pumpkin pasties, churro cruffins, or vanilla bean sugar cookie bars. These also make amazing ice cream sandwich cookies with vanilla or salted caramel ice cream tucked in the middle, similar to how I serve my butterscotch blondies during movie nights. However you serve them, let the cookies cool completely before frosting so every bite keeps that soft center and butterscotch crackle you baked in.
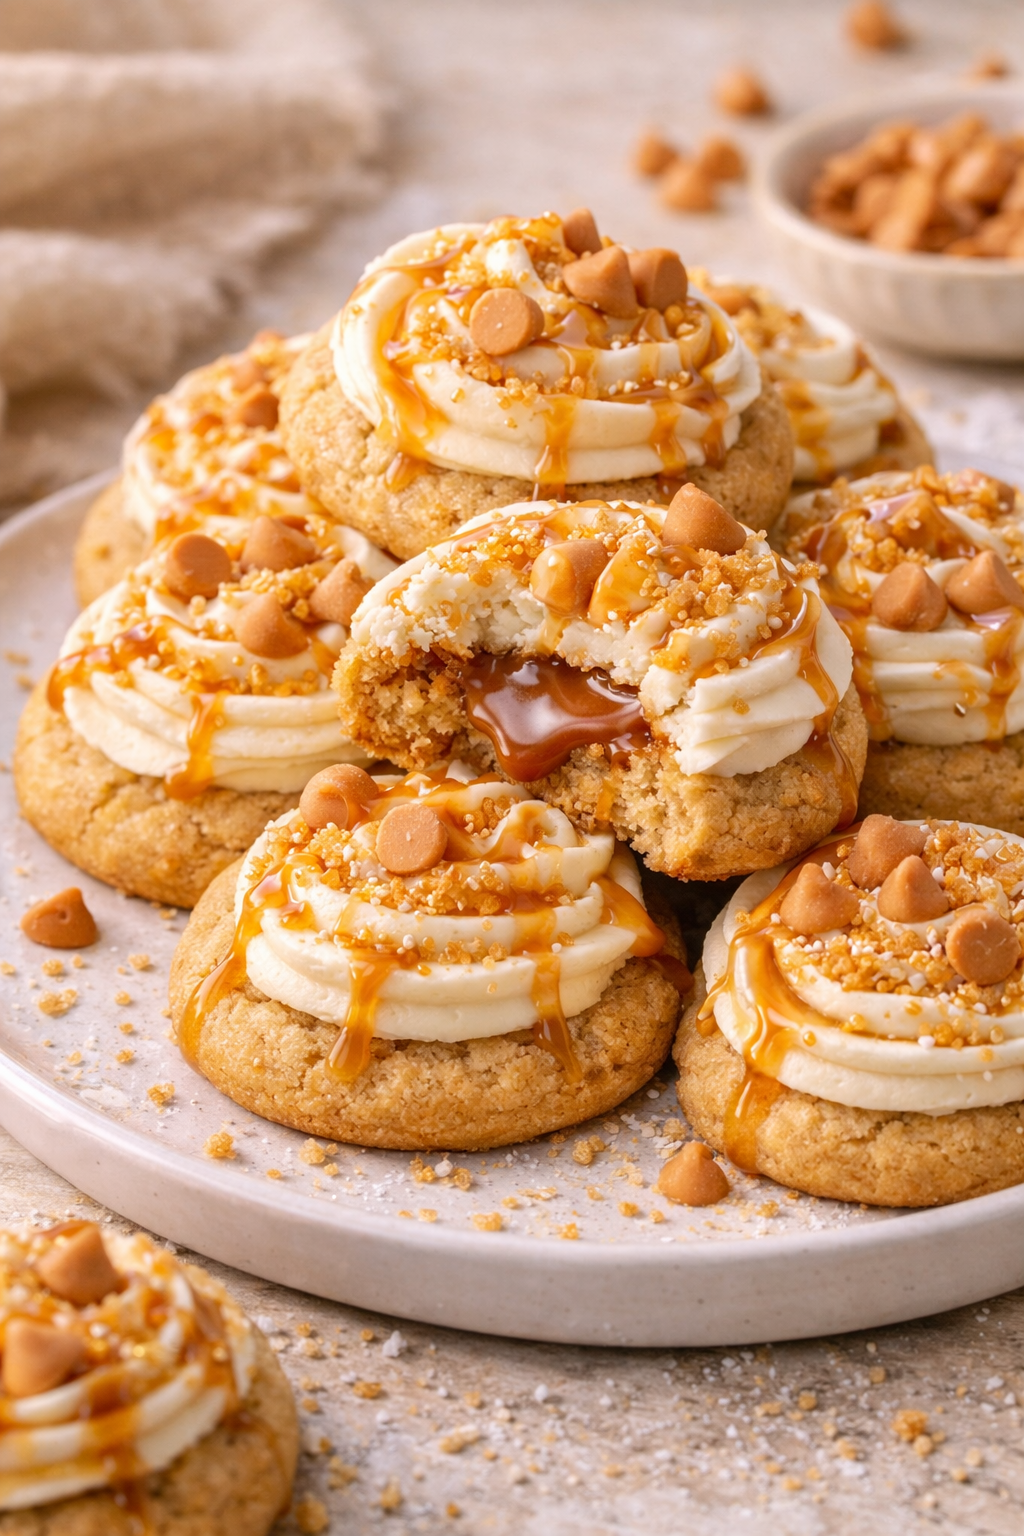
Serving Image of Harry Potter Butterbeer Cookies
Conclusion
Every time I pull a tray of these cookies from the oven, I feel a little spark of magic in my very ordinary kitchen. There is something about that warm, buttery aroma, the caramel vanilla notes, and the soft, chewy centers that turns a simple afternoon into a memory. Whether you are baking with kids who grew up on the books, hosting a movie marathon, or just treating yourself after a long day, these Harry Potter Butterbeer Cookies have a way of slowing everyone down and drawing them to the same plate.
I hope this recipe gives you an excuse to pause, preheat the oven, and invite someone you love to sit at the counter while you bake. Let them lick the spoon, sneak a warm cookie, and tell you about their day. That is where the real magic happens.
When you try this recipe, I would love to hear how it turned out and who you shared it with. Snap a photo, make it your own, and come back to bake with me again.
Recipe Card Image of Harry Potter Butterbeer Cookies
Recipe
Harry Potter Butterbeer Cookies
Ingredients
Ingredients
- 2 1/4 cups all-purpose flour
- 1 tsp baking soda
- 1/2 tsp baking powder
- 1/2 tsp salt
- 3/4 cup unsalted butter softened
- 1/2 cup granulated sugar
- 3/4 cup packed light brown sugar
- 1/4 cup butterscotch chips melted and slightly cooled
- 2 large eggs room temperature
- 2 tsp vanilla bean paste
- 1 tsp butter extract
- 1/4 tsp molasses extract optional
- 2 tbsp cream soda
- 1/2 cup unsalted butter softened
- 4 cups powdered sugar
- 1/4 cup butterscotch chips melted and cooled
- 3 tbsp heavy cream or whole milk
- 1 tsp vanilla bean paste
- 1/2 tsp butter extract
- 1 pinch salt
- Butterscotch sauce for drizzling (optional)
Instructions
- Preheat oven to 350°F. Line two baking sheets with parchment paper.
- In a medium bowl whisk together flour, baking soda, baking powder, and salt, then set aside.
- In a microwave-safe bowl melt 1/4 cup butterscotch chips in 15 to 20 second bursts, stirring between each, until smooth, then let cool for 5 minutes.
- In a large bowl beat 3/4 cup softened butter, granulated sugar, and brown sugar on medium speed for 3 to 4 minutes until light and fluffy.
- Add the melted and cooled butterscotch to the butter mixture and beat on medium speed for 1 minute until combined.
- Beat in the eggs one at a time, mixing well after each addition until smooth.
- Mix in 2 tsp vanilla bean paste, 1 tsp butter extract, molasses extract if using, and cream soda until the batter is smooth and glossy.
- With the mixer on low speed gradually add the flour mixture and mix just until combined with a few streaks of flour remaining.
- Use a spatula to gently fold the dough until no dry spots remain; the dough should be soft and slightly sticky.
- Cover the bowl with plastic wrap and refrigerate the dough for 30 minutes.
- Scoop dough into 2 tablespoon portions and roll into balls, then place on prepared baking sheets about 2 inches apart.
- Bake for 10 to 12 minutes until the edges are set and lightly golden while the centers look slightly underdone.
- Cool cookies on the baking sheets for 5 minutes, then transfer to a wire rack to cool completely.
- For the frosting, melt 1/4 cup butterscotch chips in the microwave in 15 second bursts until smooth, then cool for 5 to 10 minutes.
- In a large bowl beat 1/2 cup softened butter on medium-high speed for 2 to 3 minutes until pale and fluffy.
- Add 2 cups powdered sugar and beat on low until combined, then on medium-high for 2 minutes.
- Add the cooled melted butterscotch, 1 tsp vanilla bean paste, 1/2 tsp butter extract, pinch of salt, and 2 tbsp cream, then beat until smooth and fluffy.
- Beat in the remaining powdered sugar, 1 to 2 cups, until the frosting is thick but spreadable; add the remaining 1 tbsp cream if needed to reach a smooth consistency.
- Beat frosting on high speed for 2 to 3 more minutes until very light and fluffy.
- Once cookies are completely cool, spread or pipe frosting on top of each cookie.
- Drizzle frosted cookies with butterscotch sauce if using, then serve or store.
Notes
- Make sure both melted butterscotch portions are only slightly warm before adding so they do not melt the butter or cook the eggs.
- Store cookies in an airtight container at room temperature for up to 3 days or refrigerate for up to 5 days.
- You can freeze unfrosted baked cookies for up to 2 months and frost after thawing.
