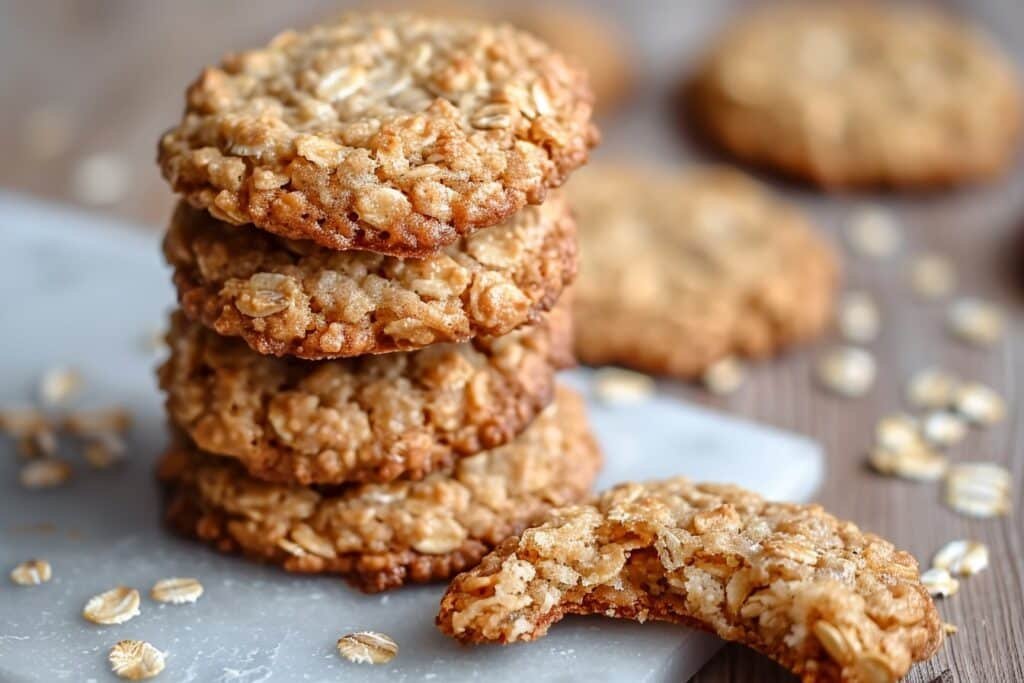
What Makes This Recipe Reliable
I built this Glazed Buttermilk Beignet Square recipe the same way bakery teams test a dough, with lots of rounds of tweaking so you do not have to guess. The yeast to sugar to buttermilk ratio gives you a foam in about 5 to 8 minutes, so you can see right away if your yeast is alive before you commit to the full batch. I tested the dough with both spooned and scooped flour, then locked in weights and cup measures so you get a soft, non sticky dough instead of a tough or soupy one. The ½ inch rolling thickness is also tested, it gives you that classic pillowy center and golden, gently crisp edges without raw middles.
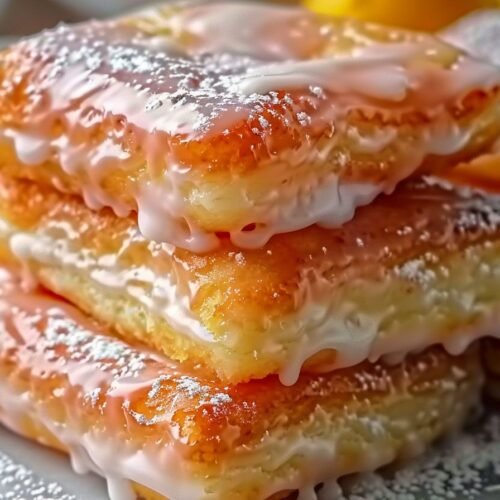
You will also notice specific temperature and visual cues all through the method to keep your Glazed Buttermilk Beignet Square consistent every time. The oil range of 340 to 350°F is narrow enough to control splatter and pale frying, but wide enough for a simple home thermometer and a basic pot. I watched the color and puff while timing each batch, then wrote the instructions so you know to fry until “evenly golden and puffed” instead of chasing a vague idea of done. Even the glaze has a guardrail, the mix is written so it clings to the warm squares and sets into a thin shell, not a thick, chalky cap or a runny mess on the rack.
Finally, this recipe is honest about timing and texture, which matters as much as the ingredients. The first rise window of 1 to 1½ hours is based on real home kitchen tests in cooler and warmer rooms, and I describe the dough as “doubled” so you can use your eyes instead of the clock alone. I also call for cooling on a wire rack, not paper towels, because I found paper created tiny dry spots that ruined that smooth vanilla glaze finish. The result is a Glazed Buttermilk Beignet Square that behaves the same on a cozy weeknight as it does when you pull it out for a celebration brunch, which is exactly what you want from a recipe you can trust.
The Method (Step-by-Step)
You will start your Glazed Buttermilk Beignet Square dough by waking up the yeast properly. Whisk the warm buttermilk, yeast, and sugar in a roomy bowl until everything looks like a pale, milky pool, then let it sit until foamy and puffed on top, about 5 to 8 minutes. If it still looks flat and quiet, your yeast might be old or your buttermilk was too hot, so do not move on until you see bubbles. Whisk in the egg and melted butter, then switch to a sturdy spatula and add the flour and salt gradually. The dough should pull away from the bowl and feel soft and elastic, a little tacky but not truly sticky. If it clings in thick streaks to your fingers, sprinkle in a tablespoon of flour at a time until it behaves.
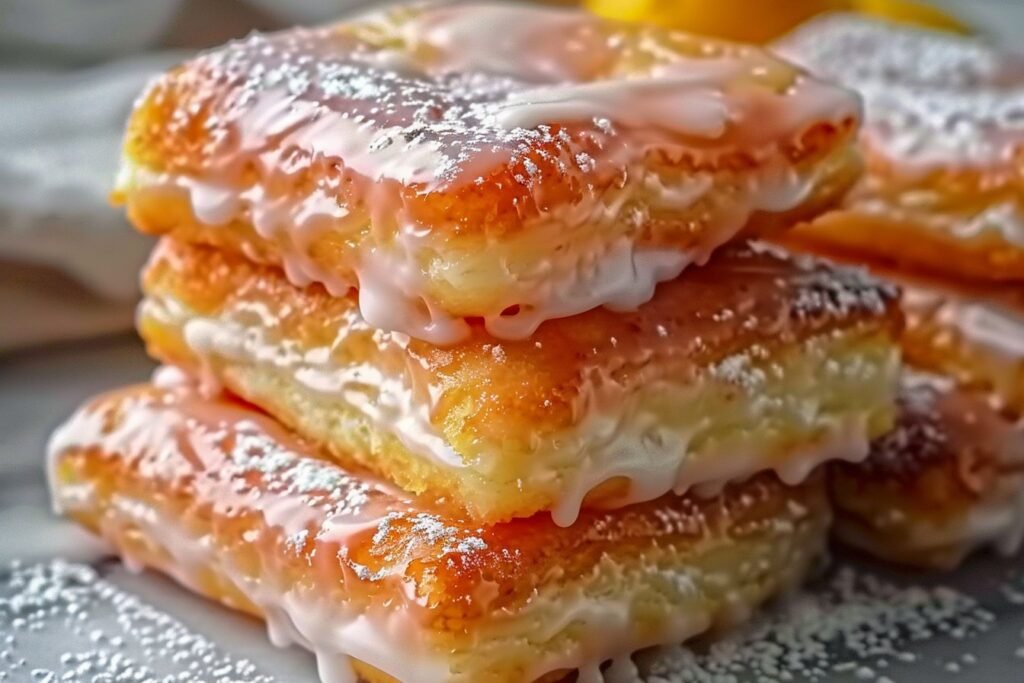
Next, you will give the dough time to rise into that pillowy texture you want in a Glazed Buttermilk Beignet Square. Lightly oil the bowl, tuck the dough back in, cover, and let it sit somewhere warm until it doubles in size, usually 1 to 1½ hours. Turn the risen dough onto a lightly floured surface and pat or roll it into a neat sheet about ½ inch thick, then use a sharp knife or bench scraper to cut clean squares so they puff evenly when fried. Heat your oil to between 340 and 350 degrees F, and fry in batches so you never crowd the pot, turning each square once with a slotted spoon until both sides are a deep, even golden color. Drain on a wire rack, not on paper towels, so the glaze can cling in a thin, glossy layer rather than soaking into soggy spots. For the glaze, whisk the powdered sugar, milk or cream, vanilla, and salt until it flows in a slow ribbon from your whisk, then spoon or dip it over the warm beignets and let it firm into a delicate shell before you sneak the first bite.
Keep It Fresh: Timing and Storage
Your Glazed Buttermilk Beignet Square will taste its absolute best within the first few hours after frying. The texture is magic when the centers are still ultra tender and the glaze has just set into that thin sugary shell. If you are serving these for brunch, fry and glaze them the same morning, then let them stand at room temperature for up to 4 hours. Keep them loosely covered on a wire rack so the bottoms do not steam and turn soggy. If your kitchen runs very warm, you can tuck them in a cool room instead of the fridge, which can dull the flavor and toughen the crumb.
For short term storage, keep glazed beignet squares in an airtight container at room temperature for about 1 day. Line the bottom of the container with parchment and leave a tiny crack in the lid so excess moisture can escape and the glaze stays set, not gummy. After that first day, the crumb starts to dry and the oil flavor becomes more noticeable, which is normal for any fried dough. You can gently refresh unglazed leftovers in a low oven at 150 to 160 °C for 5 to 7 minutes, then add fresh glaze, but know they will never be quite as dreamy as day one. If you want to work ahead, the smartest move is to refrigerate the risen, unrolled dough overnight, or freeze cut, un fried squares for up to 1 month, then fry and glaze fresh so every Glazed Buttermilk Beignet Square still tastes bakery special.
Swaps, Variations, and Serving Ideas
If you want to play around with your Glazed Buttermilk Beignet Square, start with the dough and glaze. Use half buttermilk and half whole milk if you are short on buttermilk, or mix in 2 tablespoons of sour cream for extra tang and tenderness. You can replace vanilla bean paste with vanilla bean paste, almond extract, or a mix of both for a subtle twist, and add a pinch of nutmeg or cinnamon right into the flour for a cozy bakery flavor. For a citrus version, stir finely grated lemon or orange zest into the glaze, then sprinkle the tops with a little extra zest before it sets. If you prefer classic powdered beignets, simply toss the warm squares in powdered sugar instead of glazing.
Once you trust the base dough, you can turn each Glazed Buttermilk Beignet Square into something party ready. Dip just half of each square in the glaze, then drizzle with melted dark chocolate and a bit of flaky salt for a coffee shop style finish. Scatter toasted coconut, finely chopped pecans, or colorful sprinkles over the wet glaze for birthdays or brunch. For a filled option, gently split the cooled beignet squares and spoon in pastry cream, lemon curd, or Nutella, then close and glaze just the tops. Serve these warm with strong coffee, café au lait, or hot chocolate, or build a dessert board with fresh berries, whipped cream, and maybe a slice of something chocolatey like a rich brownie for contrast.
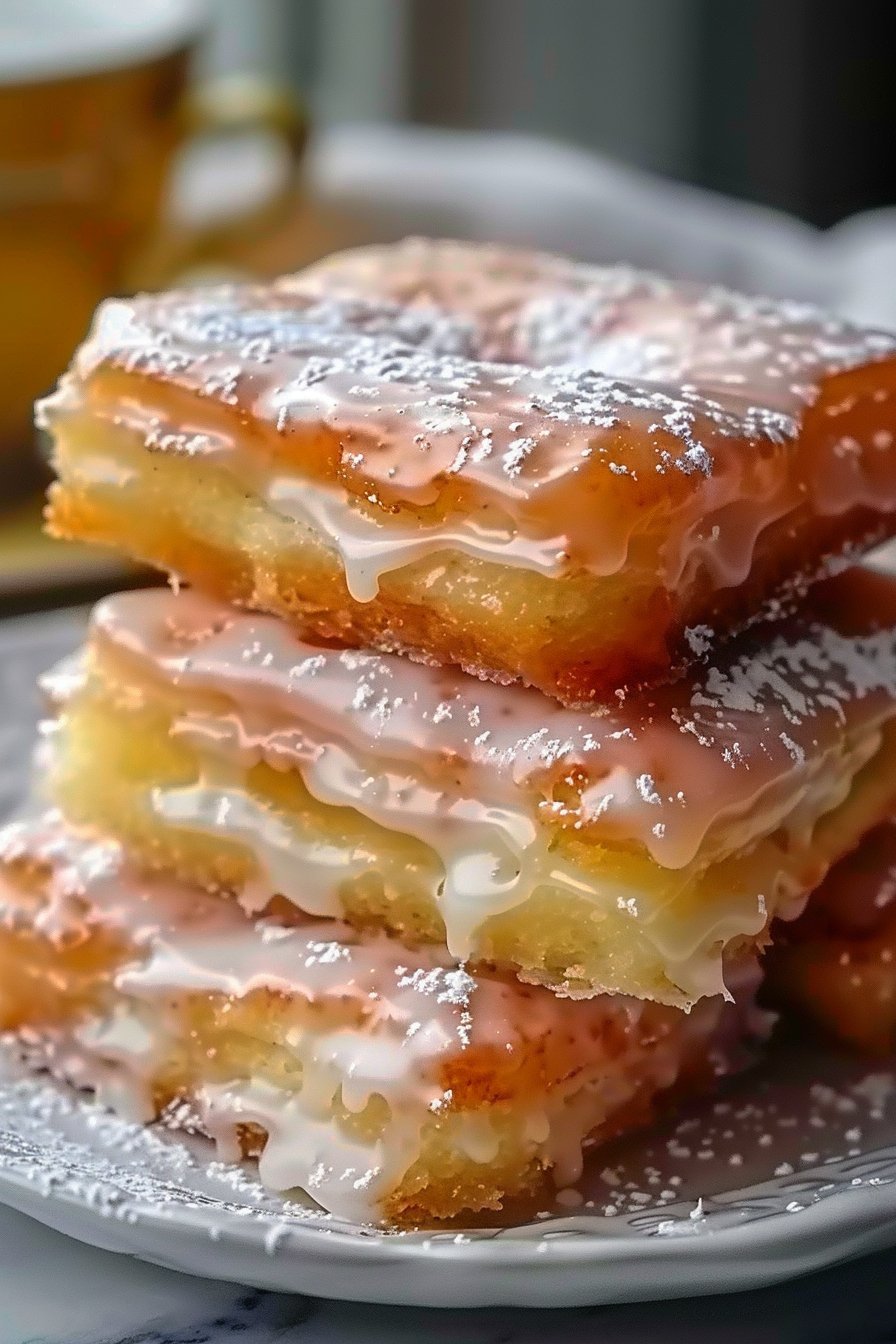
Serving of Glazed Buttermilk Beignet Square
Conclusion
Every time I pull a warm tray of these soft, sugar kissed squares from the fryer, I am reminded that the sweetest moments in life usually happen right at the kitchen table. A Glazed Buttermilk Beignet Square is not just a treat, it is an invitation. An invitation for little hands to dust everything in powdered sugar, for friends to linger a bit longer over coffee, and for you to slow down and savor something truly homemade.
I hope this recipe gives you an excuse to create your own tiny traditions, whether it is a lazy weekend brunch, a family movie night, or a surprise plate delivered to a neighbor. You do not have to be a professional baker to make something unforgettable, you just have to start. So grab your mixing bowl, warm the oil, and give these beignet squares a try. I have a feeling they may become one of your most requested treats.
For more delicious recipes like this, follow us on social media!
Instructions Process of Glazed Buttermilk Beignet Square
Recipe
Glazed Buttermilk Beignet Square
Ingredients
Ingredients
- 3/4 cup warm buttermilk about 105 to 110°F
- 2 1/4 teaspoons active dry yeast
- 1/4 cup granulated sugar
- 1 large egg room temperature
- 1/4 cup unsalted butter melted and cooled slightly
- 3 1/4 cups all-purpose flour
- 3/4 teaspoon kosher salt
- Neutral oil for frying (such as vegetable or canola, about 6 to 8 cups for a pot)
- 2 cups powdered sugar
- 4 tablespoons milk or heavy cream
- 1 teaspoon vanilla bean paste or vanilla bean paste
- Pinch of fine salt
Instructions
- In a large mixing bowl, whisk together the warm buttermilk, active dry yeast, and granulated sugar until dissolved, then let the mixture stand until foamy on top, about 5 to 8 minutes.
- Whisk in the egg and melted butter until smooth.
- Add the flour and kosher salt gradually, stirring with a sturdy spoon or spatula until a soft dough forms and pulls away from the sides of the bowl.
- Transfer the dough to a lightly floured surface and knead until smooth, elastic, and just slightly tacky but not sticky, about 8 to 10 minutes.
- Lightly oil a clean bowl, place the dough inside, turn it to coat, cover tightly, and let rise in a warm place until doubled in size, about 1 to 1 1/2 hours.
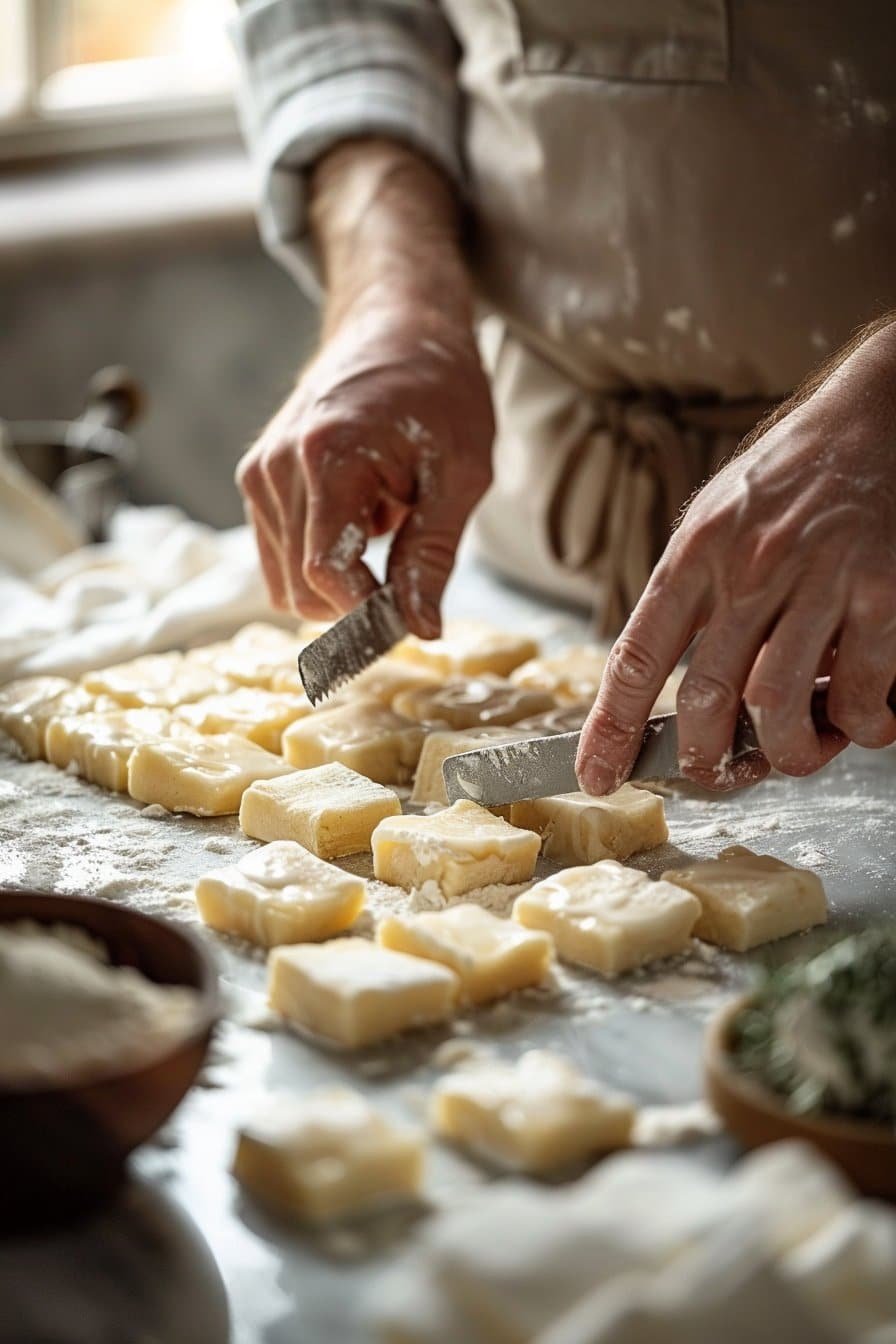
- Punch down the risen dough and turn it out onto a lightly floured surface, then roll or pat it into a rectangle about 1/2 inch thick.
- Using a sharp knife or bench scraper, cut the dough into 12 even squares and transfer them to a lightly floured surface or parchment, spacing them slightly apart.
- Heat neutral oil in a heavy pot or deep fryer to 340 to 350°F, checking with a thermometer and keeping the oil level no more than halfway up the pot.
- Carefully add a few dough squares to the hot oil without crowding the pot and fry until puffed and deeply golden on the first side, about 2 to 3 minutes.
- Turn each beignet square and fry the second side until evenly golden and cooked through, about 2 minutes more.
- Use a slotted spoon to lift the fried beignet squares onto a wire rack set over a sheet pan and let excess oil drain briefly.
- For the glaze, whisk together the powdered sugar, milk or cream, vanilla, and pinch of salt in a bowl until smooth and thick but pourable.
- While the beignet squares are still warm but cool enough to handle, dip the tops into the glaze or spoon glaze over them, allowing excess to drip back into the bowl.
- Return glazed beignet squares to the wire rack, glaze side up, and let the glaze set into a shiny shell, about 5 to 10 minutes, before serving.
Notes
- Keep the oil temperature between 340 and 350°F; too cool and the beignets absorb oil, too hot and they brown before cooking through.