In this article, we’re diving deep into freezing green beans the right way — from selecting the freshest pods to blanching, storing, and avoiding soggy results. Whether you’re prepping a garden haul or just scored a bulk deal at the farmers’ market, we’ll walk you through every step of the process with zero guesswork. You’ll also get answers to common questions about blanching, texture, and freezer life. Let’s lock in flavor, color, and crunch — the easy way.
A Kitchen Trick That Saved My Summer Beans
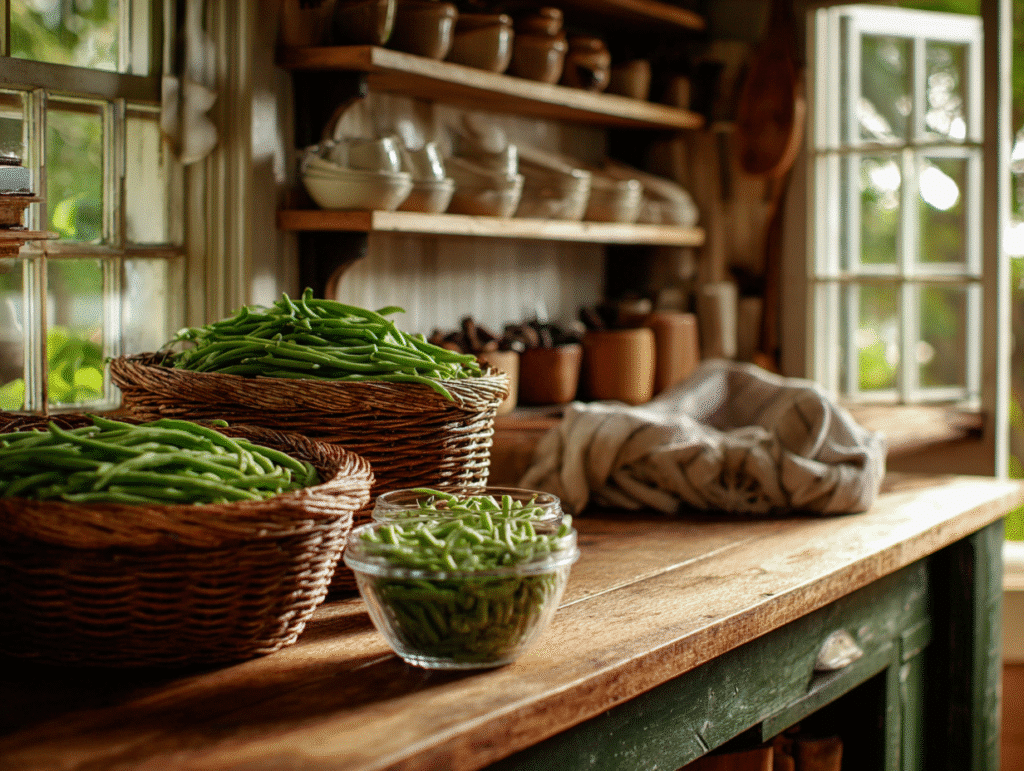
Hi, I’m Abby! I didn’t grow up freezing green beans — I grew up eating them fresh from my grandma’s garden, sautéed in butter with just a pinch of salt. But the first summer I planted my own backyard garden, I realized something quickly: green beans don’t trickle in gently. They explode in waves.
There I was, elbow-deep in colanders of vibrant beans, wondering how I’d ever use them all before they went limp. That’s when I stumbled into the world of freezing green beans — and let me tell you, it was a total game-changer.
I experimented a lot that first summer. I tried skipping blanching (bad idea), freezing them whole (worse idea), and stuffing too many into freezer bags. But once I nailed the method, it was like unlocking a secret pantry filled with peak-season flavor — all year round.
Why Freezing Green Beans Is Totally Worth It
Freezing green beans isn’t just about saving your harvest or a good farmers’ market haul. It’s about preserving freshness, locking in nutrients, and having a colorful, tender-crisp veggie ready to go in minutes — without reaching for canned alternatives. The best part? When you freeze them the right way, you’re not stuck with limp, flavorless pods. They stay bright, snappy, and delicious, whether you’re adding them to a stir-fry or roasting them with garlic and lemon.
Plus, it’s a budget-friendly way to extend summer flavors long past their season. I use the same technique for freezing peaches, and I’ve even adapted it for sweet recipes like frozen s’mores.
If you’ve got beans and a freezer, you’re halfway there. Let’s walk through the foolproof process that keeps your green beans crisp, vibrant, and ready for any recipe.
The Best Prep Method for Freezing Green Beans
To Blanch or Not to Blanch?
If you’ve ever wondered why some frozen green beans come out beautifully tender-crisp and others turn soggy and bland, the answer usually lies in one small but mighty step: blanching.
Blanching isn’t optional — it’s essential. This quick boil-then-chill process stops enzyme activity that causes veggies to lose color, flavor, and texture in the freezer. When you skip it, your beans might look fine going in, but you’ll notice they turn dull, mushy, or rubbery after a month or two.
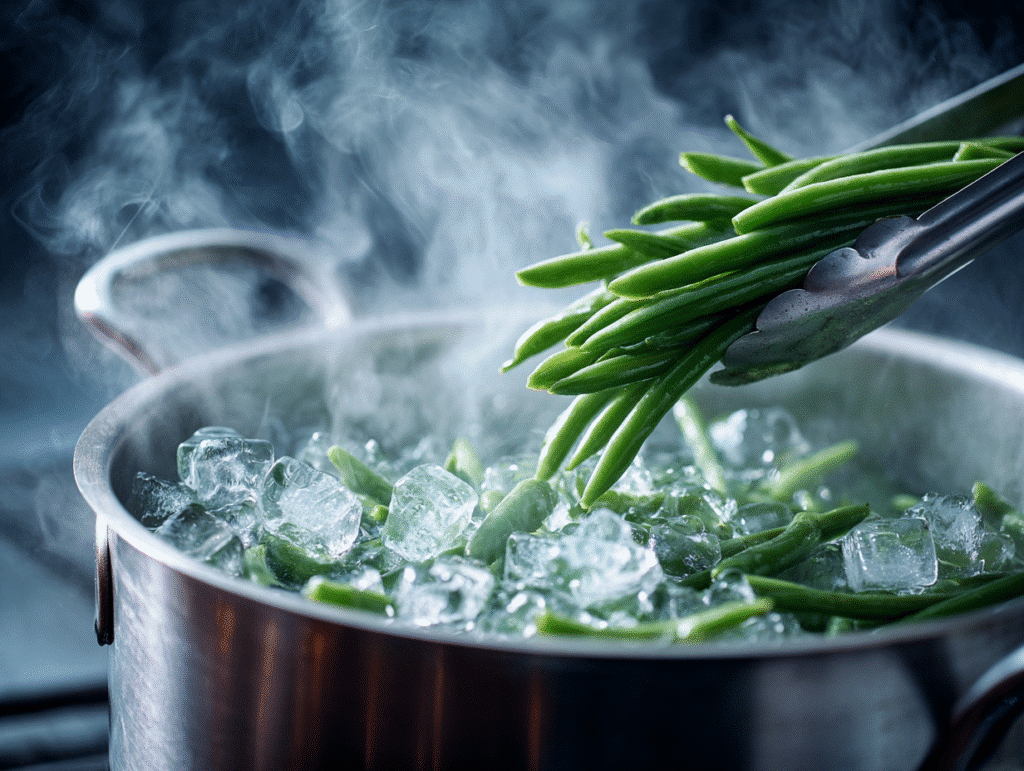
So how long should you blanch green beans? Just 3 minutes. That’s all it takes to preserve their vibrant green hue and keep them crisp. Once blanched, plunge them into an ice water bath to stop the cooking instantly. (Need a refresher on why ice water matters? This ice water hack explains everything.)
For smaller batches, some folks use steam blanching instead of boiling, which works too — just extend the steam time to about 5 minutes.
Step-by-Step: Freezing Green Beans Like a Pro
Once you’ve got your beans washed and blanched, here’s the easy part:
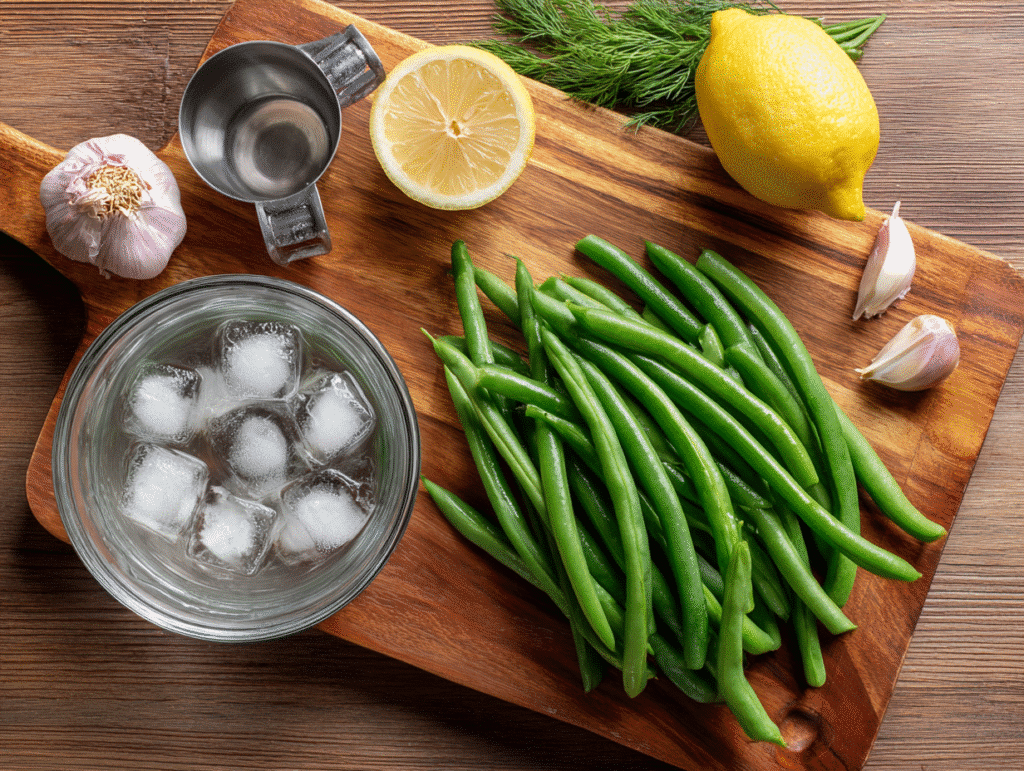
- Trim & Wash: Snap off the ends and rinse thoroughly.
- Blanch: Boil for 3 minutes in salted water.
- Ice Bath: Immediately transfer beans to an ice water bath for another 3 minutes.
- Dry Thoroughly: Spread them on a clean towel and pat dry. Any excess moisture can cause ice crystals.
- Pre-Freeze (Optional): Arrange beans in a single layer on a parchment-lined baking sheet. Freeze for 1 hour to prevent clumping.
- Bag & Seal: Transfer beans into freezer-safe bags. Remove as much air as possible. Label with date.
Pro tip: Use quality freezer bags, not thin sandwich ones. And don’t forget — portion your bags based on how you’ll cook with them later. Nothing’s worse than thawing a whole bag when you just need a handful for sour cherry sauce or a quick weeknight stir-fry.
If you’re someone who loves cooling summer treats like watermelon popsicles, freezing green beans will feel just as satisfying — and just as refreshing when winter dinners start to feel repetitive.
Mistakes That Ruin Frozen Green Beans
Skipping Blanching? Here’s What Happens
Let’s be real: blanching feels like a hassle when you’re busy. But if you skip this step when freezing green beans, you’ll regret it a month later. Without blanching, green beans keep aging — even in the freezer. Enzymes continue breaking down their texture and color, leaving you with limp, pale beans that no amount of seasoning can fix.
You’ll also notice more freezer burn, odd smells, and uneven cooking. Some folks try to freeze raw green beans and toss them straight into soups or sautés — and while that can work in a pinch, it won’t deliver that vibrant crunch or fresh flavor you want. If you’re going to put in the work to preserve them, blanching is non-negotiable.
Still not convinced? Check out the science behind freezer prep in this wellness shots recipe. Proper storage means better results — no matter what you’re freezing.
Common Storage Errors and How to Avoid Them
Even with perfect blanching, a few small mistakes can undo your hard work:
- Overcrowding your bags: This leads to clumps of frozen beans that don’t cook evenly. Pre-freeze on a baking sheet to avoid this.
- Not removing air: Excess oxygen invites freezer burn. Use a straw or vacuum sealer to get the air out.
- Skipping labels: You think you’ll remember when you froze them… but you won’t. Always date your bags.
- Freezer door storage: That spot fluctuates in temperature. Store beans toward the back for stable freezing.
Also, avoid freezing beans that are bruised, overripe, or starting to wilt. Only fresh, crisp beans freeze well — just like you wouldn’t freeze bruised fruit for something like a natural Mounjaro drink.
Getting your freezer game right doesn’t take much. Just a little attention to prep and storage can make the difference between sad, soggy beans and vibrant, tender-crisp green bites that shine on any dinner plate.
Serving Frozen Green Beans Without Losing Texture
How to Cook Frozen Green Beans That Taste Fresh
You’ve done the prep work, stored them right, and now it’s time to serve those frozen green beans like they just came from the garden. The secret? Don’t thaw them.
That’s right — cook frozen green beans straight from the freezer. Thawing adds moisture, which can make them soggy. Instead, toss them into a hot skillet with olive oil, garlic, and a pinch of sea salt. Sauté for 6–8 minutes until just tender and slightly crisp. You’ll lock in texture while enhancing flavor.
Prefer steaming? Use a basket over simmering water for 5 minutes. Add lemon zest and crushed red pepper for brightness. Want something heartier? Roast them from frozen at 425°F for 20 minutes with olive oil and parmesan. No one will guess they came from your freezer.
Bonus tip: Add a pinch of pink Himalayan salt — not just for seasoning, but for trace minerals too. This pink salt trick enhances even the simplest side dish.
Avoid boiling unless you’re using them in soups or stews, and even then, keep cooking time short. Overcooking is the fast track to mushy beans — the number one texture complaint after freezing.

How Long They Last and When to Toss Them
Properly stored, frozen green beans keep well for 8 to 12 months. That’s nearly a full year of ready-to-go greens, especially helpful during winter when fresh produce prices spike.
But how do you know it’s time to toss them? Watch for:
- Ice crystals or frost buildup inside the bag
- Faded color or limp texture
- Off smells once cooked
While they’re technically safe beyond a year, flavor and texture decline. Use older batches in blended dishes like soups or casseroles. Fresh-looking batches deserve better — maybe a sauté with lemon or paired with a hydrating ice water hack during a summer meal.
Now that you’ve mastered freezing and cooking green beans, let’s tackle the most common questions people ask about the process.
Frequently Asked Questions About Freezing Green Beans
What is the proper way to freeze fresh green beans?
Trim the ends, rinse, and blanch green beans in boiling water for 3 minutes. Immediately transfer them to an ice water bath, dry thoroughly, and freeze flat on a baking sheet. Once frozen, store them in airtight freezer bags labeled with the date.
What happens if you don’t blanch greens before freezing?
Skipping blanching leads to dull color, mushy texture, and flavor loss. Enzymes continue breaking down the beans even while frozen, causing faster spoilage and poor texture when cooked.
Why are my green beans soggy after freezing?
Sogginess usually results from skipping blanching, thawing before cooking, or overcooking. Always blanch before freezing and cook beans directly from frozen using dry-heat methods like sautéing or roasting.
Are green beans good after being frozen?
Yes, if properly blanched and stored, frozen green beans retain their flavor, color, and texture. They’re great for stir-fries, soups, casseroles, and side dishes.
Is it better to freeze greens raw or cooked?
It’s better to freeze them blanched, not raw or fully cooked. Blanching preserves freshness and prevents spoilage, while fully cooked greens lose texture after thawing.
How long do you blanch green beans?
Blanch green beans for exactly 3 minutes in boiling water. Then chill them in an ice bath for another 3 minutes to stop cooking.
What is the best way to preserve green beans?
Blanching and freezing is the best method for long-term storage. It preserves nutrients and texture better than canning, especially for home use. Use vacuum-sealed bags and keep them in the coldest part of your freezer for up to 12 months.
Conclusion
Freezing green beans isn’t just a smart way to preserve a garden haul — it’s a foolproof method for keeping crisp, colorful veggies on hand all year long. By blanching, drying, and storing them properly, you’ll skip the mush and serve fresh-tasting beans every time.
Whether you sauté, steam, or roast them, frozen green beans can be a kitchen staple that saves time and money without sacrificing taste. With a little prep, you’ll have vibrant green beans ready to go whenever you need them — no can opener required.
For more colorful, health-forward creations and behind-the-scenes peeks into my test kitchen, connect with me on Facebook and see what’s brewing daily on Pinterest. Your next favorite recipe might just be a scroll away.

Freezing Green Beans the Right Way: A Simple, Flavor-Saving Method
Ingredients
- 1 lb fresh green beans
- 1 tsp salt
- 4 cups ice water
- Filtered water for boiling
- Freezer-safe bags
Instructions
- 1. Wash and trim the green beans.
- 2. Bring a large pot of salted water to a boil.
- 3. Blanch green beans for 3 minutes.
- 4. Transfer beans to an ice bath for 3 minutes.
- 5. Drain and pat dry thoroughly.
- 6. Pre-freeze on a baking sheet (optional).
- 7. Transfer to freezer bags, remove air, and seal.