The Memory Behind This Treat
The first time I made Fantasy Fudge, I was standing on a step stool in my grandmother’s avocado-green kitchen, clutching a wooden spoon that was almost as big as my arm. She didn’t bother explaining sugar stages with fancy terms; she’d simply say, “Stir until it smells like hot caramel and looks like silk.” I can still remember how the evaporated milk fogged up the windows and how the vanilla marshmallow creme came out of the jar in slow, dramatic ribbons. Back then, it felt like magic—watching a bubbling, chaotic pot turn into a smooth, glossy river of chocolate. When the pan finally went into the chilly back porch to cool, we’d hover nearby, “just checking,” even though we both knew it needed hours, not minutes.
As I grew up and moved into my own tiny kitchens—with wobbly burners and mismatched pans—this same Fantasy Fudge recipe came with me. I learned quickly that even if your whisk isn’t fancy and your pot isn’t perfect, you can still make a pan of holiday fudge that tastes like it came from a candy shop. I’ve made it on rushed Tuesday nights when I needed a last-minute dessert, and on quiet December mornings when the world felt still and the only sounds were the spoon scraping the sides of the pot and the gentle boil of sugar. The vanilla bean paste was my own little “grown-up” twist, a nod to the baker I’ve become while still honoring the recipe I started with on that step stool. Every time I smooth the fudge into the pan and add sprinkles, it feels like I’m layering memories right along with the chocolate—simple, sweet, and meant to be shared.
How To Make It (Mix & Ingredients)
Making Fantasy Fudge is all about timing, gentle heat, and a good stir. Start by lining a 9×13-inch pan with foil and giving it a quick spray of non-stick cooking spray—this seems small, but it makes lifting and slicing your fudge so much easier later. In a medium, heavy-bottomed pot, you’ll combine the granulated sugar, evaporated milk, and butter. Bring this mixture to a gentle boil over medium heat, then let it bubble for about 5 minutes, stirring every couple of minutes so nothing sticks or scorches. If you have a candy thermometer, you’re aiming for the soft ball stage (about 234–240°F); if not, trust the time and look for a thick, glossy, steady boil.
Instructions Process of Fantasy Fudge
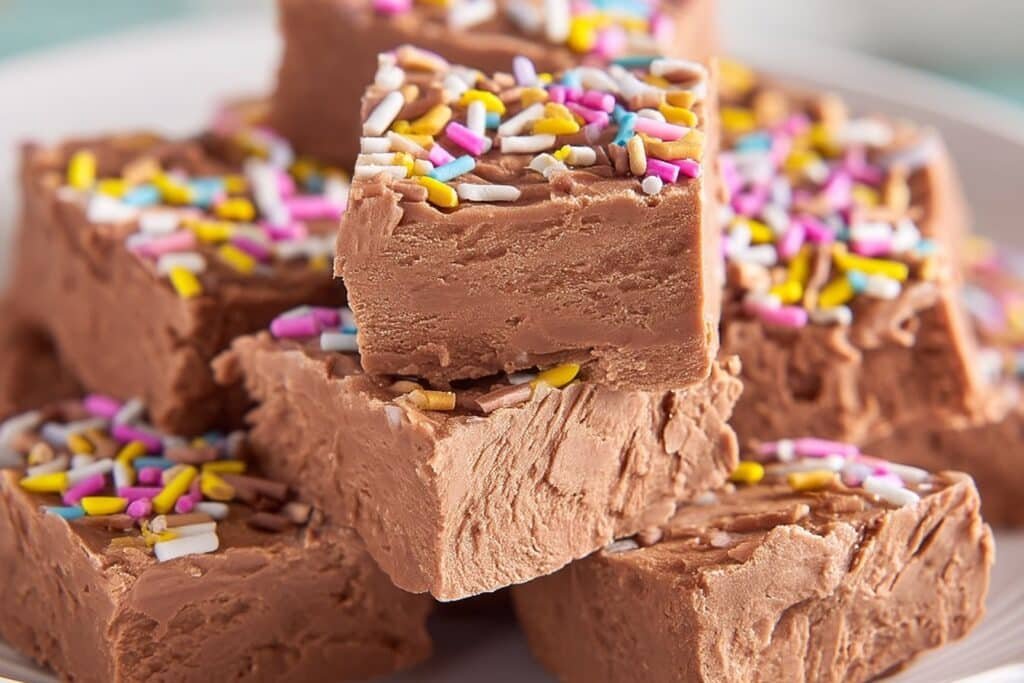
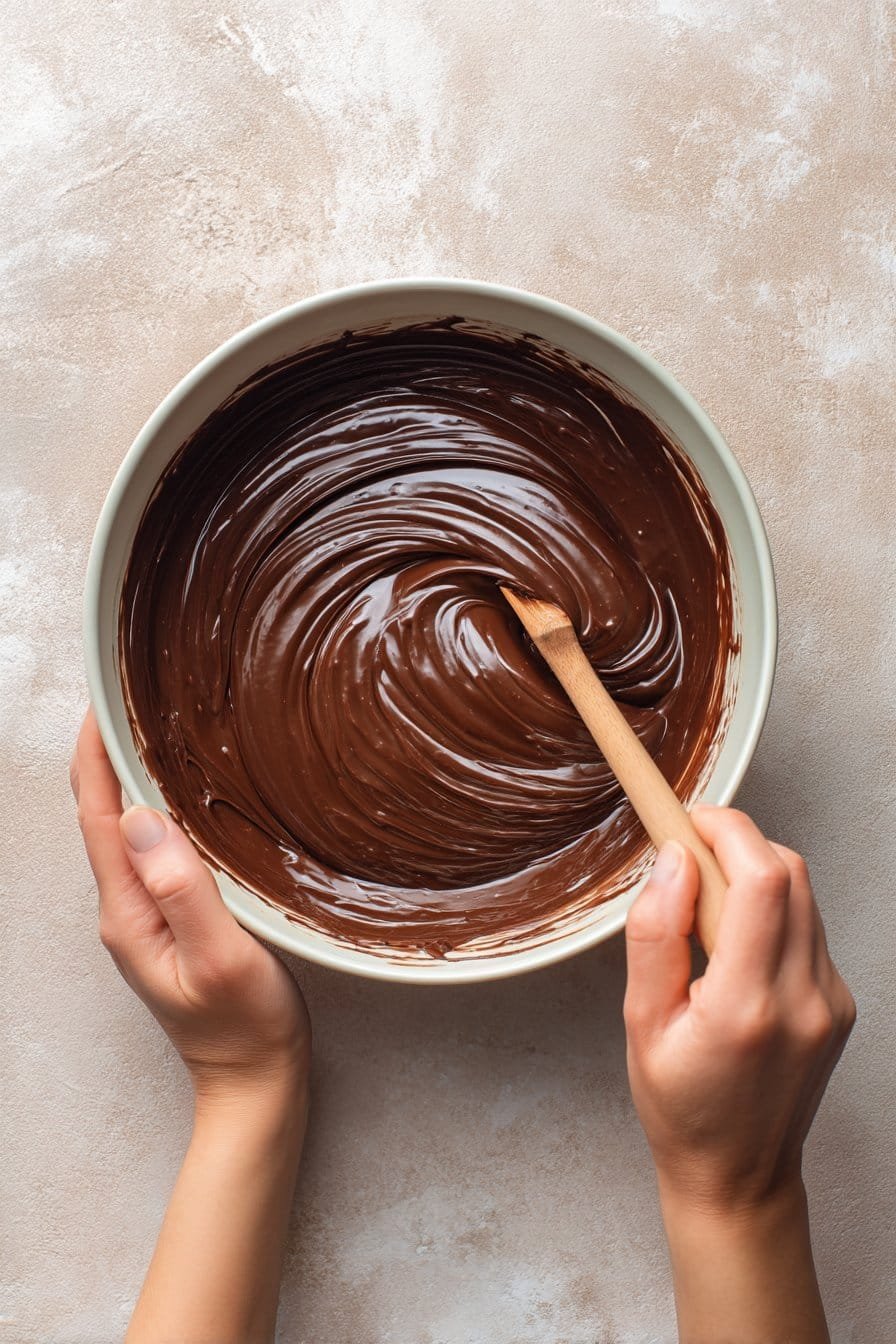
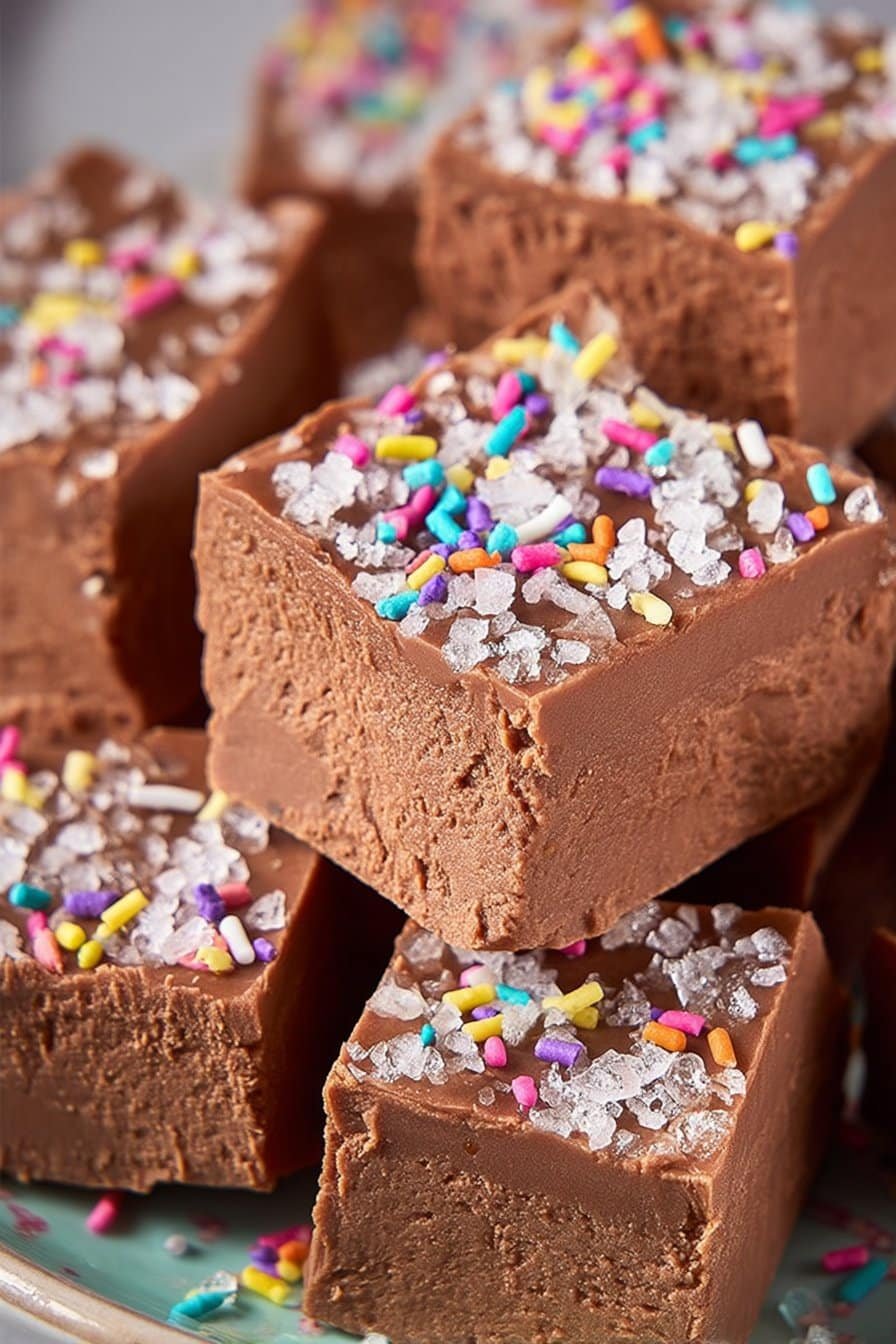
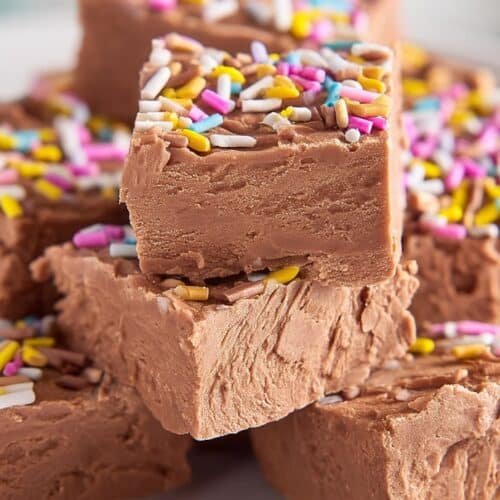
Once the base is ready, take the pot off the heat and immediately add the semi-sweet chocolate chips, vanilla marshmallows creme, and vanilla bean paste. At first, it will look like a lumpy, swirly mess—keep whisking or stirring with a sturdy spatula until the mixture turns completely smooth, shiny, and unified, with no streaks of marshmallow or visible chocolate chips. This is the heart of classic Fantasy Fudge: the melted chocolate gives you that deep cocoa flavor, while the marshmallows creme creates an ultra-creamy, almost mousse-like texture once it sets. Pour the fudge into your prepared pan, working fairly quickly because it will start to firm up as it cools. While it’s still warm and soft, scatter your sprinkles or other toppings over the surface and lightly press them in so they stay put, then chill the pan for 1–3 hours until set before cutting into neat little squares.
Make-Ahead & Storage
Fantasy Fudge is one of those dreamy desserts that actually tastes better the next day, which makes it perfect for make-ahead holiday prep. Once your Fantasy Fudge is fully set and cut into squares, transfer the pieces to an airtight container, layering them with parchment or wax paper so they don’t stick together or pick up fridge smells. In the refrigerator, the fudge will keep its silky, creamy texture for about 2 weeks. If your kitchen is cool (around 65–68°F) and dry, you can also store it tightly covered at room temperature for up to 5–7 days, but I usually recommend the fridge for the best texture and safety. Just remember to let it sit at room temp for 10–15 minutes before serving so each square softens slightly and tastes extra luscious.
If you want to work even further ahead—think cookie platters, edible gifts, or a holiday dessert board next to your pecan bars or sugar cookie cut-outs—Fantasy Fudge freezes beautifully. Cut the fudge into squares, chill them until firm, then wrap groups of 6–8 pieces in plastic wrap and place the bundles in a freezer-safe bag or container, pressing out extra air. Properly wrapped, the fudge keeps in the freezer for up to 2 months without losing its rich flavor or creamy bite. To thaw, move the wrapped bundles to the refrigerator overnight, then bring them to room temperature before unwrapping so condensation forms on the outside of the wrap, not on your fudge. Avoid repeated thawing and refreezing—that’s when the texture can turn a little grainy and the sprinkles can bleed their colors.
Best Ingredients & Party Variations
For the very best Fantasy Fudge, start with real butter, not margarine. Butter keeps the texture velvety and the flavor rich, which matters in such a simple recipe. Use evaporated milk, not sweetened condensed milk—condensed is too sweet and will throw off the texture. I also love using vanilla bean paste instead of plain vanilla extract; those tiny specks of vanilla make your fudge look bakery-special and add deeper flavor. And when it comes to semi-sweet chocolate chips, don’t go ultra-dark—around 50–60% cacao gives you a smooth, not-bitter, classic Fantasy Fudge taste.
For easy party variations, think in toppings and mix-ins. Stir in 1–1½ cups of chopped toasted walnuts or pecans right after the chocolate and marshmallow creme melt for that old-fashioned fudge shop vibe. Sprinkle the top with crushed candy canes for a winter holiday tray, or use pastel sprinkles and white chocolate chips for a spring or Easter version. If you love peanut butter, swirl ½ cup of warmed peanut butter over the top of the warm Fantasy Fudge, then drag a knife through it for a marbled effect. For kids’ parties, mini marshmallows, colorful sprinkles, or chopped sandwich cookies make this fudge tray disappear fast.
To build a themed dessert table, tie your Fantasy Fudge into other bite-size treats so everything feels cohesive. Make a chocolate-lover’s spread with this fudge, brownie bites, and small cups of hot cocoa topped with whipped cream. For a birthday party, cut the fudge into tiny squares and serve it alongside chocolate chip cookies or a simple vanilla snack cake so guests can mix and match. Whatever variation you choose, keep the base recipe the same—that perfect balance of sugar, butter, evaporated milk, and marshmallow creme is what guarantees that classic creamy Fantasy Fudge texture every single time.
Serving of Fantasy Fudge
Conclusion
The very best part of this recipe, at least for me, isn’t the silky chocolate or the perfect swirls on top—it’s the people who gather around to share it. A pan of fudge on the counter has a way of turning quick visits into long chats, simple weeknights into tiny celebrations, and ordinary days into “remember when” stories. This is the kind of treat grandparents slip to grandkids, neighbors drop off still warm, and friends wrap up in little tins just because.
I hope this Fantasy Fudge finds its way into your traditions too—holiday trays, bake sales, movie nights, or those evenings when you just need something sweet and nostalgic. Don’t overthink it, don’t aim for perfection; just make a batch, cut a few generous squares, and see how fast they disappear.
Whenever you’re ready, pop into the kitchen and give this recipe a try. And if you do, I’d love for you to share your sweet moments and versions.
For more delicious recipes like this, follow us on social media!
What is Fantasy Fudge and how is it different from regular fudge?
Fantasy Fudge is a nostalgic, marshmallow creme–based chocolate fudge that’s ultra-creamy, sweet, and almost foolproof. Instead of relying only on sugar, butter, and chocolate, this recipe adds vanilla marshmallows creme for extra smoothness and stability. That marshmallow base helps the fudge set up soft and creamy rather than dry or crumbly. It’s also a bit quicker than old-fashioned stovetop fudge that needs precise temperature control. If you’ve ever been intimidated by candy thermometers, Fantasy Fudge is the cozy, approachable version that still tastes like a holiday classic.
Do I really need a candy thermometer to make Fantasy Fudge?
You do not have to use a candy thermometer for this Fantasy Fudge, but it can give extra peace of mind. As long as you bring the sugar, evaporated milk, and butter mixture to a full rolling boil and cook it for about 5 minutes, you will be close to the soft-ball stage. Stir every couple of minutes so the bottom doesn’t scorch and the mixture heats evenly. If you do use a thermometer, you’re aiming for around 234–240°F. When in doubt, trust the timing, the steady boil, and the way the mixture thickens slightly before you stir in the chocolate and marshmallow creme.
Can I adjust this Fantasy Fudge recipe for different mix-ins or flavors?
Absolutely—Fantasy Fudge plays very nicely with mix-ins. Stir in 1–2 cups of chopped nuts, crushed candy canes, toffee bits, or mini marshmallows right after the chocolate and marshmallows creme melt and the mixture is smooth. For flavor twists, you can swap part of the semi-sweet chips for milk chocolate, dark chocolate, or even peanut butter chips. A splash of almond, peppermint, or orange extract in place of part of the vanilla bean paste also works well. Just keep the base ratios of sugar, butter, evaporated milk, chocolate, and marshmallows creme the same so the fudge still sets properly.
Recipe
Fantasy Fudge
Ingredients
Ingredients
- 4 cups granulated sugar
- 12 oz evaporated milk
- 1 cup unsalted butter 2 sticks
- 12 oz semi-sweet chocolate chips
- 14 oz vanilla marshmallow creme 2 jars
- 1 tsp vanilla bean paste
- Sprinkles for topping
- Non-stick cooking spray
- Aluminum foil
Instructions
- Line a 9x13 inch baking pan with aluminum foil, leaving a slight overhang on the sides, and spray the foil lightly with non-stick cooking spray.
- In a medium heavy-bottomed pot, combine the granulated sugar, evaporated milk, and butter.
- Set the pot over medium heat and cook, stirring frequently, until the mixture comes to a full boil.
- Once boiling, continue to cook for 5 minutes, stirring every 2 to 3 minutes to prevent scorching. If using a candy thermometer, cook to the soft ball stage.
- Remove the pot from the heat. Immediately add the semi-sweet chocolate chips, vanilla marshmallow creme, and vanilla bean paste.
- Whisk or stir vigorously until the chocolate chips and marshmallow creme are completely melted and the mixture is smooth and glossy with no streaks.
- Quickly pour the fudge mixture into the prepared pan and spread it into an even layer with a spatula.
- Immediately add sprinkles over the top and gently press them into the surface so they adhere.
- Transfer the pan to the refrigerator and chill for 1 to 3 hours, or until the fudge is firm.
- Lift the fudge out of the pan using the foil overhang, place on a cutting board, peel back the foil, and cut into 36 squares.
Notes
- Have all ingredients measured and ready before you start cooking, as the fudge mixture sets quickly once off the heat.