Why This One Delivers
These Easter brownies work so well because they give you bakery style results without fussy steps or special equipment. Everything happens in one pan, which means less cleanup and more time for hiding eggs or wrangling kids out of their fancy shoes. The melted butter and combo of granulated sugar and brown sugar create that perfect dense and chewy texture, with shiny crackly tops that look impressive on your Easter dessert table. You get deep chocolate flavor from cocoa powder plus chocolate chips baked right in, so every bite tastes rich even before you add the topping.
The real magic of these Easter brownies comes from the simple but luxurious chocolate layer and easy decorating options. A quick chocolate topping with a spoonful of coconut oil spreads into a smooth, glossy blanket over the cooled brownies, which makes the whole pan look like it came straight from a bakery box. Then you can let the kids go wild with pastel colored white chocolate, mini candy eggs, and sprinkles, or keep it more grown up and minimal. Because you bake everything in a standard 23 by 33 centimeter pan, these slice into 16 sturdy squares that travel well to church gatherings, school parties, or family dinners.
I also love that this recipe is forgiving for newer bakers who want a holiday dessert that feels special but not stressful. You mix the wet ingredients in one bowl, the dry in another, fold gently, and you are basically done. As long as you do not overmix and you line your pan, you will get consistent, reliable Easter brownies every time. If you already love rich bar desserts like peanut butter blondies or magic cookie bars, this tray of chocolate packed Easter brownies will slide right into your holiday rotation with very little effort.
From Prep to Finish
You will go from loose ingredients to sliceable Easter Brownies in under an hour, so it helps to set yourself up smartly. Start by lining your 23 by 33 centimeter pan with parchment, letting the edges overhang so you can lift the brownies out in one piece. Whisk the melted butter with both sugars until the mixture looks thick and syrupy, then beat in the eggs one at a time. When you add the vanilla bean paste the batter should look glossy and a bit stretchy, which is your sign that the sugar has started to dissolve. In a separate bowl, combine the flour, cocoa, and salt, then gently fold that into the wet bowl. Stop stirring as soon as you no longer see dry streaks so your Easter Brownies stay dense and fudgy, not cakey.
Once the batter is even, fold in the chocolate chips and spread it into the pan, nudging it into the corners with an offset spatula or the back of a spoon. Bake until the top looks set and slightly shiny, with a few moist crumbs on a toothpick, usually about 35 minutes. Let the pan cool to just warm, then melt the chocolate chips with the coconut oil in short microwave bursts, stirring often so you do not scorch it. Pour this over the cooled base and tilt the pan or use a spatula to coax the topping into an even layer. Swirl in tinted white chocolate for a marbled look, then press in mini candy eggs and sprinkles before the top firms up. Chill briefly to set, lift the slab out by the parchment, and cut your Easter Brownies into neat squares, wiping the knife between cuts for clean edges.
Timing, Storage, and Make-Ahead
Once your Easter Brownies bake, let them cool in the pan for at least 45 to 60 minutes before you add the chocolate topping, or the topping can slide or turn dull. After you spread the melted chocolate on top, give it about 20 minutes in the refrigerator so it sets cleanly and slices neatly. If you are baking for a crowd and need to stagger dishes in the oven, you can bake the brownies in the morning, top them after lunch, and they will be ready to cut by the time guests arrive. Use the parchment sling to lift the whole slab out, then slice with a long sharp knife, wiping the blade between cuts for clean edges. The total recipe time might say 1 hour, but with full cooling and decorating, I like to allow about 2 hours from start to first bite.
Store leftover Easter Brownies in an airtight container at room temperature for up to 3 days, or in the refrigerator for up to 6 days. I prefer room temperature because the centers stay fudgy and the chocolate layer has a softer bite, but the fridge is a good choice if your kitchen runs warm or you are using a lot of candy on top. For longer storage, wrap the slab or individual squares tightly in plastic, then place in a freezer bag and freeze for up to 2 months. Thaw at room temperature for about 1 hour, or warm a square for 10 to 15 seconds in the microwave for a just baked feel. If you like to prep Easter desserts like carrot cake bars or other make ahead treats, you can fully bake these brownies a day in advance, chill them in the pan, then add the topping and decorations the morning you plan to serve so they look freshly finished.
Ingredient Swaps and Serving Options
If you need to tweak these Easter Brownies for what you already have in the pantry, you have plenty of room to play. Use light or dark brown sugar, or even all granulated sugar if you must, and your brownies will still bake up rich and chewy. You can swap vanilla bean paste for regular vanilla bean paste or almond extract for a slightly nutty flavor. For the cocoa, natural or Dutch processed both work in this recipe, just know Dutch will give a deeper chocolate taste. If you need to skip dairy, use a good vegan butter and dairy free chocolate chips, plus coconut oil in place of the butter in the topping.
You can also change the personality of your Easter Brownies with your topping choices. Trade the semisweet chips for milk chocolate, dark chocolate, or even a mix if you like more complex flavor. Use candy coated chocolate eggs, pastel marshmallows, shredded coconut dyed green for a nest effect, or simple colored sprinkles. The white chocolate swirl is flexible too, you can use candy melts, a drizzle of caramel, or even a cream cheese glaze for a tangy finish. Serve the brownies at room temperature for dense, fudgy squares, slightly chilled for a firmer bite, or warm with a scoop of vanilla ice cream and extra mini eggs on top for the most indulgent Easter dessert plate.
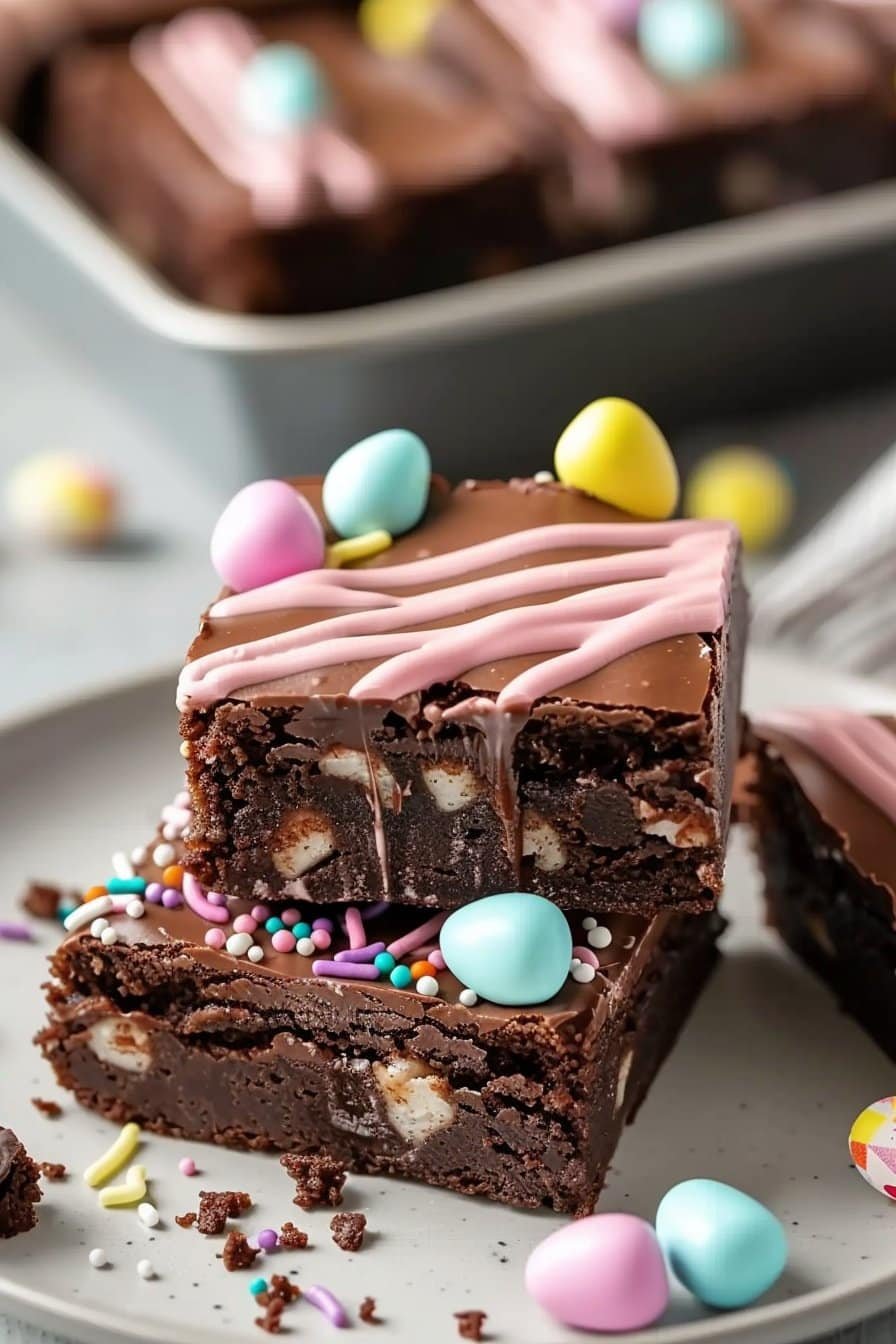
Serving Image of Easter Brownies
Conclusion
When I pull this pan from the oven and see that shiny, crackly top and melted pockets of chocolate, it always reminds me why I love baking for the holidays so much. A simple pan of Easter Brownies has a funny way of turning into a whole moment at the table. Kids sneaking an early taste, grownups reaching for “just a small square” and staying to chat a little longer. These are the small, sweet rituals that make a busy holiday feel cozy and connected.
I hope this one pan brownie recipe becomes one of those traditions in your home too. Even if you are short on time or not very confident in the kitchen yet, you can absolutely bake these. You do not need perfect decorating skills, just a pan, a spoon, and a little curiosity. The oven will take care of the rest.
When you make them, I would love for you to share a plate with someone you love, or even drop a few squares on a neighbor’s porch. Then come back, leave a comment, and tell me how it went.
For more delicious recipes like this, follow us on Facebook and Pinterest!
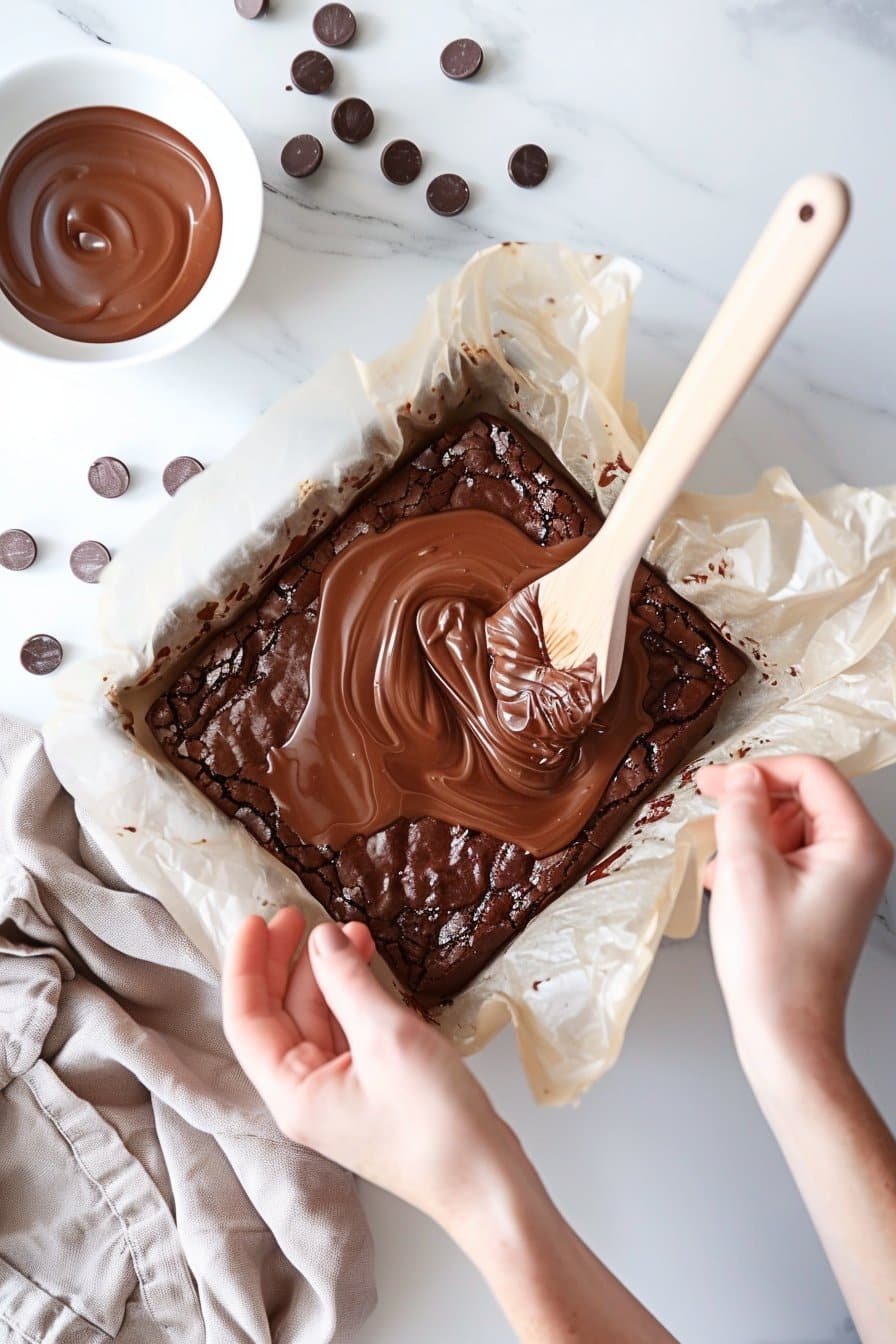
Process Image of Easter Brownies
Recipe

Easter Brownies
Ingredients
Ingredients
- 1 cup unsalted butter melted
- 1 1/2 cups granulated sugar
- 1 cup brown sugar packed
- 4 large eggs room temperature
- 1 tablespoon vanilla bean paste
- 1 cup all-purpose flour
- 3/4 cup unsweetened cocoa powder
- 1/2 teaspoon salt
- 1 cup semisweet chocolate chips
- 1 1/2 cups semisweet or milk chocolate chips for topping
- 1 tablespoon coconut oil or unsalted butter
- 1/2 cup white chocolate melted
- Pink food coloring
- Blue food coloring
- Yellow food coloring
- 1 cup mini candy eggs
- 1/4 cup sprinkles
Instructions
- Preheat the oven to 350°F. Line a 9x13-inch baking pan with parchment paper, leaving some overhang on the long sides for easy removal.
- In a large mixing bowl, whisk together the melted butter, granulated sugar, and brown sugar until smooth and slightly thick.
- Add the eggs one at a time, whisking well after each addition until the mixture is thick and glossy. Stir in the vanilla bean paste.
- In a separate bowl, sift together the flour, cocoa powder, and salt.
- Gently fold the dry ingredients into the wet mixture using a spatula just until no dry streaks remain. Do not overmix.
- Fold in the 1 cup semisweet chocolate chips, then spread the batter evenly into the prepared pan, smoothing the top.
- Bake for 35 minutes, or until the top looks set and a toothpick inserted near the center comes out with a few moist crumbs.
- Place the pan on a wire rack and let the brownies cool in the pan for at least 45 minutes to 1 hour, until completely cool to the touch.
- Once the brownies are cool, place the 1 1/2 cups chocolate chips and coconut oil or butter in a microwave-safe bowl. Microwave in 20 second bursts, stirring after each, until fully melted and smooth.
- Pour the melted chocolate topping over the cooled brownies and spread it into an even layer with an offset spatula or the back of a spoon.
- Divide the melted white chocolate into three small bowls. Tint one bowl pink, one blue, and one yellow with a few drops of food coloring, stirring each until evenly colored.
- Spoon small amounts of the colored white chocolate over the chocolate topping and use a skewer or knife tip to gently swirl for a marbled pattern.
- Immediately press mini candy eggs and sprinkle sprinkles over the top before the chocolate sets, distributing them evenly.
- Refrigerate the pan for 20 minutes, or until the chocolate topping is firm to the touch.
- Use the parchment overhang to lift the brownie slab out of the pan onto a cutting board. Cut into 16 squares, wiping the knife between cuts for clean edges. Serve at room temperature.
Notes
- Allow the brownies to cool fully before adding the topping to prevent the chocolate from melting into the base.
- Store brownies in an airtight container at room temperature for up to 3 days, or in the refrigerator for up to 6 days.
- For cleaner slices, chill the brownies before cutting and use a long sharp knife, wiping the blade between each cut.
- You can use all semisweet or all milk chocolate for the topping depending on how sweet you like your Easter brownies.