
The Memory Behind This Treat
The first time I tested these Dulce de Leche Cheesecake Bars, my whole kitchen smelled like a cross between a holiday cheesecake and a pan of warm caramel. I had just come back from visiting a friend in Buenos Aires, where every breakfast seemed to involve something topped, filled, or stuffed with dulce de leche. Back home, I didn’t have the patience for a full water-bath cheesecake on a Tuesday night, but I still wanted that silky, tangy-sweet bite. So I did what any tired, dessert-obsessed baker would do: I reached for graham crackers, a can of dulce de leche, and my stand mixer, and promised myself I’d keep it simple. An hour later, there was a pan of gently wiggly cheesecake cooling on the counter, with a marbled top that looked far more impressive than the effort I’d actually put in.
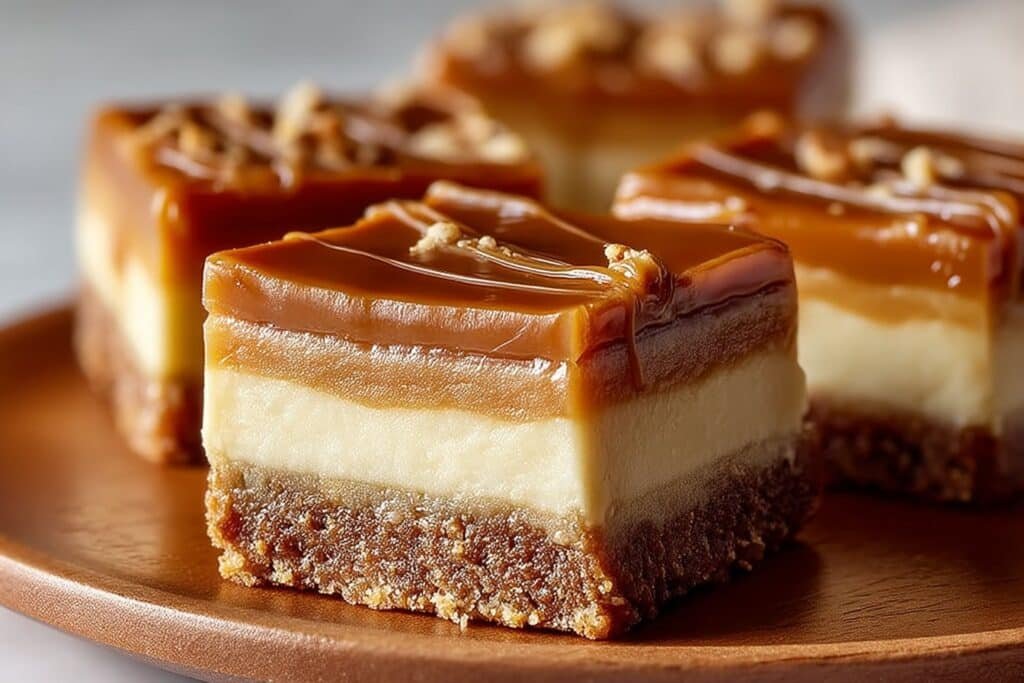
These bars quickly became my “I’ll bring dessert” solution for everything from casual game nights to baby showers. I loved that I could press the crust in with the bottom of a measuring cup, beat the cream cheese until it was cloud-smooth, and swirl the dulce de leche with a butter knife like I was painting something much fancier than a weeknight dessert. Friends started requesting them instead of birthday cake, partly because they’re easy to transport, but mostly because that combination of tangy cheesecake and velvety caramel hits every sweet tooth in the room. Over time, I added tiny touches—like a pinch of sea salt on top for balance and a handful of chopped nuts for crunch—little upgrades that make these Dulce de Leche Cheesecake Bars feel bakery-special, even though you probably have everything you need sitting in your pantry already.
How To Make It (Mix & Ingredients)
To build these Dulce de Leche Cheesecake Bars, you’ll start with a simple 3-ingredient graham cracker crust. Combine the graham cracker crumbs, sugar, and melted butter in a bowl and stir until every crumb looks slightly damp and sandy, like wet beach sand. When you press this mixture into your parchment-lined 8×8 pan, really pack it down using the bottom of a measuring cup or glass so it bakes into a firm, sliceable base. Slip the pan into the freezer for 10–15 minutes; this quick chill helps the crust set so it won’t float or crumble once you pour on the creamy cheesecake layer.

Instructions Process of Dulce de Leche Cheesecake Bars
For the cheesecake mixture, make sure your cream cheese is truly softened to room temperature—if it’s still cool in the center, you’ll fight lumps. Beat the cream cheese first until it’s completely smooth, then slowly add the sugar so it dissolves nicely and the mixture turns fluffy and light. Add the eggs one at a time, mixing on low just until they disappear to avoid overbeating (overmixing can cause cracks). Finish with the vanilla bean paste, scraping down the bowl so no sneaky cream cheese bits hide on the bottom. You’re aiming for a silky, pourable batter that still holds a bit of body.Now comes the fun part: the dulce de leche swirl. Spread about two-thirds of the cheesecake filling over your chilled crust, then warm the dulce de leche slightly if it’s very thick so it drizzles easily (10–15 seconds in the microwave usually does it). Spoon or drizzle it over the surface, then add dollops of the remaining cheesecake batter on top. Drag a thin knife or skewer through everything in gentle “S” or figure-8 motions to create ribbons—don’t over-swirl, or you’ll lose that pretty marbled pattern. If you like a hint of contrast, plan to finish your chilled bars with a sprinkle of flaky sea salt and chopped nuts for a little crunch against the creamy swirl.
Make-Ahead & Storage
These Dulce de Leche Cheesecake Bars are the definition of make-ahead dessert, which makes them perfect for holidays, potlucks, or “I just want dessert waiting in the fridge” weeks. You can bake the pan completely, let it cool, and then chill it overnight before slicing for the cleanest bars. Once they’re fully chilled and cut, store the bars in an airtight container in the refrigerator, layering them with parchment or wax paper so the dulce de leche swirl doesn’t stick. They’ll stay fresh and creamy for about 4–5 days in the fridge without losing their texture. If you like a slightly firmer bite, serve them straight from the fridge; for a softer, silkier texture, let them sit at room temperature for about 10–15 minutes before serving.
To really get ahead, you can also freeze these Dulce de Leche Cheesecake Bars. Chill the baked slab completely, then cut into bars and place them on a parchment-lined baking sheet to freeze until solid. Once frozen, wrap each bar tightly in plastic wrap and tuck them into a freezer bag or airtight container; they’ll keep well for up to 2 months. Thaw individual bars overnight in the refrigerator, still wrapped, so condensation forms on the outside of the wrap instead of on the cheesecake itself. Avoid thawing at room temperature, or the dulce de leche layer can get a little weepy and the crust may turn soft instead of staying pleasantly crisp.
Best Ingredients & Party Variations
For the very best Dulce de Leche Cheesecake Bars, start with ingredients that actually taste like something. Use full‑fat brick cream cheese (not whipped or low‑fat) so the bars bake up lush and creamy instead of rubbery. I love vanilla bean paste here because you get those pretty specks plus a warmer flavor, but good-quality pure vanilla extract works in a pinch. When it comes to the dulce de leche, look for a canned version that lists milk and sugar as the main ingredients—some brands are thicker and darker, which gives you a more pronounced caramel note and deeper swirls. For the crust, classic graham crackers are perfect, but you can mix in a few chocolate grahams or even vanilla wafers if you like a softer, sweeter base. If you add nuts on top, toast them lightly first; that tiny extra step gives your bars a richer, almost bakery-style finish.
Once you have a solid pan of Dulce de Leche Cheesecake Bars, you can dress them up for any party tray. For a “salted caramel” platter, sprinkle flaky sea salt over the warm bars right after baking, then garnish with pecans for a sweet-salty crunch. For a birthday or celebration spread, drizzle melted dark chocolate in a zigzag pattern over chilled bars, then add a few colorful sprinkles for that “cake meets cheesecake” energy. In summer, serve them chilled with fresh berries on the side—strawberries and raspberries cut the sweetness in the nicest way. If you’re building a dessert table with things like brownies or lemon bars, cut these cheesecake bars into 1‑inch bites so guests can sample more than one treat without committing to a full square. And if you really want to lean into indulgence, serve small squares of these alongside mini portions of tres leches cake for a cozy, caramel-forward dessert duo.

Serving of Dulce de Leche Cheesecake Bars
Conclusion
Every time I pull a pan of these bars from the oven and hear that quiet crackle of the crust settling, I’m reminded that the sweetest moments are usually the simplest. A casual weeknight dessert suddenly feels like a little celebration, and setting a plate of squares on the table has a way of pulling everyone a bit closer—hands reaching in, someone claiming the “gooey corner piece,” and a few happy sighs over creamy bites and caramel ribbons.
I hope these Dulce de Leche Cheesecake Bars find a spot in your own rotation of “bakes that make people linger.” Whether you serve them after Sunday dinner, bring them to a potluck, or sneak one with your afternoon coffee, let this be your reminder that you don’t need a special occasion to create one. You just need a mixing bowl, a warm oven, and a little curiosity.
Give the recipe a try, make it your own, and if it becomes a new family favorite, I’d truly love to hear about it.
For more delicious recipes like this, follow us on social media!
What makes these Dulce de Leche Cheesecake Bars so easy for home bakers?
These Dulce de Leche Cheesecake Bars use simple, grocery-store ingredients and straightforward mixing—no water bath, no special pans. The graham cracker crust mixes together in one bowl and firms up quickly in the freezer instead of needing a pre-bake. The cheesecake layer is a basic cream cheese filling that comes together with a hand mixer in just a few minutes. The dulce de leche swirl looks fancy but only requires a drizzle and a few gentle figure-8 motions with a knife or skewer. If you can stir, press, and swirl, you can absolutely make these bars.
How do I get a smooth, creamy texture in the cheesecake layer?
Start with cream cheese that is truly softened to room temperature; cold cream cheese will stay lumpy no matter how much you mix. Beat the cream cheese first on its own until silky, then add the sugar gradually so it dissolves and whips in evenly. Add the eggs one at a time on low speed, just until combined, to avoid overbeating and incorporating too much air. Scrape down the bowl a couple of times so no thick bits hide at the bottom. A final quick mix on low helps smooth everything out before you pour it over the crust.
How can I tell when my Dulce de Leche Cheesecake Bars are perfectly baked?
These bars are done when the edges look set and slightly puffed, but the center still has a soft, gentle wobble when you nudge the pan. If the surface looks dry and cracked, they’ve gone a bit too far, though they’ll still taste good. At 325°F (160°C), they usually bake in about 30–35 minutes, but every oven runs a little differently, so start checking at 28 minutes. You want “barely done,” because the cheesecake will finish setting as it cools and chills. Pulling them at the right time keeps the texture creamy instead of dry or grainy.
Recipe

Easy Dulce de Leche Cheesecake Bars
Ingredients
Ingredients
- 2 cups graham cracker crumbs
- 1/3 cup granulated sugar
- 1/2 cup unsalted butter melted
- 16 oz cream cheese softened
- 2/3 cup granulated sugar
- 2 large eggs at room temperature
- 1 teaspoon vanilla bean paste
- 13.4 oz canned dulce de leche
- 1 pinch flaky sea salt for garnish (optional)
- 1/2 cup chopped pecans or walnuts for garnish (optional)
Instructions
- Line an 8x8 inch baking pan with parchment paper, leaving some overhang on the sides for easy removal.
- In a medium bowl, combine the graham cracker crumbs and 1/3 cup granulated sugar and stir to blend.
- Pour in the melted butter and mix until all the crumbs are evenly moistened and the mixture looks like wet sand.
- Transfer the crumb mixture to the prepared pan and press it firmly and evenly into the bottom using the bottom of a measuring cup or glass.
- Place the pan in the freezer for 10 to 15 minutes to help the crust set while you prepare the filling.
- Preheat the oven to 325°F.
- In a large mixing bowl, beat the softened cream cheese with an electric mixer on medium speed until completely smooth and creamy, about 1 to 2 minutes.
- Gradually add the remaining 2/3 cup granulated sugar, beating until the mixture is light and fluffy and no graininess remains.
- Add the eggs one at a time, mixing on low speed just until each egg is incorporated and scraping down the sides and bottom of the bowl as needed.
- Add the vanilla bean paste and mix on low speed until evenly combined and the batter is smooth.
- Remove the crust from the freezer and pour about two-thirds of the cheesecake batter over the chilled crust, spreading it into an even layer with a spatula.
- If the dulce de leche is very thick, warm it briefly in the microwave for 10 to 15 seconds until it is pourable but not hot.
- Drizzle or spoon most of the dulce de leche evenly over the cheesecake layer in the pan.
- Dollop the remaining cheesecake batter over the top in several spoonfuls, leaving some of the dulce de leche showing through.
- Use a thin knife or skewer to gently swirl the cheesecake batter and dulce de leche together in figure-8 or “S” motions to create a marbled pattern without overmixing.
- Tap the pan lightly on the counter to release any large air bubbles and to level the surface.
- Bake the bars at 325°F for 30 to 35 minutes, or until the edges are set and the center still has a slight wobble when you gently jiggle the pan.
- Remove the pan from the oven and place it on a wire rack to cool completely to room temperature, 1 to 2 hours.
- Once cooled, cover the pan loosely with plastic wrap or foil and refrigerate for at least 4 hours or preferably overnight until fully chilled and firm.
- Just before serving, sprinkle the top with a pinch of flaky sea salt and chopped pecans or walnuts if using.
- Use the parchment overhang to lift the chilled cheesecake slab out of the pan and place it on a cutting board.
- With a sharp knife, cut into 16 even bars, wiping the knife clean between cuts for the neatest slices.
- Serve chilled and store any leftovers covered in the refrigerator.
Notes
- Mix the eggs on low and only until just combined to help prevent cracks and overbaking.
- Do not overbake; the center should still wobble slightly when done and will firm up as it cools and chills.
- For cleaner slices, chill the bars overnight and use a hot, dry knife, wiping between each cut.
- You can omit the nuts for a smoother topping or swap them for toasted almonds or hazelnuts.
