The Memory Behind This Treat
The first time I made Creamy Oreo Balls, I was standing in my tiny first apartment kitchen, with one mixing bowl, a dented baking sheet, and exactly 30 minutes before friends arrived. I needed something that felt a little “wow” but required almost zero effort and definitely no oven, because that old thing ran hotter than the surface of the sun. So I crushed a sleeve of Oreos in a zip-top bag with a rolling pin, mixed in some cream cheese with a wobbly wooden spoon, and hoped for the best. When I pulled the chilled Oreo balls from the fridge and dipped them in warm, melted chocolate, I remember thinking, “That’s it? That was way too easy.” Then my friends ate them in complete silence for a solid minute—which is the best review you can get.
Over time, Creamy Oreo Balls quietly became my “emergency dessert.” Need something for a last-minute birthday spread? Oreo balls. Forgotten the bake sale until 9 p.m.? Oreo balls. I’ve made them at my parents’ house with my mom’s old floral mixing bowl, at friends’ houses using whatever random chocolate we could find in their pantry, and once with my niece, who took her job of “sprinkle supervisor” very seriously. We lined up the little chocolate-coated bites on parchment, some perfectly round, some a bit lopsided, and no one cared—they still looked like a tray of tiny truffles.
What I love most is how this recipe fits into real life. You can make a batch while your lasagna is in the oven or between loads of laundry. You don’t need special tools: a bowl, a spoon, and a bit of fridge space do the job beautifully. These days, when I’m planning an easy dessert board with things like no-bake cheesecakes or chocolate-covered pretzels, these Oreo balls are always on it. They’re proof that you don’t need a full day of baking—or a spotless kitchen—to serve something that feels special, nostalgic, and a little bit indulgent.
How To Make It (Mix & Ingredients)
To make these Creamy Oreo Balls, you only need 3 main ingredients, plus an optional helper. Start with about 24 Oreo cookies; you can use regular, double-stuf, or even flavored Oreos if you want to play. If you need a gluten-free version, swap in your favorite gluten-free chocolate sandwich cookies. Next comes 8 ounces of softened cream cheese—this is what gives you that truffle-like creamy center. Let it sit at room temperature for about 20–30 minutes so it blends smoothly; cold cream cheese will give you a lumpy mixture and make rolling more difficult.
Instructions Process of Creamy Oreo Balls
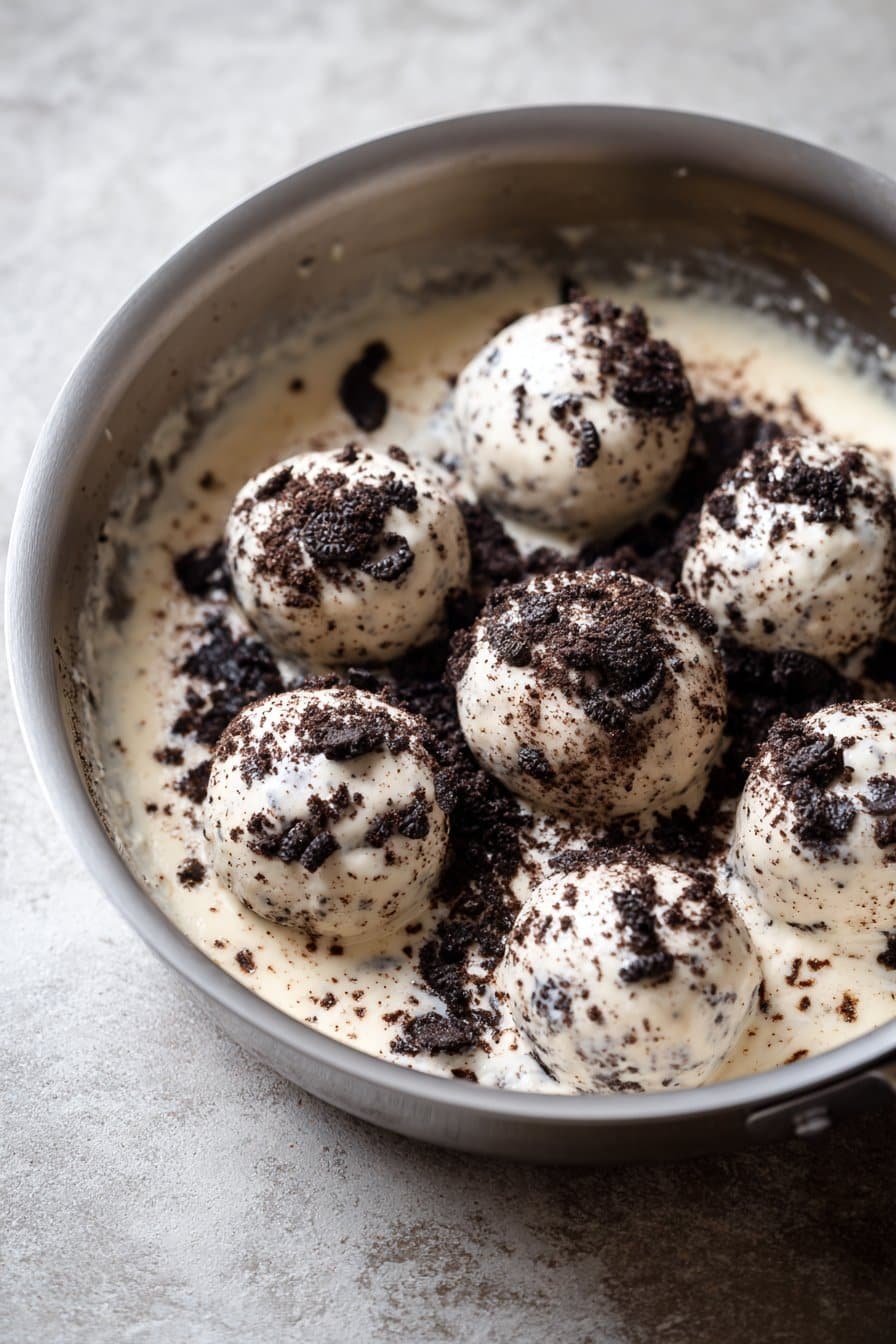
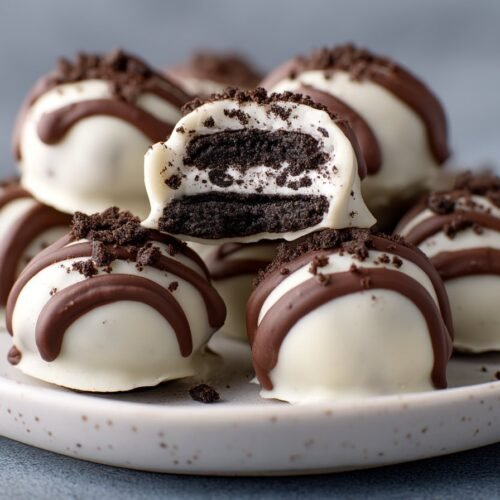
For the shell, you’ll need about 12 ounces of chocolate: chocolate melting wafers, almond bark, or chocolate chips all work. If you use chocolate chips, I recommend adding 1 teaspoon of coconut oil to help the coating set shiny and smooth. First, pulse the cookies in a food processor until you have fine crumbs with no big pieces remaining. If you do not have a processor, seal the cookies in a zip-top bag, push out the air, and crush them with a rolling pin or sturdy glass until sandy and even. You’re aiming for the texture of potting soil, not gravel.Add the crumbs to a medium bowl with the softened cream cheese. Use a hand mixer, a sturdy spatula, or clean hands to mix until the dough looks uniform and no streaks of white remain—this step makes the centers of your creamy Oreo balls extra lush. The mixture will feel slightly sticky but should hold together when you squeeze it; if it crumbles, mix a bit more. Once that’s ready, you are only a chill and a chocolate dip away from dessert happiness; if you are already dreaming about more no-bake sweets, these would sit beautifully next to a batch of rich chocolate truffles on your dessert plate.
Make-Ahead & Storage
Creamy Oreo Balls are a make-ahead dream, which is why I love serving them for parties and holidays. You can prepare the filling, roll the balls, and chill them un-dipped for up to 2 days in the refrigerator before coating in chocolate. Just keep them on a parchment-lined tray, covered well with plastic wrap so they don’t dry out or absorb fridge odors. Once coated in chocolate and fully set, store your creamy Oreo balls in an airtight container in the fridge for up to 5 days. I like to use a shallow container and layer them with parchment so the tops stay pretty and don’t smudge.
For longer storage, these little bites freeze surprisingly well. Arrange the finished creamy Oreo balls on a tray, freeze until solid, then transfer to a freezer-safe bag or container, squeezing out extra air. They’ll keep their texture and flavor for about 2 months. When you’re ready to serve, thaw them in the refrigerator for a few hours or overnight—this helps prevent condensation from making the chocolate coating sticky. If you enjoy frozen treats, you can even eat them straight from the freezer for a firmer, truffle-like texture that’s extra satisfying.
Best Ingredients & Party Variations
The secret to truly unforgettable Creamy Oreo Balls is using the best versions of very simple ingredients. Start with fresh, crisp Oreos (stale cookies make the mixture gummy instead of truffle-like). For the filling, use full-fat cream cheese that’s nicely softened; it blends smoother, sets better, and gives that rich “cheesecake center” you want. When it comes to coating, choose good-quality melting wafers or bar chocolate over basic chocolate chips if you can—wafers melt silkier and give a shinier shell. And don’t skip that tiny teaspoon of coconut oil in the chocolate; it helps the coating glide on smoothly instead of going on thick and lumpy.
Once you’ve nailed the base, it’s easy to turn your creamy Oreo balls into a whole party platter of flavors. For a birthday party, roll some balls in rainbow sprinkles before the chocolate sets, or use golden Oreos with white chocolate and pastel sprinkles. For a holiday version, crush peppermint candies on top, or use mint Oreos for a cool, festive bite. Hosting a more grown-up get-together? Stir a teaspoon of instant espresso powder into the cookie mixture for a mocha twist, or mix in a spoonful of peanut butter and dip in milk chocolate for a richer, candy-bar feel. For mixed dietary needs, swap in gluten-free sandwich cookies and a dairy-free cream cheese, then coat in dark chocolate so your whole crew can still enjoy that same creamy, nostalgic Oreo-truffle moment.

Serving of Creamy Oreo Balls
Conclusion
If you’re anything like me, you’re already picturing a little plate of these creamy Oreo balls on your table, disappearing one by one while everyone insists they’re “just having one more.” There’s something so simple and joyful about a dessert that doesn’t ask for much—no oven, no fancy tools—just a few ingredients, a bit of rolling, and a quick dip in chocolate. Yet the payoff feels huge: little bites of comfort that look party-ready in under an hour.
What I love most about this recipe is how it turns into a memory-maker without you even trying. Kids can help with the rolling, friends can decorate their own, and suddenly your kitchen becomes the coziest spot in the house. These are the kind of treats you bring to a movie night, a baby shower, or a random Tuesday… and people remember them.
I hope you feel inspired to grab that package of Oreos and make a batch. Then come back and tell me how fast they disappeared.
For more delicious recipes like this, follow us on social media!
What exactly are Creamy Oreo Balls?
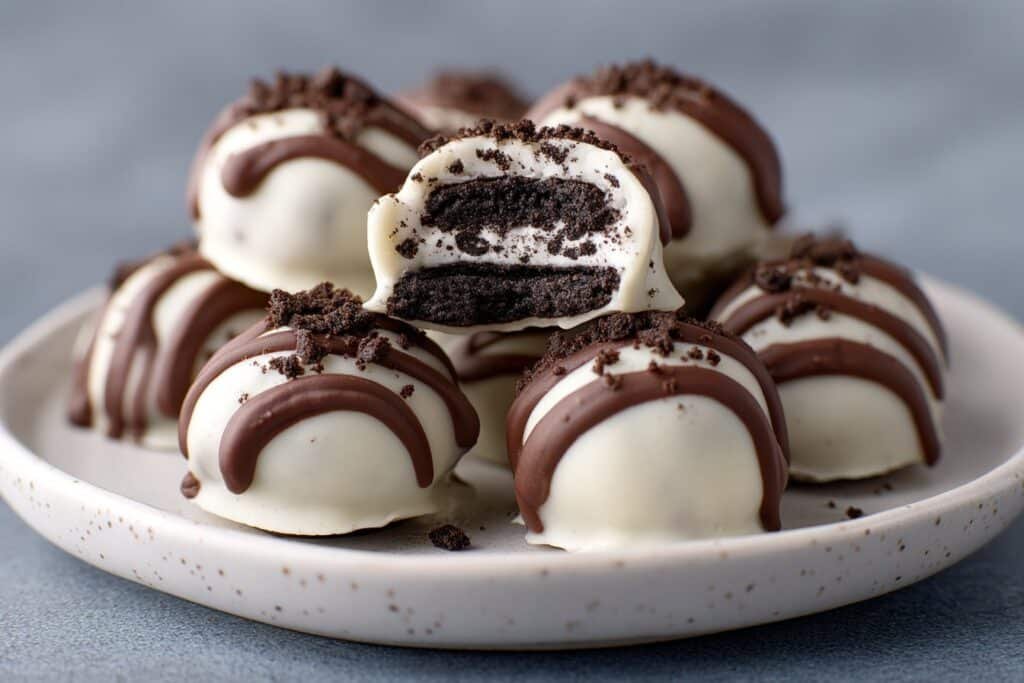
Creamy Oreo Balls are a no-bake bite-sized dessert made from crushed Oreo cookies mixed with softened cream cheese, then rolled and dipped in melted chocolate. The filling sets into a truffle-like center that’s rich, smooth, and full of cookies-and-cream flavor. Once the chocolate coating hardens, you get a crisp shell with a soft, creamy middle. They’re perfect for parties, holiday cookie trays, or whenever you need a fast, impressive treat. You only need a handful of ingredients and no oven, which makes them great for beginner bakers or busy days.
How far in advance can I make Creamy Oreo Balls?
You can make Creamy Oreo Balls up to 5–7 days in advance and store them in an airtight container in the refrigerator. Layer them with parchment paper so they don’t stick together or smudge the chocolate coating. For the best texture, let them sit at room temperature for about 5–10 minutes before serving, so the centers soften slightly. If you want to work even further ahead, you can freeze them for up to 2 months. Just thaw them in the fridge overnight to keep the chocolate from sweating.
How do I get a smooth, shiny chocolate coating?
For the best coating on Creamy Oreo Balls, use good-quality melting wafers or chocolate chips and melt them slowly at 50% power in the microwave, stirring often. Adding about 1 teaspoon of coconut oil can thin the chocolate slightly and give it a prettier, glossy finish. Make sure your Oreo balls are well-chilled before dipping so they don’t crumble or fall apart in the warm chocolate. Dip with a fork, tap off excess chocolate on the side of the bowl, and slide each ball onto parchment paper with a toothpick. Let them set completely at room temperature or in the fridge until firm and shiny.
Recipe
Creamy Oreo Balls
Ingredients
Ingredients
- 24 Oreo cookies
- 8 oz cream cheese softened
- 12 oz chocolate melting wafers or chocolate chips
- 1 tsp coconut oil
Instructions
- Line a baking sheet with parchment paper and set aside.
- Place the Oreo cookies in a food processor and pulse into fine crumbs, or seal them in a zip-top bag and crush with a rolling pin until no large pieces remain.
- Transfer the Oreo crumbs to a mixing bowl and add the softened cream cheese.
- Mix with a spatula, hand mixer, or clean hands until the mixture is smooth and uniform with no visible streaks of cream cheese.
- Scoop about 1 tablespoon of the mixture at a time and roll into 1-inch balls using your hands.
- Arrange the Oreo balls on the prepared parchment-lined baking sheet in a single layer.
- Refrigerate the tray of Oreo balls for 15 minutes to firm up.
- Place the chocolate and coconut oil in a microwave-safe bowl.
- Microwave the chocolate mixture at 50% power in 30-second intervals, stirring after each interval, until completely melted and smooth.
- Working one at a time, dip each chilled Oreo ball into the melted chocolate, using a fork to lift it out and let excess chocolate drip back into the bowl.
- Place the coated Oreo balls back onto the parchment-lined baking sheet.
- Repeat with all remaining Oreo balls, reheating the chocolate briefly at 50% power if it begins to thicken.
- Let the chocolate-covered Oreo balls sit at room temperature or in the refrigerator until the chocolate is fully set, about 30 minutes.
- Once set, transfer the Oreo balls to an airtight container and store in the refrigerator until ready to serve.
Notes
- Use gluten-free sandwich cookies and certified gluten-free chocolate for a gluten-free version.
- You can top the freshly dipped Oreo balls with extra crushed Oreos or sprinkles before the chocolate sets.
- Store the finished Oreo balls in the refrigerator for up to 5 days or freeze for up to 1 month.