Why This One Delivers
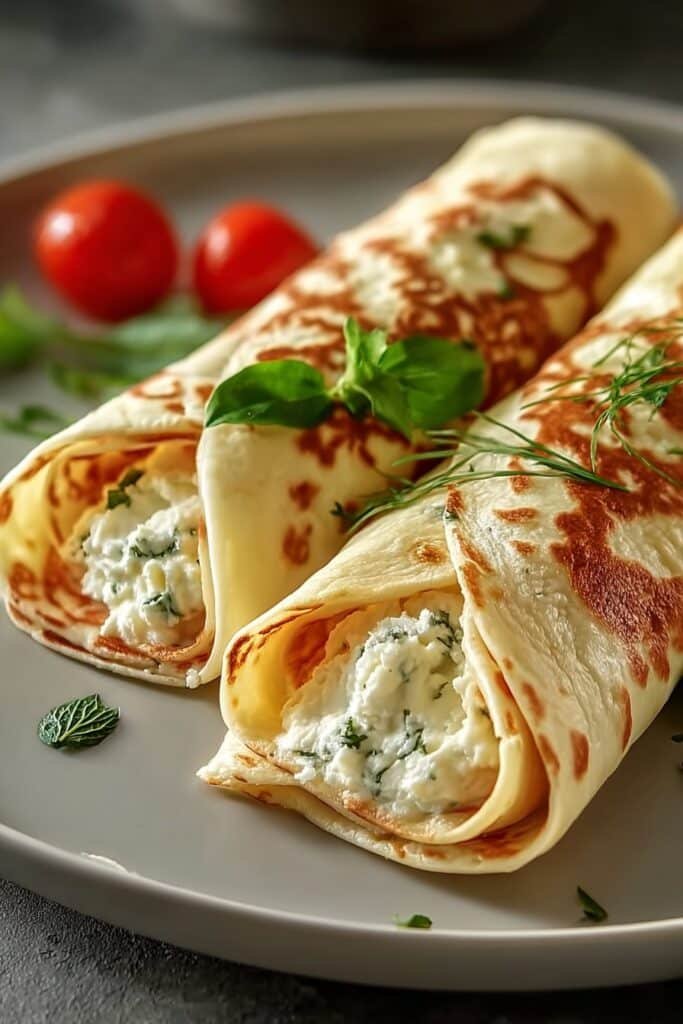
These skillet cottage cheese wraps give you that soft, bakery style chew with almost no work and just two base ingredients you probably already have in the fridge. The texture lands somewhere between a tender crepe and a flexible tortilla, so you can roll, fold, or pan toast them without cracking or crumbling.
Since the cottage cheese and eggs blend until completely smooth, you will not find any rubbery curds or gritty bits, just a silky batter that cooks into golden wraps. They behave like a fresh bakery upgrade to your usual low carb option, without gums or mystery ingredients. If you have ever brought home a pack of high protein wraps that tasted suspiciously like cardboard, these homemade wraps will feel like a small miracle.
On busy weekdays, this recipe fits neatly between getting the skillet hot and pouring your coffee. The batter rests happily in the blender jar while you heat the pan, and you season it right from the start. One batch of cottage cheese wraps can lean Italian with dried basil and oregano, or feel like a breakfast wrap with black pepper and smoked paprika. Low heat and a light coating of oil in a nonstick skillet do the hard work for you, so the wraps stay tender and flip easily, even if you do not feel like a confident stovetop cook.
The short time in the skillet means you can prep fillings while each wrap sets. Slice turkey, stir hummus, or pile up crisp veggies while the batter quietly turns into soft, golden rounds. I love pairing these with roasted veggie quesadillas, using them as a soft base under leftover chicken, or tucking them around whatever bits and pieces are waiting in the fridge.
Nutritionally, these wraps bring steady, satisfying protein without the heaviness of traditional bread. Each one lands around 95 calories, with enough staying power to carry you through the afternoon when you use them for lunch. Because the only required ingredients are cottage cheese and eggs, the recipe naturally skips gluten and stays low carb, which makes it friendly for a lot of different eaters at your table. You can tuck these cottage cheese wraps into lunch boxes, serve them as snack size roll ups, or use them as a cozy, simple canvas for whatever you are craving. They feel special and bakery worthy, but the process stays forgiving enough for a sleepy Sunday or a rushed Monday.
From Prep to Finish
From the moment you pull out the blender, these cottage cheese wraps move quickly, so a little prep makes everything smoother. If you can, use room temperature cottage cheese so it blends more easily and gives you a silkier batter. Add the salt, garlic powder, and pepper right into the blender, so every wrap tastes the same and you do not have to season in the pan. Blend until you see no visible curds and the mixture looks pourable and creamy, usually about 30 seconds. If you still spot tiny specks, give it another quick blitz so the wraps cook evenly and release cleanly from the skillet.
Once the batter looks smooth, preheat your nonstick skillet over low heat and lightly grease it. That first wrap does not need to be the sacrifice to the pancake gods. Pour about one third cup of batter into the center of the pan and immediately swirl the skillet in a gentle circle, just like making crepes, to spread the batter into a thin, even layer. Let it cook without touching it until the surface turns from shiny to matte and the edges lift slightly when you nudge them with a spatula.
If the wrap feels like it is sticking, resist the urge to add more oil and give it another minute instead. The batter needs time to set before it will release. When the edges look dry and pale golden, slide a wide spatula all the way underneath and flip in one confident motion. Cook the second side until small pale golden spots appear, then slide it onto a plate to cool while you finish the rest of the cottage cheese wraps. If you want to keep them extra soft for rolling around tomorrow’s lunch, stack them with small squares of parchment between each one.
Timing, Storage, and Make-Ahead
These cottage cheese wraps move from blender to plate in about 15 minutes, which makes them very friendly for weekday cooking. From the first egg you crack to the last wrap you stack, the timing stays predictable. Each wrap usually needs 3 to 5 minutes on the first side and 1 to 2 minutes on the second side, so do not rush the low heat. Let the skillet do its quiet work.
Before you stack or fill the wraps, let them cool to room temperature. Warm wraps stacked right away trap steam, which can make them a little soggy. I like to layer them with small parchment squares so they stay neat, separate, and ready for whatever fillings you have planned, from veggie packed lunches to a simple sweet cottage cheese wrap with berries for breakfast.
For storage, place completely cooled wraps in an airtight container or zip top bag and refrigerate for up to 4 days. Keep them lying flat so they stay smooth and flexible. To reheat, warm a nonstick skillet over low heat and give each wrap about 20 to 30 seconds per side, just until soft and bendable. You can also microwave a single wrap on a plate for 10 to 15 seconds.
These wraps freeze well, too. Stack them with parchment squares between each one, slide the stack into a freezer bag, press out the air, and freeze for up to 2 months. Thaw the stack in the refrigerator overnight, then gently reheat or enjoy them cold for easy meal prep friendly wraps that taste like they came from a cozy little neighborhood bakery skillet.
Ingredient Swaps and Serving Options
One of my favorite things about these skillet cottage cheese wraps is how forgiving they are. If cottage cheese is not your first love, you can swap in ricotta for a slightly sweeter, creamier flavor, or use Greek yogurt for a tangier wrap with plenty of protein. Prefer yolk free wraps? Use 3 egg whites in place of the 2 whole eggs and add a teaspoon of olive oil to help keep the texture flexible.
You can keep the seasoning simple with just salt, or lean into flavor with garlic powder, smoked paprika, or an Italian herb blend. A tablespoon of finely grated Parmesan right in the blender adds a savory, bakery style edge that tastes especially good with roasted veggies or grilled chicken.
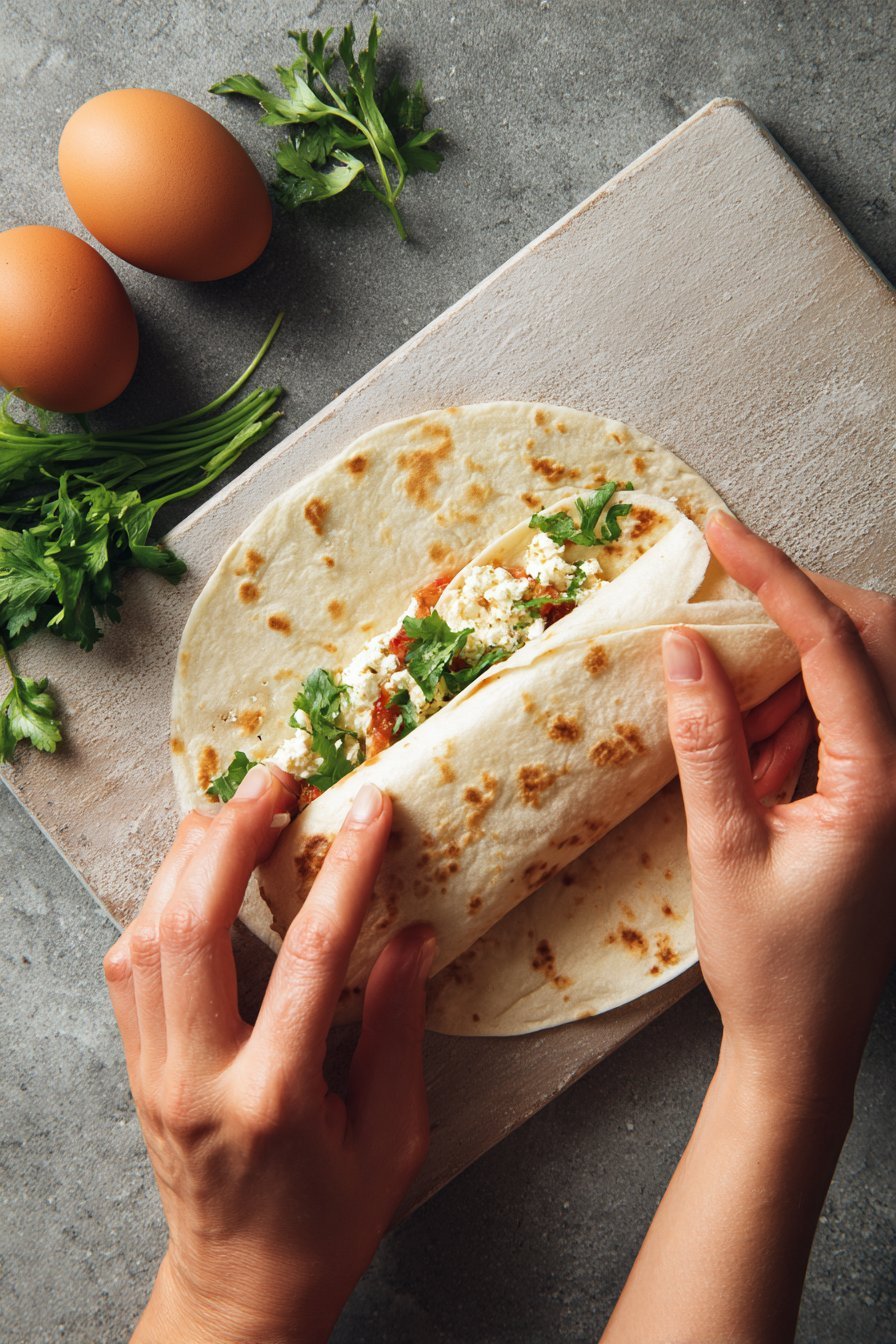
These cottage cheese wraps welcome almost any filling you are in the mood for. For a quick lunch, fill them with sliced turkey, crisp lettuce, and a swipe of honey mustard or hummus, then roll them like a classic deli wrap. For breakfast, think soft scrambled eggs, sautéed spinach, and a sprinkle of cheddar. Or go sweet with Greek yogurt, berries, and a drizzle of maple syrup.
They also work beautifully as mini skillet pizzas. Top a wrap with a thin layer of tomato sauce, a handful of cheese, and your favorite toppings, then warm it in a skillet until the cheese melts and the bottom feels lightly toasted. If you enjoy these, you might also like using a similar batter for crepe style savory fillings or as a lighter stand in for tortillas on taco night when you want something cozy and satisfying without feeling heavy.

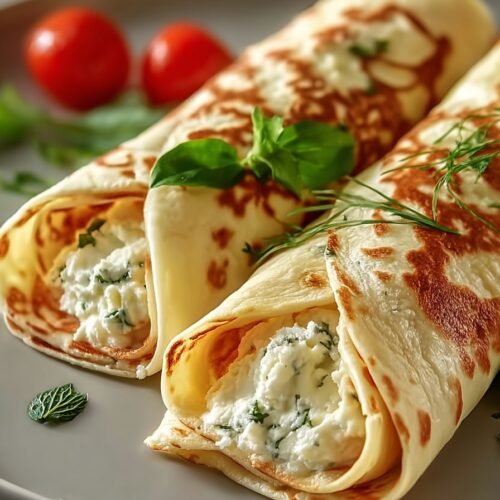
Serving of Cottage Cheese Wraps
Conclusion
I hope this little skillet routine finds its way into your regular rotation. There is something quietly joyful about watching two simple ingredients turn into a stack of warm, golden wraps that feel like they came from a corner bakery instead of your own stovetop.
More than anything, I love how a plate of cottage cheese wraps pulls people toward the kitchen. Kids wander in to see what smells so good, partners hover for a quick bite off the edge of a wrap, and suddenly you have a small crowd visiting while you stand at the stove. Those are the moments that turn ordinary days into something softly special.
When you try this recipe, take a minute to pour yourself something to sip and enjoy that first warm bite right over the skillet. Then come back and tell me how you filled your wraps and how you made them your own.
Instructions Process of Cottage Cheese Wraps
Recipe
Cottage Cheese Wraps
Ingredients
Ingredients
- 1 cup cottage cheese room temperature
- 2 large eggs
- 1/2 teaspoon salt optional
- 1/4 teaspoon garlic powder optional
- 1/4 teaspoon ground black pepper optional
- 1/2 teaspoon dried mixed herbs such as Italian seasoning (optional)
- Cooking spray or 1 tablespoon neutral oil for the skillet
Instructions
- Add the cottage cheese and eggs to a blender.
- Add the salt, garlic powder, pepper, and dried herbs, if using.
- Blend on high for about 30 seconds, until the mixture is completely smooth and pourable with no visible curds.
- Place a nonstick skillet over low heat and let it warm for 1 to 2 minutes.
- Lightly grease the skillet with cooking spray or a small amount of oil, spread to coat the surface.
- Pour about 1/3 cup of batter into the center of the skillet.
- Immediately lift and tilt the skillet, swirling to spread the batter into a thin, even circle.
- Cook without moving the wrap for 3 to 5 minutes, until the surface looks dry and matte and the edges begin to lift.
- Slide a wide spatula under the wrap and flip it in one motion.
- Cook the second side for 1 to 2 minutes, until lightly golden in spots.
- Transfer the cooked wrap to a plate and let it cool slightly.
- Repeat with the remaining batter, lightly greasing the skillet as needed, to make 4 to 5 wraps total.
- Cool the wraps to room temperature before stacking, placing small pieces of parchment between wraps if storing.
Notes
- Keep the heat low so the wraps cook through without browning too quickly.
- If a wrap seems to stick, give it another minute to set before trying to flip.
- Store cooled wraps in an airtight container in the refrigerator for up to 4 days.
- Warm chilled wraps in a dry skillet over low heat before filling and serving.