Why This One Delivers
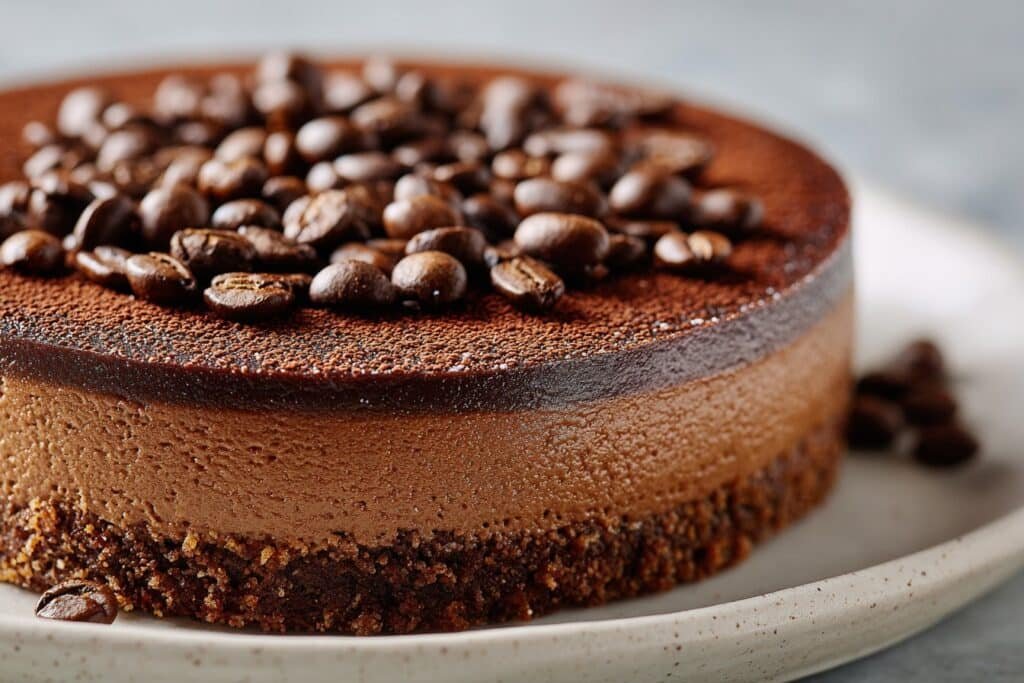
This Coffee Mocha Cheesecake gives you that true bakery case moment at home, the kind where the slices are tall, glossy, and just a little over the top. You get a thick, buttery graham cracker crust that bakes up crisp enough to stand tall but still tender when your fork slides through. The filling has the sweet spot of coffee and chocolate, with brewed coffee for depth and cocoa for that classic mocha flavor, so it tastes like your favorite coffee shop drink in cheesecake form. Because the cream cheese, eggs, and coffee start at room temperature, the batter blends silky smooth, without curdling or weird lumps. It bakes into clean, even layers that hold their shape beautifully on the plate.
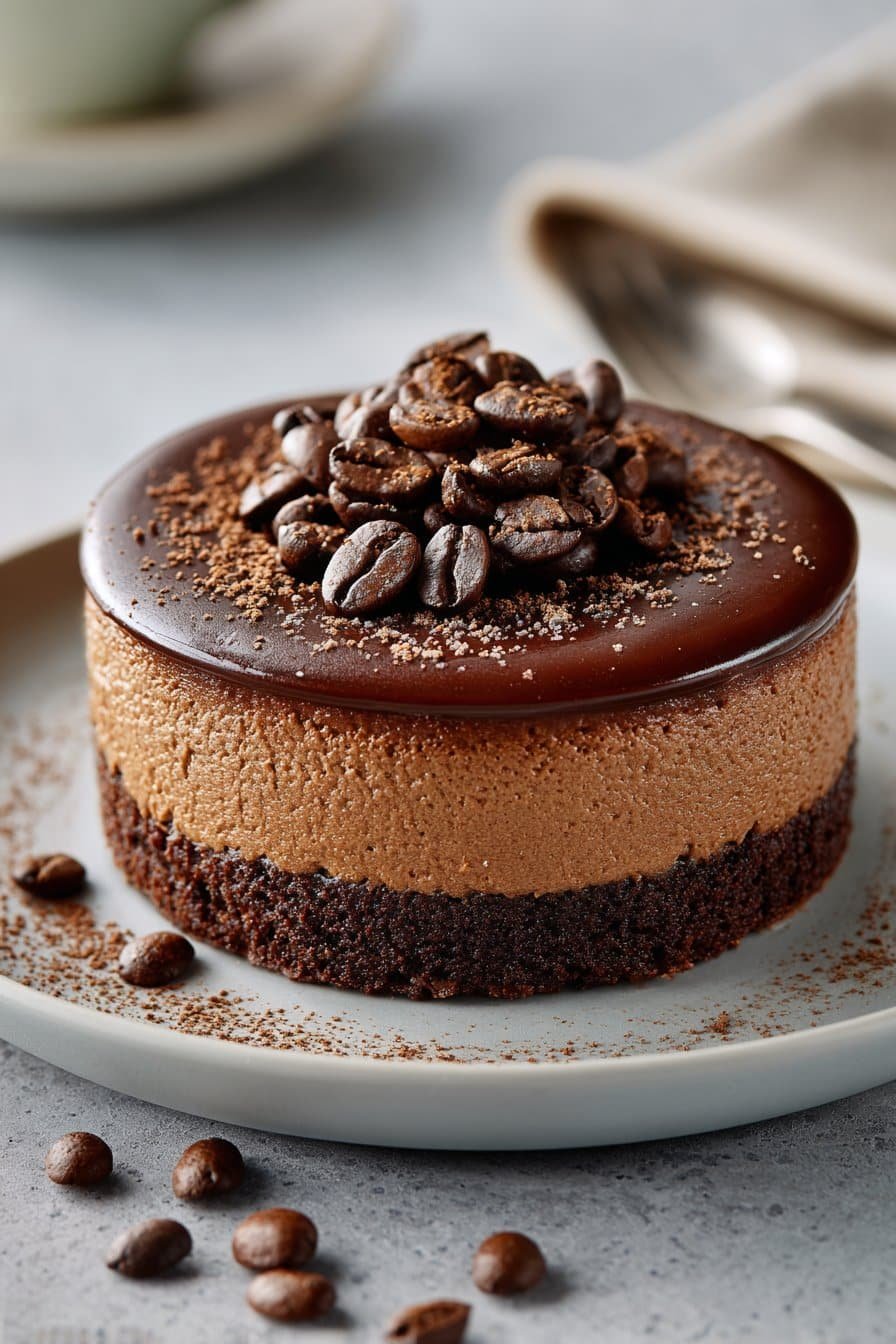
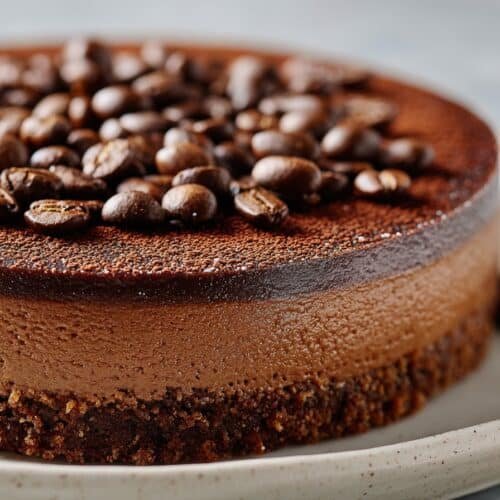
Flavor wise, this Coffee Mocha Cheesecake actually tastes like coffee, not like a hint of it whispered in the background. The cooled brewed coffee and instant coffee in the whipped cream topping layer the flavor so you taste it from the crust up to the garnish. A short, gentle mix on the filling keeps it creamy instead of dense, and that long chill time lets the cocoa bloom and the coffee mellow so every bite feels balanced. The whipped cream topping is lightly sweet, not heavy, so it softens the richness instead of weighing it down. Finish with chocolate shavings and you have a bakery style centerpiece that slices cleanly, keeps well, and feels special enough for birthdays, but achievable on a weeknight if you plan ahead.
From Prep to Finish
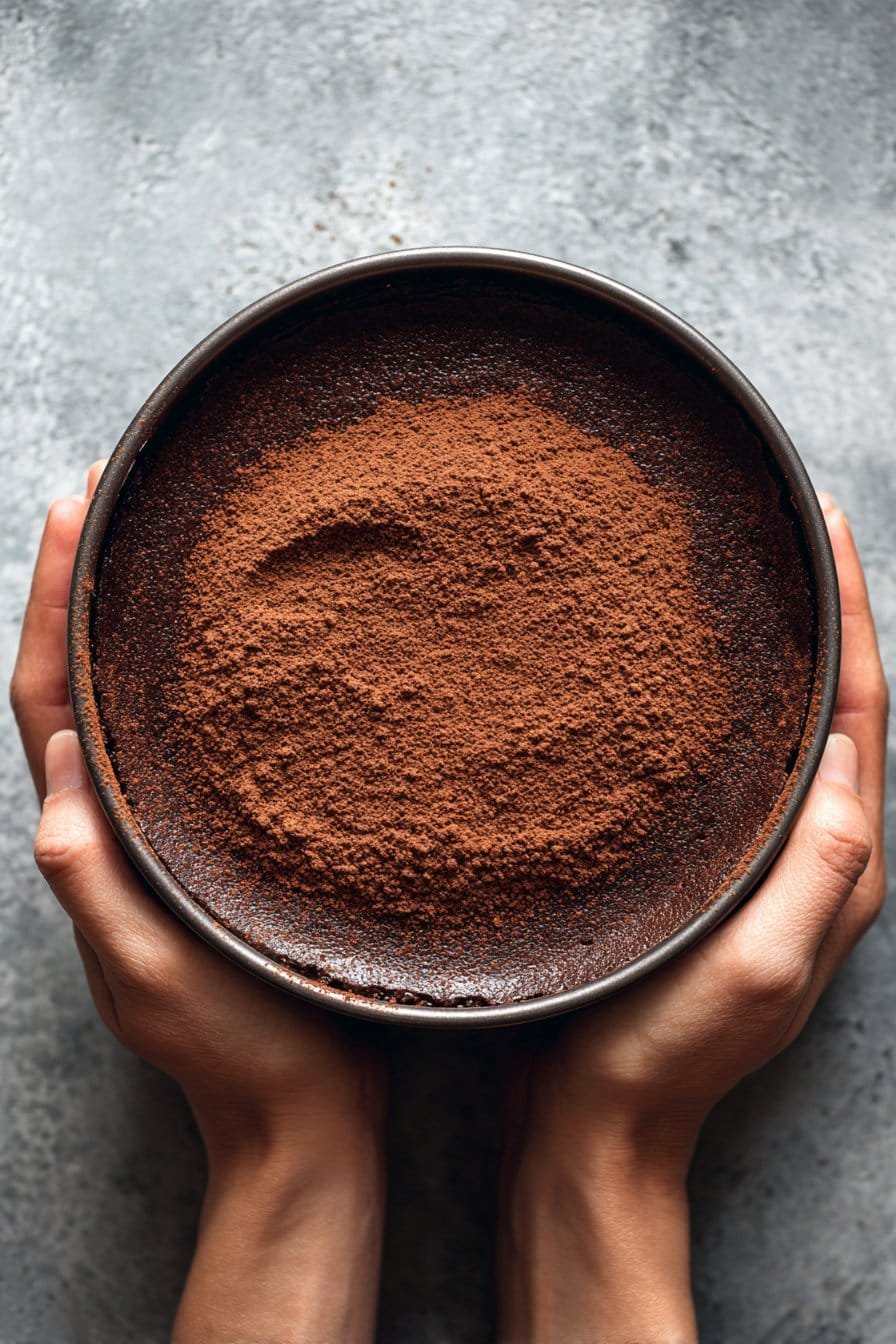
Once you have your ingredients measured and at room temperature, this Coffee Mocha Cheesecake comes together in simple, cozy stages. Start with the crust by stirring together the graham cracker crumbs, sugar, and melted butter until the texture feels like damp sand that holds when you pinch it. Press it firmly into the bottom of your springform pan, using the flat bottom of a measuring cup to smooth it out and create even thickness. Bake it briefly if your recipe calls for it, or chill it to set while you move to the filling. This little bit of care at the base gives you that classic bakery style snap under the creamy layers.
For the filling, beat the cream cheese and sugar just until smooth and fluffy, scraping the bowl so no lumps hide at the bottom. Add the eggs one at a time, mixing on low and stopping as soon as each one disappears, so you do not whip in too much air. Stir in the cooled brewed coffee, cocoa powder, and vanilla bean paste until you have a silky mocha ribbon that pours but does not seem watery. Pour it over the crust, tap the pan gently on the counter to release air bubbles, then bake until the edges are set and the center has a soft jiggle like set Jell O. Let your Coffee Mocha Cheesecake cool slowly on the counter, then chill for at least 4 hours, preferably overnight. Before serving, whip the heavy cream with powdered sugar and instant coffee granules to soft peaks, swirl it over the chilled cheesecake, and finish with chocolate shavings for a polished bakery case look that tastes even better at home.
Timing, Storage, and Make-Ahead
Your Coffee Mocha Cheesecake is a bit of a planner’s dessert, so think of the timing as part of the recipe, not an afterthought. The hands on work is only about 25 minutes, plus about 1 hour of baking, but the real magic happens in the chill time. After the cheesecake bakes, let it cool to room temperature completely, usually 1 to 2 hours, before you even think about refrigerating it. Then chill it for at least 4 hours, though overnight gives you the most velvety texture and deeper coffee and chocolate flavor. If you are serving for a special occasion, I like to bake it the day before, then whip the coffee cream and add the chocolate shavings right before guests arrive.
For storage, cover the chilled Coffee Mocha Cheesecake tightly with plastic wrap or a cake dome, and keep it in the refrigerator for up to 5 days. Avoid storing it next to strong smelling foods, like onions or garlic, since cream cheese loves to soak up odors. If you want to freeze it, skip the whipped topping, chill the baked cheesecake until firm, then wrap it well in plastic, followed by a layer of foil. It freezes beautifully for up to 2 months. Thaw overnight in the refrigerator, then add your coffee whipped cream and garnish, just like you would with a fresh [Mocha Tres Leches Cake] or rich espresso dessert. This make ahead approach lets you spread out the work, while still serving a dessert that tastes like it came straight from a bakery case.
Ingredient Swaps and Serving Options
Your Coffee Mocha Cheesecake can be as classic or as playful as you want. For the crust, you can swap graham cracker crumbs with chocolate wafer crumbs for a deeper cocoa flavor, or use crushed Oreos and skip the extra sugar, since the cookies are already sweet. If you need a gluten free option, use your favorite gluten free graham style cookies and keep the butter amount the same. No vanilla bean paste on hand. Use an equal amount of vanilla bean paste, or try half vanilla and half almond extract for a bakery style twist.
For the filling, full fat cream cheese gives the best texture, but you can replace up to one third of it with sour cream or thick Greek yogurt for a slightly tangier Coffee Mocha Cheesecake. Swap the brewed coffee with strong espresso or instant coffee diluted in hot water if you want a bolder coffee note, and adjust the cocoa powder up by 1 or 2 tablespoons for a darker chocolate flavor. If you prefer a milder dessert, cut the brewed coffee to 2 tablespoons and add 2 tablespoons of heavy cream to keep the batter volume the same. You can also flavor the topping differently, for example sprinkle cocoa over the whipped cream and skip the instant coffee, or drizzle with warm ganache like you might do for a rich chocolate cheesecake recipe.
Serving this cheesecake is where you can really play. Slice it cold for clean bakery style wedges, then let each slice sit at room temperature for about 15 minutes so the texture softens and the mocha flavor opens up. Add a dollop of extra whipped cream, chocolate covered espresso beans, or a light dusting of cocoa powder right before serving. Pair a thin slice with hot espresso for coffee lovers, or serve smaller cubes on a dessert board with berries, salted nuts, and vanilla ice cream for a more casual, graze friendly way to enjoy your Coffee Mocha Cheesecake.
Instructions Process of Coffee Mocha Cheesecake
Conclusion
I always say that some desserts feel like an occasion all on their own, and this one absolutely does. From the moment you start mixing the creamy filling to that first slice with ribbons of mocha and espresso, you are creating more than a cheesecake. You are building a little ritual that invites people to linger at the table just a bit longer. A quiet afternoon turns into a coffee date, a simple dinner turns into a celebration, and suddenly everyone has a story to share over dessert.
If you have been a little nervous to bake something this special, consider this your friendly nudge. You can do this, step by step, and the reward is a showstopper that tastes like your favorite café in cheesecake form. I hope this Coffee Mocha Cheesecake brings laughter, second helpings, and those soft, cozy moments that stay with you long after the plates are empty.
For more delicious recipes like this, follow us on social media!
Serving of Coffee Mocha Cheesecake
Recipe
Coffee Mocha Cheesecake
Ingredients
Ingredients
- 1 1/2 cups graham cracker crumbs
- 1/4 cup granulated sugar
- 1/2 cup unsalted butter melted
- 24 oz cream cheese softened
- 1 cup granulated sugar
- 3 large eggs at room temperature
- 1/4 cup brewed coffee cooled
- 1/4 cup unsweetened cocoa powder
- 1 tsp vanilla bean paste
- 1 cup heavy cream chilled
- 2 tbsp powdered sugar
- 1/2 tsp instant coffee granules
- 1/4 cup chocolate shavings
Instructions
- Preheat the oven to 325°F and lightly grease a 9-inch springform pan.
- In a medium bowl, combine graham cracker crumbs, 1/4 cup granulated sugar, and melted butter until the mixture resembles damp sand.
- Press the crust mixture firmly into the bottom of the prepared pan, smoothing it into an even layer.
- Bake the crust for 10 minutes, then set aside to cool while you prepare the filling.
- In a large mixing bowl, beat the softened cream cheese and 1 cup granulated sugar on medium speed until smooth and creamy, scraping the bowl as needed.
- Add the eggs one at a time, mixing on low speed just until each egg is incorporated and stopping as soon as it disappears.
- Add the cooled brewed coffee, cocoa powder, and vanilla bean paste, and mix on low speed until the batter is smooth and evenly combined.
- Pour the cheesecake batter over the cooled crust and tap the pan gently on the counter to release any air bubbles.
- Place the springform pan on a baking sheet and bake for 50 to 55 minutes, until the edges are set and the center jiggles slightly when gently shaken.
- Turn off the oven, crack the oven door, and let the cheesecake cool inside for 1 hour.
- Remove the cheesecake from the oven, let it cool completely at room temperature, then refrigerate for at least 4 hours or overnight.
- When ready to serve, add the heavy cream, powdered sugar, and instant coffee granules to a mixing bowl.
- Whip the cream mixture on medium-high speed until soft peaks form.
- Spread or pipe the coffee whipped cream over the chilled cheesecake.
- Garnish the top with chocolate shavings, release the cheesecake from the springform pan, slice, and serve.
Notes
- Do not overmix the filling after adding the eggs to keep the cheesecake light and prevent cracking.
- For cleaner slices, wipe the knife with a warm, damp cloth between cuts.
- You can chill the baked cheesecake overnight for the best flavor and texture.