The Memory Behind This Treat
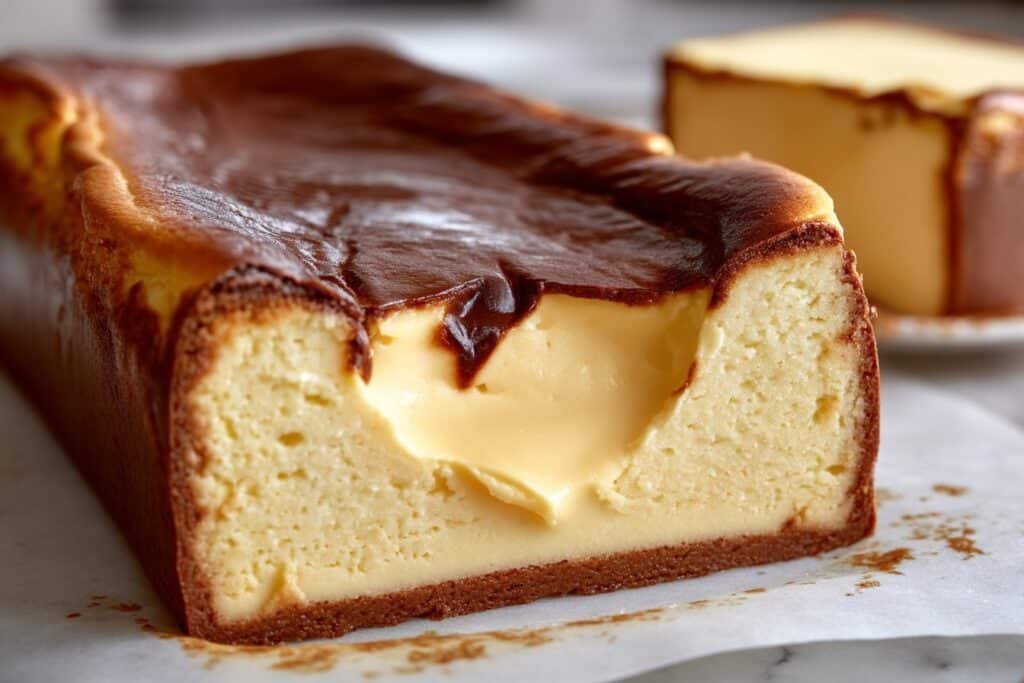
The first time I tested this Burnt Basque Cheesecake in a Loaf Pan, it was less “grand baking plan” and more “what do I do with this extra cream cheese?” kind of evening. It was a Tuesday, I remember, because I had exactly 1 sad lemon in the fridge, a half-empty carton of heavy cream, and just enough eggs to make something interesting—or order takeout. I didn’t have a springform pan clean (or, if we’re honest, the patience to line and wrap one in foil), but my loaf pan was sitting right there, ready and willing. So I lined it with crinkly parchment, let the paper climb high and wild up the sides, and decided to see if this rebellious, crustless cheesecake would still caramelize and puff the way it does in the traditional round. When it came out deep golden, with that dramatic burnt top and a little jiggle in the center, I knew we were onto something special.
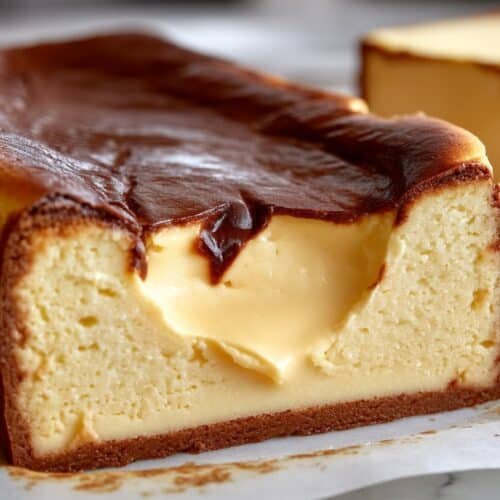
What surprised me most was how cozy the loaf shape felt, especially when I sliced it. Instead of perfect wedges for a fancy plate, we had thick, generous bars you could serve on mismatched plates, pass around the couch, or tuck next to a scoop of ice cream. It reminded me of the way my mom used to bake simple pound cakes in the same pan—no fuss, just honest dessert meant to be shared. I brought that first batch to a casual game night, and everyone kept cutting “just another sliver,” the way people do when they secretly want a second slice but pretend they don’t. Since then, this Burnt Basque Cheesecake in a Loaf Pan has become my go-to for low-key dinners, late-night cravings, and those “I have 15 minutes of energy but want a show-stopper” days. It’s the kind of recipe that quietly works its way into your regular rotation, the way a good brownie or banana bread recipe does, just a little more dramatic and a lot more indulgent.
How To Make It (Mix & Ingredients)
For this Burnt Basque Cheesecake in a Loaf Pan, start with truly soft, room-temperature cream cheese—it should press easily with a finger, no cold lumps. Beat the cream cheese and sugar together until the mixture looks silky and glossy; if you see tiny grainy bits, keep mixing so the sugar fully dissolves. Add your eggs one at a time, scraping down the bowl after each one so you don’t end up with streaks of unset egg in the final cheesecake. When you pour in the heavy cream, switch to a lower speed and mix just until combined; too much air here can cause the cheesecake to puff dramatically and crack more than we want. Finally, sift in the flour and salt together and fold gently with a spatula until no dry pockets of flour remain, especially in the corners of the bowl.
Instructions Process of Burnt Basque Cheesecake in a Loaf Pan
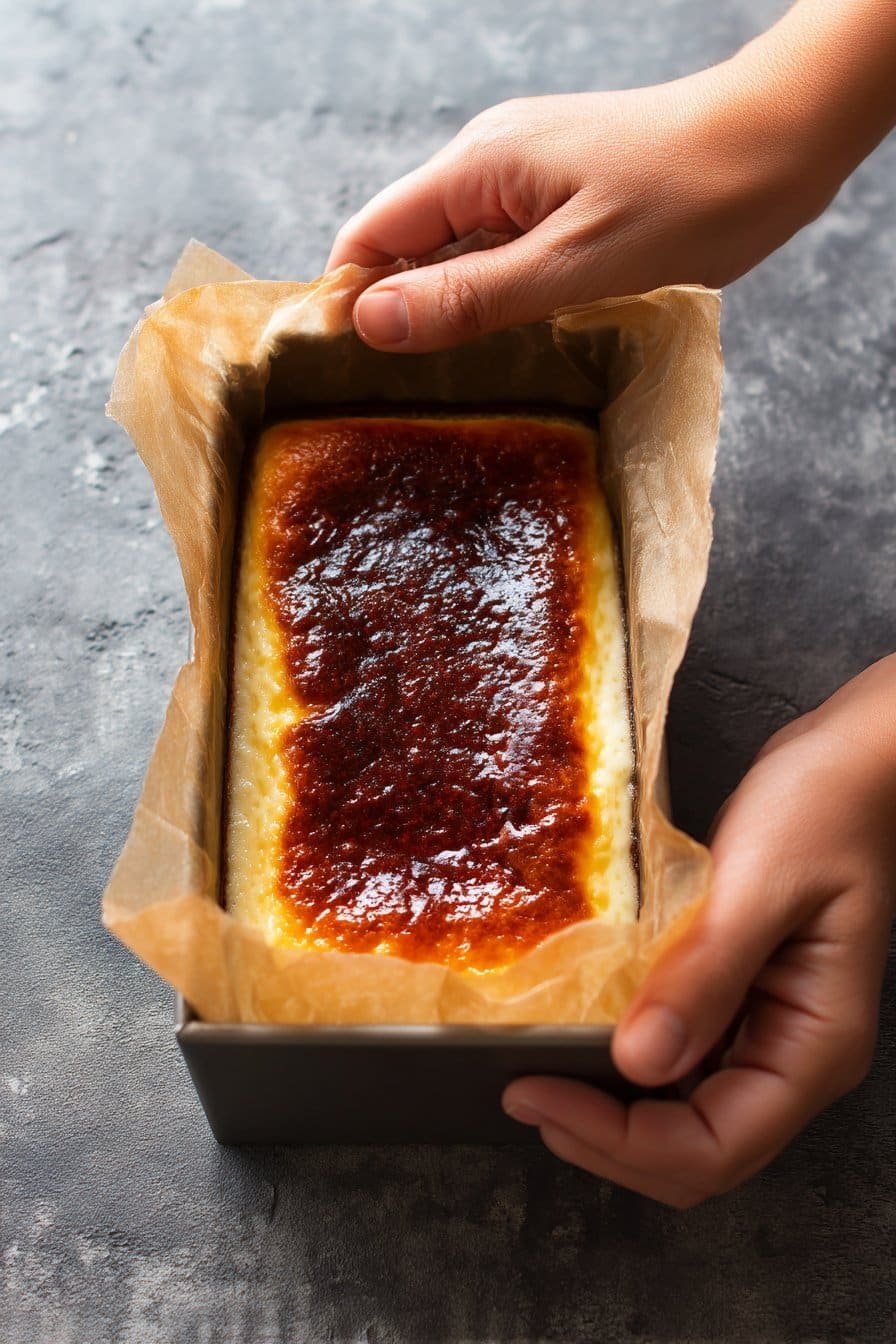
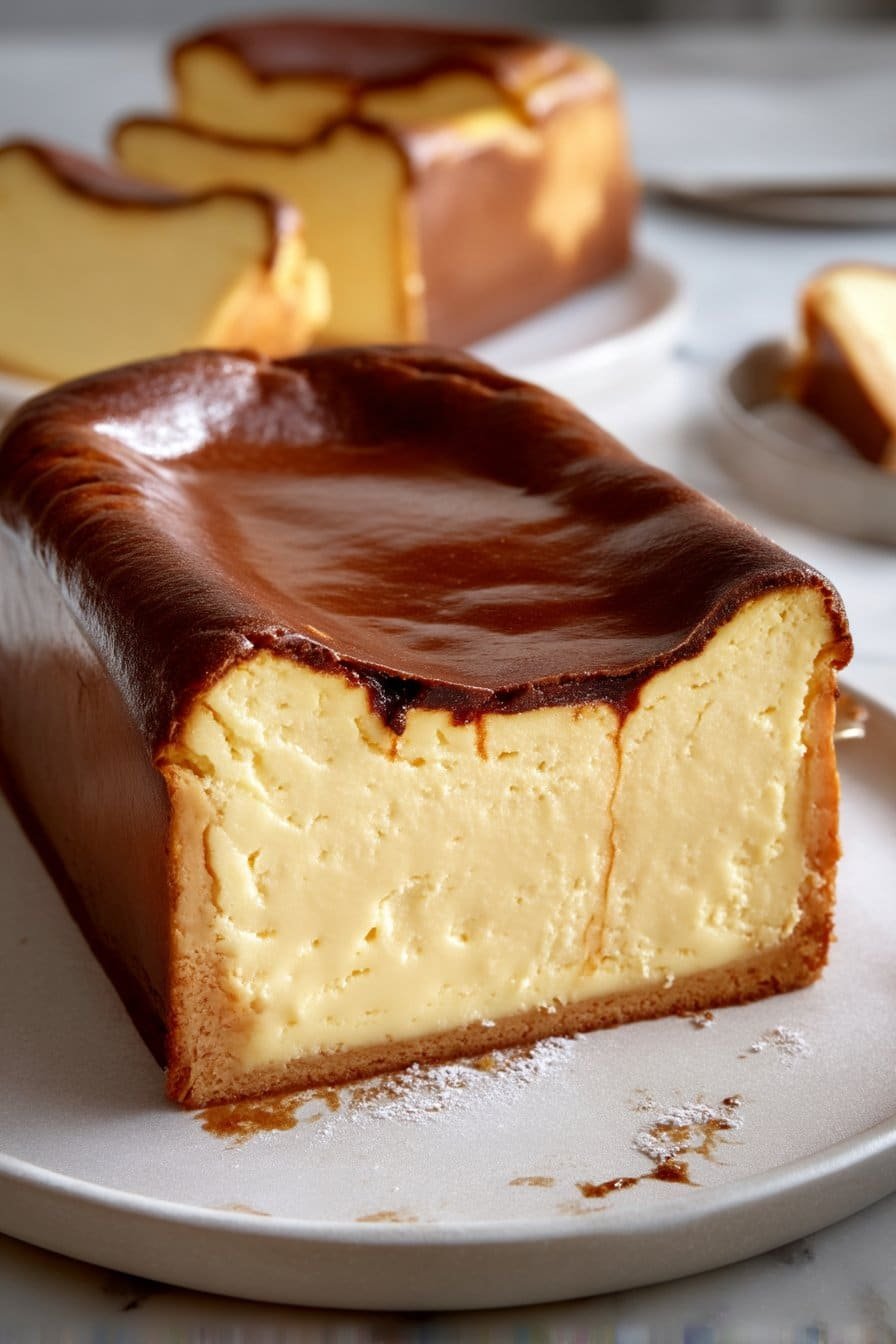
Prepare your 9×5 loaf pan by greasing it lightly and lining it with parchment, letting the paper overhang like “handles” on the long sides—this makes lifting out your Burnt Basque Cheesecake in a Loaf Pan a breeze later. The batter will be on the runny side, almost like thick pouring cream, so don’t panic; that loose texture is what bakes into that custardy, creamy center we love. Tap the filled loaf pan firmly on the counter 2–3 times to knock out any large bubbles, then slide it onto the center rack of a fully preheated 400°F oven. You’re looking for a deep mahogany, almost dramatic burn on top, with a confident jiggle in the center of the pan when you nudge it. Once baked, let the cheesecake cool in the pan at room temperature, then chill it until cold and sliceable—loaf-pan slices are perfect for topping with whipped cream, berries, or even a drizzle of caramel, just like I do with my favorite holiday cheesecakes.
Make-Ahead & Storage
This Burnt Basque Cheesecake in a Loaf Pan is actually one of those desserts that tastes better when you plan ahead. You can bake it up to 2 days in advance, let it cool completely in the pan, then cover the loaf pan tightly with plastic wrap or foil and refrigerate. For easier slicing, I like to chill it overnight and then lift it out of the pan using the parchment before serving. If you want ultra-clean slices (great if you’re plating it next to something pretty, like a fruit tart or layered dessert), pop the whole loaf into the fridge for a full 24 hours.
Once baked and chilled, your Burnt Basque Cheesecake in a Loaf Pan keeps beautifully in the refrigerator for up to 4 days. Store individual slices in an airtight container, with a small piece of parchment between layers if you stack them so the edges stay neat. Keep the whipped cream, berries, and caramel sauce separate and add them just before serving so the top stays caramelized and slightly rustic, not soggy. If you love planning dessert boards for gatherings, you can slice the cheesecake ahead, then plate it alongside fresh berries and maybe a batch of brownies or bar cookies right before your guests arrive.
For longer storage, you can freeze this Burnt Basque Cheesecake in a Loaf Pan, though the texture will be slightly softer after thawing. Chill it completely, then wrap the unsliced loaf (or individual slices) tightly in plastic wrap and a layer of foil, and freeze for up to 1 month. Thaw overnight in the refrigerator, then serve cold or let it sit at room temperature for about 20 minutes to take off the chill. If you’re making several desserts for a holiday table, this one’s the perfect “make-ahead hero” alongside pies, puddings, or any of your other favorite baked treats.
Best Ingredients & Party Variations
For the richest, creamiest Burnt Basque Cheesecake in a Loaf Pan, think “small ingredient list, big personality.” Use full-fat cream cheese that’s completely at room temperature; if it’s still a bit chilly, you’ll end up fighting tiny lumps in your batter. The same goes for the eggs and heavy cream—room temp helps everything emulsify into that silky, pourable custard. I also love a fine, fresh all-purpose flour here; old flour can taste a little stale and dull the flavor. And don’t skip the salt—that tiny 1/4 teaspoon makes the caramelized top taste deeper and the creamy center taste sweeter.
Once you’ve nailed the base recipe, this Burnt Basque Cheesecake in a Loaf Pan becomes a perfect “party bar” dessert. For a tasting platter, chill the loaf fully, slice into 1-inch bars, and serve each piece with something different: one with whipped cream and berries, one with warm caramel sauce, another with shaved dark chocolate or crushed espresso beans. For a holiday spin, swirl 2–3 tablespoons of lemon curd, jam, or dulce de leche into the batter right in the loaf pan before baking—just a few lazy figure-eights with a knife will do. Hosting brunch? Serve thinner slices with a side of macerated strawberries and a dusting of powdered sugar, almost like a custardy “toast.” And if you love contrast, you can lean into that burnt-top magic by pairing each slice with something cold and bright—think berry sorbet or even a spoonful of tangy yogurt alongside, just like I’d do next to a rich [no-bake cheesecake] or a creamy custard tart.
Serving of Burnt Basque Cheesecake in a Loaf Pan
Conclusion
If you’ve made it this far, I hope you can almost smell it: that caramelized top, the custardy center, and the warm, toasty scent filling your kitchen. There’s something so comforting about taking a humble pan, simple ingredients, and a tiny bit of faith—and turning it into an indulgent little ritual you can slice and share. This Burnt Basque Cheesecake in a Loaf Pan feels fancy enough for a celebration, but relaxed enough for a Tuesday night dessert on the couch.
I love how this kind of recipe has a way of gathering people, even if it’s just your favorite person, two forks, and a still-warm pan between you. It’s the kind of treat you bring to a friend who needs a hug, slice up for a cozy family movie night, or save for a quiet moment at the end of a long day. However you serve it, you’re not just baking a dessert—you’re making a memory.
So go preheat that oven, trust the process, and give this recipe a try. And if you do, I’d love to hear how it turned out and who you shared it with.
For more delicious recipes like this, follow us on social media!
Can I bake Burnt Basque Cheesecake in a loaf pan instead of a round pan?
Absolutely, you can make Burnt Basque Cheesecake in a loaf pan, and it works beautifully. A standard 9×5 inch loaf pan gives you those pretty, tall slices and a rustic, crackly top. The texture stays just as creamy as the classic round version, as long as you keep the batter depth similar. If your loaf pan is smaller or larger, you may need to slightly adjust the bake time. Just keep an eye on the color and jiggle rather than the clock.
How should I prepare the loaf pan so the cheesecake doesn’t stick?
For Burnt Basque Cheesecake in a loaf pan, I always both grease and line the pan. Lightly butter or oil the inside, then press in a sheet of parchment so it comes up and over the long sides, creating “handles” for easy lifting. Don’t worry if the parchment wrinkles; those folds help create the signature rustic edges. Make sure the parchment reaches at least level with the rim to contain the rising batter. A well-lined pan also helps prevent leaks and makes cleanup easier.
How do I know when my Burnt Basque Cheesecake in a loaf pan is perfectly baked?
Look for a deeply bronzed, almost burnt top with a center that still gently jiggles when you nudge the pan. At 400°F (200°C), this usually takes about 45 minutes in a 9×5 inch loaf pan, but ovens vary, so start checking a few minutes early. The edges should be set and slightly puffed, while the middle looks softly underbaked. If the entire surface is firm with no movement, it’s likely overbaked and will be less silky inside. Remember, it will firm up more as it cools and chills.
Recipe
Indulgent Burnt Basque Cheesecake in a Loaf Pan You’ll Love
Ingredients
Ingredients
- 16 oz full-fat cream cheese at room temperature
- 3/4 cup granulated sugar
- 3 large eggs at room temperature
- 1 cup heavy cream
- 1/4 cup all-purpose flour
- 1/4 teaspoon salt
- 1 cup whipped cream for serving
- 1 cup fresh berries for serving
- 1/2 cup caramel sauce for drizzling
Instructions
- Preheat the oven to 400°F and position a rack in the center.
- Lightly grease a 9x5 inch loaf pan, then line it with parchment paper, letting the paper overhang the long sides for easy lifting.
- In a large mixing bowl, beat the cream cheese and granulated sugar together until very smooth and silky, with no visible lumps or graininess.
- Add the eggs one at a time, beating well after each addition and scraping down the sides of the bowl as needed.
- Pour in the heavy cream and mix on low speed or stir until just combined.
- Sift the flour and salt into the bowl, then fold gently with a spatula until no dry streaks remain.
- Pour the batter into the prepared loaf pan and tap the pan firmly on the counter 2 to 3 times to release any large air bubbles.
- Bake for 45 minutes, or until the top is deep golden brown to dark mahogany and the center still jiggles slightly when the pan is gently shaken.
- Remove the cheesecake from the oven and let it cool completely in the pan at room temperature.
- Once cooled, transfer the pan to the refrigerator and chill for at least 4 hours, or until fully cold and set.
- When ready to serve, lift the cheesecake from the pan using the parchment overhang and slice into thick pieces.
- Serve each slice with whipped cream, fresh berries, and a drizzle of caramel sauce.
Notes
- This cheesecake can be made up to 2 days ahead and stored covered in the refrigerator until serving.
- For cleaner slices, chill the cheesecake overnight before cutting and wipe the knife clean between cuts.