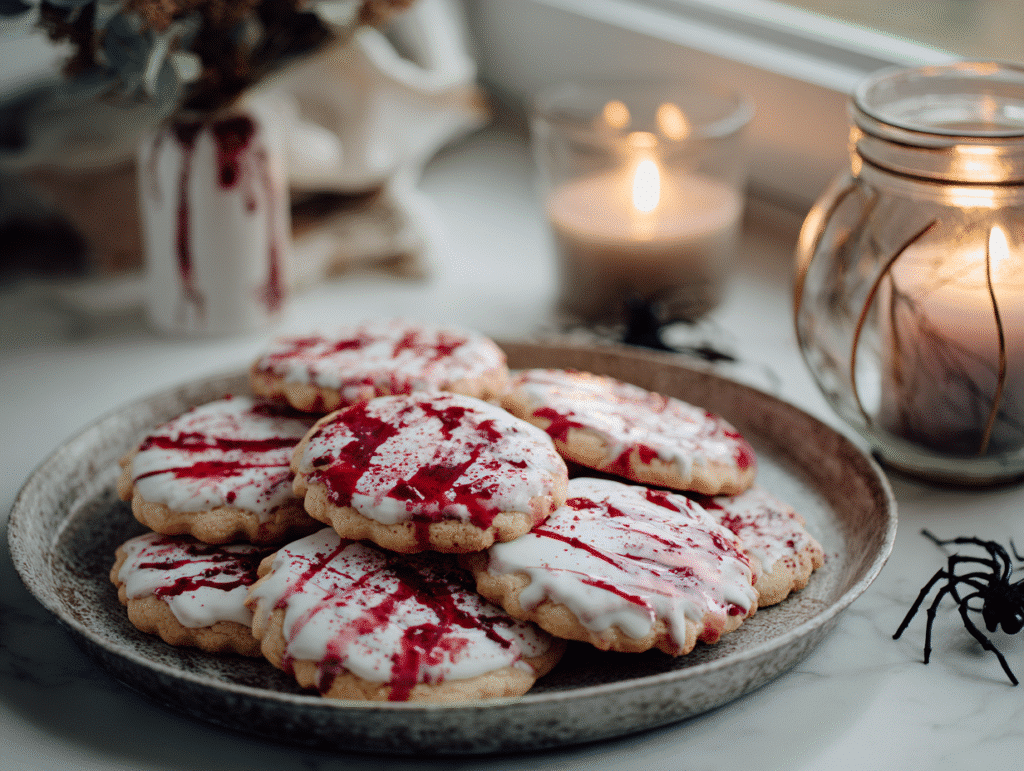
If you’ve ever wanted a dessert that’s equal parts spooky and sweet, blood splatter cookies are your answer. These cookies are crisp, buttery sugar cut-outs dressed in white icing, then splattered with vivid red dye for a dramatic, crime-scene effect. They’re easy enough for beginners but eye-catching enough to wow guests at Halloween parties, horror movie nights, or even themed birthdays.
In this article, I’ll share the story behind these eerie treats, how to bake them without spreading, the art of mastering a realistic “spatter,” and clever ways to use and store them. By the end, you’ll be ready to bake cookies that look wicked but taste heavenly.
The Story Behind Blood Splatter Cookies
Why Blood Splatter Cookies Steal the Show
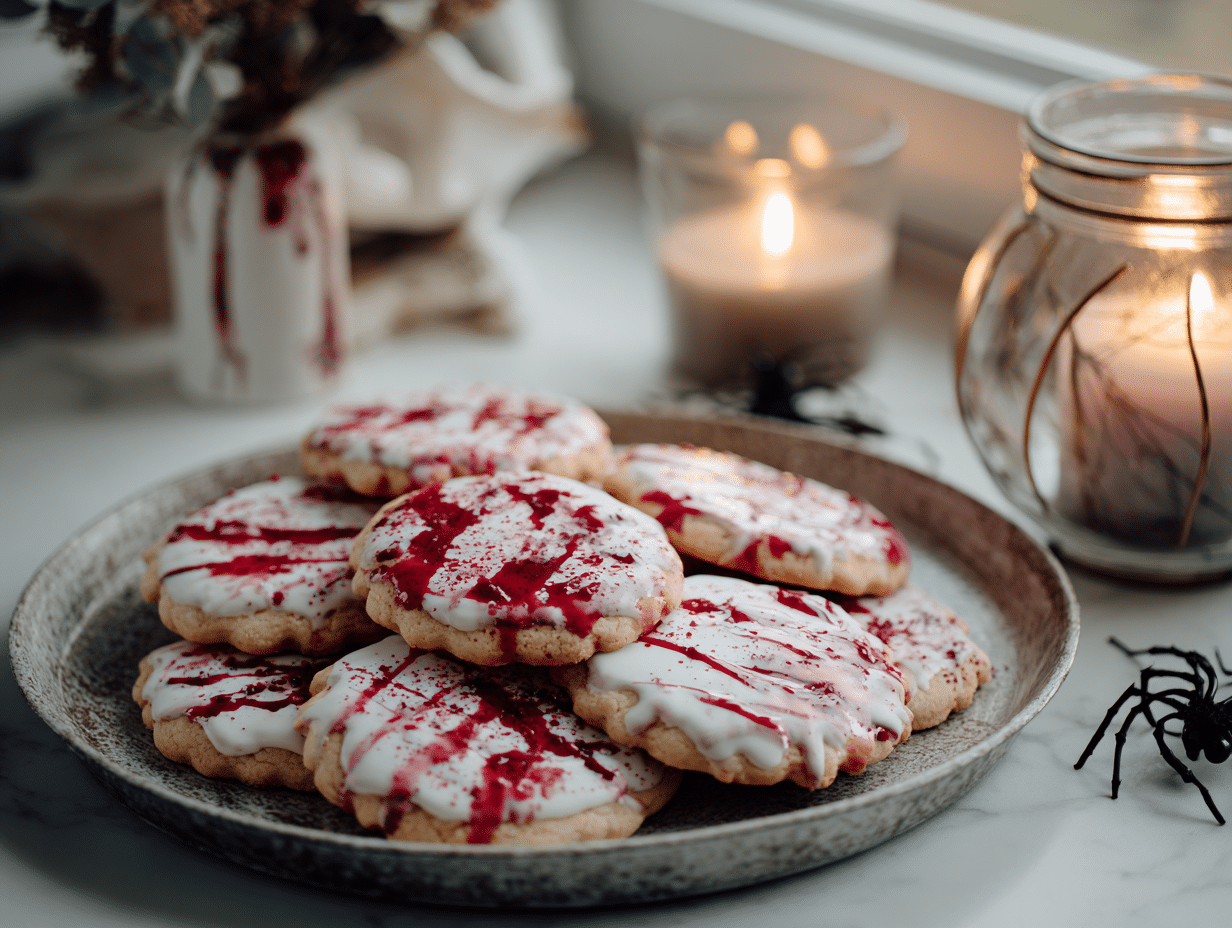
When I first saw a platter of blood splatter cookies at a Halloween gathering, I thought they looked straight out of a crime drama. The white icing made the perfect backdrop for the red streaks, and I couldn’t resist picking one up. The best part? They didn’t just look impressive—they were buttery, crisp, and melt-in-your-mouth delicious. Blood splatter cookies steal the show because they offer more than shock value.
They’re a simple sugar cookie with an edgy makeover, combining the comfort of a classic bake with the thrill of something unexpected. If you’re used to making traditional sugar cookies or even festive designs like Christmas tree cookies or gingerbread men, these are a fun twist to add to your baking repertoire.
My First Time Baking These Spooky Cookies
The first time I made blood splatter cookies, I was skeptical. Would the red dye stain everything in my kitchen? Would they look more silly than scary? I set out with a batch of my favorite sugar cookie dough, rolled and cut into neat rounds. After icing them with smooth royal icing and letting them dry, I grabbed a clean paintbrush, dipped it into thinned red gel dye, and flicked it across the cookies. Suddenly, the cookies transformed from plain white circles into eerie works of edible art.
The splatter effect was surprisingly easy—and a little addictive! Soon, I had trays full of “bloody” cookies that looked like they belonged on a detective show. They became an instant hit, much like when I introduced my family to Halloween monster brownies. Since then, blood splatter cookies have become my go-to for spooky season, right alongside pumpkin cupcakes and ghost meringues.
Baking the Perfect Base Cookie
Choosing the Right Dough for Blood Splatter Cookies
Every great blood splatter cookie begins with a sturdy base. The key is to use a dough that holds its shape well during baking. A classic sugar cookie or shortbread works best because they’re firm enough to support icing without crumbling. When I tested different recipes, I noticed that butter-heavy cookies sometimes spread too much, losing their clean edges.

To avoid this, I chill the dough for at least 30 minutes before rolling it out. If you’re not sure which recipe to choose, think about what you’d use for cut-out holiday cookies—those same qualities make the perfect foundation here. The result is a cookie that’s crisp on the edges, soft in the center, and strong enough to withstand the messy splatter to come.
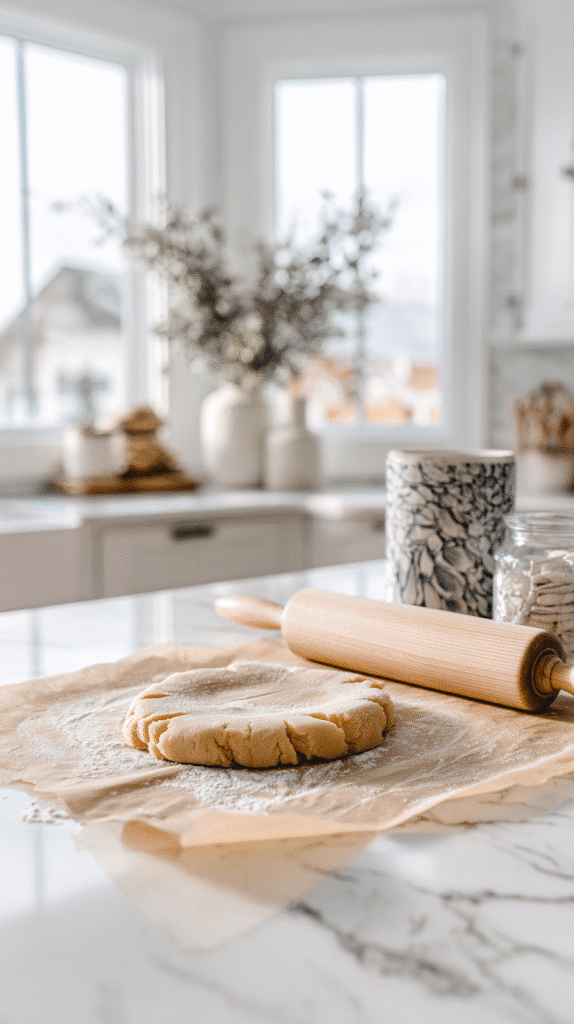
A little trick I learned from making heart-shaped sugar cookies is to roll the dough evenly, about ¼ inch thick. This thickness gives the cookies a nice bite without becoming fragile. Too thin, and the cookies may break when you flick the dye. Too thick, and they can turn cakey rather than crisp.
Keeping Cut-Out Sugar Cookies from Spreading
One of the most common frustrations with sugar cookies is spreading. Instead of neat circles or shapes, you end up with uneven blobs. Fortunately, there are easy ways to prevent this. First, always chill your dough after cutting the shapes. Pop your baking sheet into the freezer for 10–15 minutes before baking—it works like magic to lock the shapes in place. Second, measure your flour accurately. Too little flour can make the dough too soft, while too much butter can cause it to melt outward. I like to spoon flour into the measuring cup and level it off with a knife for accuracy.
Finally, bake on parchment paper or a silicone mat for even heat distribution. These small details keep your cookies looking picture-perfect, ready for their eerie makeover. After all, the cleaner your base, the more striking the red splatter will look against the white icing.
Also Read: Peanut Butter Spider Cookies: The Cutest Halloween Treat You’ll Love
Mastering the Blood Splatter Technique
Tools and Tricks for a Realistic Splatter
The magic of blood splatter cookies lies in the decoration. Once your iced cookies have dried completely—usually overnight—it’s time for the fun part. To get that eerie “crime scene” look, you’ll need a few tools: red gel food coloring, a clean paintbrush or toothbrush, and a small bowl of water to thin the dye. Gel dye is best because it gives a rich, deep red without making the icing runny.
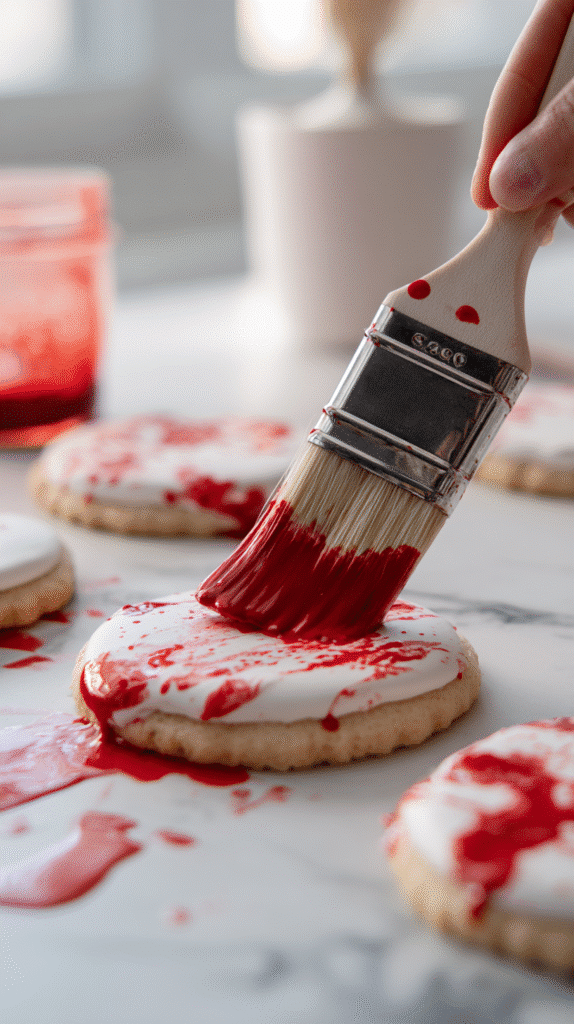
Dip your brush into the thinned dye, hold it over the cookies, and flick your wrist quickly to create splatters. If you’re nervous, practice on parchment first to test the pattern. A toothbrush gives a finer mist, while a paintbrush creates bold streaks and drips. Layering both gives the most realistic effect. Some bakers even add a touch of cocoa powder to deepen the red, making the “blood” look more authentic.
I like to set my cookies on a large baking sheet lined with paper to catch any mess. That way, cleanup is simple, and I can go wild with flicking dye. It reminds me of the same energy I put into decorating Halloween spider web cupcakes—messy, fun, and unexpectedly artistic.
Why It’s Called Blood Spatter (Not Splatter)
You might notice some recipes use the term “blood spatter” while others say “blood splatter.” The correct term, especially in forensic science, is “blood spatter.” Spatter refers to the pattern created when blood is propelled through the air, like what you see in crime dramas. Splatter is more casual, often used interchangeably, but spatter is technically accurate. When applied to cookies, it’s just a playful nod to crime-scene aesthetics.
So, while you can call these “blood splatter cookies” in casual conversation, knowing the difference adds a little geeky fun to the process. And honestly, it’s a great conversation starter when you set a plate of them down at a Halloween party.
Also Read: 3-Ingredient Sugar Cookies: Easiest Recipe You’ll Ever Bake
Creative Uses & Storage Tips
What Blood Splatter Cookies Are Used For Beyond Halloween
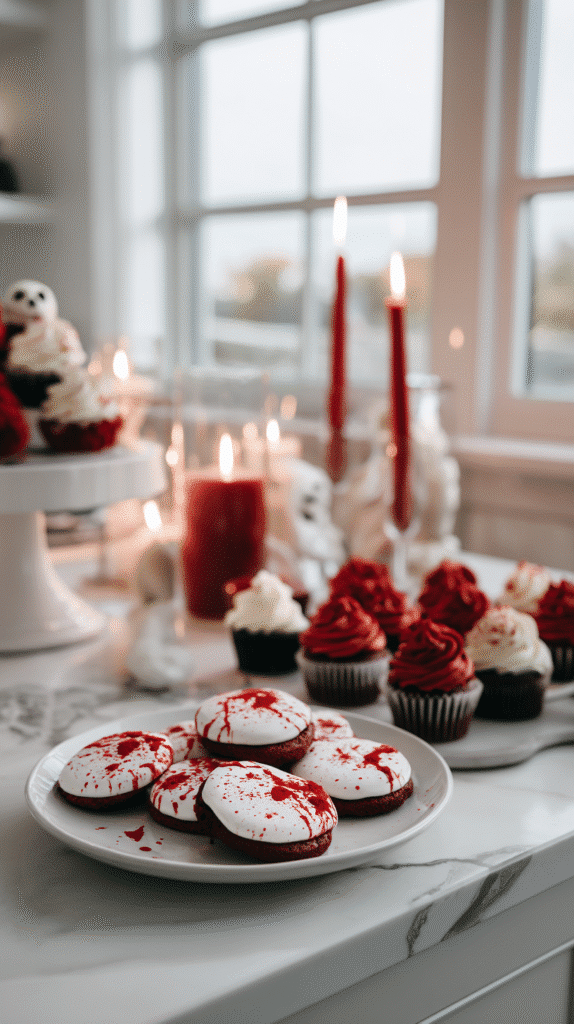
While blood splatter cookies are a staple at Halloween parties, their use doesn’t stop there. They’re fantastic for horror movie marathons, crime-themed birthdays, or even true crime podcast listening parties. I’ve even brought them to a murder mystery dinner, and they instantly became the centerpiece of the dessert table. Their dramatic look makes them more than just a cookie—they’re a playful prop that sparks conversation.
If you want to get creative, pair them with themed desserts like bloody red velvet cupcakes or dark chocolate brownies. Together, they create a spooky spread that’s both visually striking and delicious. For kids’ parties, you can tone down the realism by using pink or bright red dye instead of deep crimson. That way, you keep the fun factor without making them too intense for little ones.
I also love using these cookies as edible party favors. Slip them into clear bags, tie with black ribbon, and you’ve got a gift guests will rave about long after the party ends.
Storing and Preventing Butter Bleed in Cookies
One thing to watch for with iced cookies is butter bleed—that faint yellowish tint that sometimes seeps into the icing. It happens when fat from the cookie migrates into the royal icing, usually from storage in humid conditions or icing cookies before they’ve cooled completely. To avoid this, make sure your cookies are fully cooled before icing, and let the icing dry completely before stacking. Store them in an airtight container, separated with parchment paper.
Butter bleed doesn’t ruin the flavor, but it can dull that sharp white background that makes the red spatter pop. For long-term storage, you can even freeze the undecorated cookies and decorate them closer to your event. That way, your finished cookies stay bright, crisp, and as striking as the moment you finished splattering them.
Frequently Asked Questions About Blood Splatter Cookies
Why is it called blood spatter and not blood splatter?
The correct forensic term is “blood spatter.” Spatter refers to the pattern of liquid drops dispersed through the air, while splatter is more casual. In cookie decorating, both terms are used, but “spatter” is technically accurate.
What causes butter bleed in cookies?
Butter bleed occurs when fat from the cookie seeps into royal icing, often due to humidity or decorating cookies before they’ve cooled. Always cool cookies completely and store them in airtight containers with parchment between layers to prevent discoloration.
How to do a good blood splatter?
Use red gel food coloring thinned slightly with water. Dip a clean paintbrush or toothbrush, then flick your wrist over iced cookies. Practice on parchment first. A toothbrush creates fine mist, while a paintbrush makes bold streaks.
How to keep cut out sugar cookies from spreading?
Chill the dough before and after cutting shapes. Freeze your cut-outs for 10–15 minutes before baking, and measure flour carefully to maintain the right dough consistency. Baking on parchment or silicone mats also helps.
What is blood splatter used for?
Beyond cookies, the blood splatter effect is used in Halloween décor, props, and even crime scene recreations in film and theater. On cookies, it’s a fun way to mimic that eerie look for themed events.
Conclusion
Blood splatter cookies are the perfect blend of creepy and delicious. With a simple sugar cookie base, smooth royal icing, and a little flick of red gel dye, you can transform an ordinary bake into something extraordinary. They’re versatile enough for Halloween, movie nights, or themed parties, and simple enough for even beginner bakers. By mastering the cookie base, practicing your splatter technique, and storing them properly, you’ll have cookies that are as bold in appearance as they are delightful to eat. So grab your whisk, mix up some dough, and get ready to spatter your way to unforgettable cookies.
If you’re inspired to try this recipe, I’d love to see your creations! Share them with me on Facebook or pin your version on Pinterest so we can keep the baking (and sipping) community growing together. With just a few simple steps, you can transform your daily pick-me-up into something extraordinary.
Blood Splatter Cookies – Creepy Yet Delicious Halloween Treats
Ingredients
- 2 ¾ cups all-purpose flour
- 1 cup unsalted butter softened
- 1 cup granulated sugar
- 1 large egg
- 1 tsp vanilla extract
- ½ tsp baking powder
- ½ tsp salt
- 2 cups royal icing
- Red gel food coloring
Instructions
- 1. Whisk flour, baking powder, and salt together. Set aside.
- 2. Beat butter and sugar until light and fluffy, then add egg and vanilla.
- 3. Gradually add dry ingredients to form dough.
- 4. Chill dough for 30 minutes, then roll to ¼ inch thickness.
- 5. Cut into shapes, place on parchment-lined baking sheets, and freeze 10 minutes.
- 6. Bake at 350°F for 10–12 minutes until edges are lightly golden. Cool completely.
- 7. Ice cookies with royal icing and let dry overnight.
- 8. Thin red gel food coloring with a little water.
- 9. Flick or spatter dye over iced cookies using a paintbrush or toothbrush.
- 10. Let cookies dry completely before serving.