The Memory Behind This Treat
The very first time I tested these Biscoff Cookie Butter Brownies, it was one of those gray Saturdays that practically begs you to preheat the oven. My husband walked into the kitchen just as I was spreading that frozen slab of cookie butter over the warm brownie batter and said, “Is that even legal?” The smell that came out of the oven 30 minutes later was unreal—like a cozy mash-up of a bake sale, a coffee shop, and a holiday party all at once. When we cut into them, the center was still slightly warm, the cookie butter turning into this gooey, rippled layer between the fudgy chocolate. We stood at the counter, forks in hand, pretending we were “just tasting for research.”
These brownies also remind me of my early days as a food stylist, when I learned the magic of layers in dessert. Flat, single-note brownies never photographed as beautifully as ones with a surprise inside—just like these, with their hidden cookie butter center and crunchy Biscoff cookie topping. At home, I started making them whenever friends came over for game night; someone always asked, “What did you put in these?” and I’d point to the jar of Biscoff on the counter like it was my secret weapon. Now, these Biscoff Cookie Butter Brownies feel like my go-to “bridge” dessert: special enough for a dinner party, but cozy enough for a movie night in sweatpants. Every time I press that cookie butter into the parchment and slide it into the freezer, it feels like I’m setting up a little surprise for my future self.
How To Make It (Mix & Ingredients)
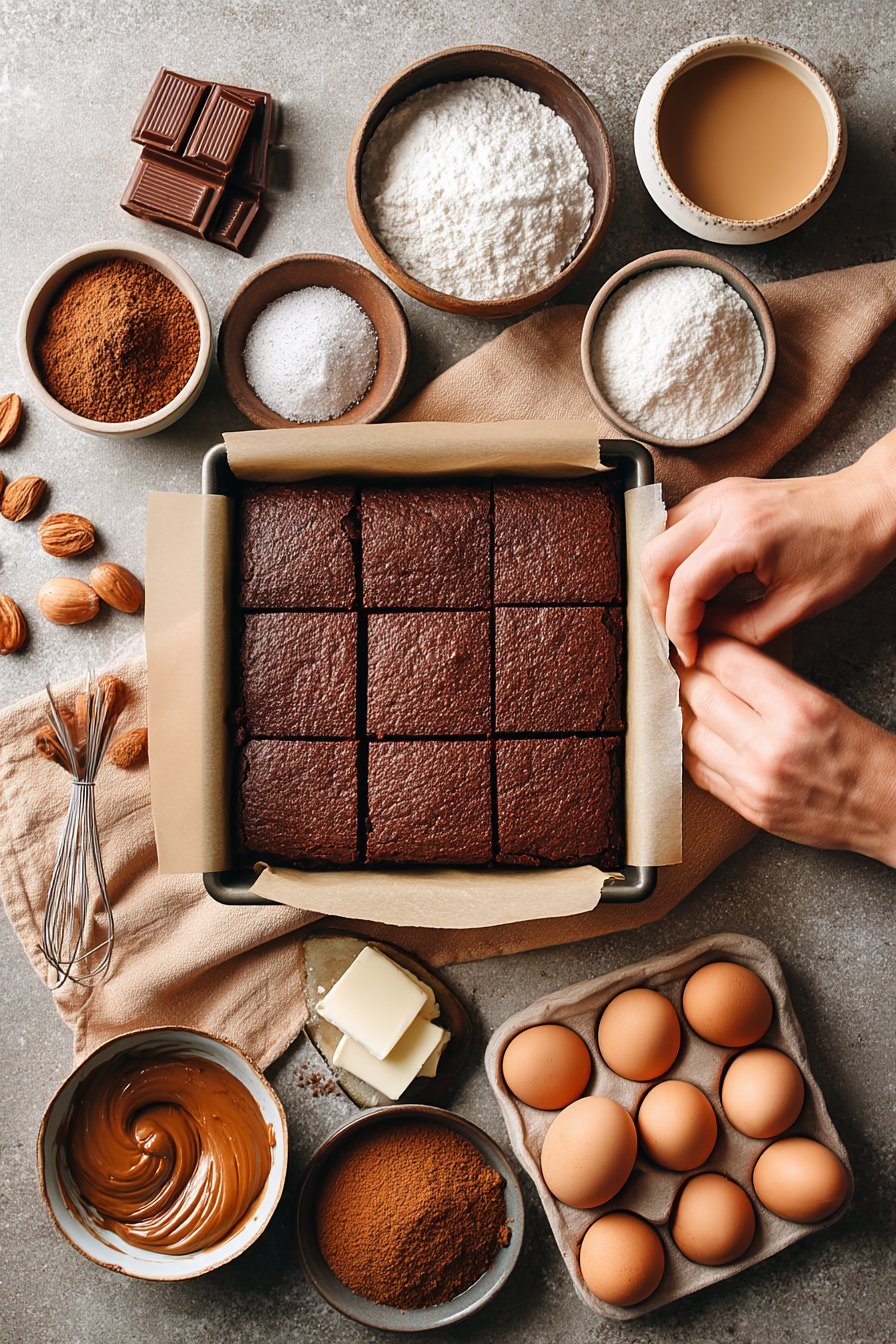
To make these Biscoff Cookie Butter Brownies, you’ll start by building that dreamy, gooey center. Line your 8×8 metal pan with a large sheet of parchment, press it into the corners, and crease along the bottom so you know exactly where the brownie edges will be. Lift the parchment out, then spread 3/4 cup Biscoff cookie butter in an even layer inside those creases—aim for a smooth, level sheet so it bakes evenly. Slide this into the freezer until it’s completely firm; it should feel solid when you tap it with your finger, like a chocolate bar, not soft or bendy. While that chills, re-line the pan with parchment, this time leaving overhang on all 4 sides so you can lift your brownies out in one clean pull after baking.
Instructions Process of Biscoff Cookie Butter Brownies
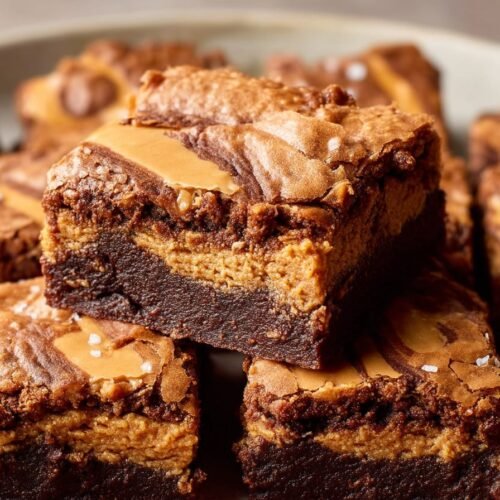
For the brownie batter, whisk together your brown sugar, granulated sugar, eggs, extra yolk, and vanilla bean paste until the mixture looks thick and slightly lightened in color; this gives you that shiny, crinkly top everyone loves. Melt the unsalted butter with 2/3 cup semi-sweet chocolate chips (microwave in 20–30 second bursts, or use a small saucepan on low), then whisk in the Dutch cocoa powder until glossy and smooth. Pour this warm chocolate mixture into your sugar-egg base and whisk just until combined—no need to beat the daylights out of it. Switch to a spatula and gently fold in the flour, espresso powder, and salt, then sprinkle in the remaining 1/4 cup chocolate chips so you get pockets of melty chocolate. The batter should be thick, pourable, and a bit sticky; if you’ve made brownies like my salted fudge brownies or marshmallow swirl brownies, you’re looking for that same rich, spoon-coating texture.
Make-Ahead & Storage
Biscoff Cookie Butter Brownies are a dream dessert to make ahead because the flavors deepen as they rest. If you want to prep in advance, you can fully bake the brownies, let them cool completely in the pan, then cover the pan tightly with foil or transfer slices to an airtight container. They keep at room temperature for 2–3 days, and the texture stays wonderfully fudgy. For longer storage, refrigerate them in a well-sealed container for up to 5 days; the brownie base will firm up slightly, but the cookie butter layer stays lush and gooey. I like to pull chilled brownies out of the fridge about 20 minutes before serving so the chocolate and Biscoff flavors really bloom.
These Biscoff Cookie Butter Brownies also freeze beautifully, which makes them perfect for future cravings or last-minute guests. Once baked and cooled, cut them into squares, then wrap each piece in plastic wrap and place in a freezer bag or airtight container; freeze for up to 2 months. To serve, thaw individual brownies at room temperature for 30–45 minutes, or warm in the microwave for about 10–15 seconds for that just-baked softness. If you’ve gone heavy on extra Biscoff spread or cookie chunks on top, set frozen brownies on a plate, not a wire rack, so nothing breaks off while they soften. Whether you stash them in the fridge or freezer, label the container (future you will thank you when you’re choosing between these and your other brownie favorites).
Best Ingredients & Party Variations
For the best Biscoff Cookie Butter Brownies, start with real Lotus Biscoff cookie butter, not a generic spread. It has that deep caramelized spice that makes the middle layer taste like a melted cookie. Use Dutch-process cocoa and good-quality semi-sweet chocolate chips so the brownie base stays rich and fudgy instead of dry or cakey. Light or dark brown sugar both work, but dark brown will give you a deeper butterscotch flavor that plays nicely with the cookie butter. And don’t skip the espresso powder—you won’t taste coffee, but it quietly boosts the chocolate so the brownies don’t get lost under all that spice.
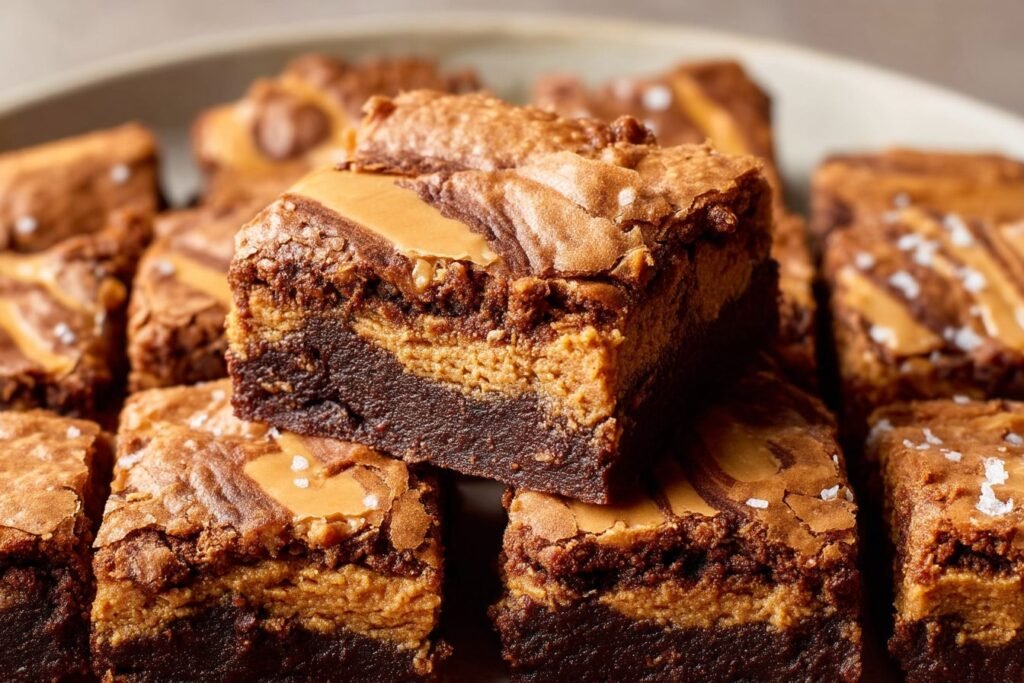
For parties, you can easily turn these Biscoff Cookie Butter Brownies into a whole dessert event. Cut them into bite-size squares for a dessert board and tuck in extra Biscoff cookies, chocolate-covered pretzels, and a small bowl of warmed cookie butter for dipping. For birthdays, swirl a couple spoonfuls of warmed cookie butter on top of the batter, then add Biscoff cookie chunks and rainbow sprinkles before baking for an easy but impressive twist. You can even bake the batter in a mini muffin pan for Biscoff brownie bites—just shorten the bake time and watch for set edges and a slightly soft center. If you love over-the-top treats, serve warm squares with vanilla ice cream, a drizzle of cookie butter, and crushed Biscoff cookies on top; it’s like a sundae and brownie had a very delicious baby.

Serving of Biscoff Cookie Butter Brownies
Conclusion
There’s something quietly magical about pulling a warm pan of brownies from the oven and calling everyone to the kitchen. These Biscoff Cookie Butter Brownies aren’t just another dessert; they’re the kind of treat that makes people linger a little longer at the table, go back for “just one more sliver,” and share the kind of conversations that only seem to happen when there’s chocolate involved.
I hope this recipe finds its way into your cozy nights in, last-minute potlucks, and those “I just need something sweet” moments. Don’t worry if a swirl isn’t perfect or a corner piece sticks to the pan—those little imperfections are exactly what make homemade baking feel so special and so loved.
If your oven is calling your name now, take this as your sign: preheat it, grab that jar of Biscoff, and give these brownies a try. And if you do bake them, I’d love for you to share your pan, your swirls, and your stories.
For more delicious recipes like this, follow us on social media!
What kind of pan is best for these Biscoff Cookie Butter Brownies?
A metal 8×8-inch pan works best because it conducts heat evenly and gives you those chewy edges and fudgy centers. Glass or ceramic pans run hotter and slower at the same time, which can cause overbaked edges and underbaked centers. If you only have glass, reduce the oven temperature by about 25°F and start checking a few minutes earlier. Always line the pan with parchment that hangs over the sides so you can lift the brownies out cleanly. This also helps protect that cookie butter layer from sticking or tearing.
How should I store and reheat Biscoff Cookie Butter Brownies?
Once completely cool, store the brownies in an airtight container at room temperature for 3–4 days. If your kitchen runs warm, you can refrigerate them to keep the cookie butter layer firm and the flavors fresh for up to a week. For longer storage, freeze individual squares tightly wrapped, then place them in a freezer bag for up to 2 months. To enjoy, let them come to room temperature or warm them in the microwave for 10–15 seconds until the center turns a little softer and gooier. Just avoid microwaving too long or the cookie butter can get oily.
Recipe
Oven-Baked Biscoff Cookie Butter Brownies
Ingredients
Ingredients
- 3/4 cup Biscoff cookie butter plus 2 tablespoons for drizzling
- 1/2 cup light or dark brown sugar packed
- 1/2 cup granulated sugar
- 2 large eggs at room temperature
- 1 large egg yolk at room temperature
- 1 tablespoon vanilla bean paste
- 10 tablespoons unsalted butter
- 2/3 cup semi-sweet chocolate chips plus 1/4 cup for folding in
- 1/4 cup unsweetened Dutch-process cocoa powder
- 2/3 cup all-purpose flour
- 1 tablespoon all-purpose flour
- 1 teaspoon espresso powder
- 1/2 teaspoon fine sea salt
- 4 Biscoff cookies
Instructions
- Press a large sheet of parchment paper into an 8x8-inch metal baking pan, creasing along the bottom edges to mark the size of the pan, then lift the parchment out.
- Spread 3/4 cup of cookie butter in an even layer inside the creased outline on the parchment, then place the parchment with cookie butter on a flat surface in the freezer until completely firm.
- Line the 8x8-inch metal baking pan again with a clean sheet of parchment paper, leaving overhang on all 4 sides for easy removal, and preheat the oven to 350°F.
- In a medium bowl, whisk together the brown sugar, granulated sugar, eggs, egg yolk, and vanilla bean paste until thick and well combined.
- In a separate heat-safe bowl, melt the butter and 2/3 cup chocolate chips together in the microwave in short bursts or over low heat on the stove, stirring until smooth, then whisk in the cocoa powder until glossy.
- Whisk the warm chocolate mixture into the sugar and egg mixture just until smoothly combined.
- Using a spatula, fold in the 2/3 cup plus 1 tablespoon flour, espresso powder, and salt until no dry streaks remain, then gently fold in the remaining 1/4 cup chocolate chips.
- Pour about half of the brownie batter into the prepared pan and spread it into an even layer from edge to edge.
- Remove the frozen cookie butter slab from the freezer, peel it away from the parchment, and place it on top of the batter, aligning it with the edges of the pan.
- Pour the remaining brownie batter over the cookie butter layer and spread it gently to cover the cookie butter completely and reach the edges of the pan.
- Break the Biscoff cookies into medium pieces and press them lightly into the top of the batter.
- Warm 2 tablespoons of cookie butter in the microwave for 15 to 20 seconds until runny, then drizzle it evenly over the top of the batter and cookie pieces.
- Bake the brownies at 350°F for 30 to 40 minutes, or until a toothpick inserted in the center comes out with a few moist crumbs but no wet batter.
- Place the pan on a wire rack and let the brownies cool completely in the pan before lifting them out using the parchment and slicing into 16 squares.
Notes
- Make sure the cookie butter slab is completely firm before layering, or it will blend into the batter instead of forming a distinct layer.
- For clean slices, chill the cooled brownies in the refrigerator for 30 to 60 minutes before cutting.
- Store leftovers in an airtight container at room temperature for up to 3 days or freeze for up to 1 month.