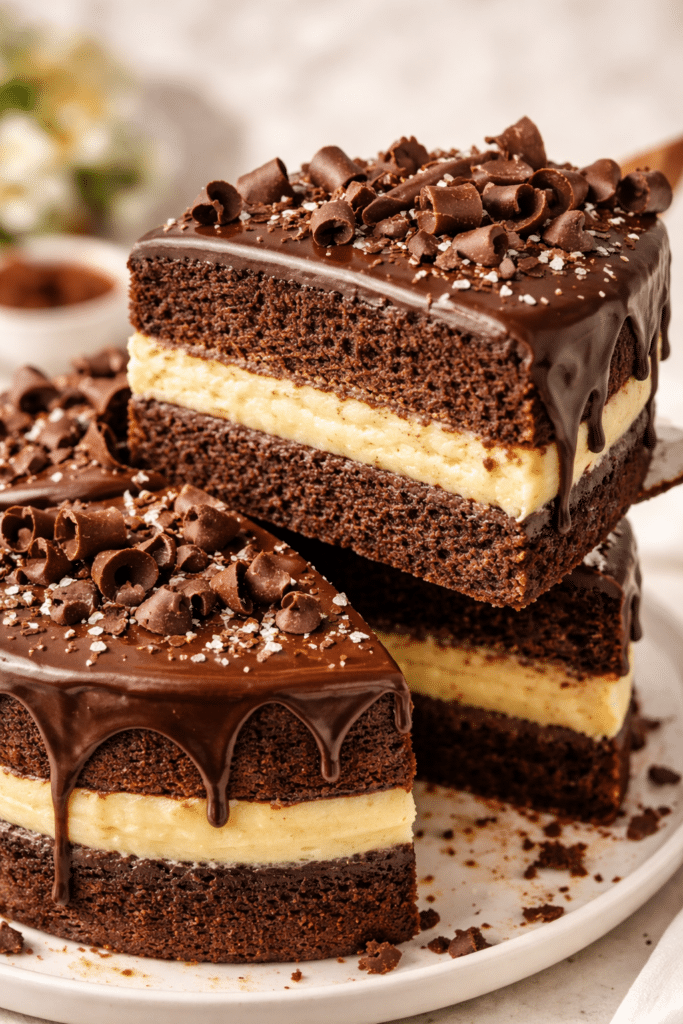
The Practical Why Behind It
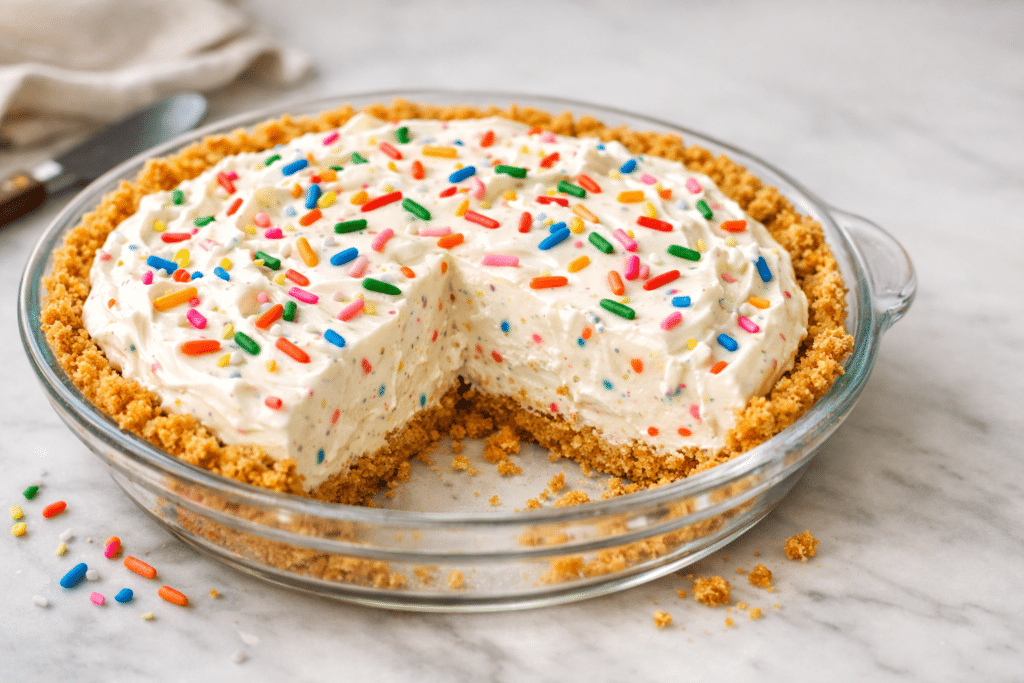
This Birthday Cake Pie looks whimsical, but there is real kitchen logic behind every part. The graham cracker crust is not just easy, it saves you from blind baking a traditional pastry shell and it gives you a sturdy, toasty base that stays crisp under a creamy filling. When you mix the crumbs until they feel like wet sand, they press together tightly and chill into a sliceable foundation that will not crumble the moment you cut into it. The granulated sugar in the crust helps everything caramelize just a touch, which gives you that bakery style flavor without fuss.
The cream cheese filling gives this Birthday Cake Pie its structure, which is why you want it fully softened before you start. Cold cream cheese clumps, and lumpy filling never feels like a celebration. Beating in the powdered sugar creates a thick, smooth base so the whipped cream can lighten it without turning runny. Using cold heavy cream and whipping to stiff peaks matters, because those tiny air bubbles become your no bake version of a chiffon layer. If you stop at soft peaks, the pie will still taste great, but the slices will lean a bit on the plate.
Folding in the rainbow sprinkles at the end keeps their colors from bleeding and turning the filling gray, which is a very unbirthday mood. The long chill time is not optional, it is when the fat firms up, the crust sets, and the flavors meld into that classic bakery style bite you love. If you have ever made a no bake cheesecake or an icebox pie, you already know the rhythm here, which makes this recipe perfect for stress free entertaining. You can assemble the entire pie the night before, then simply crown it with extra sprinkles and slice, so you can actually enjoy the party instead of babysitting a cake in the oven.

Ingredients Image of Birthday Cake Pie
Step-by-Step Method
Start by making your graham cracker crust so your Birthday Cake Pie has time to chill. Stir the crumbs, sugar, and melted butter together until everything looks like damp sand and holds when you pinch it. Firmly press the mixture into a 9 inch pie dish, working it up the sides with the bottom of a measuring cup to keep it even and tight. If the crust feels loose, keep pressing until it packs and looks smooth, not crumbly. Set it aside on the counter while you prepare the filling, or pop it into the fridge for a quick head start on chilling.
For the filling, beat the softened cream cheese until completely smooth, with no tiny lumps hiding along the sides of the bowl. Slowly mix in the powdered sugar and vanilla bean paste until the mixture turns velvety and glossy. In a separate chilled bowl, whip the cold heavy cream to stiff peaks, which should stand straight up when you lift the whisk. Gently fold the whipped cream into the cream cheese mixture so you do not knock out all the air, then fold in the rainbow sprinkles just until they are streaked throughout. Spoon this fluffy filling into your crust, smooth the top, then cover the pie and refrigerate at least 4 hours, until the center feels firm and cool to the touch. Right before serving, shower the top with extra sprinkles, slice with a sharp knife cleaned between cuts, and serve your Birthday Cake Pie icy cold for those perfect bakery style slices.
Make-Ahead and Storage Notes
Birthday Cake Pie is a dream dessert for planners, because it actually tastes better after a long chill. You can assemble the crust and filling completely, then cover the pie snugly with plastic wrap and refrigerate it for up to 2 days before serving. For the neatest slices, let it chill at least the full 4 hours, but overnight gives you that classic bakery style firmness while keeping the texture creamy. Add the extra rainbow sprinkles right before serving so they stay bright and do not bleed color into the whipped cream filling. If you like to stay organized for parties, you can also pre crush graham crackers and portion them in a zip top bag several days ahead.
For short term storage, keep any leftover Birthday Cake Pie covered in the fridge, where it will stay fresh for about 3 to 4 days. The crust will slowly soften as it sits, but it still tastes delicious and has that nostalgic, almost icebox pie feel. To store cleanly sliced pieces, place them in a single layer in an airtight container, or line a container with parchment and stack slices with a little parchment between layers. You can serve chilled straight from the fridge, or let slices sit at room temperature for about 10 minutes if you prefer a softer, mousse like bite. I do not recommend freezing this pie, because the whipped cream and cream cheese filling can turn grainy as it thaws, and the sprinkles can bleed and lose their fun confetti look.
Variations and How to Serve It

Serving Image of Birthday Cake Pie
Birthday Cake Pie is wonderfully forgiving, so you can treat it like a dress up game for grown ups and kids. For a confetti cookie twist, press chopped soft sugar cookies right into the graham cracker crumbs before adding the butter, or swap in crushed vanilla sandwich cookies for a more classic bakery flavor. If you love chocolate, fold 2 to 3 tablespoons of mini chocolate chips into the filling along with the sprinkles, or drizzle the chilled pie with a thin lace of chocolate sauce just before serving. For a fun flavor swap, trade the vanilla bean paste for almond extract or cake batter extract, then top with white chocolate curls instead of extra sprinkles. You can even turn this into mini Birthday Cake Pie cups by pressing a spoonful of crust into small jars or muffin liners, filling, then chilling as usual for party ready single servings.
Serving this Birthday Cake Pie is the easy part, but a few small details make it feel bakery worthy. Chill it for the full time so the slices cut cleanly, then use a hot sharp knife, wiped between cuts, for those pretty, photo friendly wedges. I like to add whipped cream swirls around the edge just before serving, sprinkle on a fresh shower of rainbow sprinkles, and tuck in a few birthday candles, even if it is not technically anyone’s birthday. Pair each slice with a cold glass of milk for kids, or a cup of coffee for the adults who always hover near the dessert table. If you love party style sweets, you can also serve small slivers of this alongside funfetti cupcakes or a classic no bake cheesecake for a full nostalgic birthday dessert spread.
Conclusion
Every time I pull this Birthday Cake Pie out of the oven, I feel that little flutter of kid like excitement all over again. There is something about the crackle of the sprinkles, the buttery crust, and that soft, colorful filling that just turns dessert into a celebration, even on an ordinary Tuesday. This is the kind of recipe that makes people wander into the kitchen, peek over your shoulder, and ask, “Is it ready yet?”
I hope you use this pie as an excuse to gather your favorite people around the table and make a small moment feel big. Bake it for birthdays, sure, but also for sleepovers, first days of school, or just because everyone made it through the week. Let someone help whisk, let someone else be in charge of the sprinkles, and do not stress over perfection. The memories you make are the real dessert.
If your oven is calling your name, take this as your sign to try the recipe, slice it generously, and share it with someone you love.
For more delicious recipes like this, follow us on Facebook and Pinterest!
Recipe

Birthday Cake Pie
Ingredients
Ingredients
- 1 1/2 cups graham cracker crumbs
- 1/4 cup granulated sugar
- 1/2 cup unsalted butter melted
- 1 8 oz package cream cheese, softened
- 1 cup powdered sugar
- 1 teaspoon vanilla bean paste
- 1 cup heavy whipping cream cold
- 1/2 cup rainbow sprinkles plus extra for topping
Instructions
- In a medium bowl, combine the graham cracker crumbs, granulated sugar, and melted butter and stir until the crumbs are evenly coated and the mixture resembles wet sand.
- Press the crumb mixture firmly into the bottom and up the sides of a 9 inch pie dish to form an even crust, then set aside.
- In a large mixing bowl, beat the softened cream cheese with an electric mixer until completely smooth and creamy.
- Gradually add the powdered sugar and vanilla bean paste to the cream cheese, mixing until the filling base is thick, smooth, and well combined.
- In a separate bowl, whip the cold heavy whipping cream with an electric mixer until stiff peaks form.
- Gently fold the whipped cream into the cream cheese mixture until fully incorporated and fluffy.
- Fold in the 1/2 cup rainbow sprinkles just until they are evenly distributed throughout the filling.
- Spoon the filling into the prepared graham cracker crust and smooth the top with a spatula.
- Cover the pie tightly with plastic wrap and refrigerate for at least 4 hours, or until the filling is fully set and chilled.
- Before serving, top the pie with additional rainbow sprinkles, slice with a sharp knife, and serve chilled.
Notes
- Chill the mixing bowl and beaters before whipping the cream for faster, more stable stiff peaks.
- Press the crust firmly with the bottom of a measuring cup to help it hold together in clean slices.
- The pie can be made up to 2 days ahead and stored covered in the refrigerator until serving.