
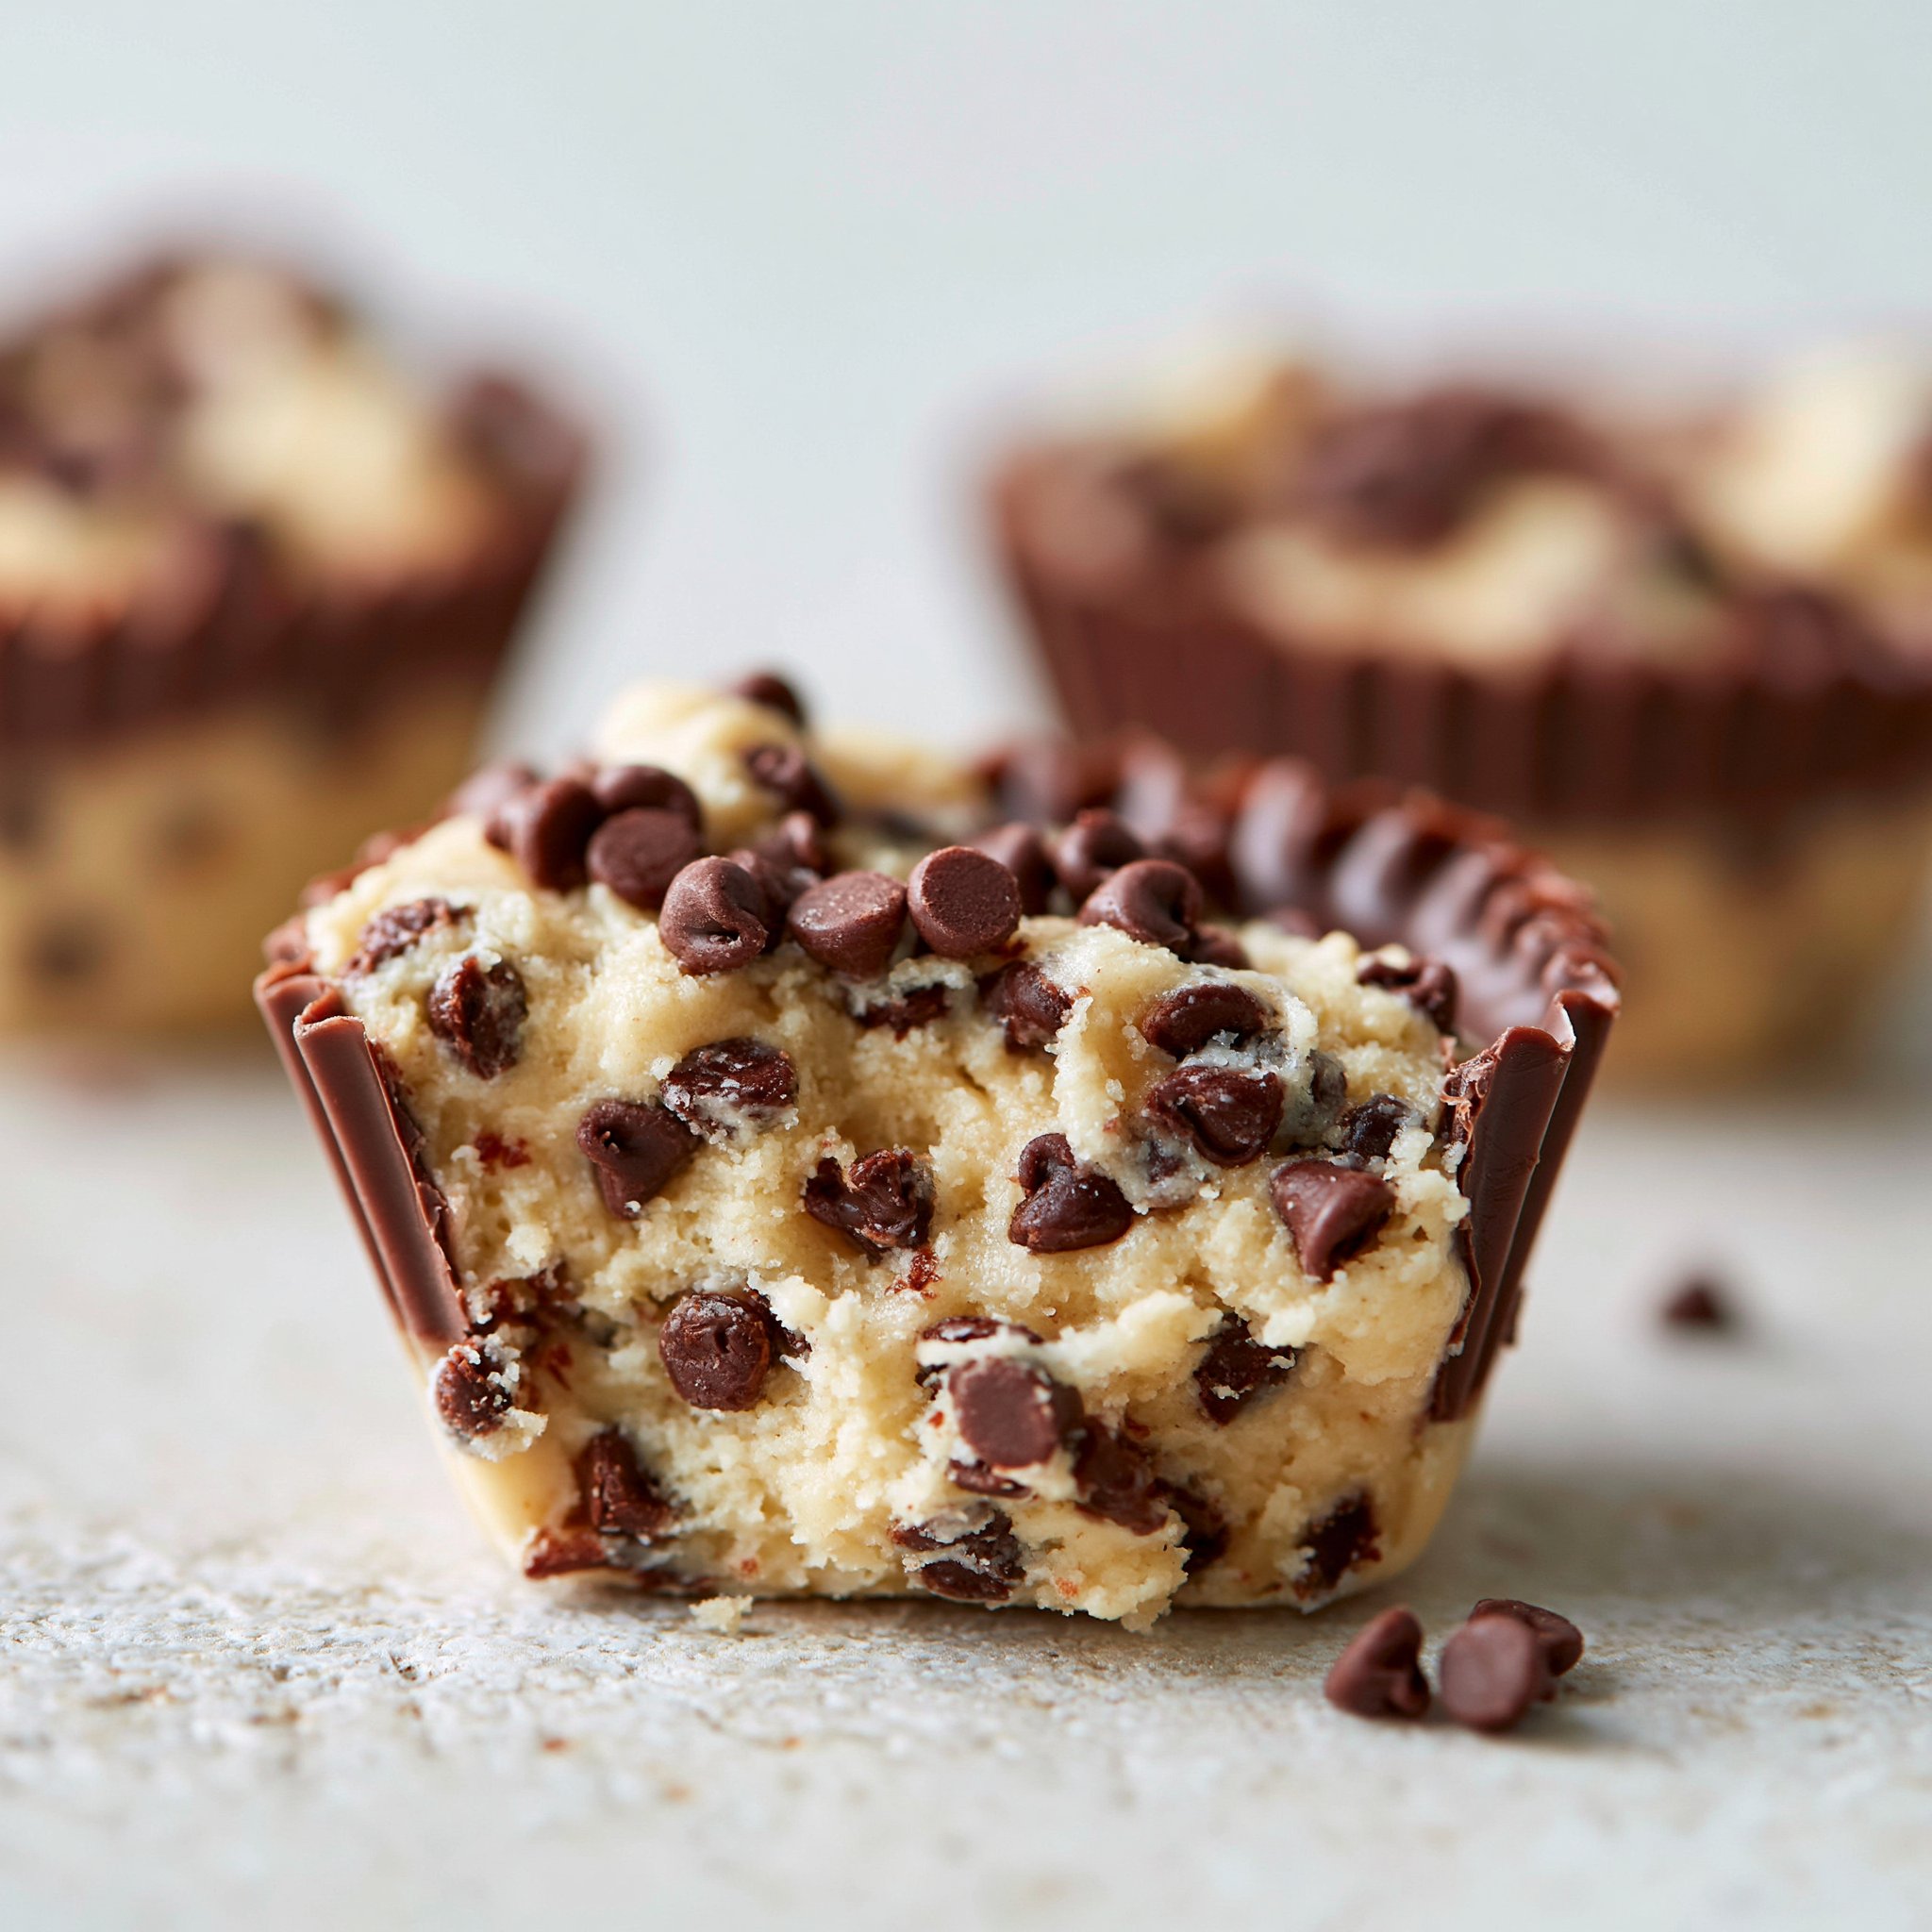
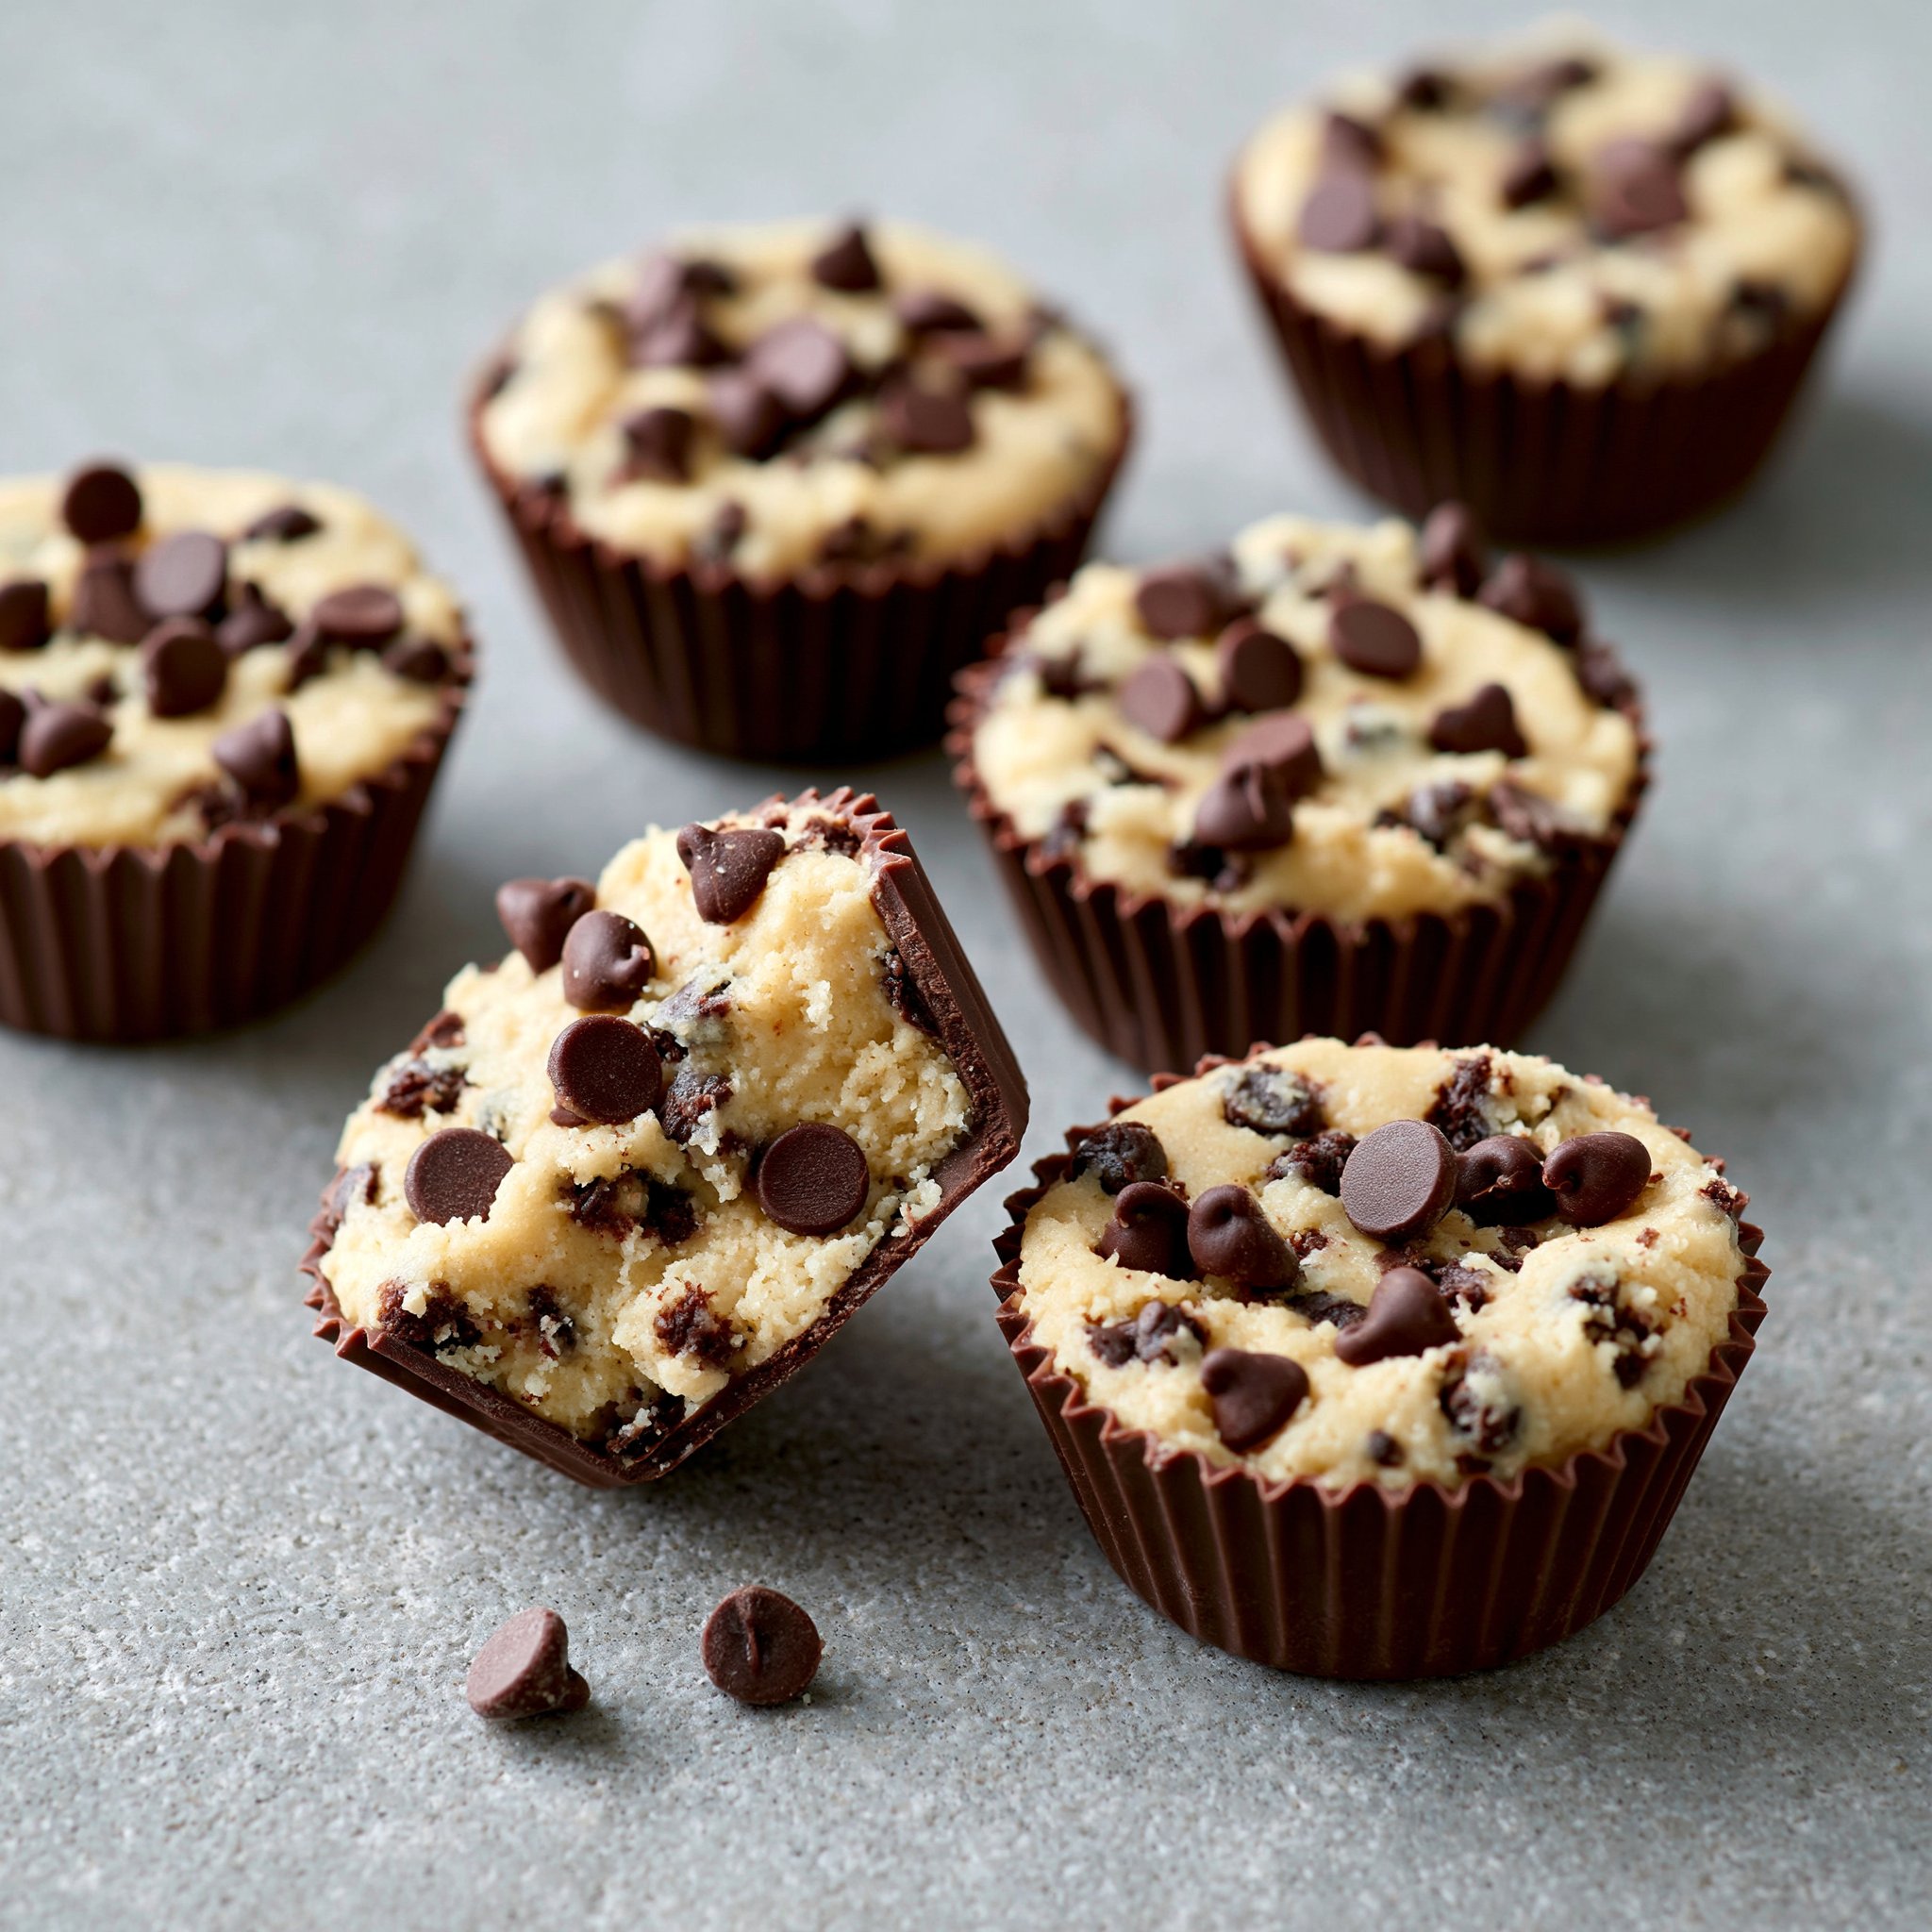
The fastest way to get “cookie dough + chocolate” satisfaction without turning on the oven is to build it in layers—and these little cups do exactly that. You press a buttery chocolate-cookie crumb crust into cups, pour on a glossy chocolate layer, then finish with a scoop of brown-sugar cookie dough that sets up into that familiar, soft bite.
They’re tidy enough for sharing, but still feel a little decadent: crunchy-crumbly base, a fudgy chocolate middle, and a doughy top dotted with mini chips. If you’re in a cookie dough mood but don’t want to bake (or you’re already planning a cookie-themed spread like my chocolate chip cookie dough protein shake), this is the quickest, most reliable route.
Why You’ll Love This Recipe
- Three distinct textures in one bite: crisp chocolate crumb crust, smooth chocolate “ganache-like” layer, and soft cookie dough on top.
- No-bake from start to finish: the fridge does the work—no oven, no water bath, no waiting for cookies to cool.
- Brown sugar + vanilla cookie dough flavor: the dough tastes like the real thing, with a warm caramel note from the brown sugar and a clear vanilla finish.
- Mini chocolate chips matter here: they distribute evenly through the dough so every bite has chocolate without making the top layer hard to cut through.
- Great make-ahead treat: they get better after a longer chill as the chocolate layer firms and the crust tightens up.
- Easy to portion and serve: individual cups are naturally neat—no slicing required, like the handheld vibe of cookie dough stuffed dates, just richer and creamier.
The Story Behind This Recipe
I tested these when I needed a dessert that looked “finished” (layers always do) but didn’t require baking space, timers, or cooling racks—basically the opposite of a cookie marathon like my brown butter chocolate chip cookies. Press, melt, beat, chill—done—and the payoff is that bakery-case look with minimal effort.
What It Tastes Like
These lean rich and chocolate-forward, but the sweetness is balanced by the deep cocoa crumb crust and the molasses-y brown sugar in the dough. You’ll smell vanilla as you mix the dough, then the chocolate layer hits first when you bite—smooth and fudgy—followed by that soft, slightly gritty-in-a-good-way cookie dough texture with mini chips popping throughout. Chilled, the layers hold cleanly and taste extra dense and satisfying.
Ingredients You’ll Need
This recipe is built on three simple layers: a chocolate cookie crumb crust held together with melted butter, a quick chocolate-and-cream layer that firms up in the fridge, and an edible cookie dough made safe and structured with heat-treated flour. Use softened butter (not melted) for the dough so it whips with the brown sugar into something light enough to scoop and spread.
- 1 cup chocolate cookie crumbs
- 1/4 cup melted butter
- 1 cup chocolate chips
- 1/2 cup heavy cream
- 1/2 cup brown sugar
- 1 cup all-purpose flour (heat-treated)
- 1/2 cup butter (softened)
- 2 teaspoons vanilla extract
- 1/2 cup mini chocolate chips
How to Make Chocolate Chip Cookie Dough Cups
- Make the crust. In a bowl, stir together the chocolate cookie crumbs and melted butter until the crumbs look evenly moistened (like wet sand). Divide and press firmly into the bottom of your cups to form a compact layer. You should be able to tap the cup and have the crust stay put—not crumble.
- Melt the chocolate layer. Combine the chocolate chips and heavy cream and melt together until completely smooth and glossy. (Stop as soon as it’s smooth; overheating can make it look thick or grainy.)
- Layer the chocolate. Spoon or pour the melted chocolate mixture over the crust in each cup. Give each cup a gentle tap on the counter so the chocolate settles into an even layer and reaches the edges.
- Mix the cookie dough. In a separate bowl, beat the softened butter and brown sugar until it looks lighter and fluffy. Add the heat-treated flour gradually, then mix in the vanilla extract. The dough should be soft and scoopable, not runny. Fold in the mini chocolate chips until evenly distributed.
- Top and chill. Spoon the cookie dough over the chocolate layer and lightly press it into place so it adheres. Refrigerate until the cups feel set and hold their shape when you pick one up (the chocolate layer should be firm, not sloshy).
- Serve cold. Enjoy straight from the fridge for the cleanest layers and the best contrast between the firm chocolate and soft cookie dough.
Tips for Best Results
- Press the crust firmly. A tight pack is what keeps the crumb base from crumbling when you bite—use your fingertips or the back of a spoon and really compress it.
- Keep the chocolate layer smooth. Melt gently and stir often; when it turns glossy with no visible chip shapes, stop. That sheen is your sign it’ll set up nicely in the fridge.
- Softened butter makes better dough. If the butter is too cold, the dough stays chunky; too warm, and it can turn greasy and harder to layer cleanly.
- Add flour gradually. Heat-treated flour still needs time to absorb; adding it slowly helps you avoid a dry, crumbly dough.
- Chill long enough for clean bites. If you cut in too soon, the chocolate layer can smear. Once chilled, the top stays soft while the center firms—exactly what you want.
- For picture-perfect layers: tap the cups after adding the chocolate, then again after topping with dough to settle everything into flat, even lines—handy if you’re also making showy cookies like my cherry chocolate chip cookies with mocha chips for the same table.
Variations and Substitutions
- Chocolate intensity: use a darker chocolate chip for a less-sweet, more cocoa-heavy middle layer (the texture stays the same; the flavor gets deeper).
- Chip size on top: stick with mini chocolate chips if you want a smooth, scoopable cookie dough layer; larger chips make the top bumpier and a bit harder to portion neatly.
- Serving format: if you’d rather do fewer, larger portions, this same layering method works in bigger cups—just allow extra chill time for the thicker chocolate layer to firm.
How to Serve It
Serve these straight from the fridge so the chocolate layer stays firm and the crust stays crisp. I like them as a plated two-bite dessert, but they also work well on a cookie tray alongside something baked like chocolate chip cheesecake cookies—the contrast of chilled and creamy vs. warm-spiced and baked is really nice.
How to Store It
Keep the cups covered in the refrigerator so the cookie dough doesn’t dry out and the chocolate layer doesn’t pick up fridge odors. They’re a great make-ahead dessert—assemble, chill until fully set, and serve cold when you’re ready. If you’re stacking or transporting, keep them well-chilled so the layers stay clean and don’t slide.
Final Thoughts
If you love the taste of cookie dough but want something a little more structured (and giftable) than eating it by the spoon, these cups hit the sweet spot: crisp chocolate base, fudgy center, and a soft, vanilla-brown-sugar top that feels like the best part of a cookie—no oven required.
Conclusion
If you want to compare cookie-dough-cup styles, I like looking at Half Baked Harvest’s take on chocolate chip cookie dough cups for presentation ideas, Bakerita’s version for a different dietary approach, and Completely Delicious’s cookie cup variation to see how changing the top layer style shifts the overall bite.
