
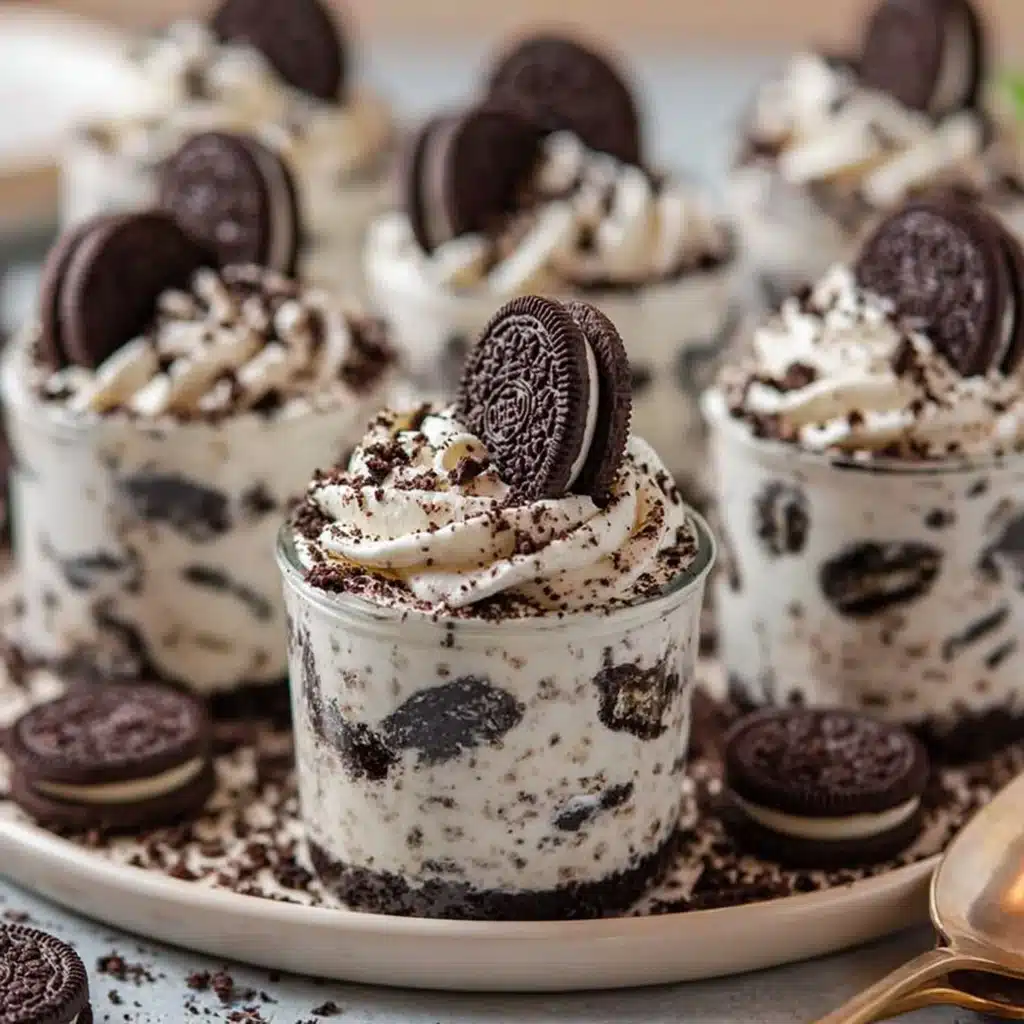
Some nights you want a dessert that feels a little “special occasion,” but you don’t want to turn on the oven or dirty every bowl you own. These Oreo no-bake cheesecake cups are my go-to for that exact mood: crushed Oreos on the bottom, a fluffy cream cheese filling folded with whipped topping, and plenty of cookie bits throughout.
What makes them worth making right away is the texture contrast—cool, creamy cheesecake against those chocolatey crumbs—and how tidy they look in individual dishes. If you like other no-bake cups (I’m thinking of my strawberry cheesecake cups), this is the cookies-and-cream version you’ll reach for when you want something richer and more dramatic.
Why You’ll Love This Recipe
- No oven, no fuss: just crush, whip, fold, and chill—done in about 15 minutes of hands-on time.
- Creamy-but-light filling: the cream cheese gives richness, while the whipped topping keeps it airy instead of dense.
- Real cookies-and-cream flavor: Oreos are in the base and folded into the filling, so every bite has chocolate cookie crunch.
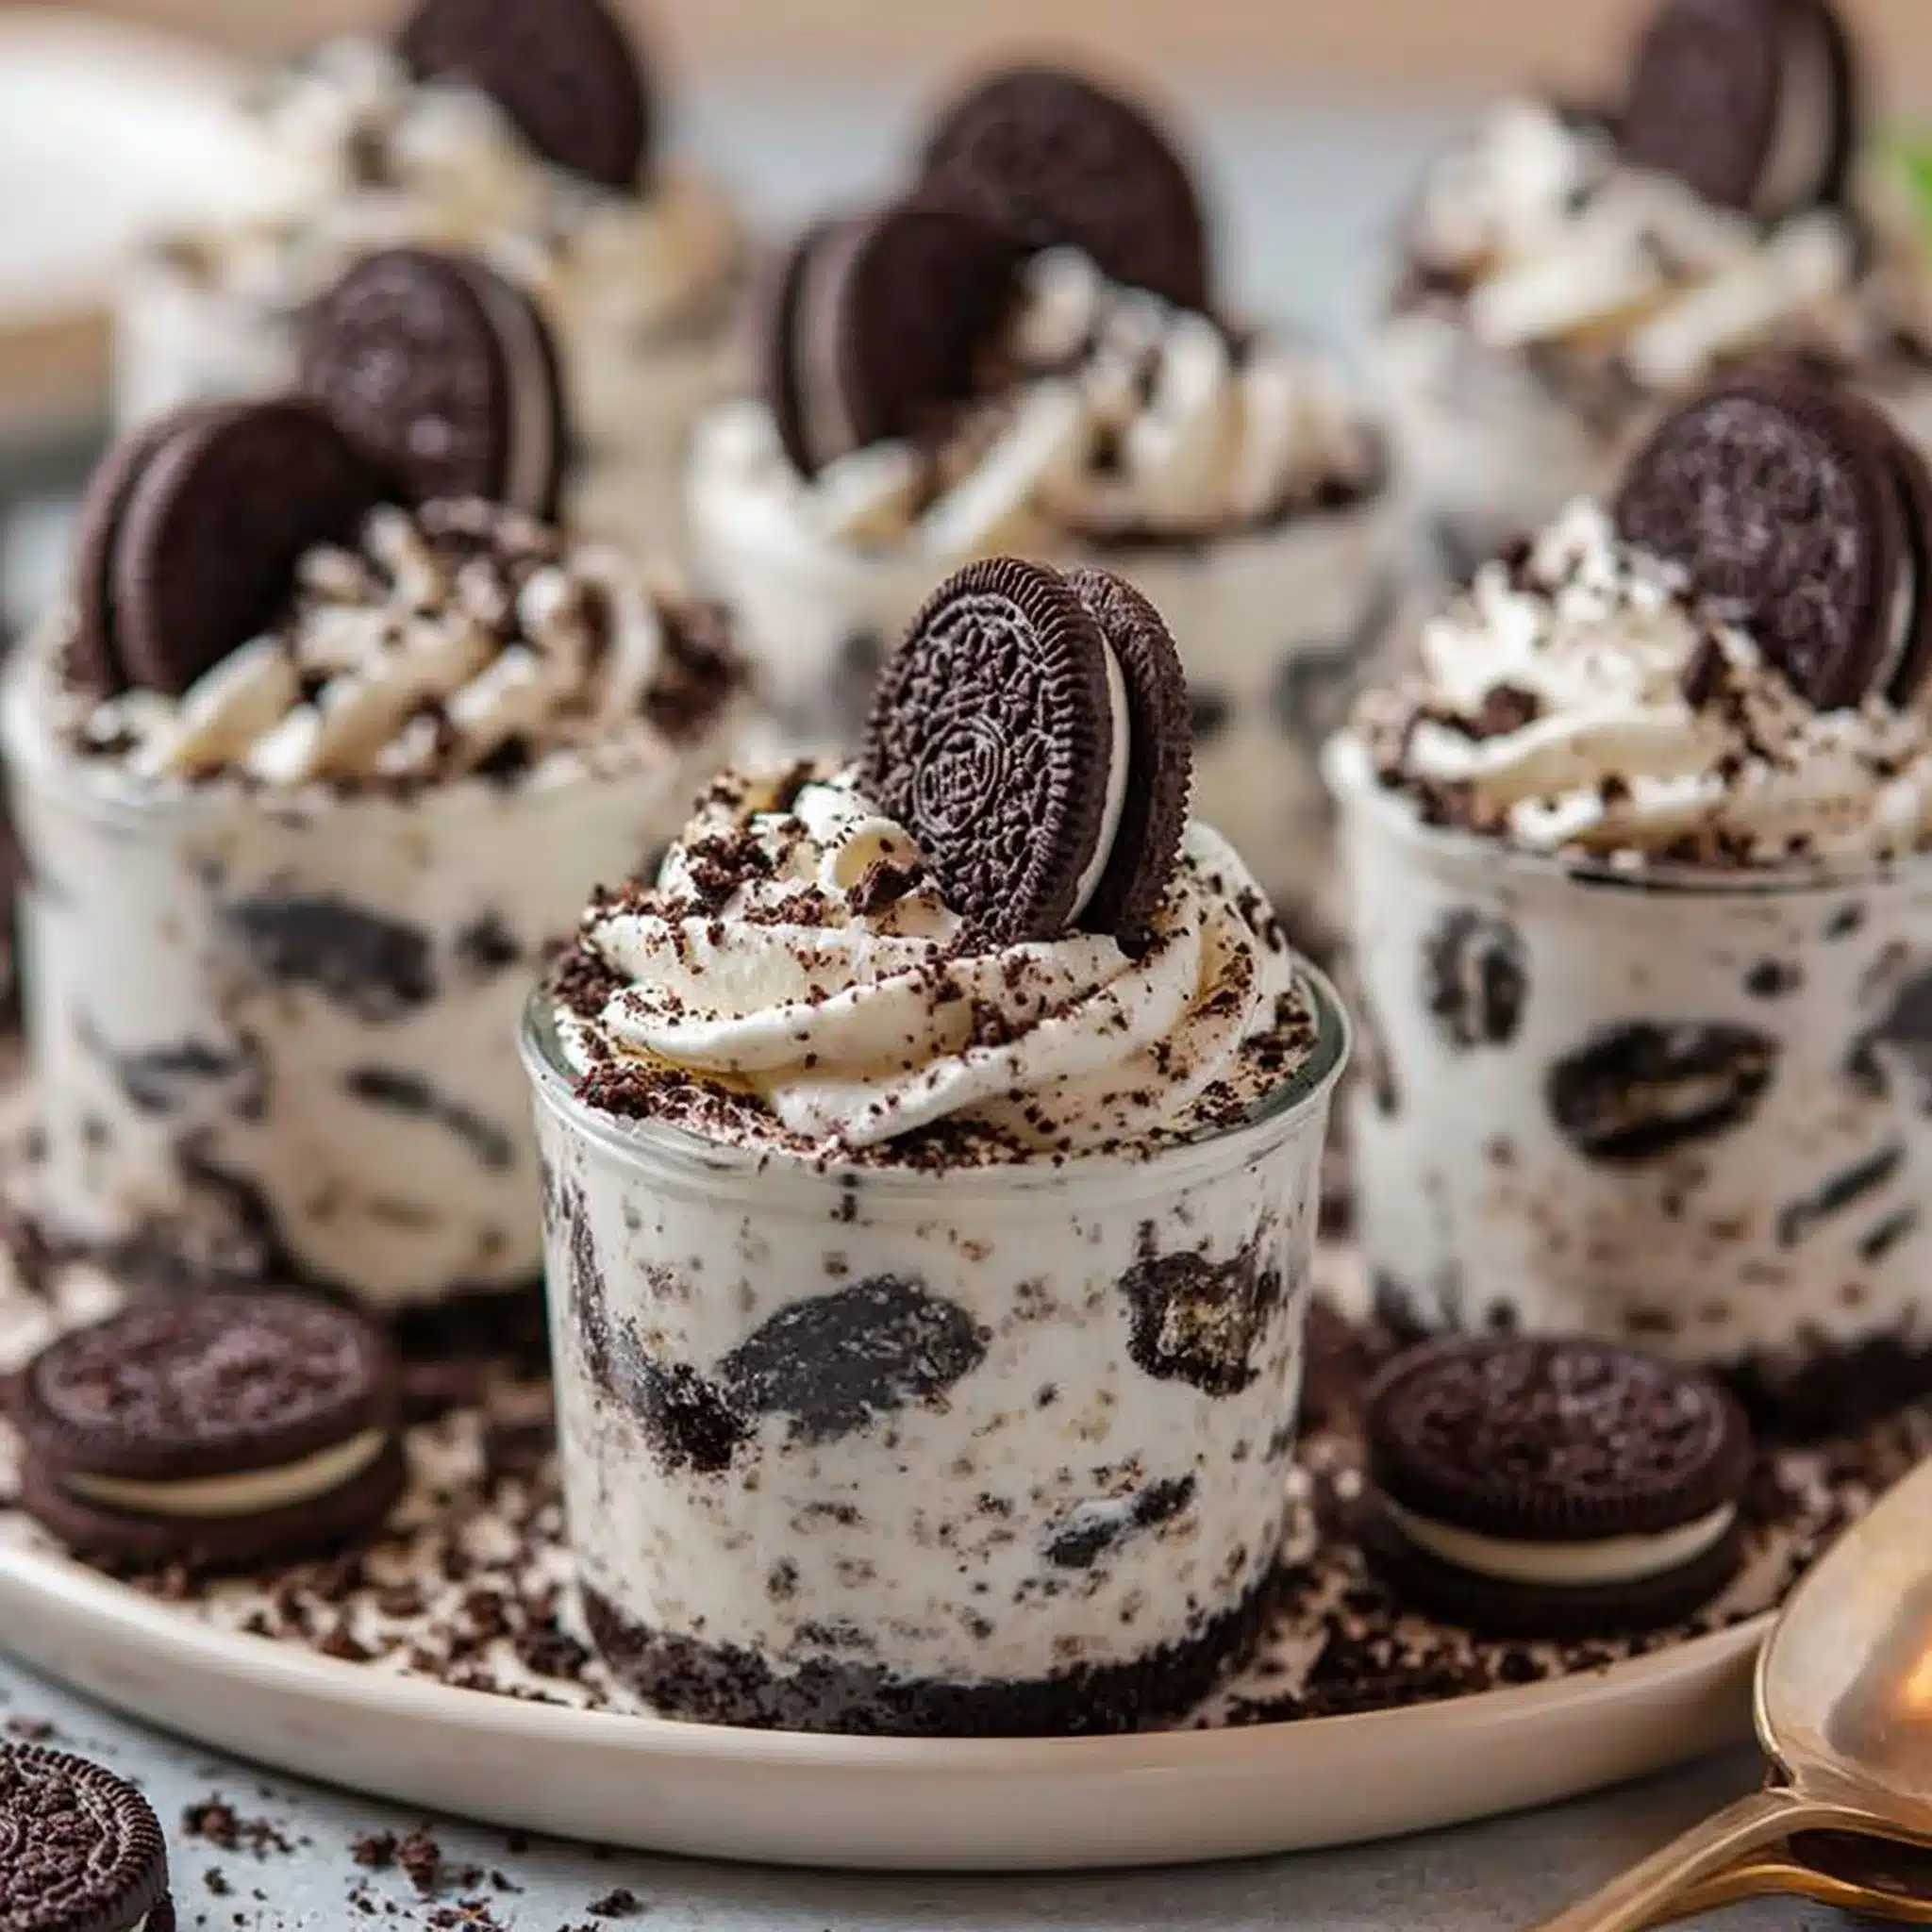
- Perfectly portioned: made for 6 small dessert dishes (aim for 3/4 cup to 1 cup), so serving is effortless.
- Make-ahead friendly: a quick 1-hour chill firms everything up so the cups hold their layers cleanly.
- Easy to dress up at the end: a final scatter of crushed Oreos and a little whipped cream makes them look bakery-neat.
The Story Behind This Recipe
I started making these cups when I needed a last-minute dessert that still looked intentional—something I could portion into little dishes, chill, and pull out right before serving without slicing or stressing (similar energy to my chocolate chip no-bake cheesecake, but with a more “cookies-and-cream” punch).
What It Tastes Like
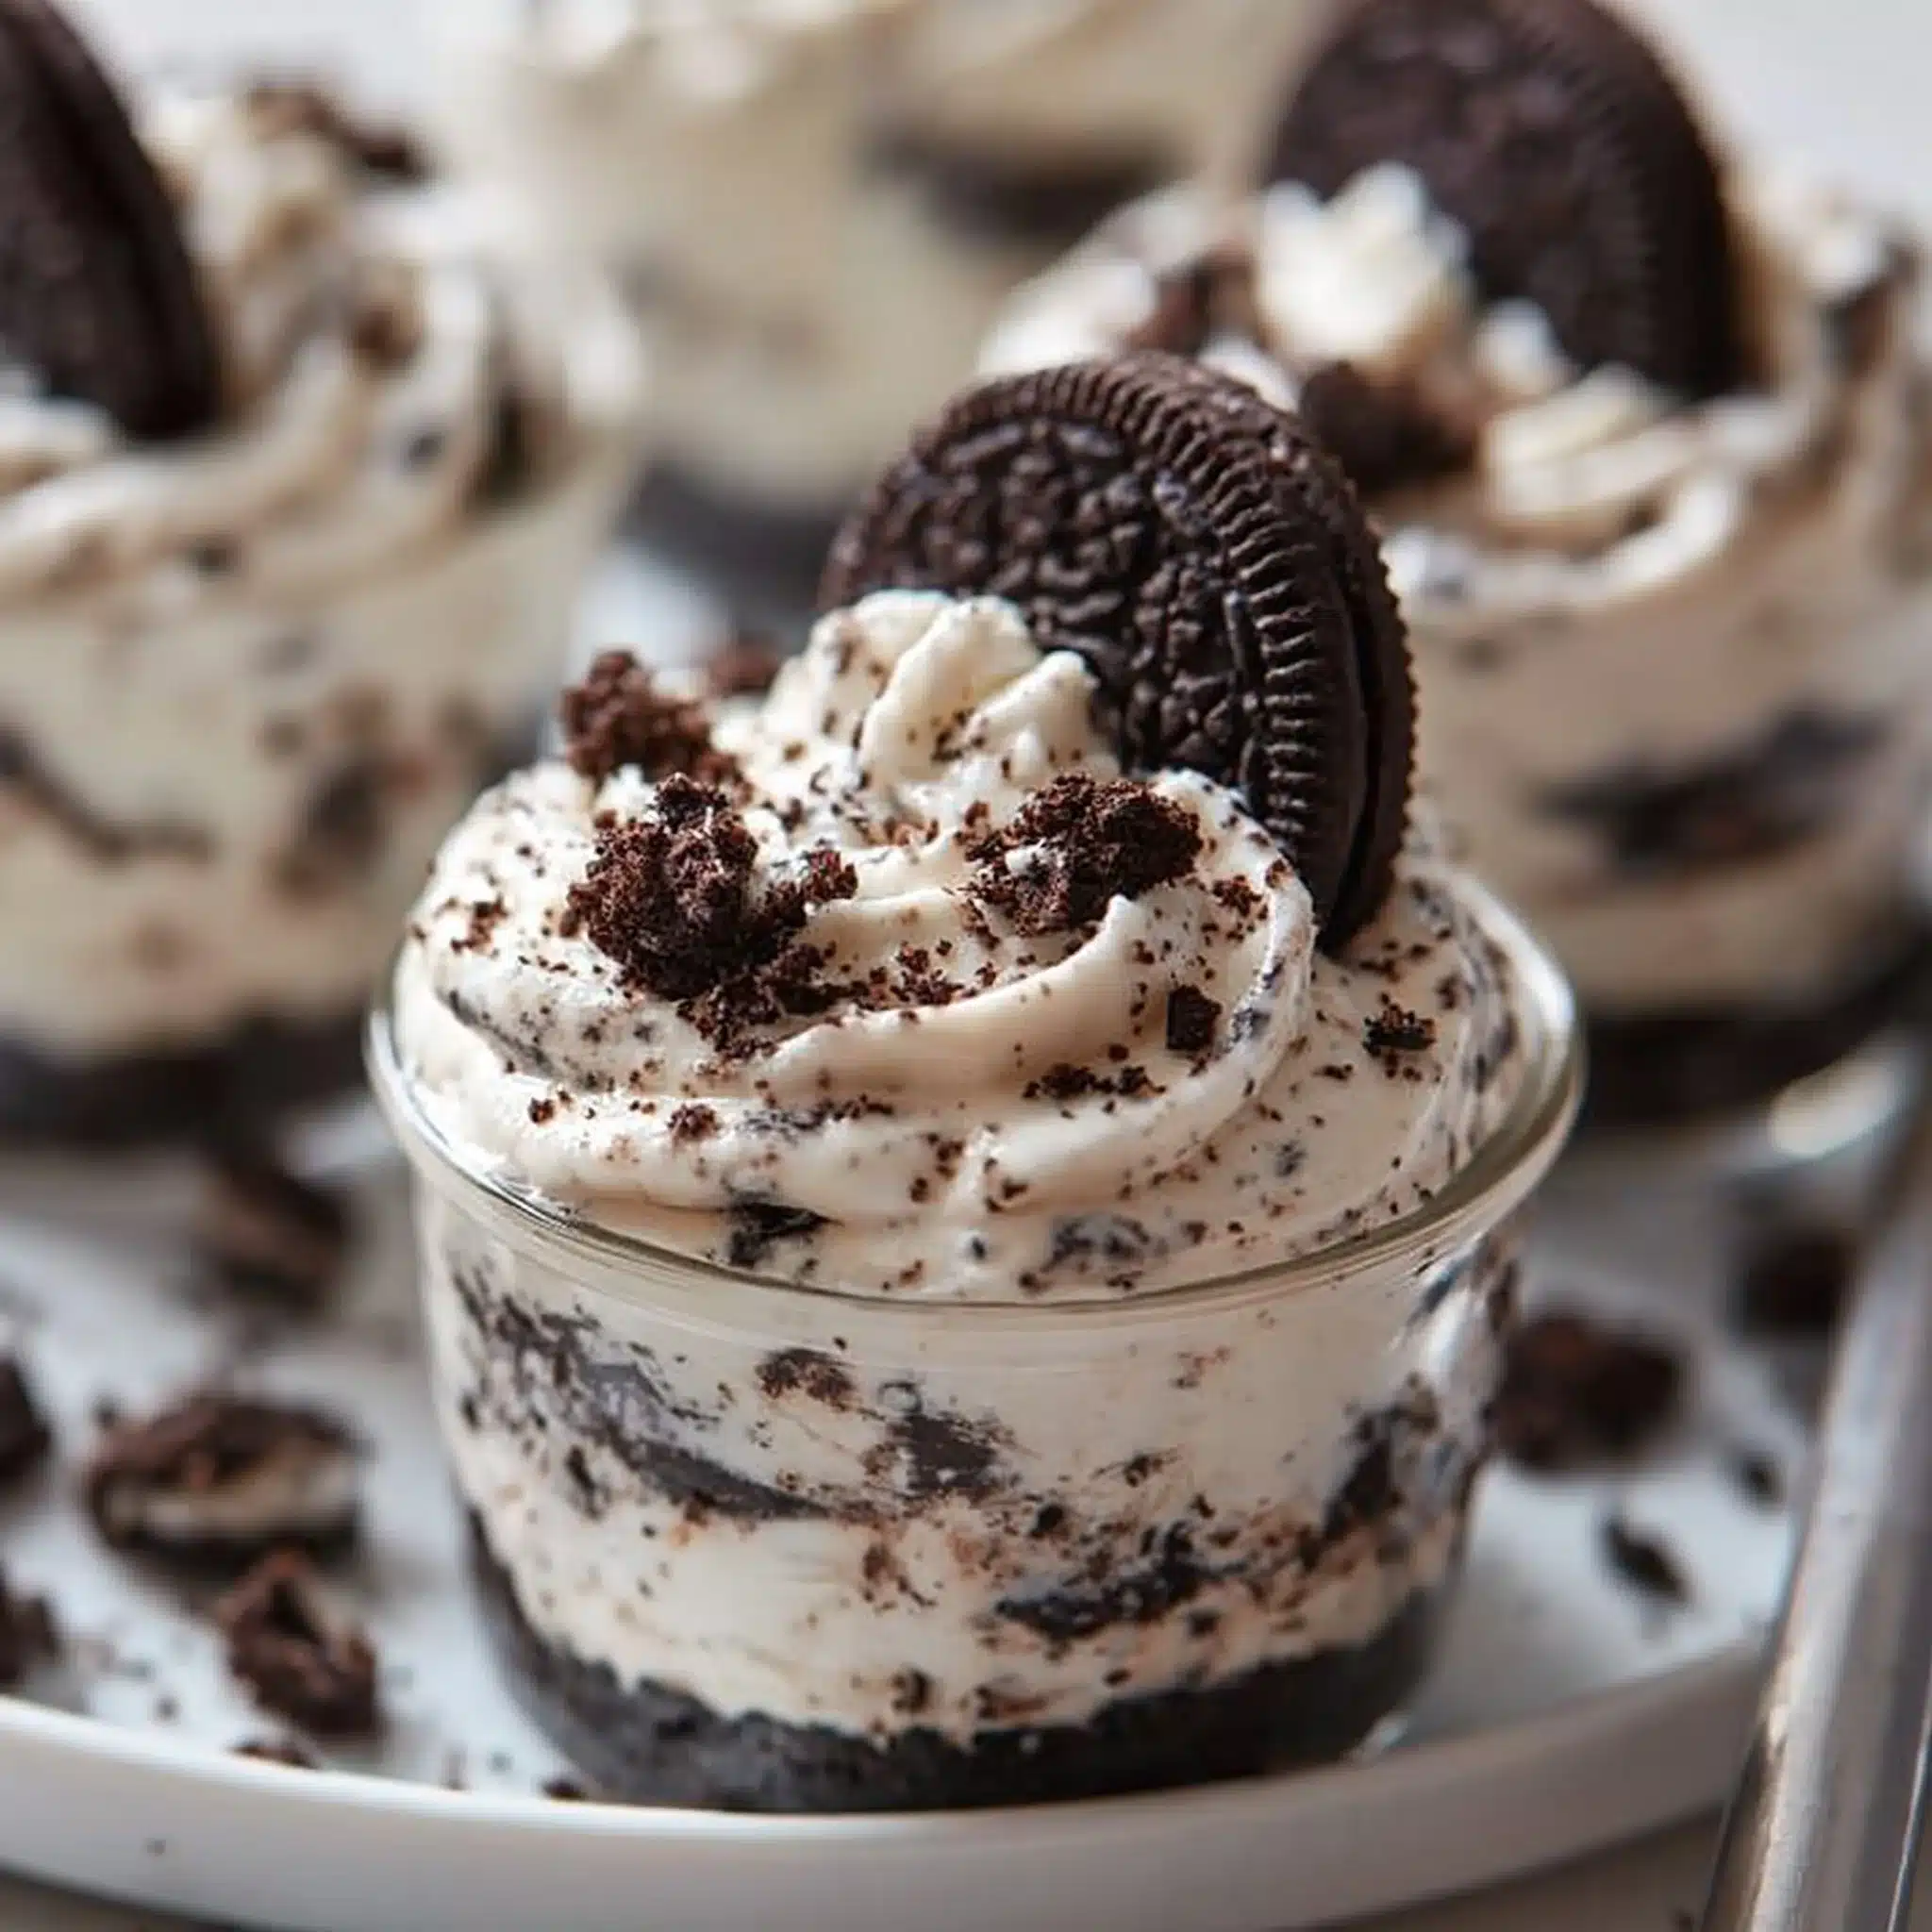
These are sweet (but not tooth-aching), with a clear vanilla aroma and that familiar Oreo cocoa note. The filling is smooth and fluffy—think “mousse-meets-cheesecake”—and the crushed cookies give a pleasant grit and crunch so it doesn’t eat like plain cream. Cold from the fridge, the cream cheese tastes richer and the Oreo bits stay bold.
Ingredients You’ll Need
This recipe is short on purpose. Softened cream cheese is the backbone—if it’s truly soft, it whips up silky with the powdered sugar (no lumps). Whipped topping lightens the mixture so it sets up airy, not heavy. And Oreos do double duty as the “crust” layer and the mix-in for that classic cookies-and-cream look. If you want more crunch on top, set aside a few extra crushed cookies.
- 1 8 oz block of cream cheese, softened
- 1 8 oz. Cool Whip or whipped topping
- 2/3 c powdered sugar
- 1 tsp vanilla
- 24-26 Oreo cookies (more as desired)
How to Make Oreo No-Bake Cheesecake Cups
Crush the Oreos.
Put the Oreos in a sealed plastic bag and crush them with a rolling pin (or a sturdy wooden spoon). You’re aiming for mostly fine crumbs with a few small chunks—those little bits look great and give texture.Build the cookie base.
Spoon 1 1/2 to 2 tablespoons of crushed Oreos into the bottom of 6 small dessert dishes (each dish should hold at least 3/4 cup to 1 cup). Tap each dish lightly so the crumbs settle into an even layer. Set aside.Whip the cream cheese and sugar until smooth.
In a mixing bowl, beat the softened cream cheese with the powdered sugar until creamy and lump-free. This should look smooth and thick, like a frosting base. (If you still see little white specks of cream cheese, keep mixing another 15–30 seconds.)Add vanilla.
Beat in the vanilla just until it disappears into the mixture—don’t overdo it here.Fold in the whipped topping.
Gently fold in the Cool Whip/whipped topping until fully incorporated. The mixture should turn lighter in color and feel noticeably fluffier.Fold in the remaining crushed Oreos.
Add the remaining crushed cookies and fold just until evenly distributed. You want cookie pieces throughout without deflating the filling.Fill the cups.
Divide the cheesecake filling evenly among the 6 dishes. Use the back of a spoon to gently press and smooth the top so it meets the crumb layer cleanly along the edges.Chill.
Refrigerate for about 1 hour (or until ready to serve). They should feel colder and slightly firmer to the touch, not loose or runny.Finish and serve.
Right before serving, top with whipped cream and more crushed Oreos.
Tips for Best Results
- Make sure the cream cheese is truly softened. If it’s still cool and firm, you’ll fight lumps that never fully disappear, even with extra mixing.
- Crush with intention: finer crumbs make a neat base; a few bigger Oreo bits mixed in give that satisfying crunch in the filling.
- Fold gently once the whipped topping goes in. Over-mixing can knock out the air, and you’ll lose that light, fluffy cheesecake texture.
- Use the full 1-hour chill if you can. The cups scoop cleaner and the Oreo flavor tastes more “set” and cohesive once cold.
- Keep a little extra Oreo crumble aside. A fresh sprinkle on top right before serving looks sharp and adds crunch (similar finishing vibes to my creamy Oreo balls).
Variations and Substitutions
- More or fewer Oreo pieces: Crush them finer for a smoother, more uniform cheesecake texture, or keep them chunkier for extra bite.
- Presentation swap: Instead of 6 dishes, you can portion into any small cups that hold about 3/4 to 1 cup—just keep the Oreo base at about 1 1/2 to 2 tablespoons per serving.
- Leaner topping: You can skip the whipped cream topping and just finish with extra crushed Oreos; it’s still plenty creamy from the filling itself.
How to Serve It
Serve these straight from the fridge while the filling is cold and fluffy. I like a generous pinch of fresh Oreo crumbs over the top right before they hit the table—those darker crumbs against the pale filling make the layers pop. If you’re serving a dessert spread, these pair nicely with other no-bake cookie desserts like my no-bake Biscoff cheesecake with crunchy cookie crust for a mix of chocolate and spiced-cookie flavors.
How to Store It
Keep the cups covered in the refrigerator until serving. For the best texture and look, add whipped cream and the final Oreo sprinkle right before serving so the topping stays fluffy and the cookie crumbs stay crisp. These are also a great make-ahead dessert—assemble and chill, then finish at the last minute.
Final Thoughts
If you’re after a no-bake dessert that looks layered and intentional but comes together with pantry-friendly ingredients, these Oreo cheesecake cups deliver—creamy, cool, and loaded with cookie crunch in every spoonful.
Conclusion
If you want to compare a few other approaches to Oreo cheesecake cups, you might enjoy reading No Bake OREO Cheesecake Cups – Best Friends For Frosting, 5 Ingredient No-Bake Oreo Cheesecake Cups | Lemons & Zest, and No Bake Mini Oreo Cheesecakes | Life, Love & Sugar for more inspiration on serving styles and textures.


