
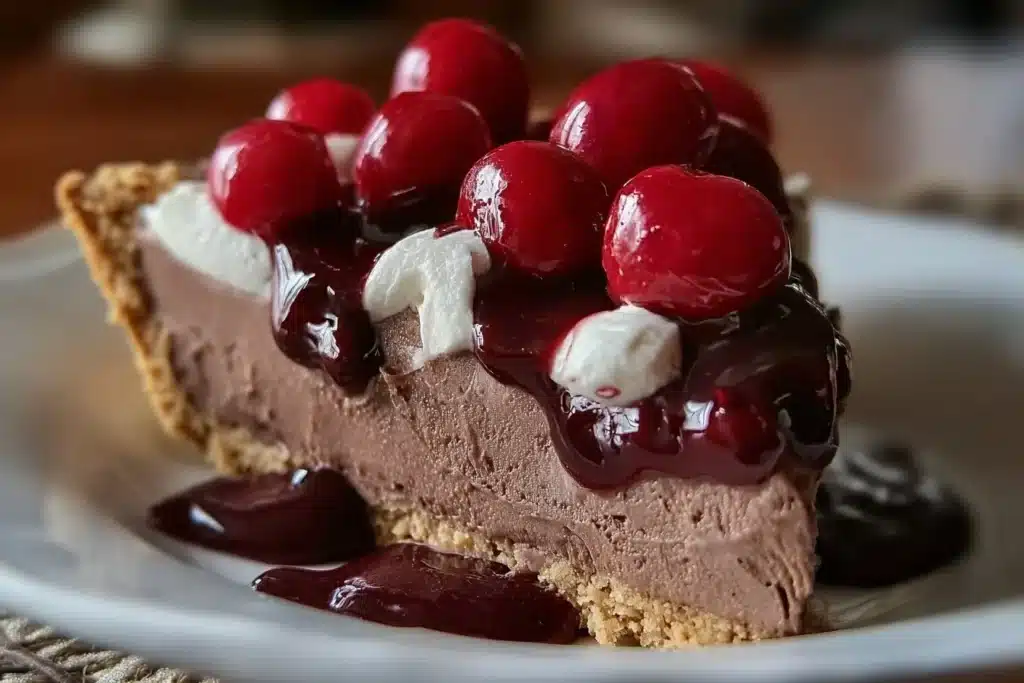
I pulled this pie together on a rainy afternoon when I wanted something chocolatey that didn’t require turning the oven on. What sold me was the contrast: a pillowy chocolate cream that’s rich but not overly heavy, a glossy, bright cherry layer that cuts through the chocolate, and the clean snap of a pre-baked crust. It comes together in under 20 minutes of active time and then ages into perfect sliceable creaminess in the fridge.
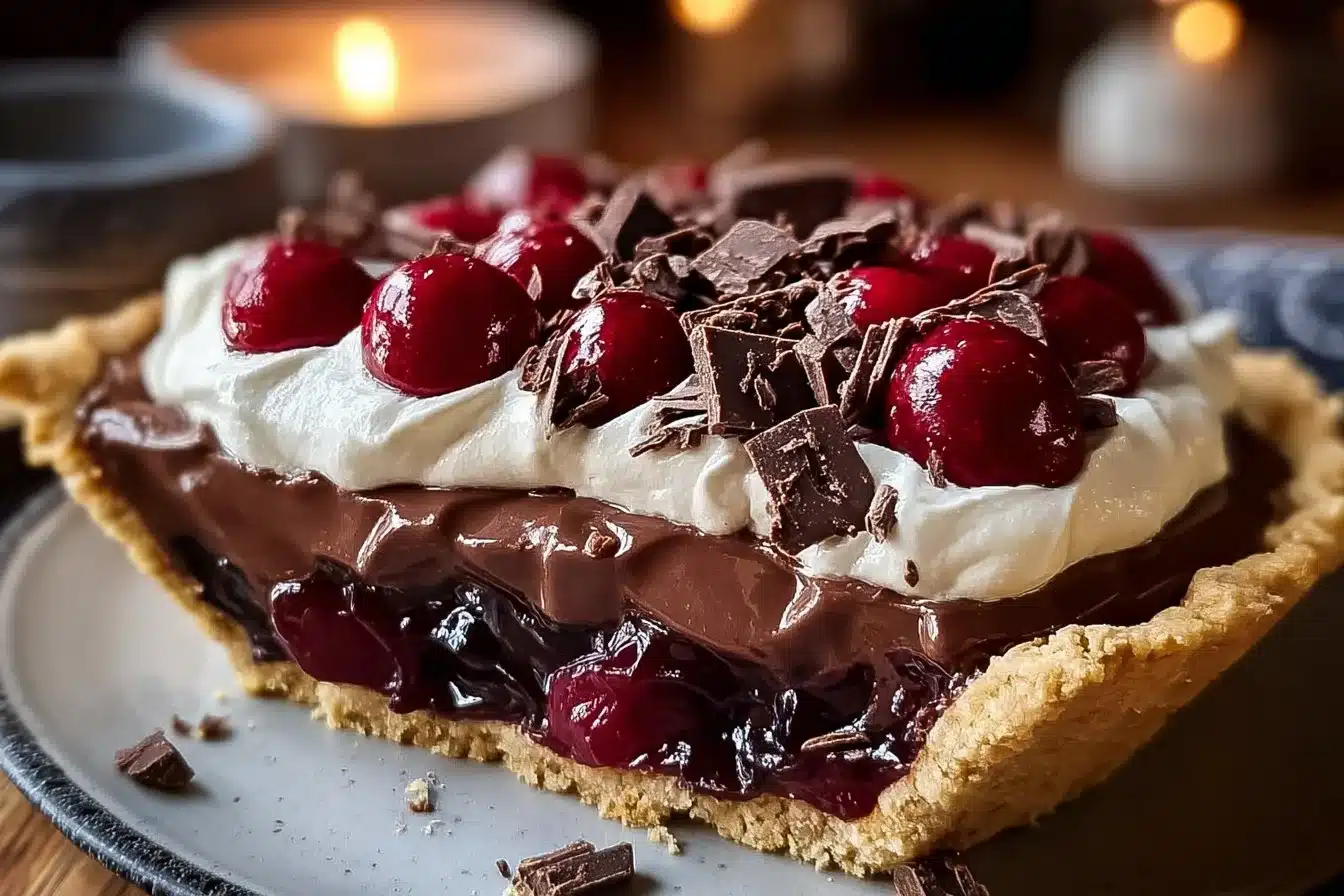
If you love the idea of chocolate and cherries, this is a fast, reliable way to get that Black Forest vibe without fuss. The pudding mix gives the filling a mousse-like body, the cream cheese adds a gentle tang and stability, and the cherry pie filling adds bursts of syrupy fruit that are as pretty as they are flavorful. If you enjoy riffing on cherry-chocolate combos, you might also like my take on a chocolate-cake version with cherry filling right here.
Why You’ll Love This Recipe
- Real contrast: silky chocolate cream and glossy cherry pockets deliver both richness and bright acidity in every bite.
- No-bake and fast: the active prep is mostly mixing — no ovens, no worry about cracking or overbaking. Read why a similar no-bake treat works well in my rice krispies-turned-dessert idea here.
- Stable, creamy texture: cream cheese and instant pudding make a sliceable filling that’s lighter than a cheesecake but firmer than whipped cream.
- Make-ahead friendly: it improves after a couple hours in the fridge and holds shape for easy slicing at parties.
- Pretty presentation: the bright cherry layer keeps the top glossy and vivid against the chocolate backdrop.
- Simple garnish options: mini chocolate chips and maraschino cherries make it look special with almost no effort.
The Story Behind This Recipe
This is the kind of shortcut I make when I want a dessert that reads impressive but is finished before dinner is cleared — a layered no-bake pie built from pantry staples and a pre-baked crust.
What It Tastes Like
Sweetness sits in the medium range — the chocolate layer is cocoa-forward but tamed by cream cheese, while the cherry topping adds a syrupy, slightly tart lift. Aroma is both chocolaty and fruity when you cut into it; the chocolate cream is dense and mousse-like, the cherry layer is glossy and syrupy, and the crust gives a faint buttery crunch that keeps each forkful satisfying.
Ingredients You’ll Need
Start by making sure the cream cheese is softened (it blends smooth faster) and the milk is cold (instant pudding sets best that way). The whipped topping lightens the chocolate base so the filling is airy, not gummy; fold it in gently to keep the mousse-like texture.
- 1 can Cherry Pie Filling, 8 oz
- Cream Cheese, 8 oz
- 1 pkg Instant Chocolate Pudding Mix
- 2 cups Cold Milk
- 8 oz Whipped Topping
- Mini Chocolate Chips (optional)
- Maraschino Cherries
- 1 9-inch Pre-Baked Pie Crust
If you like quick no-bake desserts, this follows the same easy logic as my creamy Oreo no-bake bites I wrote about here.
How to Make Indulgent Chocolate Cherry Cream Pie That’s a No-Bake Dream
- Soften the cream cheese: let the 8 oz cream cheese sit at room temperature until it’s soft enough to press a finger into easily (about 20–30 minutes). Beat it in a medium bowl with an electric mixer until completely smooth and no lumps remain — about 1–2 minutes on medium speed. You should see a glossy, even texture with no streaks.
- Add the pudding mix and milk: sprinkle the instant chocolate pudding mix over the smooth cream cheese, then pour in the 2 cups of cold milk slowly while whisking. Continue whisking until the mixture thickens and just starts to set — it will pull away from the bowl slightly and coat the whisk with a thick layer (about 1–2 minutes). The mixture should be thick but still scoopable.
- Fold in whipped topping: scoop half of the 8 oz whipped topping into the chocolate cream. Using a rubber spatula, fold gently until the whipped topping is streak-free and the filling looks lightened and mousse-like. Stop folding once it’s homogeneous — overfolding will deflate the air.
- Press into the crust: spread the chocolate cream evenly into the 9-inch pre-baked pie crust. Smooth the top with an offset spatula or the back of a spoon; you want a flat, even layer so the cherries can sit on top.
- Add the cherry layer: spoon the entire can of cherry pie filling over the chocolate layer. Work from the center outward and leave any large fruit pieces on top for visual appeal — you’re aiming for glossy, evenly distributed red pockets, not a smeared look.
- Finish and chill: dollop and gently spread the remaining whipped topping over the cherries, or pipe it for a prettier finish. Sprinkle mini chocolate chips if using. Refrigerate the pie for at least 2 hours until the center is set and the layers feel firmer to the touch. The pie should hold a respectable slice when you run a knife through it.
- Slice and serve: to get clean slices, run a thin knife under hot water, dry it, and make each cut in one smooth motion, wiping the blade between slices. Serve with an extra dollop of whipped topping and a maraschino cherry on each slice if you like.
Tips for Best Results
- Soften the cream cheese fully: small lumps will stay in the chocolate base if the cream cheese isn’t smooth — beat until completely silky.
- Keep the milk cold: instant pudding sets faster and yields a creamier texture when the milk is very cold.
- Fold, don’t stir: when adding whipped topping, fold gently to keep the filling airy and avoid a dense, heavy result. For more no-bake layering tips, see this pastel pie technique I use sometimes here.
- Chill at least 2 hours, preferably 3–4: the center should feel firmer and not jiggly. If it’s still soft after 2 hours, give it more time.
- For cleaner slices, warm and dry your knife between cuts — the warmed blade glides through the layers instead of dragging.
Variations and Substitutions
- Swap the cherry filling for another canned fruit pie filling (strawberry or raspberry) for a different bright counterpoint to the chocolate — expect a similar glossy, syrupy top but with a different fruit note.
- Use crushed cookies pressed into the crust for more texture, but note that the flavor shifts toward cookie-chocolate instead of a buttery pie crust crunch. See a richer, nut-forward pie idea if you’re thinking of adding texture here.
- Mini chocolate chips on top are optional — they add a little snap and visual contrast without altering the structure.
How to Serve It
Serve chilled in wedges so the glossy cherry layer shines above the chocolate. A small scoop of vanilla ice cream or a spoonful of extra whipped topping complements the pie’s richness, and a single maraschino cherry placed on each slice makes it look finished. This pie is straightforward to plate — a fork will pick up both the cherry pocket and the mousse-like chocolate layer nicely.
How to Store It
Refrigerator: cover tightly with plastic wrap or place the pie in a pie carrier and store in the fridge for up to 3 days. The texture will remain mousse-like but will firm slightly over time.
Freezer: not recommended — freezing changes the whipped topping’s texture and can make the filling weepy on thaw.
Make-ahead: assemble up to 24 hours ahead; wait to add extra mini chips or fresh maraschino cherries until just before serving to maintain visual appeal.

Final Thoughts
This pie hits the sweet spot between easy and elegant: just a few pantry staples become a dessert that looks layered and tastes layered — silky chocolate, tangy cream cheese, and bright cherries. It’s one of those recipes I keep on hand when I want something pretty with minimal fuss.
Conclusion
For a vegan take on a similarly styled chocolate dessert, see this Vegan Chocolate Pie (No Tofu, No Nuts) – Delightful Adventures, which swaps dairy for plant-based richness. If you’re exploring other no-bake fruit-and-cream desserts, try these Healthy No-bake Blueberry Cream Pie Energy Bites for a lighter, portable option. And for another Black Forest–style no-bake idea, this Vegan No-Bake Chocolate Cherry Tart (Black Forest-Inspired) is a lovely plant-based riff.
Indulgent Chocolate Cherry Cream Pie
Ingredients
For the filling
- 8 oz Cream Cheese Soften before mixing
- 1 pkg Instant Chocolate Pudding Mix Use chocolate flavor
- 2 cups Cold Milk Ensure it's cold for best results
- 8 oz Whipped Topping Fold gently into chocolate mixture
For the cherry layer
- 1 can Cherry Pie Filling 8 oz can
For assembly
- 1 9-inch Pre-Baked Pie Crust Use store-bought or homemade
- to taste Mini Chocolate Chips Optional garnish
- to taste Maraschino Cherries Optional for garnish
Instructions
Preparation
- Soften the cream cheese at room temperature for about 20–30 minutes until easy to mix.
- Beat the softened cream cheese in a medium bowl until smooth and glossy, about 1–2 minutes with an electric mixer.
- Sprinkle the instant chocolate pudding mix over the cream cheese, and gradually add the cold milk while whisking. Continue whisking until thickened, about 1–2 minutes.
- Fold in half of the whipped topping gently until the mixture is streak-free and airy.
Assembly
- Spread the chocolate cream evenly into the pre-baked pie crust, smoothing the top.
- Spoon the cherry pie filling over the chocolate layer, spreading it for an even distribution.
- Dollop the remaining whipped topping over the cherries or pipe it for a decorative finish.
- Sprinkle with mini chocolate chips if desired, then refrigerate the pie for at least 2 hours until set.
Serving
- To serve, run a thin knife under hot water and dry it before cutting to achieve clean slices. Serve with extra whipped topping and a maraschino cherry if desired.


