Why This Recipe Works
These Chocolate Snowball Cookies with Melted Chocolate Centers start with a rich, buttery base, which gives them that classic crumbly snowball texture that almost melts on your tongue. The combination of all purpose flour and cocoa powder creates a tender shortbread style dough, sturdy enough to hold its round shape in the oven yet delicate when you bite into it. A modest amount of baking powder helps them puff just slightly, so the centers stay soft while the outside sets into that perfect, not too crisp shell. Using vanilla bean paste instead of plain extract layers in a deep, almost custard like flavor that stands up to all that chocolate and keeps the sweetness balanced instead of flat.
The method is built to protect that melted chocolate center you want so much. Chilling the dough before baking prevents the cookies from spreading, so the chocolate stays nestled inside like a hidden truffle rather than leaking onto the pan. A relatively short bake at 350°F lets the outside set while the middle remains just soft enough for a warm, fudge like bite once they cool a little. Rolling the cookies in powdered sugar while they are still warm hydrates the sugar slightly, so it clings in an even coat, then a second roll after cooling gives you that snowy, bakery style finish. If you add nuts, their fine chop and optional toasting add gentle crunch and a roasty depth, without stealing the spotlight from the melted chocolate center.

Serving Image of Chocolate Snowball Cookies with Melted Chocolate Centers
How to Make It
Start by beating the softened butter and granulated sugar together until the mixture looks light and fluffy, about 2 to 3 minutes on medium speed. When it feels a bit like thick frosting, mix in the vanilla bean paste so those little specks are evenly dotted throughout. In a separate bowl, whisk the flour, cocoa powder, salt, and baking powder, then slowly add the dry ingredients to your butter mixture. Mix on low speed just until the dough comes together and there are no visible streaks of flour. It will feel soft, dense, and slightly sticky, which is perfect for these Chocolate Snowball Cookies with Melted Chocolate Centers.
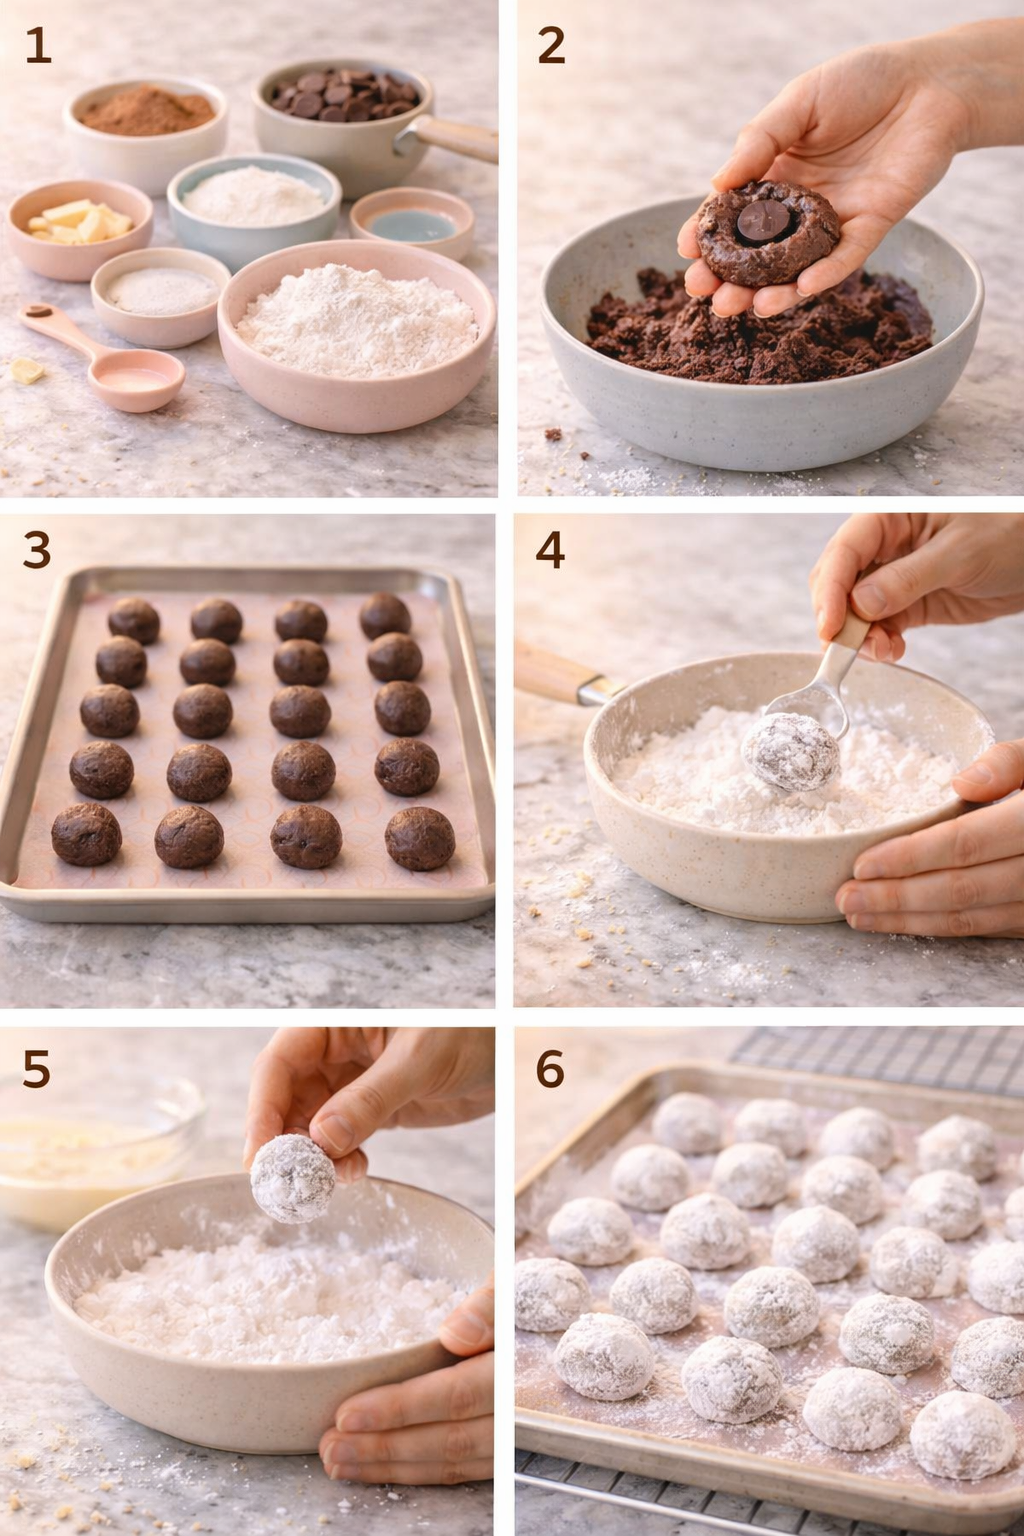
Process Image of Chocolate Snowball Cookies with Melted Chocolate Centers
If you like a little crunch, gently fold in the finely chopped nuts so they are evenly scattered through the dough. Use a small cookie scoop or tablespoon to portion the dough, then roll each scoop between your palms to form smooth balls. Nestle a small piece of good quality chocolate inside each ball, then pinch the dough closed and roll again so the center is fully hidden. Arrange the cookies on a parchment lined baking sheet, chill them for about 15 to 20 minutes, and preheat your oven to 350°F while they firm up. Bake until the tops look dry and the edges feel set, usually 10 to 12 minutes, then let them cool on the sheet for 5 minutes before rolling them in powdered sugar, cooling completely, and rolling once more for that classic snowy finish that rivals any of your favorite Halloween cookie recipes.
Time, Prep, and Storage Plan
Chocolate Snowball Cookies with Melted Chocolate Centers move fairly quickly once you start, so it helps to think through the timeline before you preheat the oven. Plan on about 30 minutes of prep, including creaming the butter and sugar, mixing the dough, and shaping the balls, plus 15 to 20 minutes of chill time for the dough to firm up. Baking usually takes 10 to 12 minutes per tray, so if you bake 2 trays back to back, you are looking at around 40 minutes of oven time. Cooling and rolling the cookies in powdered sugar adds another 10 minutes, especially if you give them that second roll while still warm for the snowy finish. In real weeknight time, that means setting aside about 1 hour total from first ingredient to last cookie on the rack.
For storage, let your Chocolate Snowball Cookies with Melted Chocolate Centers cool completely so the chocolate centers settle and the sugar coating sets. Store them in an airtight container at room temperature for up to 5 days, separating layers with parchment so the powdered sugar does not rub off too much. If your kitchen runs warm, you can refrigerate the container for up to 1 week, but let the cookies sit out for 10 to 15 minutes before serving so the centers soften again. You can also freeze the baked cookies for up to 2 months, well wrapped, then thaw at room temperature and dust lightly with fresh powdered sugar before serving. For long range planners, roll the raw dough into balls, freeze on a sheet, then transfer to a bag and bake from frozen, adding 1 to 2 minutes to the bake time, just like you might do with truffles or soft thumbprint style cookies.
Flexible Options and Serving Notes
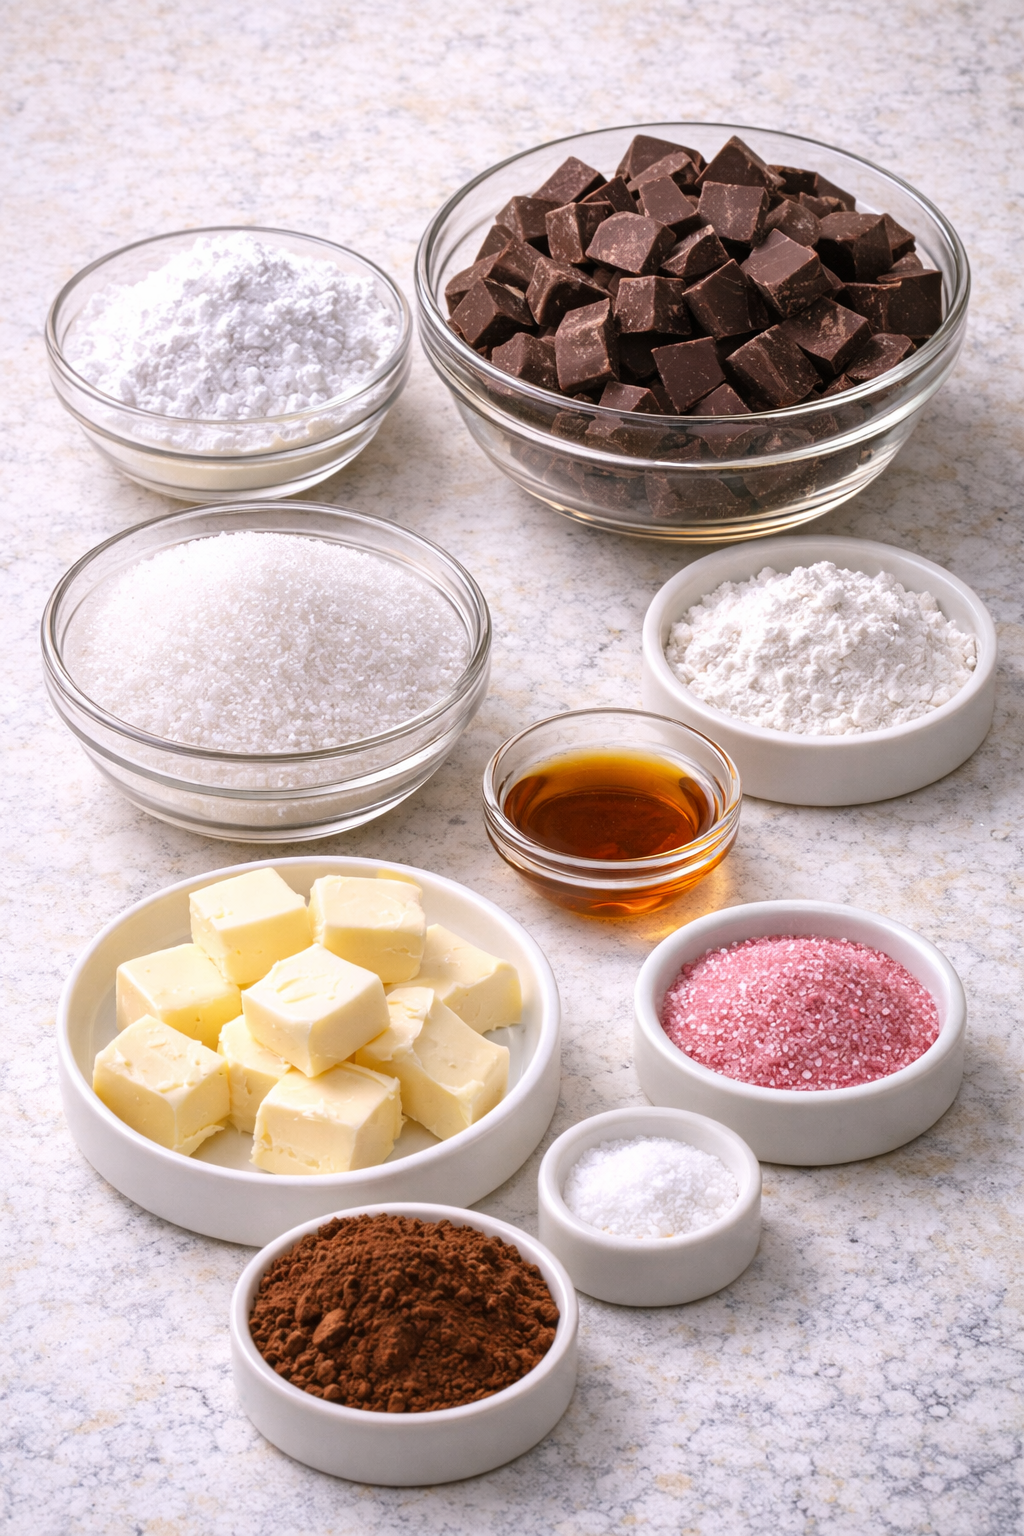
Ingredients Image of Chocolate Snowball Cookies with Melted Chocolate Centers
One of my favorite things about these Chocolate Snowball Cookies with Melted Chocolate Centers is how easy it is to dress them up for different moods and holidays. For a nut free batch, simply skip the pecans or walnuts, and add an extra 2 tablespoons of flour if the dough feels too soft. You can also swap the vanilla bean paste for almond extract for a more candy shop flavor, or peppermint extract for a winter party. If you want them extra chocolatey, tuck a few mini chocolate chips into the center before you roll each ball. For a Halloween tray, mix a spoonful of black cocoa with the powdered sugar and roll half the cookies in that and half in regular sugar, so you get a ghost and shadow effect on the plate.
Serving these cookies warm is the secret to showing off that molten center, so plan your timing if you are entertaining. Bake them right before guests arrive, or bake ahead and rewarm on a parchment lined sheet at 275°F for about 5 to 7 minutes, just until the centers loosen again but the tops do not crack. The powdered sugar will melt a bit in the oven, so lightly roll or sift more sugar over the cookies just before serving to bring back the pretty snowball look. These little Chocolate Snowball Cookies with Melted Chocolate Centers also sit beautifully next to other bite size sweets, like fudge brownie bites or pumpkin spice truffles, for a cozy dessert board. However you serve them, offer napkins and a gentle warning that the first bite might reveal a very gooey, very worth it middle.
Conclusion
There is a special kind of quiet magic that happens when a tray of warm cookies comes out of the oven and everyone suddenly drifts toward the kitchen. These Chocolate Snowball Cookies with Melted Chocolate Centers are that kind of magic. They are the treats you pass around during movie nights, tuck into holiday tins, or bring to a friend who needs a little extra sweetness in their day. I love how one bite leads to another, and before you know it, there is a whole moment built around a simple cookie plate.
My hope is that you feel confident and excited to try these in your own kitchen. Do not worry if a few look imperfect or a little lopsided. The powdered sugar hides plenty, and honestly, those are usually the ones people reach for first. Turn on some music, invite a helper, and let this recipe be part of your cozy rituals, whether it is December or a random Tuesday.
If you bake a batch, I would love to hear how they turned out.
For more delicious recipes like this, follow us on Facebook and Pinterest!

Recipe Card Image of Chocolate Snowball Cookies with Melted Chocolate Centers
Recipe
Chocolate Snowball Cookies with Melted Chocolate Centers
Ingredients
Ingredients
- 1 cup unsalted butter softened
- 1/2 cup granulated sugar
- 2 teaspoons vanilla bean paste
- 1 3/4 cups all-purpose flour
- 1/2 cup unsweetened cocoa powder
- 1/4 teaspoon salt
- 1/2 teaspoon baking powder
- 1 cup finely chopped pecans or walnuts toasted if desired
- 24 small pieces semisweet or dark chocolate about 6 oz total, for filling
- 1/2 cup powdered sugar for rolling
Instructions
- In a large mixing bowl, beat the softened butter and granulated sugar together on medium speed for 2 to 3 minutes until light and fluffy.
- Add the vanilla bean paste and mix until evenly incorporated.
- In a separate bowl, whisk together the flour, cocoa powder, salt, and baking powder until well combined.
- Gradually add the dry ingredients to the butter mixture, mixing on low speed just until a soft, dense dough forms and no dry streaks remain.
- Fold in the finely chopped nuts until they are evenly distributed throughout the dough.
- Line a baking sheet with parchment paper. Use a small cookie scoop or tablespoon to portion the dough into 24 equal portions.
- Roll each portion into a ball, then flatten slightly in your palm. Place one small piece of chocolate in the center, wrap the dough around it, pinch to seal, and roll again into a smooth ball.
- Arrange the filled dough balls on the prepared baking sheet, spacing them about 1 inch apart.
- Refrigerate the baking sheet with the dough balls for 15 to 20 minutes to firm up.
- While the dough chills, preheat the oven to 350°F.
- Bake the chilled cookies for 10 to 12 minutes, until the tops look dry and the edges feel set but the centers are still soft.
- Let the cookies cool on the baking sheet for 5 minutes, then roll each warm cookie in powdered sugar and transfer to a wire rack to cool completely.
- Once the cookies are cool, roll them in powdered sugar a second time to create a thick, snowy coating.
Notes
– Toast the nuts in a dry skillet over medium heat for 3 to 5 minutes, stirring often, until fragrant, then cool before chopping and adding to the dough.