The Practical Why Behind It
You get a lot of payoff for very little effort with this Creamy No Bake Biscoff Cheesecake with Crunchy Cookie Crust. No oven, no water bath, no cracks, just a chilled pan of silky cheesecake that slices neatly and tastes like you spent all afternoon on it.
There is a very real kitchen logic behind every choice in this Creamy No Bake Biscoff Cheesecake with Crunchy Cookie Crust. Those Biscoff cookies do double duty, both as flavor and structure, because their caramel spice and fine crumb pack together tightly with butter to create a crust that actually holds when sliced. You skip the oven, which means no worrying about water baths, cracked tops, or watching the timer while guests arrive. Instead, the fridge does the work, and you get a dessert that feels as impressive as a baked cheesecake without babysitting it. The long chill time is not just a suggestion either, it lets the butter firm up and the filling set into neat, creamy slices.
Inside the filling, softened cream cheese gives you body, while Biscoff spread adds built in sweetness and that deep cookie butter flavor, so you use fewer ingredients and bowls. Powdered sugar dissolves quickly, which keeps the texture silky rather than grainy. Whipping the heavy cream separately might feel like an extra step, but it is the secret to that cloud like lift. Fold it in gently, and you get a stable, mousse style consistency that slices cleanly yet melts on your tongue. If you have made my no bake Nutella cheesecake or my peanut butter pie, you will recognize the same whipped cream method showing up here for good reason.
This recipe also respects real life schedules. You can crush the cookies, press the crust, and mix the filling in under 30 minutes, then let it chill while you go to work, sleep, or prep dinner. It keeps beautifully, so you can make it a day ahead and pull it out when guests walk in, garnishing with extra crumbs at the last second for a fresh bakery look. The ingredient list keeps things simple too, just one type of cookie, one main flavor, plus basics you probably already have in the fridge. In the end, you get a Creamy No Bake Biscoff Cheesecake with Crunchy Cookie Crust that looks special, tastes like you fussed, yet fits neatly into an everyday kitchen rhythm.
Step-by-step method
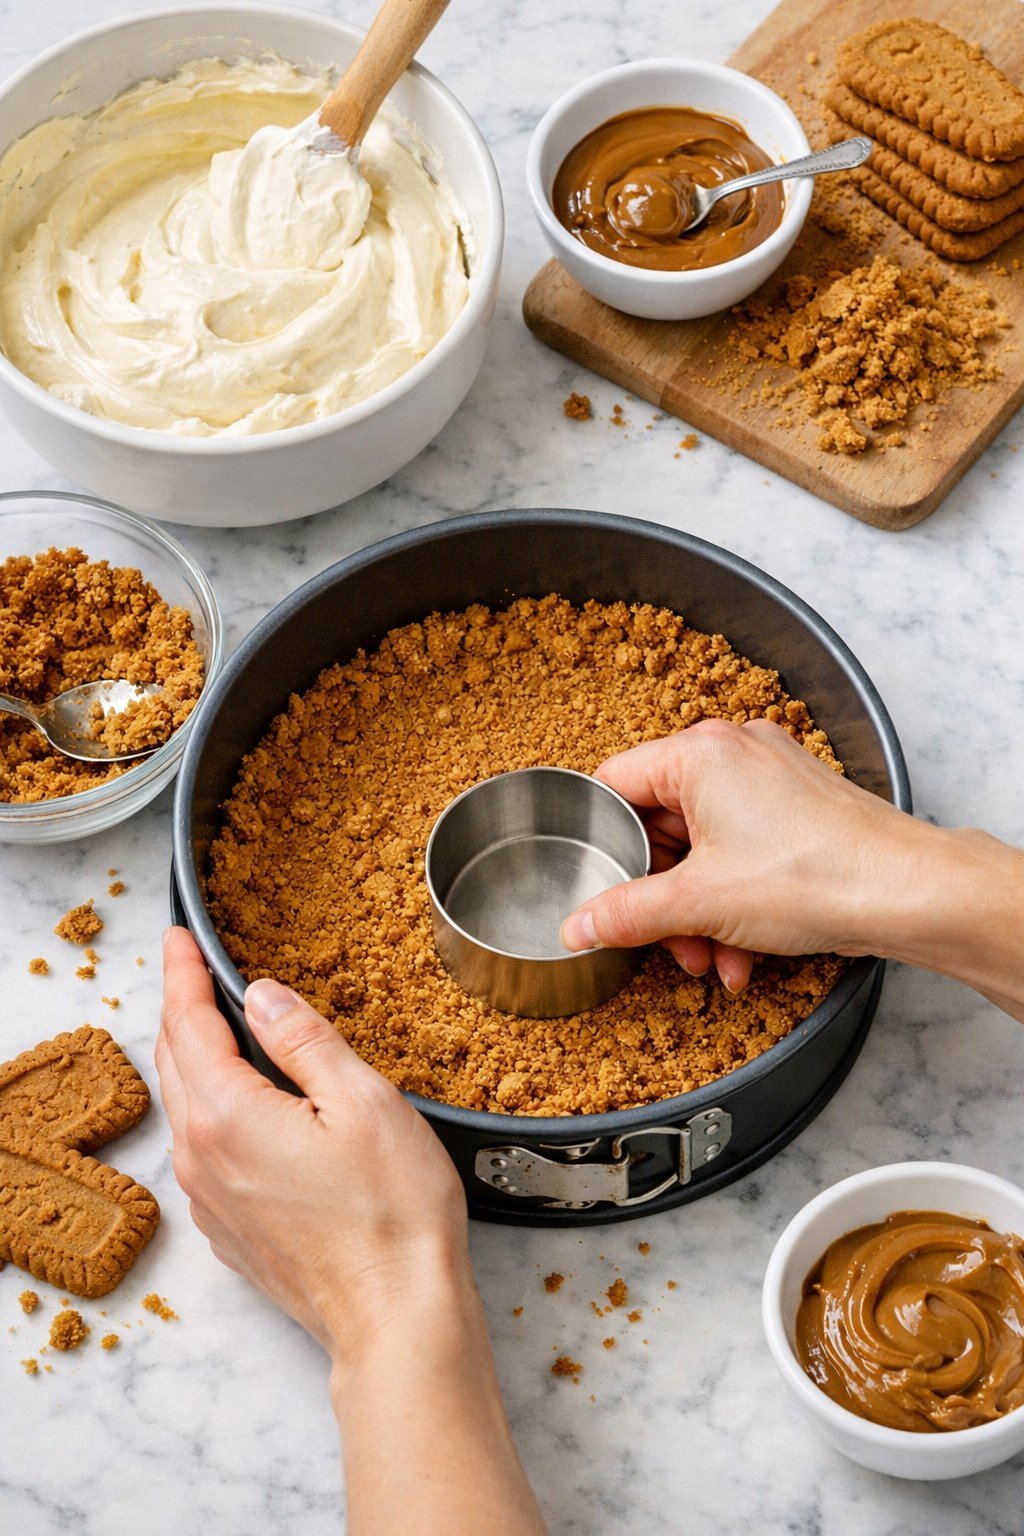
Start with the crust so it has time to chill. Crush your Biscoff cookies until they are very fine crumbs, either in a food processor or with a rolling pin in a sturdy bag. Aim for a mix of sandy crumbs with just a few slightly larger bits for extra crunch. Stir in the melted butter until every crumb is coated and the mixture feels like damp sand when you squeeze it in your hand. Press this firmly into the bottom of a 23 centimeter springform pan, using the flat bottom of a measuring cup to get an even, compact layer without gaps. Pop the crust into the refrigerator while you work on the creamy filling for your Creamy No Bake Biscoff Cheesecake with Crunchy Cookie Crust.
For the filling, beat the softened cream cheese until completely smooth and lump free, scraping the bowl a couple of times so nothing sticks to the sides. Add the Biscoff spread and powdered sugar, then mix until the filling looks glossy and silky. In a separate chilled bowl, whip the cold heavy cream with the vanilla bean paste to soft peaks, which means the tips gently curl over when you lift the whisk. Gently fold the whipped cream into the Biscoff cream cheese mixture in two or three additions, using a spatula and light motions so you keep all that air in. Take your time here, and stop folding as soon as you see a smooth, even color. Pour the filling over your chilled crust and smooth the top with an offset spatula or the back of a spoon. Cover the pan tightly, then refrigerate for at least 4 hours, though overnight will give you the cleanest, most confident slices.
Process Image of Creamy No Bake Biscoff Cheesecake with Crunchy Cookie Crust
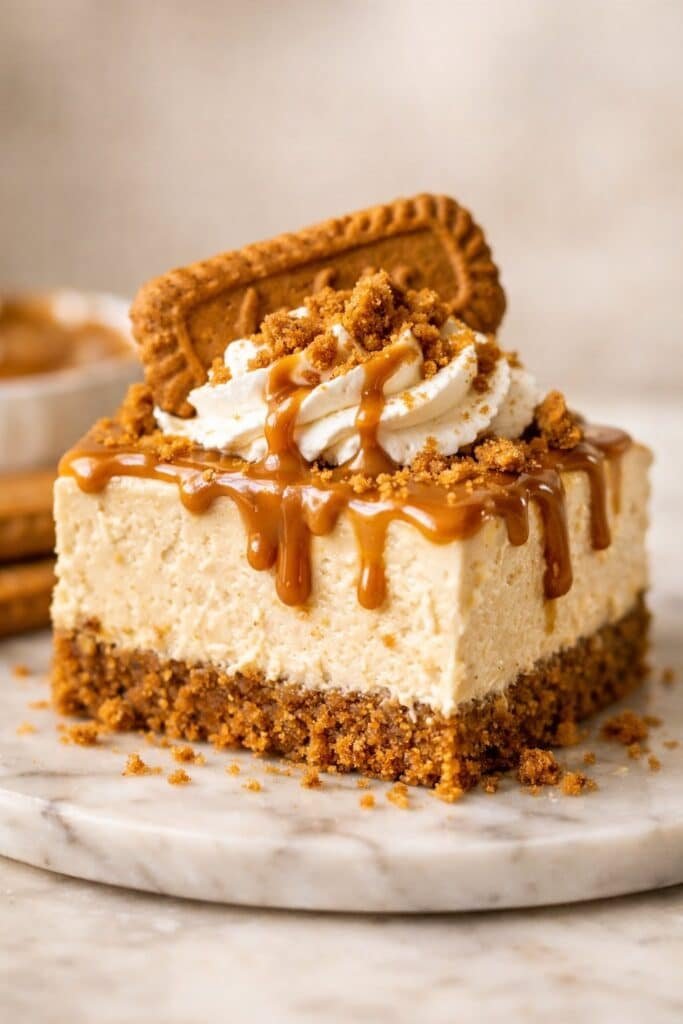
When you are ready to serve, run a thin knife under hot water, dry it, then slide it around the inside edge of the pan to loosen the cheesecake. Release the springform ring and admire those layers of caramel colored filling and cookie crust. For a little flourish, drizzle warmed Biscoff spread over the top, or sprinkle on extra crushed cookies for added crunch. If you love this, you might also enjoy pairing it with a scoop of my classic vanilla bean ice cream for an extra cozy dessert plate. Slice with the same warm knife, wiping between cuts, so every piece of this Creamy No Bake Biscoff Cheesecake with Crunchy Cookie Crust looks bakery ready and table proud.
Make Ahead and Storage Notes
This Creamy No Bake Biscoff Cheesecake with Crunchy Cookie Crust actually tastes better when it has time to chill, so it is a perfect make ahead dessert. For clean slices and a set but silky center, I like to make it the night before and let it rest at least 8 to 12 hours in the refrigerator. Assemble the crust and filling as directed, cover the pan tightly with plastic wrap or foil, and keep it on a flat shelf so the top sets level and smooth. If you are planning a party menu with other treats, such as a peanut butter cheesecake or a layered icebox cake, you can safely tuck this cheesecake in the fridge up to 2 days before serving without any loss of flavor or texture. Just leave any whipped cream, extra Biscoff drizzle, or cookie garnish for just before you bring it to the table, so the topping stays crisp and pretty.
For storage after serving, cover any remaining slices of Creamy No Bake Biscoff Cheesecake with Crunchy Cookie Crust and refrigerate up to 4 days. The crust will slowly soften as it sits, but it will still taste lovely and a little more dessert bar like by day three. Place individual slices in airtight containers if you want really neat edges and less fridge aroma sneaking in. You can also freeze this cheesecake, either whole or sliced, for up to 1 month. Freeze uncovered until firm, then wrap in plastic and slip into a freezer bag, and thaw overnight in the refrigerator before serving. The texture stays creamy, although the Biscoff topping may look slightly matte after freezing, so you can refresh it with a light drizzle of warmed Biscoff spread and a sprinkle of fresh cookie crumbs.
Variations and How to Serve It
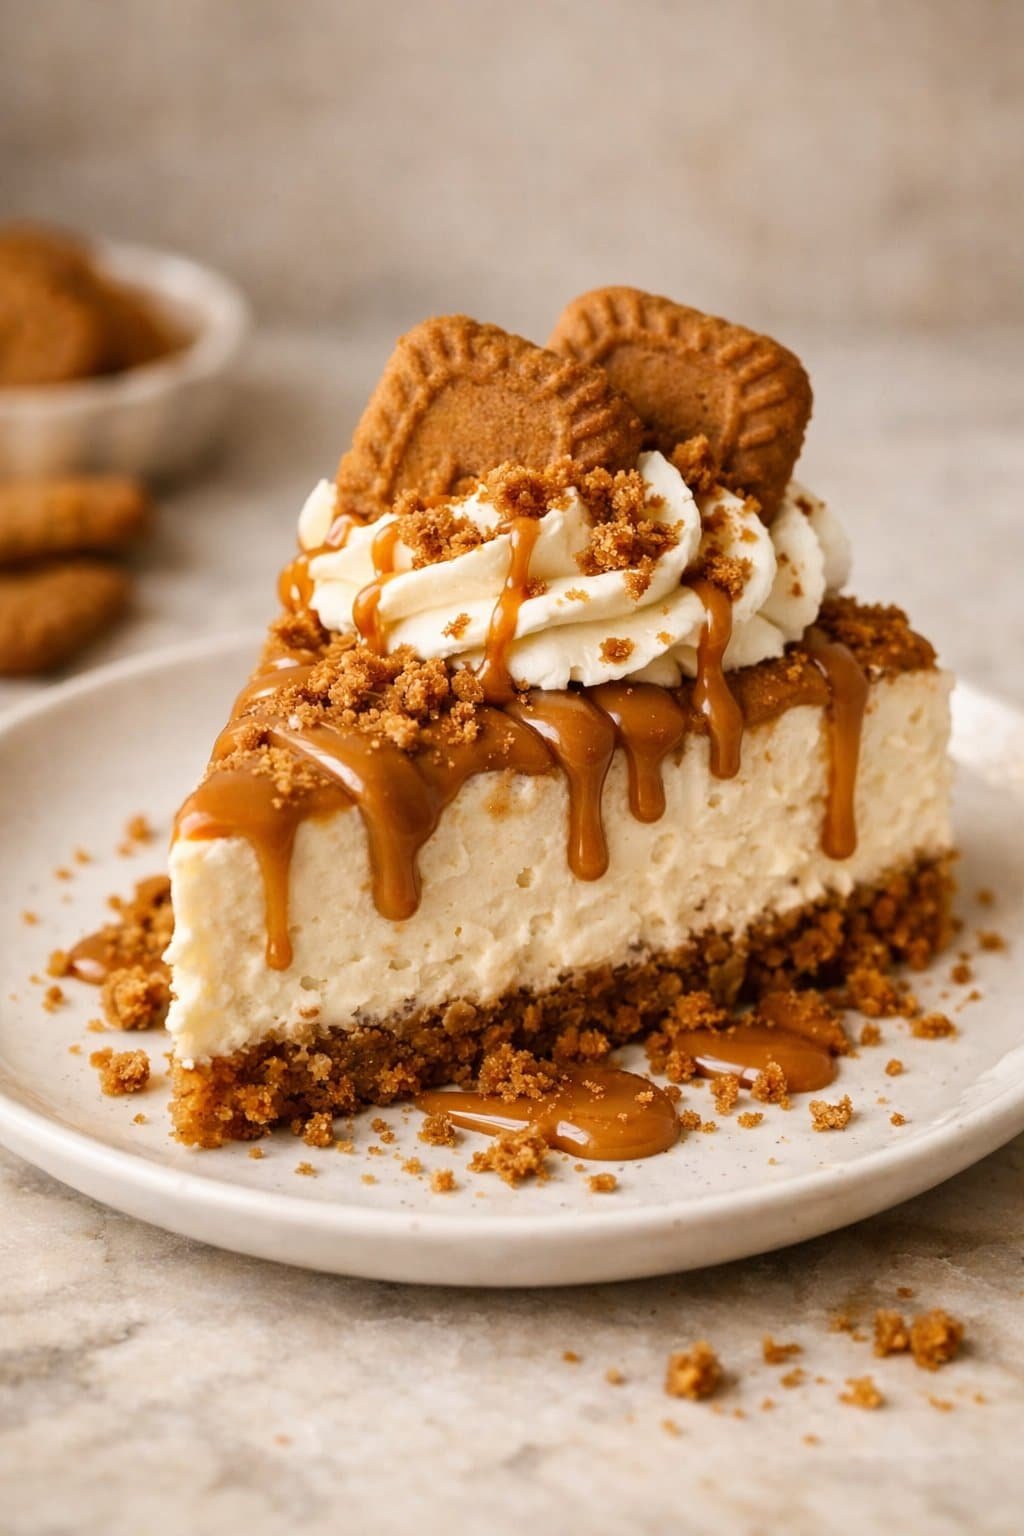
Serving Image of Creamy No Bake Biscoff Cheesecake with Crunchy Cookie Crust
You can take this Creamy No Bake Biscoff Cheesecake with Crunchy Cookie Crust in so many directions, depending on who is coming to dessert. For a chocolate twist, drizzle cooled melted dark chocolate over the chilled cheesecake, then sprinkle with extra crushed Biscoff cookies so every slice has contrast and crunch. If you feel fruity, swirl 3 to 4 tablespoons of slightly warmed raspberry or strawberry jam into the top of the filling before chilling, creating pretty ripples and a sweet tang that cuts through the lush Biscoff flavor. For a mini dessert spread, press the crust into individual jars or muffin liners, divide the filling on top, and chill for the cutest portable cheesecakes. You can also fold in a handful of finely chopped toasted pecans or hazelnuts to the crust for a nutty note that plays beautifully with the caramel spice of the cookies.
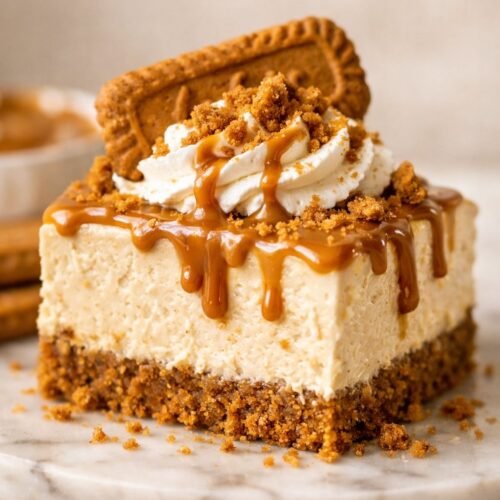
When it is time to serve, use a long, sharp knife, run it under hot water, wipe it dry, then slice for clean edges that show off that thick creamy layer over the Crunchy Cookie Crust. Serve each slice as is for purists, or add a little flourish, a dollop of softly whipped cream, a quick drizzle of warmed Biscoff spread, and a whole cookie tucked at an angle for a café style finish. This Creamy No Bake Biscoff Cheesecake with Crunchy Cookie Crust also loves company on the plate, think a few fresh berries or sliced bananas, or even a spoon of salted caramel for the super sweet tooth crowd. If you are planning a dessert table with treats like a classic no bake chocolate cheesecake or a simple vanilla panna cotta, cut this cheesecake into smaller slivers so guests can sample everything without overwhelm. Leftovers keep nicely in the refrigerator, so you can enjoy a chilled slice straight from the pan with your afternoon coffee, which might be the best serving suggestion of all.
Conclusion
Every time I make this Creamy No Bake Biscoff Cheesecake with Crunchy Cookie Crust, it turns an ordinary day into something worth lingering over. There is something about that spiced cookie scent and silky filling that makes people wander into the kitchen, peek over your shoulder, and suddenly stay just a little longer. It is the kind of dessert that invites stories at the table, extra forks, and that “just one more sliver” moment long after dinner.
I hope this cheesecake finds its way into your own celebrations, whether it is a cozy weeknight treat, a birthday surprise, or the dessert you pull out when you want to spoil the people you love. Try it once, then make it again your own way, and let it become one of those recipes your family starts asking for by name. When you do, I would love to hear how it turned out and who you shared it with.
For more delicious recipes like this, follow us on Facebook and Pinterest!
Recipe
Creamy No Bake Biscoff Cheesecake with Crunchy Cookie Crust
Ingredients
Ingredients
- 7 oz Biscoff cookies
- 6 tbsp unsalted butter melted
- 16 oz cream cheese softened
- 1 cup Biscoff spread
- 3/4 cup powdered sugar
- 1 cup heavy cream cold
- 1 tsp vanilla bean paste
- Optional garnish: extra crushed Biscoff cookies and melted Biscoff spread
Instructions
- Crush the Biscoff cookies into fine crumbs using a food processor or by sealing them in a bag and rolling with a rolling pin.
- Combine the cookie crumbs and melted butter in a bowl and stir until all crumbs are evenly coated.
- Press the crumb mixture firmly into the bottom of a 9-inch springform pan to form an even crust, then refrigerate while preparing the filling.
- In a large bowl, beat the softened cream cheese until completely smooth and creamy.
- Add the Biscoff spread and powdered sugar to the cream cheese and mix until the filling is smooth and glossy.
- In a separate chilled bowl, whip the cold heavy cream and vanilla bean paste to soft peaks.
- Gently fold the whipped cream into the Biscoff cream cheese mixture in 2 to 3 additions until fully combined and airy.
- Pour the filling over the chilled crust and smooth the top with a spatula.
- Cover the pan tightly with plastic wrap and refrigerate for at least 4 hours or until set.
- Before serving, run a warm knife around the edge of the pan, release the springform ring, slice, and garnish with extra crushed cookies or a drizzle of melted Biscoff spread if desired.
Notes
- For the cleanest slices, refrigerate the cheesecake overnight before cutting.