Why This Recipe Works
These No Bake Blueberry Cheesecake Bars work so well because every layer has a clear job to do. The buttery cookie crust firms up in the fridge and gives you that clean, bakery style edge that cuts neatly into bars without crumbling everywhere. The creamy cheesecake layer uses just the right balance of cream cheese and whipped cream so it sets firm enough to slice, yet stays soft and mousse like when you bite into it. A generous swirl of blueberry on top adds moisture and tang, which keeps the sweetness in check and makes each bite taste bright, not heavy or flat.
From a practical standpoint, this recipe removes a lot of the stress that traditional cheesecake can bring. You do not have to fuss with a water bath, crack prevention, or exact oven timing, so beginners can still get picture perfect results. Because the bars chill to set, the texture actually improves as they rest, which means you can make them a day ahead for parties, picnics, or holidays and they will slice even more cleanly. The recipe also scales easily, so you can press it into a standard baking pan for a crowd, the way I do when I menu plan a spread of make ahead desserts like lemon bars or brownie bites.
What makes these No Bake Blueberry Cheesecake Bars feel bakery worthy is the balance of textures and flavors in every square. You get a crisp, buttery base, a thick blanket of velvety cheesecake, and a glossy blueberry layer that looks like it came from a pastry case. The chill time does all the heavy lifting, so as long as you give the bars at least several hours in the fridge, they slice into neat, defined layers that hold up on a dessert tray. Even if you are a little loose with your swirling technique, the marbled top always looks intentional and impressive, which is exactly what you want from a dessert that asks for only about 15 minutes of active effort.
How to Make It
Start by pressing your prepared graham cracker mixture firmly into a parchment lined 23 by 33 centimeter baking pan, really packing it in so it forms a tight, even crust. I like to use the bottom of a measuring cup to press the crumbs into the corners and smooth the surface, so every one of your No Bake Blueberry Cheesecake Bars has the same sturdy base. Chill the crust for at least 10 minutes while you whip the filling, since a cold crust helps the creamy layer set neatly instead of sliding around. If your kitchen runs warm, give it a few extra minutes so the butter or coconut oil in your crust can firm up fully.
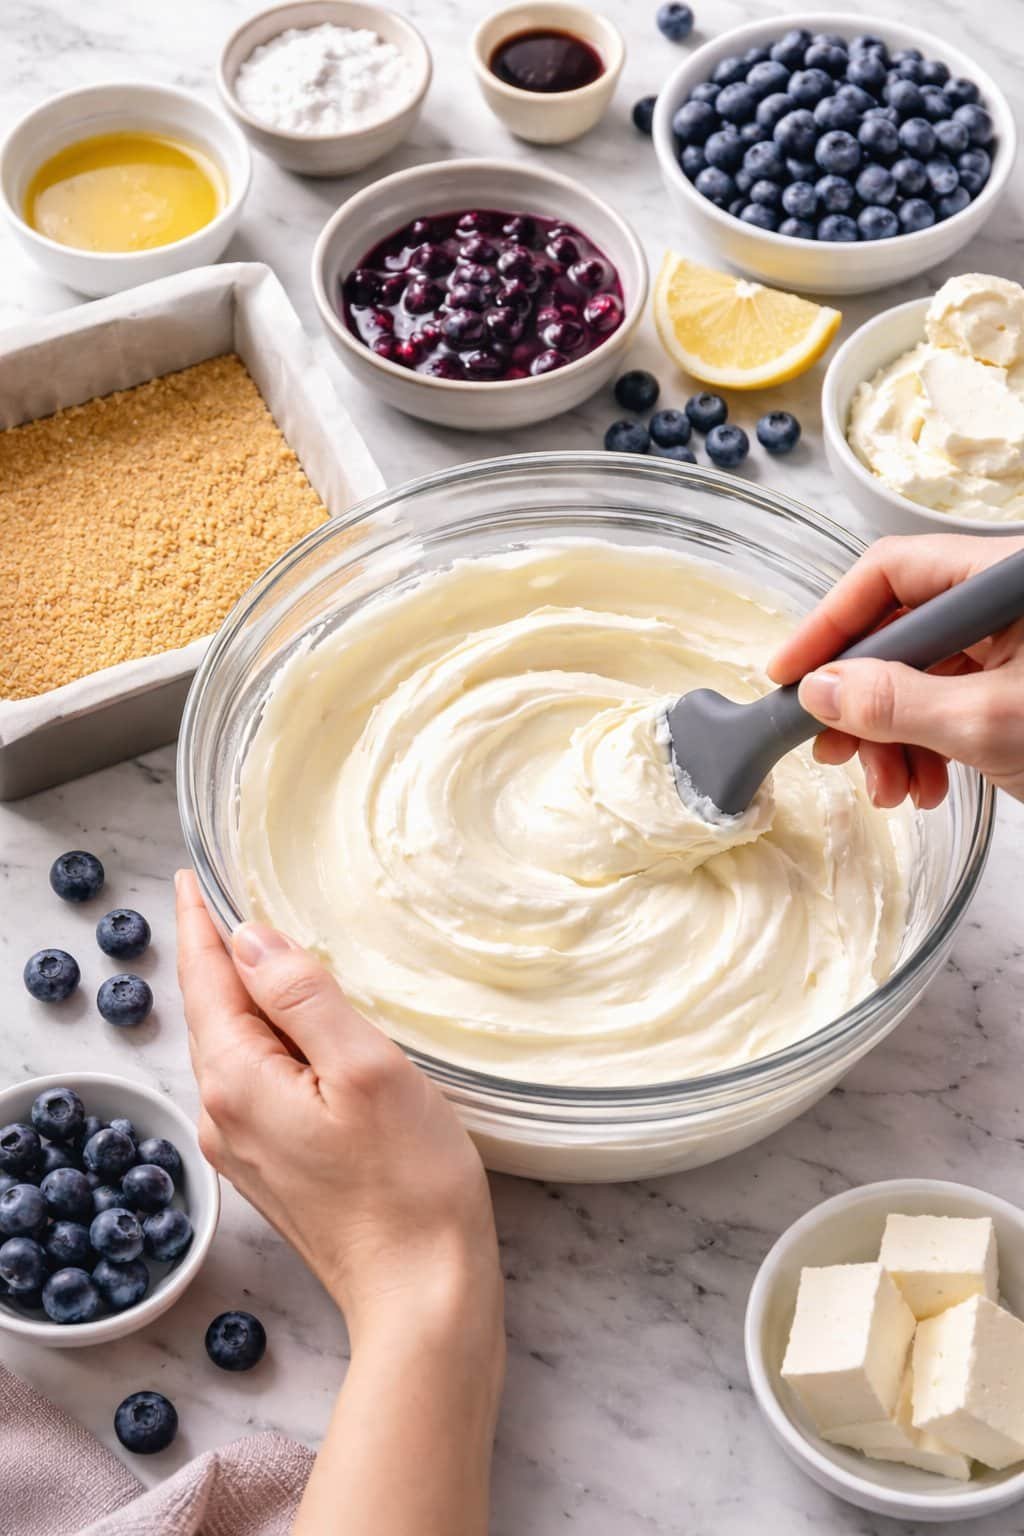
Process Image of No Bake Blueberry Cheesecake Bars
For the filling, beat your cream cheese until smooth and free of lumps, then slowly add the sugar so it dissolves into the mixture instead of sitting grainy on top. Fold in the whipped cream or whipped topping gently with a spatula, turning the bowl and cutting through the center, so you keep everything light and fluffy instead of deflating it. Spoon in your blueberry puree and swirl it just enough to marble the cheesecake layer, or fully mix it if you prefer a single lavender shade. Pour the filling over the chilled crust and tap the pan lightly on the counter to pop any big air bubbles. Smooth the top, then chill for at least 4 hours, preferably overnight, until the bars slice cleanly. Use a hot knife for tidy edges, wiping the blade between cuts, and garnish with fresh berries or a little extra puree for that bakery style finish you love from recipes like my berry swirl cheesecake squares.
Time, Prep, and Storage Plan
You can have these No Bake Blueberry Cheesecake Bars prepped in about 15 minutes, which makes them weeknight and last minute guest friendly. The only “waiting” is chill time, and that is where the magic happens. After a quick cook on the crust, pour on your creamy blueberry filling and let the bars rest in the fridge for at least 4 hours so they firm up enough to slice cleanly. If you want picture perfect squares, I recommend chilling them overnight. Plan backward from when you want to serve, and give yourself a little extra time cushion, especially on hot days when cream cheese takes longer to set.
Once your No Bake Blueberry Cheesecake Bars are fully chilled, use a long, sharp knife and wipe it clean between cuts for neat edges. Keep the bars in a single layer in an airtight container, or leave them in the pan and cover tightly with plastic wrap, and store them in the refrigerator for up to 5 days. They hold up beautifully for make ahead desserts, potlucks, or lunchbox treats. If you want to freeze them, chill until firm, cut into bars, wrap each bar tightly, then place in a freezer safe bag or container for up to 2 months. Thaw in the refrigerator overnight, not on the counter, so the filling stays creamy instead of weeping or turning grainy.
Flexible options and serving notes
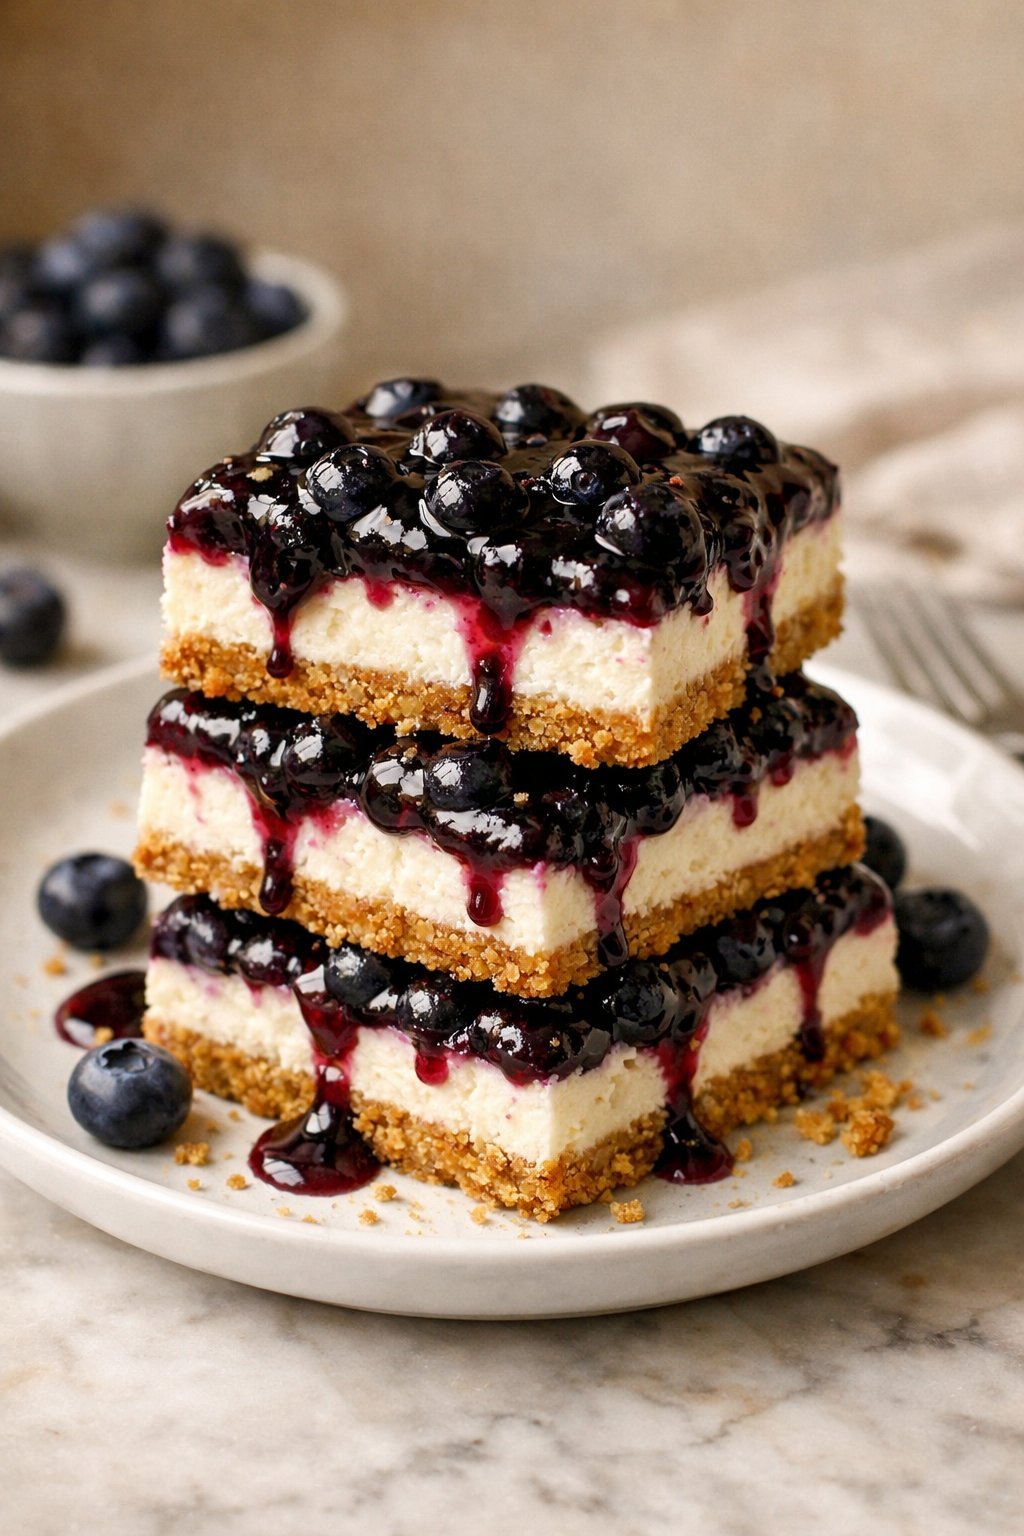
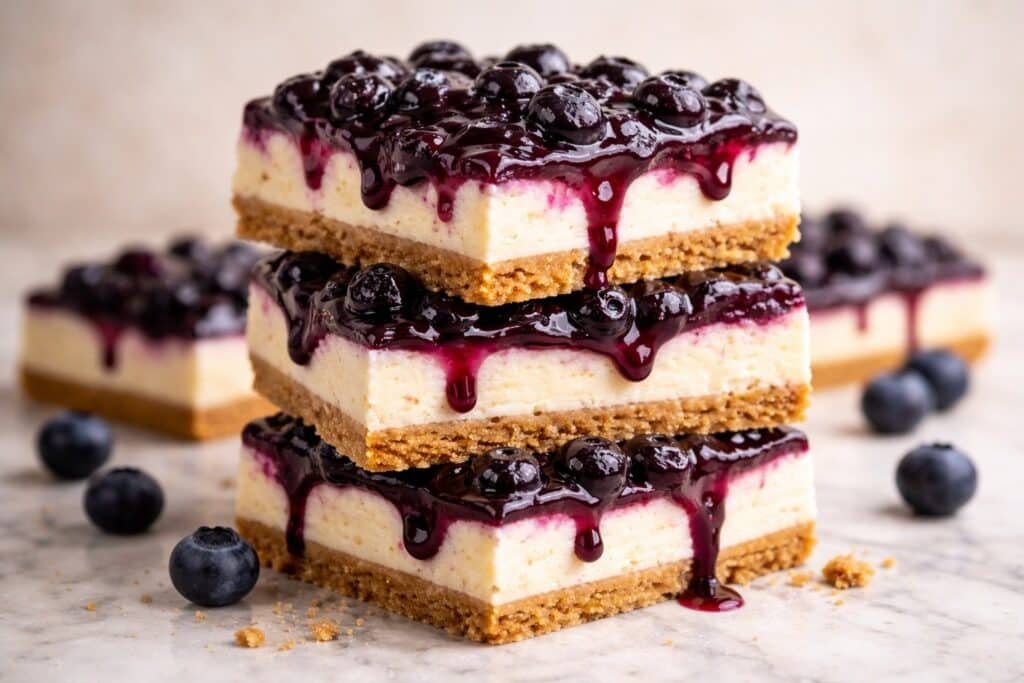
Serving Image of No Bake Blueberry Cheesecake Bars
These No Bake Blueberry Cheesecake Bars can dress up or stay casual, depending on what you need. For an even more bakery style moment, cut them into neat squares, then pipe a small rosette of whipped cream on each bar and tuck a single fresh blueberry or mint leaf on top. If you want to lean richer, use a graham cracker crust with a pinch of cinnamon, or swap in crushed shortbread cookies for a softer, buttery base. For a slightly lighter version, you can use Neufchâtel cheese and Greek yogurt, just expect a softer set and a tangier flavor. I also love to swirl in a tablespoon or two of lemon curd on top before chilling for a bright citrus twist that makes the blueberry flavor pop.
When it is time to serve, keep these bars properly chilled so the slices stay sharp and clean. Use a long, sharp knife, wipe it with a warm damp towel between cuts, and you will get those bakery style edges that make everyone think you work in a pastry kitchen. If you plan to bring these to a cookout or potluck, transport the pan cold, keep it on an ice pack if it is very warm out, and slice right before serving. Leftovers keep best in a single layer in an airtight container, or with parchment between layers if you need to stack them, and they stay delicious for up to 5 days. For an easy dessert board, serve the bars with a small bowl of extra blueberry sauce, a plate of lemon sugar cookies, and some chocolate covered strawberries so guests can mix and match flavors.
Conclusion
Every time I make these bars, I think of the quiet moments that turn into happy gatherings. A pan of creamy, chilled squares on the table has a funny way of pulling people into the kitchen, forks in hand, conversations starting, and stories spilling out. That is the magic of baking at home. You are not just mixing cream cheese and berries. You are building little memories that your family and friends will ask for again and again.
I hope these No Bake Blueberry Cheesecake Bars become one of those recipes you reach for when you want something easy, impressive, and a little bit special. Do not wait for a holiday or a party. Try them on a random Tuesday, taste that silky filling and bright blueberry swirl, and see how quickly they disappear.
If you do make them, I would love for you to share your experience, your tweaks, and who you served them to. Baking is always better when we do it together.
For more delicious recipes like this, follow us on Facebook and Pinterest!
Recipe
No Bake Blueberry Cheesecake Bars
Ingredients
Ingredients
- 2 1/2 cups graham cracker crumbs
- 1/2 cup granulated sugar
- 3/4 cup unsalted butter melted
- 24 oz cream cheese softened
- 3/4 cup granulated sugar
- 1 tsp vanilla bean paste
- 1 cup heavy cream cold
- 1/2 cup powdered sugar
- 1 1/2 cups fresh or frozen blueberries
- 1/4 cup granulated sugar
- 1 tbsp lemon juice
- 1 tsp cornstarch
- 2 tbsp water
- Fresh blueberries and mint leaves for garnish (optional)
Instructions
- Line a 13x9 inch baking pan with parchment paper, leaving an overhang for easy lifting.
- In a medium bowl, stir together graham cracker crumbs, 1/2 cup granulated sugar, and melted butter until the crumbs are evenly moistened.
- Press the crumb mixture firmly and evenly into the bottom of the prepared pan, using the bottom of a measuring cup to compact it well.
- Bake the crust at 350°F for 10 to 12 minutes until lightly golden, then let it cool completely and chill in the refrigerator while you prepare the filling.
- In a small saucepan, combine blueberries, 1/4 cup granulated sugar, and lemon juice over medium heat and cook, stirring often, until the berries start to break down and release their juices, about 5 to 7 minutes.
- In a small bowl, whisk cornstarch and water until smooth, then stir the mixture into the blueberries and cook for 1 to 2 minutes more until thickened; remove from heat and let the blueberry mixture cool to room temperature.
- In a large mixing bowl, beat softened cream cheese, 3/4 cup granulated sugar, and vanilla bean paste with an electric mixer until very smooth and creamy, scraping down the sides of the bowl as needed.
- In a separate bowl, beat cold heavy cream and powdered sugar with an electric mixer on medium high speed until stiff peaks form.
- Gently fold the whipped cream into the cream cheese mixture with a spatula until fully combined and smooth, keeping the mixture light and airy.
- Pour about 3/4 of the cooled blueberry mixture into the cream cheese filling and gently swirl it through with a spatula, or fold in fully if you prefer a uniform blueberry color.
- Pour the cheesecake filling over the chilled crust, spreading it into an even layer with a spatula and tapping the pan lightly on the counter to release air bubbles.
- Spoon the remaining blueberry mixture over the top in small dollops and use a toothpick or knife to swirl it into a marbled pattern.
- Cover the pan tightly and refrigerate for at least 4 hours, preferably overnight, until the cheesecake layer is firm.
- Remove the chilled slab from the pan using the parchment overhang; use a sharp knife dipped in hot water and wiped dry between cuts to slice into 24 bars.
- Serve the bars chilled, garnished with fresh blueberries and mint leaves if desired, and store leftovers in an airtight container in the refrigerator for up to 5 days.
Notes
- Chill the bars completely before cutting to get clean, bakery style edges and distinct layers.